Table of Contents
Advertisement
Instructions for
Installation and Use
GB
GB
GB
GB
GB
English, 2
BD62
BD52
DQ47
DE47X1
Contents
Introduction, 2
Know Your Timer, 11
Oven Temperature Charts, 19-20
Main Oven Temperature Chart, 28-29
Care and Cleaning, 34-35
Installation, 38
Tall Cabinet Ventilation, 39-40
If something goes wrong..., 41-42
Guarantee Information, 44
Build-in Electric
double oven
GB
Advertisement
Table of Contents

Related Manuals for Hotpoint DQ47


Summary of Contents for Hotpoint DQ47
-
Page 1: Table Of Contents
Instructions for Installation and Use Build-in Electric double oven Contents Introduction, 2 Safety Information, 3 The main parts of your Double Oven (BD62 & BD52), 4 English, 2 The main parts of your Double Oven (DQ47 & DE47X1), 5 Temperature Conversion Chart, 6 Controls (BD62 &... -
Page 2: Introduction
Introduction To the Installer: * The guarantee is subject to the provisions that Before installation, fill in the product details on the the appliance: back cover of this book. The information can be found on the rating plate. (a) Has been used solely in accordance with the Users Instruction Book. -
Page 3: Safety Information
Safety Information 2. COVER THE PAN WITH A FIRE BLANKET OR When used properly your appliance is completely DAMP CLOTH, this will smother the flames and safe but as with any electrical product there are extinguish the fire. certain precautions that must be observed. 3. -
Page 4: The Main Parts Of Your Double Oven (Bd62 & Bd52)
The main parts of your Double Oven (BD62 & BD52) WARNING: DO NOT TOUCH THE GLASS DOORS WHEN THE OVEN IS IN USE AS THESE AREAS CAN BECOME HOT. Top Oven Main Oven Temperature Control Temperature Control Timer Main Oven Oven Pilot Pilot... -
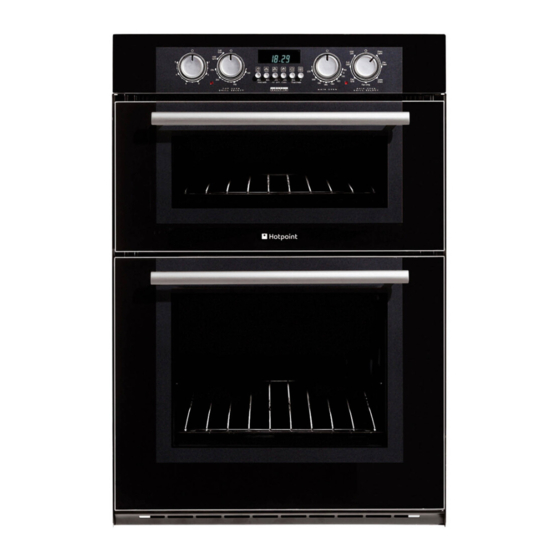
Page 5: The Main Parts Of Your Double Oven (Dq47 & De47X1)
The main parts of your Double Oven (DQ47 & DE47X1) WARNING: DO NOT TOUCH THE GLASS DOORS WHEN THE OVEN IS IN USE AS THESE AREAS CAN BECOME HOT. Top Oven Main Oven Temperature Control Temperature Control Timer Main Oven Oven Pilot Pilot... -
Page 6: Temperature Conversion Chart
Temperature Conversion Chart The chart below gives details of comparisons of oven settings for gas conventional ovens and fan oven in degrees °F and °C Conventional Oven Fan Oven Gas Mark °F °C °C ½... -
Page 7: Controls (Bd62 & Bd52)
The Controls (BD62 & BD52) Top Oven Pilot Main Oven Pilot Grill Top Oven Timer Main Oven Multifunction Control Temperature Temperature Selector Control Control IMPORTANT TOP OVEN TEMPERATURE CONTROL Turn the control clockwise to set the top oven Before using your oven in the ordinary way, thermostat to the required temperature. -
Page 8: Controls (Dq47 & De47X1)
The Controls (DQ47 & DE47X1) Top Oven Pilot Main Oven Pilot Grill Top Oven Timer Main Oven Control Temperature Temperature Control Control IMPORTANT GRILL CONTROL The grill control is designed to provide variable heat Before using your oven in the ordinary way, control of either both grill elements on together or the ALWAYS make sure that the timer has been set to single left-hand grill element only. -
Page 9: Multifunction Selection Switch (Bd62 & Bd52)
Multifunction Selector Switch (BD62 & BD52) The Multifunction selector switch is used when operating the main oven. Full Grill Both left and right hand grill elements will be on in With the exception of the O position the main this position. oven light will remain on when this selector Use the oven thermostat control to set the required switch is used. -
Page 10: Oven Timer Operation
Oven Timer Operation 5. If cooking food that requires frying before placing Note: Timer must be set to 'Time of Day' and in the oven for auto cooking, keep the delay start 'Manual' before the ovens can be used. time to a minimum. AUTOMATIC COOKING 6. -
Page 11: Know Your Timer
Know Your Timer TIMER FUNCTION BUTTONS CLOCKFACE The timer incorporates a 24 hour 0 0 0 clock. Minute Minder Button Ensure the correct time of day Here you can set a time period of up to 23 hours 59 is always set, before using minutes, that will count down. -
Page 12: Electronic Clock & Automatic Oven Timer Operation
Electronic Clock & Automatic Oven Timer Operation SETTING THE TIME OF DAY (a) To set the timer to switch the oven(s) On and Off Step 1 Make sure all oven Automatically controls are turned Off. (b) To set timer to switch on immediately and OFF 0 0 0 Step 2 Check the electricity automatically after a set cook period. - Page 13 At the end of the Cook Period Note: If your appliance has two ovens: When the NOTE: The Cookpot symbol disappears the 'Auto' symbol will flash and timer has been set for one oven it is possible to an intermittent audible tone will use the other oven only during the same be heard.
-
Page 14: Grill Pan And Handle
Grill Pan and Handle The grill pan handle is detachable from the pan, to Top Oven Shelf Positioning for Grilling facilitate cleaning and storage. The grill pan handle can be ENSURE SHELVES ARE fixed as follows: FITTED CORRECT WAY UP. Remove the screw Step 1 and washers from... -
Page 15: Operation When Using The Top Oven For Grilling
Operation when using the Top Oven for Grilling GRILL SETTING CONTROL TIMER TOP OVEN TEMPERATURE CONTROL Ensure oven timer is set to manual. Place Step 1 the shelf in the correct position (see Grilling Guide). Place the food/grill pan on the shelf, positioned centrally under the grill element. -
Page 16: Using The Top Oven For Solarplus Grilling
Your cooker is not fitted with a conventional grill. DO NOT under any circumstances insert objects Hotpoint have developed a Solarplus high speed into the grill mesh as this could damage the grill which is designed to reduce your grilling times. -
Page 17: Using The Top Oven As A Convection Oven
Using the Top Oven as a Convection Oven The top oven should be used to cook small quantities of food. The oven is designed so that the grill element operates at a reduced heat output, this is combined with a heating element situated underneath the floor of the oven. -
Page 18: Operation When Using The Top Oven As A Convection Oven
Operation when using the Top Oven as a Convection Oven TIMER TOP OVEN TEMPERATURE CONTROL Check that the timer is in manual. Step 1 PLATE WARMING Place the shelf in the correct position (see Place the plates/dishes on shelf position 1 from the Step 2 Oven Temperature Charts). - Page 19 Oven Temperature Charts - Baking Top Oven Cooking Baking Pre-heat Temperature °C Time in mins. Position in Oven Scones 210/220 10-15 Runner 2 from bottom of oven Small Cakes 180/190 20-25 Runner 2 from bottom of oven Victoria Sandwich 170/180 20-30 Runner 2 from bottom of oven Sponge Sandwich (fatless)
- Page 20 Oven Temperature Charts - Meat Top Oven Cooking Meat Pre-heat Temperature °C Time (approx.) Position in Oven Beef/ Lamb 170/180 35 mins per 450g (1lb) + 35 mins over. (slow roasting) Beef/ Lamb 190/200 35-40 mins per 450g (1lb) (foil covered) Pork 170/180 40 mins per 450g (1lb) + 40 mins over...
-
Page 21: Main Oven - Fan Grilling (Bd62 & Bd52)
Main Oven - Fan Grilling (BD62 & BD52) Fan grilling is a combination of heat from the grill General Recommendations element and the oven fan circulating the hot air Most types of meat and poultry cooked by this around the food. method will have an all over brownness and Joints of meat and poultry will be browned as if they crispness on the outside. -
Page 22: Main Oven - Fan Grilling Roasting Chart (Bd62 & Bd52)
Main Oven - Fan Grilling Roasting Chart (BD62 & BD52) Shelf positions are counted from the base upwards ie: lowest shelf position is 1. Weight Time Plus Extra Total Cooking Time Type of Meat or Poultry Temp °C Tips (min/kg) Time (mins) (mins) PORK... -
Page 23: Using The Main Oven For Other Functions
Using the Main Oven for Other Functions FAN ONLY SETTING LIGHT ONLY SETTING (BD62 & BD52) - When the Multifunction Control (D) DEFROSTING FROZEN MEAT & POULTRY Joints of meat and whole birds should be defrosted is turned clockwise to the LIGHT ONLY setting, the slowly, preferably in a refrigerator (allowing 5-6 hours main oven light only will illuminate. -
Page 24: Main Oven - Conventional Oven (Bd62 & Bd52)
Main Oven - Conventional Oven (BD62 & BD52) Important NEVER line the shelves, the floor or the sides of the oven with aluminium foil as overheating and damage may result. The oven is heated by elements at the top of the oven and underneath the floor of the oven. -
Page 25: Main Oven - Fan Oven (All Models)
Main Oven - Fan Oven (all Models) Important NEVER line the shelves, the floor or the sides of the oven with aluminium foil as overheating and damage may result. The oven is heated by elements at the rear of the oven. -
Page 26: Main Oven - Fan Oven Cookery Notes
Main Oven - Fan Oven Cookery Notes Since a fan oven heats up more quickly, and It should be noted that at the end of a cooking generally cooks food at a lower temperature than a period there may be a momentary puff of steam conventional oven, pre-heating the oven is often when the oven door is opened, this will disperse in a unnecessary. -
Page 27: Main Oven - Fan Oven Cookery Notes
Main Oven - Fan Oven Cookery Notes Temperature and Time Frozen Meat and Poultry The oven is provided with two shelves. A third is Joints of meat and whole birds should be defrosted available as an optional extra, contact Genuine Parts slowly, preferably in a domestic refrigerator (allowing and Accessories Hotline (see back page) for further 5-6 hours per 450g,1 lb), or at room temperature... -
Page 28: Main Oven Temperature Chart
Main Oven Temperature Chart Conventional Oven (BD62 & BD52) It is not necessary to pre-heat the fan oven before roasting. Note: Where times are stated, they are approximate only. Meat Pre-heat Temperature °C Time (approx.) Position in Oven Beef/ Lamb 170/180 35 mins per 450g (1lb) + 35 mins over. -
Page 29: Main Oven Temperature Chart
Main Oven Temperature Chart Baking Conventional Oven (BD62 & BD52) Food Pre-heat Temperature °C Time in mins. Shelf Position Scones 220/230 10-15 2nd from bottom Small Cakes 180/190 15-25 3nd from bottom Victoria Sandwich 160/170 20-30 3nd from bottom Sponge Sandwich (fatless) 170/180 15-20 3nd from bottom... -
Page 30: Main Oven - Circulaire Roasting (Bd62 & Bd52)
Main Oven - Circulaire Roasting (BD62 & BD52) CIRCULAIRE ROASTING Operating Instructions: Circulaire roasting - food is placed on the roasting Ensure the Oven Timer is set to manual. STEP 1. rack, this allows the oven fan to circulate the hot air Ensure that the oven shelf is in the position you require. -
Page 31: Main Oven - Circulaire Roasting Chart (Bd62 & Bd52)
Main Oven - Circulaire Roasting Chart (BD62 & BD52) Type of Meat & Poultry Temperature °C Time (approximate) BEEF Beef - any type of joint 160/180 20-25 minutes per 450g (1lb) + 20 minutes extra PORK Pork - any type of joint 160/180 25 minutes per 450g (1lb) + 25 minutes extra... -
Page 32: Using The Main Oven For Other Functions
Using the Main Oven for Other Functions 'S' SLOW COOK SETTING POINTS TO CONSIDER WHEN PREPARING This is used for slow cooking, keeping food warm FOOD FOR SLOW COOKING 1. Make sure that the dishes to be used will fit into and warming plates for short periods. -
Page 33: Main Oven Grilling (Bd62 & Bd52)
Main Oven Grilling (BD62 & BD52) DO NOT allow young children near the appliance Grilling Procedure: 1. Open the main oven door fully and position the rod when the grill is in use as the surfaces can get shelf as recommended in the grilling chart (see extremely hot. -
Page 34: Care And Cleaning
Care and Cleaning Warning: Before cleaning, please ensure that the It should not normally be necessary to clean the electricity supply to the appliance is switched off "Stayclean" panels with water. If the user feels it is desirable to do so, wipe them over with a clean, and the appliance is fully cold. - Page 35 Care and Cleaning 3. OVEN DOORS 5. HOW TO CLEAN THE LAMP LENS TOP OVEN LAMP CONTROL PANEL OVEN DOORS MAIN OVEN LAMP Warning: To avoid electric shocks - please ensure that the electricity supply to the appliance is switched off and the appliance is fully cold, before cleaning lamp lens.
-
Page 36: Care And Cleaning (Bd62 & Bd52)
Care and Cleaning (BD62 & BD52) Take particular care not to damage the inner surface of the door inner glass that is coated with a heat reflective layer. Do not use scouring pads, or abrasive powder, which will scratch the glass. Ensure that the glass panel is not subjected to any sharp mechanical blows. -
Page 37: Care And Cleaning (Dq47 & De47X1)
Care and Cleaning (DQ47 & DE47X1) Refit the door inner glass as follows. CLEANING THE DOORS 1. Open the door fully. Take particular care not to damage the inner 2. Locate the inner door glass into its slots. The inner surface of the door inner glass that is coated with door glass has a special reflective coating on one a heat reflective layer. -
Page 38: Installation
Installation Electrical Requirements Important For your own safety, we recommend that your cooker It is essential that the lower cupboard is constructed in is installed by a competent person such as one who the manner illustrated i.e. having side, back, and roof is registered with NICEIC (National Inspection panels so joined as to provide no apertures which Council for Electrical Installation Contracting). -
Page 39: Tall Cabinet Ventilation
Tall Cabinet Ventilation Fig. 1 Ventilation Slot required here if cabinet does not fit to ceiling - 51mm x 457mm min. area Ventilation Slot required here if the cabinet does not fit to the ceiling - 51mm x 457mm min. 50 mm area Air Gap... - Page 40 562mm Viewed down through cabinet Cabinet No. 6x25mm screw (4 supplied) Fig. 3 870mm Oven Door Fig. 2 882mm, 870mm if cooker trim is to overlap Connector top edge of shelf Cable if hob fitted Cable to Hob if if fitted Cable Fig.
-
Page 41: If Something Goes Wrong
If something goes wrong... Before calling a Service Engineer, please check through the following lists. THERE MAY BE NOTHING WRONG. Problem Check Slight odour or small amount of smoke when grill / This is normal and should cease after a short period. oven used for first time If you find that the timer display is blank, then it is likely that there is no electricity supply to... -
Page 42: If Something Goes Wrong
If something goes wrong... Problem Check Grilling is uneven. Ensure that Grill pan has been positioned as stated in the Grilling section of this book. The oven lamp is not covered by the guarantee. The part is easily changed (see the section Oven lamp does on oven lamp replacement) A new lamp may be obtained from our Genuine Parts &... - Page 43 Disposal of your product To minimise the risk of injury to children please dispose of your product carefully and safely. Remove all doors and lids. Remove the mains cable (where fitted) by cutting off flush with the appliance and always ensure that no plug is left in a condition where it could be connected to the electricity supply.
- Page 44 We have a dedicated team who can provide free advice and assistance with your appliance if you experience any technical difficulties within the first 90 days of ownership. Simply call our Hotpoint Service Hotline on 08709 066 066 (ROI 0818 313 413) for telephone assistance, or, where necessary, to arrange for an engineer to call.
-
Page 45: Service Information
After Sales Service No one is better placed to care for your Hotpoint appliance during the course of its working life than us - the manufacturer. Essential Contact Information Hotpoint Service We are the largest service team in the country offering you access to 400 skilled telephone advisors and 1100 fully qualified engineers on call to ensure you receive fast, reliable, local service. - Page 48 11/2007 - 195059683.03 XEROX BUSINESS SERVICES...
Need help?
Do you have a question about the DQ47 and is the answer not in the manual?
Questions and answers
How can I see what temperature I am setting on the oven. There are no indicators around the dial
To check the temperature setting on a Hotpoint oven with part number DQ47, turn the oven thermostat control to the required temperature. The oven indicator light will stay on until the oven reaches that temperature, then cycle on and off to maintain it. This shows the current temperature setting.
This answer is automatically generated