Magnavox ZV457MG9 A Owner's Manual
Digital video disc recorder & video cassette recorder with digital tuner
Hide thumbs
Also See for ZV457MG9 A:
- Owner's manual (110 pages) ,
- Quick manual (2 pages) ,
- Owner's manual (110 pages)
Table of Contents
Advertisement
Quick Links
Owner's Manual
ZV457MG9 A
D
V
IGITAL
IDEO
D
T
WITH
IGITAL
© 2010 Funai Electric Co., Ltd.
D
R
ISC
ECORDER
UNER
T
HANK YOU FOR CHOOSING
N
R
Q
G
/
EAD YOUR
UICK
UIDE AND
M
USING YOUR
I
F YOU HAVE READ YOUR INSTRUCTIONS AND STILL NEED ASSISTANCE
YOU MAY ACCESS OUR ONLINE HELP AT WWW
1-800-605-8610
OR CALL
INSTRUCCIONES EN ESPAÑOL INCLUIDAS.
& V
C
IDEO
ASSETTE
M
AGNAVOX
?
EED HELP FAST
O
'
M
OR
WNER
S
ANUAL FIRST FOR QUICK TIPS THAT MAKE
AGNAVOX PRODUCT MORE ENJOYABLE
.
MAGNAVOX
WHILE WITH YOUR PRODUCT
R
ECORDER
.
.
,
.
/
COM
SUPPORT
.
Advertisement
Table of Contents

Related Manuals for Magnavox ZV457MG9 A


Summary of Contents for Magnavox ZV457MG9 A
- Page 1 Owner's Manual ZV457MG9 A & V IGITAL IDEO ECORDER IDEO ASSETTE ECORDER WITH IGITAL UNER HANK YOU FOR CHOOSING AGNAVOX EED HELP FAST EAD YOUR UICK UIDE AND WNER ANUAL FIRST FOR QUICK TIPS THAT MAKE USING YOUR AGNAVOX PRODUCT MORE ENJOYABLE...
-
Page 2: Safety Information
SAFETY INFORMATION The model and serial numbers of this unit may be found on the cabinet. Model No.: You should record and retain those numbers for future reference. Serial No.: WARNING: TO REDUCE THE RISK OF FIRE OR ELECTRIC SHOCK, DO NOT EXPOSE THIS APPARATUS TO RAIN OR MOISTURE. - Page 3 SAFETY INFORMATION CAUTION: Danger of explosion if battery is incorrectly replaced. Replace only with the same or equivalent type. WARNING: Batteries (Battery pack or battery installed) shall not be exposed to excessive heat such as sunshine, fire, or the like. LASER SAFETY This apparatus employs a laser.
- Page 4 SAFETY INFORMATION Cleaning discs Supplied Accessories • When a disc becomes dirty, clean it with a cleaning remote control (NB884UD) with batteries AA(1.5 V)x2 cloth. Wipe the disc from the center to out. Do not wipe in a circular motion. •...
- Page 5 SAFETY INFORMATION Trademark Information is trademark of Eastman Kodak Company. HDMI, the HDMI logo and High-Definition Multimedia Interface are trademarks or registered trademarks of HDMI Licensing LLC. Manufactured under license from Dolby Laboratories. Dolby and the double-D symbol are trademarks of Dolby Laboratories.
-
Page 6: Table Of Contents
CONTENTS Introduction Recording SAFETY INFORMATION ......2 INFORMATION ON DVD RECORDING ... . . 39 FEATURES . - Page 7 CONTENTS Playback Editing INFORMATION ON PLAYBACK ....56 INFORMATION ON DISC EDITING....70 BASIC PLAYBACK .
-
Page 8: Features
FEATURES This unit not only plays back DVD, CD and VCR but also offers features for you to record on DVD and edit them after that. The following features are offered with this unit. Recording Quick search for what you want to watch: This unit is compatible with DVD+RW/DVD-RW, which You can easily find the part you want to watch using the are rewritable repeatedly and DVD+R/DVD-R, which are... -
Page 9: Symbols Used In This Owner's Manual
FEATURES Symbols Used in this Owner’s Manual To specify for what disc type each function is, we put the following symbols at the beginning of each item to operate. * DVD-RW/-R recorded in VR mode or non compatible recording format are not playable. * DVD-RW recorded in the mode other than +VR is not recordable on this unit unless you erase all contents in the disc (refer to page 80). -
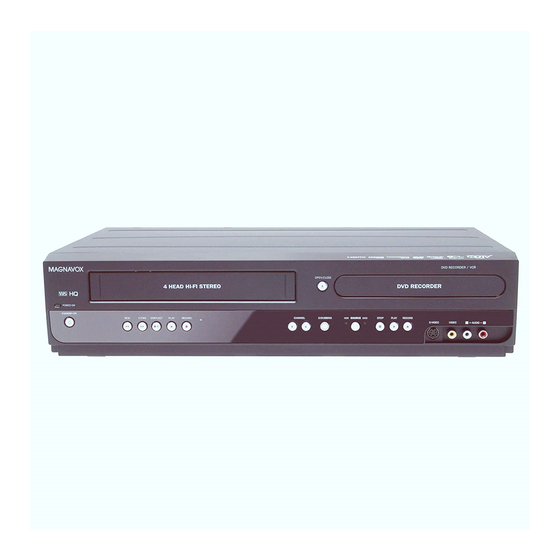
Page 10: Functional Overview
FUNCTIONAL OVERVIEW Front Panel ZV457MG9 2019 18 17 11 10 9 8* 7 ( * ) The unit can also be turned on by pressing these buttons or inserting a cassette tape. 14. CHANNEL L / K buttons (DVD/VCR) 1. Cassette compartment (VCR) Insert a cassette tape here. -
Page 11: Rear Panel
FUNCTIONAL OVERVIEW Rear Panel HDMI OUT DVD/VCR DIGITAL AUDIO S-VIDEO COMPONENT S-VIDEO IN --- AUDIO --- OUT VIDEO OUT AUDIO OUT ANTENNA COAXIAL IN --- VIDEO --- OUT 1. AC Power Cord 9. S-VIDEO IN jack (L1) • Connect to a standard AC outlet to supply power to this Use to connect the S-video output of external device unit. -
Page 12: Remote Control
FUNCTIONAL OVERVIEW Remote Control Installing the Batteries in the Remote Control Using a Remote Control Install the batteries (AAx2) matching the polarity Keep in mind the following when using the remote control: indicated inside battery compartment of the remote • Make sure that there are no obstacles between the remote control. - Page 13 FUNCTIONAL OVERVIEW 1. DTV/TV button (DVD/VCR) 19. HDMI button (DVD) • Press to switch between digital TV (DTV) mode and • Press to set the HDMI connector’s video signal out- analog TV (TV) mode. put mode. 2. STANDBY-ON y y button (DVD/VCR) 20.
-
Page 14: Front Panel Display
FUNCTIONAL OVERVIEW Front Panel Display BS CS : Appears when the timer : Appears when this unit is in programming or OTR has DVD output mode. : Appears in the afternoon been set or is proceeding. : Appears when the timer with the clock display. -
Page 15: Connection
CONNECTION Read this first: 1) Disconnect the AC power cords of the devices from the AC outlet. 2) Make the connection as illustrated below. 3) After making all the connections, connect the AC power cords of the devices. • Connect this unit directly to the TV. If the RCA audio/video cables are connected to a VCR, pictures may be distorted due to the copy protection system. -
Page 16: Compatible Port
CONNECTION Connecting to a TV with an HDMI™ Compatible Port • HDMI outputs the video / audio signals without converting to analog signals. • No audio connection is required. HDMI IN HDMI cable HDMI OUT rear of this unit HDMI OUT DVD/VCR DIGITAL AUDIO... -
Page 17: Component Video Out Jacks
CONNECTION Connecting to a TV Using Component Video Out Jacks AUDIO IN RCA audio cable RCA component video cable COMPONENT VIDEO IN DVD / VCR (Green) AUDIO COMPONENT VIDEO OUT (Green) (Blue) (Blue) (Red) (Red) rear of this unit ANT. IN This connection is for RF coaxial HDMI OUT... -
Page 18: Connecting To A Tv Using Audio / Video Jacks
CONNECTION Connecting to a TV Using Audio / Video Jacks IN --- AUDIO --- OUT AUDIO IN RCA audio cable VIDEO IN IN --- VIDEO --- OUT RCA video cable rear of this unit HDMI OUT DVD/VCR DIGITAL AUDIO S-VIDEO S-VIDEO IN --- AUDIO --- OUT COMPONENT... -
Page 19: Connecting To A Cable / Satellite Box
CONNECTION Connecting to a Cable / Satellite Box RCA video cable RCA audio cable IN --- AUDIO --- OUT AUDIO IN RCA audio cable AUDIO OUT VIDEO OUT VIDEO IN IN --- VIDEO --- OUT RCA video cable cable/satellite box RF coaxial cable rear of this unit... -
Page 20: Connecting To A Tv Without Audio / Video Jacks
CONNECTION Connecting to a TV without Audio / Video Jacks Set channel 3 or 4 ANT. IN rear of this unit HDMI OUT DVD/VCR DIGITAL AUDIO S-VIDEO S-VIDEO IN --- AUDIO --- OUT COMPONENT AUDIO OUT VIDEO OUT ANTENNA COAXIAL IN --- VIDEO --- OUT VHF / UHF antenna... -
Page 21: Digital Audio Connection
CONNECTION Digital Audio Connection Coaxial Cable Connection DIGITAL Dolby Digital decoder AUDIO OUT rear of this unit HDMI OUT DVD/VCR DIGITAL AUDIO S-VIDEO COMPONENT S-VIDEO IN --- AUDIO --- OUT AUDIO OUT VIDEO OUT COAXIAL ANTENNA digital audio COAXIAL COAXIAL IN --- VIDEO --- OUT coaxial cable digital audio... -
Page 22: Before You Start
Refer to your TV’s user manual for details. • If more than 10 minutes have passed since you have turned on the unit, you may see the MAGNAVOX screen saver instead of “Initial Setup” menu. MAGNAVOX screen saver: Input Mode Names for Common TV Brands (Example) -
Page 23: Guide To On-Screen Display / Menu
BEFORE YOU START This unit uses the following on-screen displays and menus to guide you to the easy operations. The on-screen displays give you the information on the loaded disc or the disc/file in playback, or the HDMI status, etc. The menus allow you to change the various kinds of settings for playing back, recording, or editing to suit your preference. - Page 24 BEFORE YOU START VCR Information MP3 Tag Information VCR mode • First, track name will be displayed. Track Name 12:00AM CH 21 Stereo • If you press [DISPLAY] one more time, artist name will be displayed. Artist Name 0:00:00 HIFI •...
-
Page 25: Main Menu
BEFORE YOU START Main Menu Press [SETUP] to display the main menu. Then use 1. General Setting: [K / L] to select a menu and press [OK] to display the To go to general setting menu. menu. These menus provide entries to all main functions 2. -
Page 26: Switching Dvd / Vcr Mode
BEFORE YOU START Switching DVD / VCR Mode Because this product is a combination of a VCR and a DVD recorder, you must select first which component you wish to operate. DVD mode VCR mode Press [SOURCE] on the front panel, or press [DVD] on the Press [SOURCE] on the front panel, or press [VCR] on the remote control. -
Page 27: Initial Setting
INITIAL SETTING You need to follow these steps when you turn on this unit for the first time. Follow the procedure in “Finding the Viewing Channel on Your TV” on page 22 to display “Initial Setup” menu. Use [K / L] to select your desired language, then press [OK]. -
Page 28: Channel Setting
CHANNEL SETTING If you have changed antenna connection, we recommend that you program available channels in your area with the following procedures. Auto Channel Scan Press [SETUP] and use [K / L] to select “General Setting”, then press [OK]. “General Setting” menu will appear. Use [K / L] to select “Channel”, then press [OK]. -
Page 29: Adding / Deleting Channels
CHANNEL SETTING Adding / Deleting Channels You may want to add or delete TV channels if your Use [K / L] to select “Add” or channel lineup changes or if you no longer watch some “Delete”, then press [OK]. channels. Adding channel is only available for the analog TV channels. -
Page 30: Setting The Clock
SETTING THE CLOCK Auto Clock Setting This unit can set the time and date automatically by ANALOG AUTO CLOCK SETTING (Cable TV only) referring to a channel that carries clock information. If a Press [SETUP] and use [K / L] to PBS (public broadcasting station) channel is available on Cable in your area, follow “Auto Clock Setting”... - Page 31 SETTING THE CLOCK Auto Clock Setting (cont’d) DIGITAL AUTO CLOCK SETTING Note for auto clock setting Press [SETUP] and use [K / L] to • The clock may set itself automatically after this unit select “General Setting”, then press receives the antenna/cable signal and plug in the power cord.
-
Page 32: Manual Clock Setting
SETTING THE CLOCK Manual Clock Setting Daylight Saving Time When “Daylight Saving Time” is “ON”, the unit clock will Press [SETUP] and use [K / L] to automatically adjust the time in order to fit the daylight select “General Setting”, then press saving time. -
Page 33: Tuner Settings
TUNER SETTINGS About digital TV broadcasting: Switching Analog Mode / With its high definition broadcast, digital broadcasting far Digital Mode surpasses analog broadcasting in both its picture and sound quality. You can easily switch the analog TV (NTSC) and digital TV What is the minor channel? (ATSC) with the remote control. -
Page 34: Selecting Tv Audio
TUNER SETTINGS This section describes how to switch the TV audio. When you record a TV program, only the audio selected here will be recorded. Selecting TV Audio Digital TV Press [AUDIO] to cycle through available audio languages. English 1/2 •... - Page 35 TUNER SETTINGS Selecting TV Audio (cont’d) Analog TV Press [SETUP] and use [K / L] to select “General Setting”, then press [OK]. “General Setting” menu will appear. Use [K / L] to select “Channel”, then press [OK]. “Channel” menu will appear. Use [K / L] to select “TV Audio Select”, then press [OK].
-
Page 36: Dtv Closed Caption
TUNER SETTINGS DTV Closed Caption Digital TV Digital TV has its own closed captions called DTV CC. Use this menu to change the settings for DTV CC. Press [SETUP] and use [K / L] to select “General Setting”, then press [OK]. -
Page 37: Closed Caption Style
TUNER SETTINGS Closed Caption Style Digital TV Digital TV can also change the style of its closed caption such as font, color or size, etc. Press [SETUP] and use [K / L] to select “General Setting”, then press [OK]. “General Setting” menu will appear. Use [K / L] to select “Display”, then press [OK]. - Page 38 TUNER SETTINGS Use [K / L] to select the item and Edge type of the displayed caption can be switched as below. switch the setting for each item you Edge Type want to set, then press [OK]. None • When “User Setting” is set to “ON”, you can set Raised the following items.
-
Page 39: Information On Dvd Recording
INFORMATION ON DVD RECORDING Before you make a recording, read the following information. Recordable Discs Recording Mode This unit can record to DVD+RW, DVD+R, DVD-RW and You can select a recording mode among 6 options, and DVD-R. the recording time will depend on the recording mode DVD+R/DVD-R can only be recorded to once. -
Page 40: Before Recording
BEFORE RECORDING Make Recording Compatible Setting for Auto Chapter You can set a specified time for chapter marks. Use this feature to make the unfinalized +VR mode discs 1) Press [SETUP] and use [K / L] to select “General recorded on other unit recordable on this unit. When you Setting”, then press [OK]. -
Page 41: One-Touch Timer Recording
BASIC RECORDING & ONE-TOUCH TIMER RECORDING Follow the steps to record TV programs. Press [DVD] first. Insert a recordable disc (refer to page 26 on how to insert a disc). * Make sure the disc is compatible with this unit. (Refer to page 39 for the list of compatible discs.) It may take a while to load... - Page 42 BASIC RECORDING & ONE-TOUCH TIMER RECORDING Press [STOP C] to stop recording. Press [REC] to start recording. “I” will be displayed for 4 seconds. The recorded title will appear in the title list. (Refer to “Guide to a Title List” on page 70.) e.g.) DVD+R SP(2Hr) 2h00m...
-
Page 43: Timer Recording
TIMER RECORDING You can program the unit to record up to 12 programs Guide to Timer Programming Display within a month in advance. Daily or weekly program recordings are also available. Before recording, make sure to Timer Programming • Set the clock before setting a timer programming. JAN/ 2/09 12:00 AM 69.1 SP SP (1:00) THU JAN/01 11:00AM... - Page 44 TIMER RECORDING Use [K / L / s / B] or [the Number Use [K / L] to select a recording mode. buttons] to enter the start and end Date Start time, then press [B]. JAN/02 1 : 00AM 12 : 00AM REC To Mode DTV69.
- Page 45 TIMER RECORDING How to select a channel number for the timer recording Analog TV For channel number 2-6 press, press [B] or [ • ] to decide the channels. For other channels (7-69), the channel will be decided as soon as you enter the channel number. Analog CATV For channel number 1-12 press, press [B] or [ •...
-
Page 46: Hints For Timer Recording
TIMER RECORDING Hints for Timer Recording • If there is a power failure or this unit has been unplugged • To cancel the timer standby mode, press [TIMER SET]. for more than 30 seconds, the clock setting and all timer •... -
Page 47: Overwriting Unnecessary Title
OVERWRITING UNNECESSARY TITLE Overwriting from the Beginning of Overwriting in the Middle of the Title the Title You can overwrite the existing title from the selected You can overwrite the existing title from the beginning. position. 1) Press [STANDBY-ON y y ]. 1) Follow the steps 1, 2 and 4 on the left. -
Page 48: Hints For Overwriting
OVERWRITING UNNECESSARY TITLE Hints for Overwriting When you overwrite on the unnecessary title, there were various circumstances such as follows. Please note that following cases only describe the overwriting without any recording mode discrepancy. To avoid accidental deletion please check if there is no important title after the overwriting point. When overwriting title is shorter than the existing title: (overwriting from the beginning of the title) overwrite... -
Page 49: Settings For An External Device
SETTINGS FOR AN EXTERNAL DEVICE Connection to an External Device Connect the external device properly to the unit by using input jacks either L2 (Front) or L1 (Rear). When connecting an external device of monaural output to this unit, use AUDIO L jack of L2 (Front) or L1 (Rear). Use S-video or the RCA audio/video cables for this connection. -
Page 50: Recording From An External Device
SETTINGS FOR AN EXTERNAL DEVICE Recording from an External Device Before recording from an external device, refer to the instructions for the connection on page 49. Recording to a DVD Press [DVD]. Insert a recordable disc (refer to page 26 on how to insert a disc). It takes a while to load the disc. -
Page 51: Bi-Directional Dubbing
BI-DIRECTIONAL DUBBING You can copy contents in a DVD to a cassette tape, or do Preparing for dubbing (cassette tape to DVD): vice versa. This function is available only when the contents • Insert a cassette tape to be dubbed. are not copy-protected. - Page 52 BI-DIRECTIONAL DUBBING VCR to DVD DVD to VCR Use [K / L] to select “VCR DVD”, Use [K / L] to select “DVD VCR”, then press [OK]. then press [OK]. Dubbing Mode Dubbing Mode Press [SETUP] to exit. Press [SETUP] to exit. Press [VCR], then press [PLAY B] to Press [DVD], then press [PLAY B] to find the point where you wish to start...
-
Page 53: Setting A Disc To Protect
SETTING A DISC TO PROTECT To prevent accidental recording, editing or erasing the titles, you can protect them from “Disc Edit” menu. Press [SETUP]. Use [K / ] to select “Disc Edit”, then press [OK]. Use [K / L] to select “Disc Protect OFF ON”, then press [OK]. -
Page 54: Playing The Discs On Other Dvd Players
PLAYING THE DISCS ON OTHER DVD PLAYERS Finalizing a Disc Press [SETUP]. You will need to finalize DVD+R, DVD-RW or DVD-R to play them back on other DVD players. Finalizing may take several minutes up to an hour. A shorter recording period on the disc will require a Use [K / L] to select “Disc Edit”, then longer time period for finalization. -
Page 55: Auto Finalizing
PLAYING THE DISCS ON OTHER DVD PLAYERS Auto Finalizing Press [SETUP] and use [K / L] to select “General Setting”, then press You can finalize discs automatically using this function. You can use this function to finalize discs after finishing [OK]. -
Page 56: Information On Playback
INFORMATION ON PLAYBACK Before you play back DVD, read the following information. Playable Discs and Files Unplayable Discs This unit is compatible to play back the following discs. The following discs will not play back on this unit. To play back a DVD, make sure that it meets the •... - Page 57 INFORMATION ON PLAYBACK PBC (playback control) for Video CD Hint for DVD Playback The contents of DVD are generally divided into titles. You can select images or information on the menu Titles may be further subdivided into chapters. screen by activating the PBC (playback control) function of the video CD.
-
Page 58: Basic Playback
BASIC PLAYBACK Direct Playback Press [DVD] first. Insert a playable disc (refer to page 26 on how to insert a disc). Align the disc to the disc tray guide. * Make sure the disc is compatible with this unit. (Refer to page 56 for the list of compatible discs.) It may take a while to load the disc. -
Page 59: Playback From The Title List
BASIC PLAYBACK Playback from the Title List If you want to see disc information, press [{ ] when the first page of the title list is displayed or press [ K ] when the first title is selected but not when “Play”, “Edit” or “Overwrite”... -
Page 60: With Mp3 / Jpeg Files
BASIC PLAYBACK Playing Back an Audio CD and a CD-RW / -R with MP3 / JPEG Files Press [DVD] first. Insert a playable disc (refer to page 26 on how to insert a disc). * Make sure the disc is compatible with this unit. (Refer to page 56 for the list of compatible discs.) It may take a while to load the disc. -
Page 61: Using The Title / Disc Menu
BASIC PLAYBACK Playing Back an Audio CD and a Using the Title / Disc Menu CD-RW / -R with MP3 / JPEG Files (cont’d) Kodak Picture CD DVD or video CD with PBC function may contain a title list, which describes the contents of the disc, or a disc The Picture CD is a service to convert photographs taken menu, which guides you through the available functions by a conventional film camera into digital data and write... -
Page 62: Special Playback
SPECIAL PLAYBACK Skipping TV Commercials During Resume Playback Playback You can play back from where you stopped playing back the disc last. 1) During playback, press [STOP C]. You can skip TV commercials to enjoy the recorded The resume message will appear. programs without interrupting. -
Page 63: Step By Step Playback
SPECIAL PLAYBACK Step by Step Playback Zoom 1) During playback, press [PAUSE F]. Playback will be paused and sound will be muted. 1) During playback, press [DISPLAY] to bring up the 2) Press [G] repeatedly. display menu. Playback will advance one frame (or step) at a time when you press [G] with the sound muted. -
Page 64: Marker Setting
SPECIAL PLAYBACK Marker Setting Repeat Playback Available repeat function may vary depending on the discs. 1) During playback press [DISPLAY] to bring up the display menu, then proceed to step 2), or press [REPEAT] then proceed to step 3). This feature allows you to assign a specific point on a disc If the display menu is already shown, skip to step 2. -
Page 65: Random Playback
SPECIAL PLAYBACK Random Playback Program Playback You can play back a disc randomly instead of playing You can program the disc to play back in your desired back in the original order. order. 1) Press [SETUP]. 1) Press [SETUP]. 2) Use [K / L] to select “DISC Playback Mode”, then press [OK]. -
Page 66: Search
SEARCH Title / Chapter Search Track Search Using [H] / [G] Using [H] / [G] 1) During playback, press [G] to skip the current 1) During playback, press [G] to skip the current track/file and move to the next. title or chapter and move to the next. The track/file will move forward one at a time. -
Page 67: Time Search
SEARCH Time Search 1) During playback, press [DISPLAY] to bring up the display menu. If the display menu is already shown, skip to step 2. 2) Use [{ / B] to select , then press [OK]. e.g.) DVD-video 1/ 5 1/ 5 0:01:00 / 1:23:45 DVD Video... -
Page 68: Selecting The Format Of Audio And Video
SELECTING THE FORMAT OF AUDIO AND VIDEO You can select the format of audio and video as you prefer depending on the contents of the disc you are playing back. Switching Subtitles Switching Audio Soundtrack DVD-video may have subtitles in 1 or more languages. When playing back a DVD-video recorded with 2 or more Available subtitle languages can be found on the disc soundtracks (these are often in different languages), you... -
Page 69: Switching Virtual Surround System
SELECTING THE FORMAT OF AUDIO AND VIDEO Switching Virtual Surround System Switching Camera Angles Some DVD-video have scenes shot from 2 or more angles. Angle information should be on the disc case if You can enjoy stereophonic virtual space through your the disc contains multi-angle scenes. -
Page 70: Information On Disc Editing
INFORMATION ON DISC EDITING Guide to a Title List Editing Discs Title list allows you to check the titles recorded on the You can edit discs for the following items. Be sure that disc easily. You can choose a title to play back from this once you edit titles, they will not remain as original. -
Page 71: Editing Discs
EDITING DISCS Deleting a Title You can delete a title which you do not need anymore. Use [K / L] to select “Edit”, then Please be advised that the titles once deleted cannot be brought back to the disc. press [OK]. For DVD+RW/DVD-RW, when the last recorded title in the title list is deleted, the available disc space to record on SP (2Hr) -
Page 72: Putting Names On Titles
EDITING DISCS Putting Names on Titles You can put title names on the titles and change the names from this menu. Use [K / L] to select “Yes”, then press [OK]. Edit - Edit Title Name MY FAVORITE 1 : 05 : 00 The name you entered will be activated for the title. -
Page 73: Setting Chapter Marks
EDITING DISCS Setting Chapter Marks You can put chapter marks in each title. Once a chapter is Follow steps 1 to 3 in “Deleting a marked, you can use it for the chapter search feature. Title” on page 71 to display “Edit” menu. -
Page 74: Clearing Chapter Marks
EDITING DISCS Clearing Chapter Marks Follow steps 1 to 3 in “Deleting a Title” on page 71 to display “Edit” menu. Use [K / L] to select “Chapter Mark”, then press [OK]. Submenu will appear. Use [H] / [G] to select a chapter mark to be deleted, then press [PAUSE F]. - Page 75 EDITING DISCS Clearing Chapter Marks (cont’d) To delete all chapter marks: Follow steps 1 to 3 in “Deleting a Title” on page 71 to display “Edit” menu. Use [K / L] to select “Chapter Mark”, then press [OK]. Submenu will appear. Use [K / L] to select “Delete All”, then press [OK].
-
Page 76: Hiding Chapters
EDITING DISCS Hiding Chapters You can hide chapters from the title list. Follow steps 1 to 3 in “Deleting a Hidden chapters are skipped during playback. Title” on page 71 to display “Edit” menu. Use [K / L] to select “Hide Chapter”, then press [OK]. -
Page 77: Setting Pictures For Thumbnails
EDITING DISCS Setting Pictures for Thumbnails You can set your desired scene as a thumbnail for each Follow steps 1 to 3 in “Deleting a title. Title” on page 71 to display “Edit” menu. Use [H], [G], [E], [D], [PAUSE F] and [PLAY B] to decide the picture you want to select as a thumbnail. -
Page 78: Dividing A Title
EDITING DISCS Dividing a Title Follow steps 1 to 3 in “Deleting a You can divide one title into 2 new titles. Title” on page 71 to display “Edit” menu. Use [H], [G], [E], [D], [PAUSE F] and [PLAY B] to decide the point at which you will divide the title. -
Page 79: Putting Name On Disc
EDITING DISCS Putting Name on Disc You can put a name on the disc and change it from this Press [STOP C] if you are playing back a disc. menu. Press [SETUP]. Use [K / L] to select “Disc Edit”, then press [OK]. -
Page 80: Erasing Disc
EDITING DISCS Erasing Disc Press [STOP C] if you are playing back a disc. You can erase all titles on a disc. Follow steps 1 to 2 in “Putting Name on Disc” on page 79 to display “Disc Edit” menu. Use [K / L] to select “Erase Disc”, then press [OK]. -
Page 81: Making Edits Compatible
EDITING DISCS Making Edits Compatible Press [STOP C] if you are playing back a disc. If you have added or deleted chapters, or made chapters hidden, you must perform “Make Edits Compatible” to see those effects on other unit. Follow steps 1 to 2 in “Putting Name on Disc”... -
Page 82: List Of Settings
LIST OF SETTINGS The following table is the contents which you can set and the default setting. Refer to the following table for useful operation. Setup Items (highlight is the default) Contents Playback Parental Lock Set the parental level for DVD playback. Pages 85-87 level 8 [Adult] to 1 [Kid Safe] Disc Audio... - Page 83 LIST OF SETTINGS Setup Items (highlight is the default) Contents Display CC Style Font Color Set the font color of the displayed caption. White Pages 88-90 pages 37-38 Black Green Blue Yellow Magenta Cyan Edge Type Set edge type of the displayed caption. None Raised Depressed...
- Page 84 LIST OF SETTINGS Setup Items (highlight is the default) Contents Video Video Input L1(Rear) Set the video input type for the external input. Video In Page 91 Page 49 S-Video In L2(Front) Video In S-Video In Recording Auto Chapter Insert chapter marks at even time intervals. Page 40 5 minutes 10 minutes...
-
Page 85: Setups
SETUPS Playback Press [STOP C] if you are playing back a disc. Press [SETUP] and use [K / L] to select “General Setting”, then press [OK]. “General Setting” menu will appear. Use [K / L] to select “Playback”, then press [OK]. General Setting Playback Display... - Page 86 SETUPS Playback (cont’d) Parental Lock (Default: OFF) Note • Press [CLEAR] to erase numbers entered incorrectly. Some DVD-video feature a parental lock level. Playback • When you forget the password or you want to clear will stop if the ratings exceed the levels you set, it will all settings in “Parental Lock”...
- Page 87 SETUPS Playback (cont’d) Dolby Digital (Default : Stream) If “Other” is selected for , press 4-digit code using [the Number buttons]. Use [K / L] to select a setting, then press [OK]. Dolby Digital Code Input Stream Your setting will be activated. •...
-
Page 88: Display
SETUPS Display Press [STOP C] if you are playing back a disc. Press [SETUP] and use [K / L] to select “General Setting”, then press [OK]. Use [K / L] to select “Display”, then press [OK]. Use [K / L] to select a desired item, then press [OK]. - Page 89 SETUPS Display (cont’d) FL Dimmer (Default: Bright) MPAA Rating Set the front panel display brightness. TV Rating Use [K / L] to select a setting, then press [OK]. Canadian English Rating FL Dimmer Canadian French Rating Auto Bright Dark You can set the viewing limitation according to MPAA rating (US movie ratings), TV Rating (US TV program You can choose one from “Auto”, “Bright”...
- Page 90 SETUPS Display (cont’d) [Canadian French Rating] Downloadable Rating Rating Category Set the rating system via digital broadcasting, or clear the 18 ans+ Adult audience only higher downloaded ratings. 16 ans+ Unsuitable for ages under 16 If the broadcasting signal does not have the downloadable rating information, the message below 13 ans+ Unsuitable for ages under 13...
-
Page 91: Video
SETUPS Video Progressive Scan (Default : OFF) This unit is compatible with the progressive scan system. The feature provides you with the higher definition images than the traditional output system does. To utilize this feature, you must set progressive scan mode to “ON”. 1) Use [K / L] to select “ON“, then press [OK]. -
Page 92: Hdmi
SETUPS HDMI Use [K / L] to select a desired item, then press [OK]. Format HDMI Audio RGB Range When you finish with the setting, press [SETUP] to exit. Format (Default : RGB) You can select the color space for HDMI output. Set the appropriate color space for your display device. -
Page 93: Reset All
SETUPS Reset All Press [SETUP] and use [K / L] to Reset the setting to default. select “General Setting”, then press [OK]. “General Setting” menu will appear. Use [K / L] to select “Reset All”, then press [OK]. Select “Yes” using [K / L] , then press [OK]. -
Page 94: Vcr Functions
VCR FUNCTIONS Information on VCR Functions Caution on using S-video, component, or HDMI connection for VCR: • Only the playback audio / video are available with these connections. • Under the condition listed below, the playback image cannot be viewed. Use the standard video connection, in such case; - during DVD recording. -
Page 95: One-Touch Timer Recording (Otr)
VCR FUNCTIONS One-touch Timer Recording (OTR) Index Search This feature allows you to set the recording length simply An index mark will be assigned at the beginning of each by pressing [REC] on the remote control. recording you make. You may skip to a specific marked point by following the steps below. -
Page 96: Other Operations
VCR FUNCTIONS Time Search Other Operations Press [VCR] first. This feature allows you to go to a specific point on a cassette tape by entering the exact amount of time you wish to skip in order to reach the point. Fast forward: When the unit is in stop mode, press [D] to fast forward Press [VCR] first. -
Page 97: Troubleshooting
TROUBLESHOOTING Before requesting service for this unit, check the table below for a possible cause of the problem you are experiencing. Some simple checks or a minor adjustment on your part may eliminate the problem and restore proper operation. Remedy The power does not turn on. - Page 98 TROUBLESHOOTING Symptom Remedy No image from HDMI connection. • Check the HDMI connection. (Check the status of the HDMI related indications.) • Check whether the connected monitor device or other device supports HDCP. (This unit will not output a video signal unless the other device supports HDCP.) •...
- Page 99 TROUBLESHOOTING Symptom Remedy The disc tray does not open when you • It may take a few seconds for the disc tray to open after you have press [OPEN/CLOSE A]. recorded or edited a disc. This is because the unit is adding disc data to the disc.
- Page 100 TROUBLESHOOTING Disc Error message Cause Solution Disc Error • Unplayable disc is inserted in the unit. • Insert the standardized disc which bear — Please eject the disc. — • The disc is upside down. the marks on page 56. Playback feature may not be available on •...
-
Page 101: Language Code
LANGUAGE CODE Language Code Language Code Language Code Abkhazian 4748 Hungarian 5467 Russian 6467 Afar 4747 Icelandic 5565 Samoan 6559 Afrikaans 4752 Indonesian 5560 Sangho 6553 Albanian 6563 Interlingua 5547 Sanskrit 6547 Amharic 4759 Interlingue 5551 Scots Gaelic 5350 Arabic 4764 Inupiak 5557... -
Page 102: Glossary
GLOSSARY Analog Audio PBC (playback control) (video CD only) An electrical signal that directly represents sound. This function enables you to play back interactive Compare this to digital audio which can be an electrical software using a menu screen. See also “Video CD”. signal, but is an indirect representation of sound. -
Page 103: Specifications
SPECIFICATIONS General VCR video heads Four heads Power requirements 120V AC, 60Hz Power consumption 30W (standby: 3.3W) Dimensions (width x height x depth) 17.2 x 4.0 x 10.3 inches (435 x 99.5 x 260mm) Weight 9.5 lbs. ( 4.3kg ) Operating temperature 41°F (5°C) to 104°F (40°C) Operating humidity... -
Page 104: Español
ESPAÑOL Discos Reproducibles Disco Grabable Este aparato es compatible con la reproducción de los Este aparato puede grabar a DVD+RW, DVD+R, DVD-RW y siguientes discos y archivos. DVD-R. Los discos DVD+R/DVD-R pueden ser grabados sólo una Discos reproducibles Logotipos vez. Los discos DVD+RW/DVD-RW pueden ser grabados y borrados muchas veces. - Page 105 ESPAÑOL Conexión Básica IN --- AUDIO --- OUT AUDIO IN cable RCA de audio VIDEO IN IN --- VIDEO --- OUT cable RCA de video parte trasera de este aparato Esta conexión es sólo para HDMI OUT el procesamiento de cada DVD/VCR DIGITAL AUDIO...
- Page 106 ESPAÑOL Grabación Básica Configuración Inicial Presione [DVD]. Cuando usted encienda este aparato por primera vez necesita seguir estos pasos. Presione [OPEN/CLOSE A] para abrir la bandeja de Presione [STANDBY-ON y y ]. discos e insertar su disco con el rótulo aupntando Encienda el televisor.
- Page 107 ESPAÑOL Grabación con Temporizador Usted puede programar el equipo para que grabe hasta 12 Presione [TIMER]. programas, con un mes de anticipación. También hay disponibles grabaciones de programas diarias o semanales. Antes de grabar, asegúrese de que • Antes de establecer una programación del temporizador Utilice [K / L] para seleccionar “Prog.
-
Page 108: Limited Warranty
To locate your nearest AUTHORIZED SERVICE CENTER or for general service inquiries, please contact us at: FUNAI SERVICE CORPORATION Customer Service Tel: 1-800-605-8610 www.magnavox.com/support 2200 Spiegel Drive Groveport, OH 43125 Printed in China E9S80UD 1VMN26713A ★★★★ * 1 V M N 2 6 7 1 3 A *...
Need help?
Do you have a question about the ZV457MG9 A and is the answer not in the manual?
Questions and answers