JVC KD-A95BT Instructions Manual
Cd receiver
Hide thumbs
Also See for KD-A95BT:
- Installation & connection manual (4 pages) ,
- Instructions manual (115 pages)
Table of Contents
Advertisement
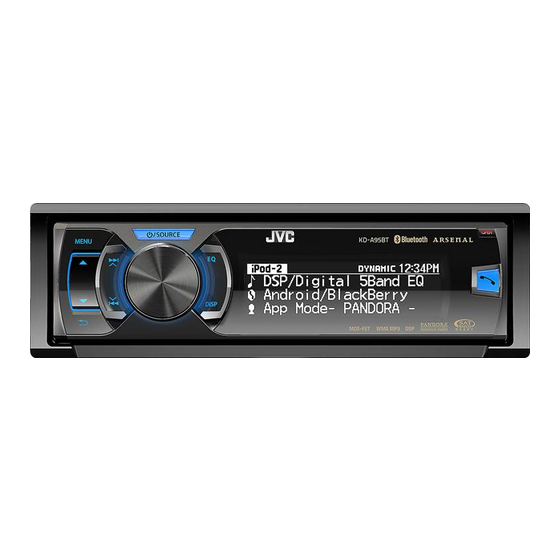
KD-A95BT
CD RECEIVER / RECEPTOR CON CD / RÉCEPTEUR CD
For canceling the display demonstration, see page 4. /
Para cancelar la demostración en pantalla, consulte la página 4. /
Pour annuler la démonstration des affichages, référez-vous à la page 4.
For installation and connections, refer to the separate manual.
Para la instalación y las conexiones, refiérase al manual separado.
Pour l'installation et les raccordements, se référer au manuel
séparé.
MANUAL DE INSTRUCCIONES
MANUEL D'INSTRUCTIONS
INSTRUCTIONS
ENGLISH
ESPAÑOL
FRANÇAIS
For Customer Use:
Enter below the
Model No. and Serial
No. which are located
on the top or bottom
of the cabinet. Retain
this information for
future reference.
Model No.
Serial No.
GET0801 001A
[J]
Advertisement
Table of Contents

Related Manuals for JVC KD-A95BT


Summary of Contents for JVC KD-A95BT
- Page 1 ENGLISH ESPAÑOL FRANÇAIS KD-A95BT CD RECEIVER / RECEPTOR CON CD / RÉCEPTEUR CD For canceling the display demonstration, see page 4. / Para cancelar la demostración en pantalla, consulte la página 4. / Pour annuler la démonstration des affichages, référez-vous à la page 4.
- Page 2 Thank you for purchasing a JVC product. Please read all instructions carefully before operation, to ensure your complete understanding and to obtain the best possible performance from the unit. For U.S.A. This equipment has been tested and found to comply with the limits for a Class B digital device, pursuant to Part 15 of the FCC Rules.
-
Page 3: Table Of Contents
Contents Warning: Stop the car before operating the unit. Preparation ............4 Caution: Canceling the display demonstration Adjust the volume so that you can hear sounds Setting the clock outside the car. Driving with the volume too high may cause an accident. Basic operations ........... -
Page 4: Preparation
How to attach the control panel How to reset your unit Your preset adjustments will also be erased. How to forcibly eject a disc How to detach the control panel Avoid touching the connectors. (Hold) Be careful not to drop the disc when it ejects. If this does not work, reset your unit. -
Page 5: Basic Operations
Basic operations Basic operations Control panel Remote controller Display window Flips down the panel Remote sensor Control dial Aim the remote controller directly at the sensor. DO NOT expose to bright sunlight. When you press or hold the following button(s)... Remote Control panel General function... -
Page 6: Radio
Basic operations Display information Changes the display information. (Press) Scrolls the current display information. (Hold) Source Display (Normal display pattern)*1 Radio Non-Radio Broadcast Data System station: Frequency FM Radio Broadcast Data System station: Programme type (PTY)/Frequency/Station name (PS) HD Radio Track title*2/Album title*2/Frequency Satellite Radio Category name/Channel name/Track title... -
Page 7: Selecting A Preset Station
Radio Auto presetting (FM) 4 Set the activation time. SSM (Strong-station Sequential Memory) You can preset up to 18 stations for FM. If an HD Radio tuner box is connected, you can also preset up to 6 stations for AM. 5 Press MENU to exit. -
Page 8: Hd Radio™ Tuner Control
HD Radio™ tuner control This unit can control the JVC KT-HD300 HD Radio tuner box (separately purchased). Refer to the KT-HD300 instruction manual for installation and connection details. HD Radio tuners can also tune in to conventional analog broadcasts. Many HD Radio stations offer more than one channel of programming. This service is called multicasting. -
Page 9: Satellite Radio Tuner Control
JVC KS-SRA100 (SIRIUS Satellite Radio interface) and Radio SCC1 (SiriusConnect Vehicle Tuner) or SCVDOC1 (SiriusConnect Vehicle Docking Kit) and SIRIUS radio XMDJVC100 (Smart Digital Adapter for JVC) and XM Universal Tuner Box XM Satellite Radio CNPJVC1 (Connection cable for JVC) and CNP2000UCA (Protocol Interface Adapter and XM Direct 2 Tuner) For details, refer also to the instructions supplied with the other components. -
Page 10: Selecting A Channel
Satellite Radio tuner control Selecting a channel Selecting a preset station/ category/channel from the list “List” menu appears. 2 Select <Preset>, <Category> or Select <SIRIUS> or <XM>. <Channel>. Select a category. If you want to select channels of all categories... SIRIUS: Select <ALL>. -
Page 11: Cd/Usb
CD/USB CD/USB Playing a CD/USB device Label side USB cable from the rear of the unit The source changes to “CD” and playback starts. The source changes to “USB” and playback starts. This unit can play MP3/WMA files stored in CD-R, CD-RW, and MP3/WMA/WAV files in USB mass storage device (such as a USB memory and Digital Audio Player). -
Page 12: Ipod/Iphone
iPod/iPhone Playing an iPod/iPhone 2 Select the desired list. USB cable from the rear of the unit Playlists Artists Albums Songs Podcasts Genres Composers Audiobooks (back to the beginning) 3 Select the desired track. USB 2.0 cable (not supplied)* The source changes to “iPod-1/iPod-2” and playback starts. -
Page 13: Pandora Internet Radio
Creating a new station iPod/iPhone application You can create a new station based on the currently playing song or artist. You can operate JVC original application with this unit in <Application Mode>. For more details, visit JVC website: <http://www3.jvckenwood.com/ english/car/index.html> (English website only). -
Page 14: Quick Search
You can connect an external component to the following terminals: EXT IN: Expansion port on the rear of this unit using the following adapters (not supplied): - JVC KS-U57, Line Input Adapter - JVC KS-U58, AUX Input Adapter AUX: AUX (auxiliary) cable from the rear of the unit. -
Page 15: Bluetooth Connection
USB cable from the rear of the unit KS-UBT1 2 Search and select “JVC Unit” on the Bluetooth device. For some Bluetooth devices, you may need to enter the Personal Identification Number (PIN) code immediately after searching. ENGLISH |... -
Page 16: Bluetooth Connection
Bluetooth connection 3 Perform (A) or (B) depending on what appears on the display. For some Bluetooth devices, pairing sequence may vary from the steps described below Pairing? Pairing? Pairing? Pairing? Yes: Press VOL Yes: Press VOL Device: [Device name] Device: [Device name] No: Press BACK No: Press BACK... -
Page 17: Bluetooth Mobile Phone
Connecting to JVC original Deleting a registered device application (Hold) JVC original application is designed to view JVC car receiver status and perform simple control operations on Android smart phones. 2 Select <Delete OK>. For JVC original application operations, visit JVC <Bluetooth>... - Page 18 Bluetooth mobile phone Adjustments during a call Text message notification Phone volume (00 — 50) When a text message is received, the unit rings [Volume 15]: Volume and “[Device Name]” “Received Message” adjustments made during a call appears. will not affect the other <Message Notice>...
- Page 19 Bluetooth mobile phone Using voice recognition Deleting a contact (name/ phone number) You can use the voice recognition features of the connected phone through this unit. Only when <Phonebook Select> is set to <In “Not Support” appears if the connected phone Unit>.
-
Page 20: Using The Settings Menu
Bluetooth mobile phone Using the Settings menu 3 Repeat this step to perform the necessary 1 Enter the “Hands-Free” menu. settings. 2 Select <Settings>. To return to the previous menu, press To exit from the menu, press MENU. The following settings are applicable to the paired device. If another device is paired, perform the settings again. -
Page 21: Bluetooth Audio Player
Bluetooth audio player Bluetooth audio player Playing a Bluetooth audio player Select <BT-1> or <BT-2> depending on the location of the USB Bluetooth adapter KS-UBT1. Operate the Bluetooth audio player to start playback. Operations and display indications may differ according to their availability on the connected device. Random Basic operations Cancels random playback. -
Page 22: Illumination Color Adjustments
Illumination color adjustments Button zone All zone: Includes both Button zone and Display zone Display zone. All zone Selecting the preset color Storing your own adjustments You can select a preset color for <Button Zone>, You can store your own day and night colors for <Display Zone>, and <All Zone>... -
Page 23: Brightness Adjustments
Brightness adjustments Brightness adjustments You can select your preferred brightness for <Button Zone>, <Display Zone> separately. (Hold) <Dimmer> Button Zone Level 00 to 31 <Brightness> Display Zone Level 00 to 31 <Day Brightness>/ <Night Brightness> 4 Press MENU to exit. Sound adjustments This unit memorizes sound settings adjusted for each individual source. - Page 24 To store another sound mode, repeat steps 1 (instrument) to 6. To set “My Sound EQ” with Optional music 1 Visit the following JVC website: <http:// www3.jvckenwood.com/english/car/ Step 1: Adjust the overall index.html> (English website only). sound level. Step 1 2 Download your preferred music sample (<.jms>...
- Page 25 Sound adjustments Setting the speaker output timing — Time Alignment Ideal listening experience is achieved when the distance between each speaker and the listener is the same. Time alignment emulates this effect by synchronizing each speaker to compensate for the delay between each speaker and the listener.
- Page 26 Sound adjustments Preset data of distance between Compensating high frequency seat position and speakers sound level — D.T. Expander Speaker distance (cm) The Digital Track Expander compensates for high frequency sound levels in compressed digital audio. The effect can be heard in the following conditions: For MP3/WMA: Front...
- Page 27 Sound adjustments Setting the cutoff frequency — X’over HPF/LPF You can select or customize the cutoff frequencies from this unit according to your speakers for an improved sound quality. 2 Select the adjustment method. (Hold) <Audio> <X’over HPF/LPF> <Easy> or <Pro> Easy The unit will adjust the cutoff frequencies You can customize the cutoff frequencies and the...
-
Page 28: Menu Operations
Menu operations Menu operations 3 Repeat step 2 if necessary. (Hold) To return to the previous menu, press To exit from the menu, press DISP or MENU. If no operation is done for about 60 seconds, the operation will be canceled. Menu item Selectable setting (Initial: [XX]) DEMO... - Page 29 If you are using a two-speaker system, set the fader level to “0”. This adjustment will not affect the subwoofer output. Displayed only when <Subwoofer On/Off> is set to <On>. Not available when JVC KT-HD300 HD Radio tuner box is connected. ENGLISH |...
- Page 30 Information Connected Phone/Connected Audio/Connected App Mode *15: Displays connected phone/audio/application device name. My BT Name: Displays the unit name (JVC Unit). My Address: Shows address of USB Bluetooth Adapter. Ext Input *16 Show/[Hide]: Enables or disables “EXT IN” in source selection.
-
Page 31: Remote Controller
Remote controller Remote controller Warning: Preparing Do not install any battery other than CR2025 or When you use the remote controller for the first its equivalent. time, pull out the insulation sheet. Do not leave the remote controller in places (such as dashboards) exposed to direct sunlight for a long time. -
Page 32: Additional Information
Additional information Additional information About discs About audio files Playable files This unit can only play the following CDs: File extensions: MP3(.mp3), WMA(.wma), WAV(.wav) For MP3/WMA discs: This unit can play back multi-session discs; Bit rate: however, unclosed sessions will be skipped MP3/WMA: 5 kbps - 320 kbps during playback. -
Page 33: About Usb Device
When operating an iPod/iPhone, some The maximum number of characters for: operations may not be performed correctly or – Folder names: 25 characters as intended. In this case, visit the following JVC – File names: 25 characters website: – MP3 Tag: 128 characters <http://www3.jvckenwood.com/english/car/... -
Page 34: About Bluetooth
The Bluetooth word mark and logos are owned by the Bluetooth SIG, Inc. and any use of such Signal conditions vary, depending on the marks by JVC KENWOOD Corporation is under surroundings. license. Other trademarks and trade names are When the unit is turned off, the device is those of their respective owners. -
Page 35: Troubleshooting
The Unit”/“Warning Check with tape before resetting the unit. ( page 4) Wiring Reset The Unit” appears If the message does not disappear, consult your JVC car audio on the display and no operations dealer or kits supplying company. can be done. - Page 36 Troubleshooting Symptom Remedy/Cause CD/USB/iPod/iPhone New station creation: “NO STATION” There are no stations found for the current song or artist. “STATION REACH LIMIT” You may not create more than 100 stations. “CANNOT MAKE NEW There is a problem creating a new station, such as a network STATION”...
- Page 37 “HW Error” appears on the Reset the unit and try the operation again. If “HW Error” appears display. again, consult your nearest JVC car audio dealer. “BT Device Not Found” appears The unit failed to search for the registered Bluetooth devices on the display.
-
Page 38: Specifications
Specifications Specifications AUDIO AMPLIFIER SECTION Power Output 20 W RMS x 4 Channels at 4Ω and ≤ 1% THD+N Load Impedance 4Ω (4Ω to 8Ω allowance) Frequency Response 40 Hz to 20 000 Hz Signal-to-Noise Ratio 80 dBA (reference: 1 W into 4Ω) Line-Out, Subwoofer-Out Level/Impedance 5 V/20 kΩ... - Page 39 Specifications GENERAL Power Requirement (Operating Voltage) DC 14.4 V (11 V to 16 V allowance) Grounding System Negative ground Allowable Operating Temperature 0°C to +40°C (32°F to 104°F) Dimensions Installation Size 182 mm × 52 mm × 159 mm (W × H × D) (7-3/16"...
- Page 40 Having TROUBLE with operation? Please reset your unit Refer to page of How to reset your unit Still having trouble?? USA ONLY Call 1-800-252-5722 http://www.jvc.com We can help you! K EN, SP, FR 0212DTSSANJEIN © 2012 JVC KENWOOD Corporation...
- Page 41 For safety’s sake, leave this work to professionals. If you experience l’expérience. Pour des raisons de sécurité, laissez un professionnel effectuer problems during installation, consult your JVC car audio dealer. y montaje en manos de profesionales. Si experimenta problemas le travail de montage et de câblage. Si vous rencontrez des problèmes •...
- Page 42 INSTALLATION / INSTALACION / INSTALLATION Part list Lista de componentes Liste de pièces A Hard case (×1) A Estuche duro (×1) A Etui de transport (×1) B Control panel (×1) B Panel de control (×1) B Panneau de commande (×1) C Sleeve (×1) C Cubierta (×1) C Manchon (×1)
- Page 43 To subwoofer / Al subwoofer / Au caisson de grave JVC Amplifier / FRONT : To front speakers / A los altavoces delanteros / Amplificador de JVC / Aux enceintes avant JVC Amplificateur REAR : To rear speakers / A los altavoces traseros / Aux Signal cord / Cable de señal /...
- Page 44 Radio por satélite SIRIUS Radio satellite SIRIUS 1 • JVC KS-SRA100, SIRIUS Satellite Radio interface 1 • JVC KS-SRA100, Interfaz de radio por satélite SIRIUS 1 • JVC KS-SRA100, interface radio satellite SIRIUS • SCC1, SiriusConnect Vehicle Tuner • SCC1, Sintonizador SirusConnect para automóviles •...
Need help?
Do you have a question about the KD-A95BT and is the answer not in the manual?
Questions and answers