Table of Contents
Advertisement
Quick Links
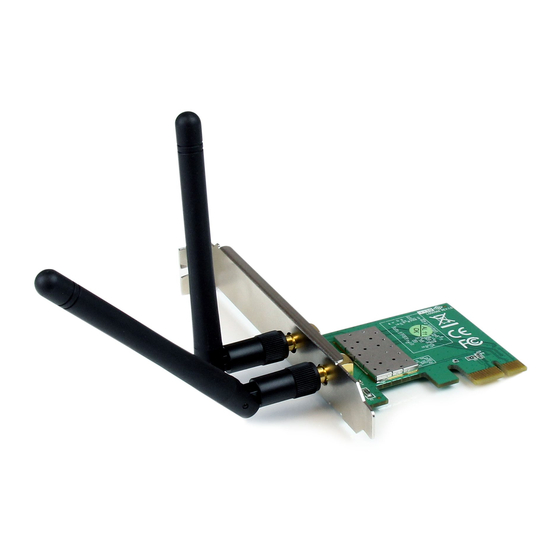
PCI Express 802.11n 300Mbps WiFi Adapter
PEX300WN2X2
*actual product may vary from photos
DE: Bedienungsanleitung - de.startech.com
FR: Guide de l'utilisateur - fr.startech.com
ES: Guía del usuario - es.startech.com
IT: Guida per l'uso - it.startech.com
NL: Gebruiksaanwijzing - nl.startech.com
PT: Guia do usuário - pt.startech.com
For the most up-to-date information, please visit: www.startech.com
Manual Revision: 06/21/2012
Advertisement
Table of Contents

Related Manuals for StarTech.com PEX300WN2X2


Summary of Contents for StarTech.com PEX300WN2X2
- Page 1 DE: Bedienungsanleitung - de.startech.com FR: Guide de l'utilisateur - fr.startech.com ES: Guía del usuario - es.startech.com IT: Guida per l'uso - it.startech.com NL: Gebruiksaanwijzing - nl.startech.com PT: Guia do usuário - pt.startech.com For the most up-to-date information, please visit: www.startech.com Manual Revision: 06/21/2012...
-
Page 2: Fcc Compliance Statement
StarTech.com. Where they occur these references are for illustrative purposes only and do not represent an endorsement of a product or service by StarTech.com, or an endorsement of the product(s) to which this manual applies by the third-party company in question. Regardless of any direct acknowledgement elsewhere in the body of this document, StarTech.com hereby... -
Page 3: Table Of Contents
Table of Contents Introduction ....................1 Packaging Contents ..........................1 System Requirements ..........................1 Installation ....................2 Hardware Installation ..........................2 Driver Installation ............................2 Verifying Installation ..........................4 How to Use ....................5 Windows XP ..............................5 Windows Vista/7/8 ............................ 6 Ralink WLAN Utility ........................... 7 Connecting to an available network: .................... -
Page 4: Introduction
Introduction The PEX300WN2X2 PCI Express Wireless N Card (PCIe x1) adds high speed wireless network connectivity to almost any PCI Express-enabled desktop/workstation PC. Using a 2T2R (2 Transmitter/2 Receiver) design over the 2.4GHz frequency, this PCIe wireless card provides up to 300Mbps of data bandwidth over an 802.11n network, while improving signal reception and range. -
Page 5: Installation
Be sure that you are properly grounded before opening your computer case or touching your PCI Express card. StarTech.com recommends that you wear an anti-static strap when installing any computer component. If an anti-static strap is unavailable, discharge yourself of any static electricity build-up by touching a large grounded metal surface (such as the computer case) for several seconds. - Page 6 5. Complete the wizard and this will automatically install all of the drivers/software. Restart the computer when prompted. Windows Vista/7/8 1. Upon starting Windows, if the “Found New Hardware” wizard appears on the screen, cancel/close the window or choose not to install the drivers and insert the included Driver CD into the computer’s CD/DVD drive.
-
Page 7: Verifying Installation
Verifying Installation Windows 2000/XP/Vista/7/8 From the main desktop, right-click on “My Computer” (“Computer” in Vista/7), then select Manage. In the new Computer Management window, select Device Manager from the left window panel. Double-click on the “Network adapters” option to open it. A new Wireless adapter should be listed. -
Page 8: How To Use
How to Use Connecting to a wireless network is done through the Windows wireless configuration utilities. You must know the name of the wireless network (SSID), the type of security it is using (if any) and it’s associated password to connect to a wireless network. Consult the documentation for your wireless access point (AP) or contact your network administrator or the wireless AP manufacturer for details. -
Page 9: Windows Vista/7/8
Windows Vista/7/8 The wireless network adapter will appear as a small icon in the System Tray (next to the clock). Left-clicking on this icon will bring up a list of detected wireless networks. Select the wireless network you wish to connect to and click the “Connect” button. If the network has security enabled, you will be prompted for a password. -
Page 10: Ralink Wlan Utility
Ralink WLAN Utility Instead of using the built-in Windows wireless utility, a 3rd party utility, Ralink WLAN Utility, can be used. This utility provides access to additional advanced features of the wireless card, such as Wi-Fi Direct and Wi-Fi Protected Setup (WPS). If the Ralink WLAN utility is installed, then a small icon will appear in the system tray area near the clock. -
Page 11: Connecting To An Available Network
Connecting to an available network: 1. To connect to a wireless network, bring up “Available Networks” from the main window. This will list all of the detected wireless networks in the area. 2. Once you locate the network you wish to connect to, select it from the list by click on the entry, then click the ‘Connect’... -
Page 12: Manually Creating A Profile
3. If the network uses encryption, a window will popup where you will need to enter the proper authentication information (i.e. password/passphrase). 4. Once successfully connected to the network, information about the wireless router/ access point will be listed in the main window and the “AP Information” section of the Available Networks window. -
Page 13: Wi-Fi Protected Setup (Wps)
4. Select the type of Authentication/Encryption used by the network (if any). Click the ‘Next’ arrow button when ready. 5. If an Authentication type was specified, enter in the password/passphrase used to access the network. Click the ‘Next’ arrow button when ready. 6. -
Page 14: Specifications
Specifications Host Interface PCI Express 1.1 (x1 slot connector) Form Factor Low/Full Profile Chipset ID Ralink RT5392 External Connectors 2 x RP-SMA Female LEDs 1 x Link/Activity Antenna Configuration 2x2:2 (TxR:S) Wireless Frequency 2.4 GHz Supported Standards IEEE 802.11b, IEEE 802.11g, IEEE 802.11n Supported Security Schemes WEP, WPA, WPA2, TKIP/AES Operating Temperature... -
Page 15: Technical Support
Limitation of Liability In no event shall the liability of StarTech.com Ltd. and StarTech.com USA LLP (or their officers, directors, employees or agents) for any damages (whether direct or indirect, special, punitive, incidental, consequential, or otherwise), loss of profits, loss of business, or any pecuniary loss, arising out of or related to the use of the product exceed the actual price paid for the product. - Page 16 StarTech.com is an ISO 9001 Registered manufacturer of connectivity and technology parts. StarTech.com was founded in 1985 and has operations in the United States, Canada, the United Kingdom and Taiwan servicing a worldwide market.
Need help?
Do you have a question about the PEX300WN2X2 and is the answer not in the manual?
Questions and answers