Chapters
Table of Contents

Related Manuals for Hoover WindTunnel Wind Tunnel Bagless Canister Cleaner


Summary of Contents for Hoover WindTunnel Wind Tunnel Bagless Canister Cleaner
- Page 1 WindTunnel Bagless Canister Cleaner with Powered Nozzle www.hoover.com Review this manual before operating cleaner. Owner’s Manual English § pp. 1-11 Español § pàg.12-17 Français § p.18-23...
-
Page 2: Table Of Contents
Your cleaner is model________________________________________________________ and has serial number ______________________________________________________ It is suggested that you attach your sales receipt to this owner’s manual. Verification of date of purchase may be required for warranty service of your Hoover product. Index Assembling Cleaner ...3 Cleaner Description...4... -
Page 3: Carton Contents
This cleaner was inspected and packaged carefully before being shipped from the factory. If you should happen to need assistance during assembly or operation, Visit us online at www.hoover.com to find the nearest service outlet Call 1-800-944-9200 for an automated referral of authorized service outlet locations (U.S. only) Call 1-800-263-6376 to speak with a representative in our Consumer Response Center, Mon-Fri 8am-7pm EST. -
Page 4: Cleaner Description
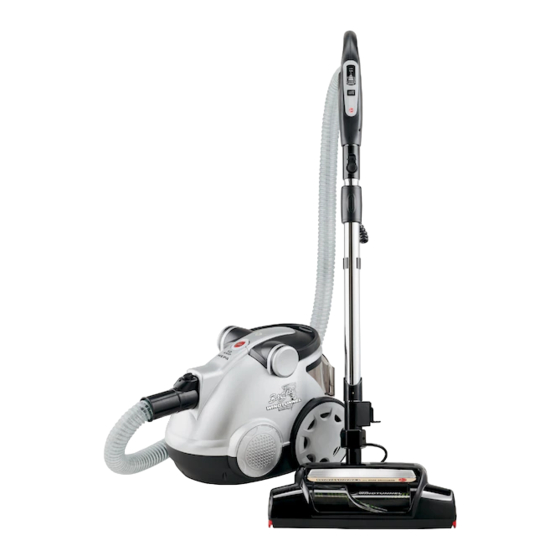
2. How to use Cleaner description The assembled cleaner will look like the drawing. 1. WindTunnel™ carpet and floor power nozzle: automatically adjusts to different carpet pile heights 2. Headlight 3. Quick disconnect pedal: step on pedal to separate wand from power nozzle 4. -
Page 5: Powered Nozzle
Polarized plug To reduce the risk of electric shock, this appliance has a polarized plug (one blade is wider than the other). This plug will fit in a polarized outlet only one way. If the plug does not fit fully in the outlet, reverse the plug. -
Page 6: Dirt Cup
Edge cleaning Special edge groomers are provided on both sides of the nozzle to remove dirt in carpet near baseboards and furniture. Guide side of nozzle parallel to edge of carpet or furniture as shown. How to clean stairs Place cleaner on stair. Using the furni- ture nozzle, clean stairs from bottom to top. -
Page 7: Belt Replacement
What to buy There are other belts manufactured that are similar in shape and size, but are not designed for the HOOVER power nozzle. Such belts do not operate the agitator cor- rectly and may create stress which could damage your power nozzle. Use only a genuine HOOVER Belt part no. - Page 8 Return nozzle to original position and lift off hood. 3-11 If belt is not broken but is stretched or cut, pull it off the motor pulley (H). 3-14 Replace brush roll cover (G) over agita- tor brush roll. Replace 3 short screws. Remove brush roll cover (G) by remov- ing the 3 Phillips head screws.
-
Page 9: Lubrication
Headlight replace- ment The headlight, located on top of the power nozzle, operates when the clean- er is turned on. Use only HOOVER part no. 27317307, which is a fused bulb, when replacing the headlight. How to replace Disconnect cleaner from electrical outlet and disconnect power nozzle from extension wands. -
Page 10: If You Have A Problem
• calling 1-800-944-9200 for an auto- mated referral of authorized service outlet locations (U.S. only). Please do not send your cleaner to Hoover in Glenwillow for service, this will only result in delay. If further assistance is needed, contact our Consumer Response Center, Phone: 1-800-263-6376, Mon-Fri 8am-7pm EST. -
Page 11: Full One Year Warranty
This warranty does not cover pick up delivery, or house calls; however, if you mail your appliance to a Hoover Sales and Service Center for warranty service, transportation will be paid one way. While this warranty gives you specific legal rights, you may also have other rights which vary from state to state. -
Page 12: Manual Del Propietario
_____________________________________ Le sugerimos que adjunte su recibo de compra a este manual del propietario. Para obtener el servicio de garantía de su producto HOOVER puede requerirse la verificación de la fecha de compra. ¡Salvaguardias importantes! Al usar un aparato eléctrico, observe siempre las precauciones básicas,... -
Page 13: Ensamblado De La Aspiradora
Si llegara a necesitar ayuda durante el ensamblado y el funcionamiento, Visítenos en nuestra página de Internet en www.hoover.com para encontrar el centro de servicio más cercano a usted Llame al 1-800-944-9200 para obtener una referencia automática de la ubicación de los centros de servicio... -
Page 14: Accesorios De Limpieza
Tubo de extensión telescópico La traba de resorte (B) del tubo permite el ajuste de la extensión a la longitud deseada. Suelte la traba de resorte empujándola hacia delante y ajuste el tubo a la longitud deseada. La traba de resorte trabará... -
Page 15: Filtro De Escape
Qué comprar Existen otras correas con formas y tamaños similares, pero no han sido diseñadas para la boquilla de HOOVER. Estas correas no accionan el agitador de manera correcta y pueden crear una tensión que podría dañar la boquilla. -
Page 16: Si Tiene Un Problema
Qué comprar Cuando compre limpiadores de bordes, pida la pieza No. 39511004 de Hoover. Cómo reemplazarlos Desenchufe la aspiradora de la toma de corriente eléctrica. 1. Saque la cubierta y la cubierta del rodillo de escobillas como se muestra en las figuras de 3-8 a 3-10. -
Page 17: Eliminación De Obstrucciones
Esta garantía no cubre la recogida, la entrega, ni las visitas a domicilio; sin embargo, si envía su aparato a un Centro de Ventas y Servicio de Hoover para un servicio de garantía, el transporte se pagará en una sola dirección. -
Page 18: Guide De L'utilisateur
été laissé à l’extérieur, il doit être apporté à un Centre de vente et de service Hoover ou chez un détaillant de service garanti autorisé Hoover (dépôt). -
Page 19: Assemblage De L'aspirateur
(É-U. seulement), OU Appelez 1-800-263-6376 pour parler à un représentant Hoover du service à la clientèle, lundi-vendredi, 8 h - 19 h HNE. Contenu de l’emballage Retirer l’aspirateur de la boîte et identifier les pièces illustrées. -
Page 20: Accessoires De Nettoyage
Positions du manche avec l’embout à turbine Le manche peut être placé à deux positions lors de l’utilisation de l’embout à turbine : à la verticale ou en position de fonctionnement. Pour abaisser le manche en position de fonctionnement, il suffit d’appuyer fermement avec le pied sur l’embout et de tirer sur le manche. -
Page 21: Remplacement Du Rouleau-Brosse Agitateur
D’autres fabricants de courroies fabriquent des courroies de taille et de forme similaires. Mais elles ne sont pas conçues pour l’embout à turbine HOOVER. Ces courroies n’actionnent pas l’agitateur correctement et peuvent générer un stress qui endommagera votre embout à turbine. Utiliser uniquement les courroies HOOVER (pièce n°... -
Page 22: Protecteur Thermique
Le rouleau-brosse agitateur est pourvu de deux roulements à billes qui doivent être lubrifiés périodiquement à un Centre de vente et de service Hoover ou à un atelier de service Hoover garanti autorisé (dépôt). 4. Dépannage Si un problème d’ordre mineur survient,... -
Page 23: Déblocage Des Obstructions
Centres de service, Appelez 1-800-263- 6376 pour parler à un représentant Hoover du service à la clientèle, lundi- vendredi, 8 h - 19 h HNE. Au Canada, s’adresser Hoover Canada, Carson Building, 100 Carson Street, Etobicoke, Ontario M8W 3R9, Téléphone: 1-800-263-6376 Mon-Fri... - Page 24 HOOVER et sont des marques déposées HOOVER y son marcas registradas ® ® HOOVER and are registered trademarks ® R2 5-05 S3755 Printed in China 59134-003...
Need help?
Do you have a question about the WindTunnel Wind Tunnel Bagless Canister Cleaner and is the answer not in the manual?
Questions and answers