IBM BladeCenter HS23 Installation And User Manual
Types 7875 and 1929
Hide thumbs
Also See for BladeCenter HS23:
- User manual (30 pages) ,
- Product manual (29 pages) ,
- Service manual (36 pages)
Table of Contents
Advertisement
Quick Links
Download this manual
See also:
User Manual
Advertisement
Table of Contents

Related Manuals for IBM BladeCenter HS23


Summary of Contents for IBM BladeCenter HS23
- Page 1 BladeCenter HS23 Types 7875 and 1929 Installation and User's Guide...
- Page 3 BladeCenter HS23 Types 7875 and 1929 Installation and User's Guide...
- Page 4 Before using this information and the product it supports, read the general information in “Notices” on page 71, the Warranty Information document, and the IBM Safety Information and the Environmental Notices and User Guide documents on the IBM Documentation CD.
-
Page 5: Table Of Contents
Instructions for IBM Business Partners . . 18 install the operating system . . 61 How to send DSA data to IBM . . 19 Using RDM to install the operating system . . 61 Removing the blade server from the BladeCenter Downloading installation instructions . - Page 6 . 76 Index ....79 Japan Electronics and Information Technology Industries Association (JEITA) statement. . 76 BladeCenter HS23 Types 7875 and 1929: Installation and User's Guide...
-
Page 7: Safety
Ennen kuin asennat tämän tuotteen, lue turvaohjeet kohdasta Safety Information. Avant d'installer ce produit, lisez les consignes de sécurité. Vor der Installation dieses Produkts die Sicherheitshinweise lesen. Prima di installare questo prodotto, leggere le Informazioni sulla Sicurezza. © Copyright IBM Corp. 2012... -
Page 8: Safety Statements
Be sure to read all caution and danger statements in this documentation before you perform the procedures. Read any additional safety information that comes with your system or optional device before you install the device. Statement 1 BladeCenter HS23 Types 7875 and 1929: Installation and User's Guide... - Page 9 Statement 2 CAUTION: ® When replacing the lithium battery, use only IBM Part Number 33F8354 or an equivalent type battery recommended by the manufacturer. If your system has a module containing a lithium battery, replace it only with the same module type made by the same manufacturer.
- Page 10 Appareil A Laser de Classe 1 Statement 4 ≥ 18 kg (39.7 lb) ≥ 32 kg (70.5 lb) ≥ 55 kg (121.2 lb) CAUTION: Use safe practices when lifting. viii BladeCenter HS23 Types 7875 and 1929: Installation and User's Guide...
- Page 11 Statement 8 CAUTION: Never remove the cover on a power supply or any part that has the following label attached. Hazardous voltage, current, and energy levels are present inside any component that has this label attached. There are no serviceable parts inside these components.
- Page 12 The device also might have more than one power cord. To remove all electrical current from the device, ensure that all power cords are disconnected from the power source. BladeCenter HS23 Types 7875 and 1929: Installation and User's Guide...
- Page 13 Rack Safety Information, Statement 2 DANGER v Always lower the leveling pads on the rack cabinet. v Always install stabilizer brackets on the rack cabinet. v Always install servers and optional devices starting from the bottom of the rack cabinet. v Always install the heaviest devices in the bottom of the rack cabinet.
- Page 14 BladeCenter HS23 Types 7875 and 1929: Installation and User's Guide...
-
Page 15: Chapter 1. Introduction
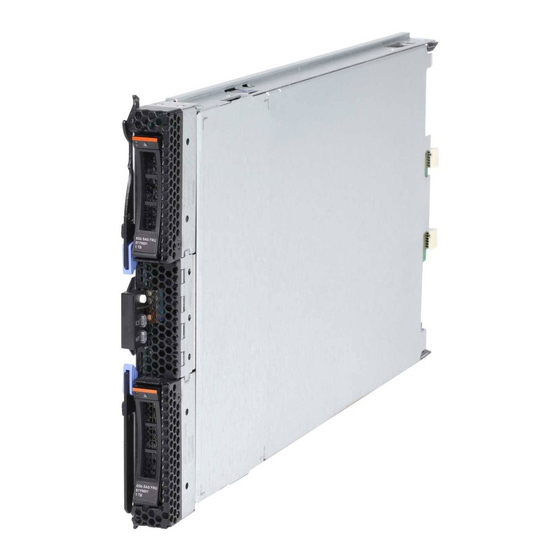
Chapter 1. Introduction The IBM BladeCenter HS23 Types 7875 and 1929 blade server is compatible with ® IBM BladeCenter units. This high density, high performance, single-wide blade server is ideally suited for medium and large businesses. The IBM BladeCenter HS23 blade server supports up to two multi-core Intel Xeon microprocessors and... - Page 16 BladeCenter unit, write identifying information on a label and place the label on the BladeCenter unit bezel. See the documentation for your BladeCenter unit for recommended label placement. BladeCenter HS23 Types 7875 and 1929: Installation and User's Guide...
-
Page 17: Related Documentation
To check for updated documentation and technical updates, go to http://www.ibm.com/supportportal/ . The IBM Documentation CD Use the IBM Documentation CD to access the blade server documentation in PDF format. The IBM Documentation CD contains documentation for your blade server in Portable Document Format (PDF) and includes the IBM Documentation Browser to help you find information quickly. -
Page 18: Hardware And Software Requirements
You can run the IBM Documentation CD on any computer that meets the hardware and software requirements. Hardware and software requirements Use this information to determine the minimum hardware and software requirements for the blade server. The IBM Documentation CD requires the following minimum hardware and... -
Page 19: Notices And Statements In This Document
The caution and danger statements in this document are also in the multilingual Safety Information document, which is on the IBM Documentation CD. Each statement is numbered for reference to the corresponding statement in the Safety Information document. -
Page 20: What Your Blade Server Offers
The IMM2 provides advanced service-processor control, monitoring, and alerting function. If an environmental condition exceeds a BladeCenter HS23 Types 7875 and 1929: Installation and User's Guide... - Page 21 By using industry standards, IBM Systems Director supports multiple operating systems and virtualization technologies for IBM and non-IBM x86 platforms. For more information, see “IBM Systems Director” on page 9.
-
Page 22: Reliability, Availability, And Serviceability Features
Hot-swap SAS storage drives v Integrated Management Module (IMM) v Light path diagnostics 1. Service availability will vary by country. Response time will vary depending on the number and nature of incoming calls. BladeCenter HS23 Types 7875 and 1929: Installation and User's Guide... -
Page 23: Ibm Systems Director
A set of common tasks that are included with IBM Systems Director provides many of the core capabilities that are required for basic management, which means instant out-of-the-box business value. -
Page 24: Major Components Of The Blade Server
The following illustration shows the major components of the blade server. Cover Heat sink CIOv expansion Microprocessor 2 card Microprocessor 1 and heat sink DIMM Hot-swap storage drive Microprocessor heat sink filler Storage drive filler BladeCenter HS23 Types 7875 and 1929: Installation and User's Guide... -
Page 25: Chapter 2. Power, Controls, And Indicators
Advanced-Management-Module Web interface or through IBM Director Console. For more information about the Advanced-Management-Module web interface, see ® http://www.ibm.com/systems/management/. For more information about IBM ® Director, see the documentation on the IBM Director CD that comes with the © Copyright IBM Corp. 2012... - Page 26 If there is no response when you press the KVM select button, you can use the Advanced-Management-Module web interface to determine whether local control has been disabled on the blade server. See http://www.ibm.com/systems/ management/ for more information. Notes: BladeCenter HS23 Types 7875 and 1929: Installation and User's Guide...
- Page 27 1. The operating system in the blade server must provide USB support for the blade server to recognize and use the keyboard and mouse, even if the keyboard and mouse have PS/2-style connectors. 2. If you install a supported Microsoft Windows operating system on the blade server while it is not the current owner of the keyboard, video, and mouse, a delay of up to 1 minute occurs the first time that you switch the keyboard, video, and mouse to the blade server.
-
Page 28: Turning On The Blade Server
The management module can turn off the blade server through the Advanced-Management-Module web interface. For additional information, see the IBM BladeCenter Management Module User's Guide or go to http://www.ibm.com/systems/management/ for more information. BladeCenter HS23 Types 7875 and 1929: Installation and User's Guide... -
Page 29: Blade Server Connectors
Blade server connectors Use this information to locate blade server system-board components and connectors for optional devices. The following illustration shows the system-board components, including connectors for user-installable optional devices, in the blade server. DIMM 1 SAS 0 hot-swap storage connector DIMM 2 Microprocessor 1 DIMM3 DIMM4 DIMM5 DIMM6 USB connector... - Page 30 BladeCenter HS23 Types 7875 and 1929: Installation and User's Guide...
-
Page 31: Chapter 3. Installing Options
To ensure proper cooling, do not operate the BladeCenter unit without a blade server, expansion unit, or blade filler installed in each blade-server bay. See the documentation for your BladeCenter unit for additional information. © Copyright IBM Corp. 2012... -
Page 32: Handling Static-Sensitive Devices
IBM Business Partners must also complete the following steps: 1. Before you configure a server for a customer, complete the Solution Assurance checklist at http://w3.ibm.com/support/assure/assur30i.nsf/webindex/ sa294/. BladeCenter HS23 Types 7875 and 1929: Installation and User's Guide... -
Page 33: How To Send Dsa Data To Ibm
3. Shut down and restart the server multiple times to ensure that the server is correctly configured and functions correctly with the newly installed devices. 4. Save the DSA log as a file and send it to IBM. For information about transferring data and logs, see http://publib.boulder.ibm.com/infocenter/ toolsctr/v1r0/index.jsp?topic=/dsa/dsa_main.html. -
Page 34: Removing The Blade Server Cover
The following illustration shows how to open the cover on the blade server. Blade server cover Cover pins Blade server cover release Blade server cover release To open the blade server cover, complete the following steps: BladeCenter HS23 Types 7875 and 1929: Installation and User's Guide... -
Page 35: Installing An Optional Expansion Unit
1. Before you begin, read “Safety” on page v and “Installation guidelines” on page 17. 2. If the blade server is installed in a BladeCenter unit, remove it (see “Removing the blade server from the BladeCenter unit” on page 19 for instructions). 3. - Page 36 To install an option into the expansion unit, refer to the documentation provided with the expansion unit. 9. If additional expansion units are being installed, repeat steps 4 through 8 for each expansion blade; otherwise continue with step 11. BladeCenter HS23 Types 7875 and 1929: Installation and User's Guide...
-
Page 37: Removing An Optional Expansion Unit
10. Follow the instructions provided with the expansion unit to install an option in the expansion unit. 11. If you have other devices to install or remove, do so now; otherwise, go to “Completing the installation” on page 42. Removing an optional expansion unit Use these instructions to remove the optional expansion unit from the blade server. -
Page 38: Installing A Hot-Swap Storage Drive
6. Lock the hot-swap storage drive into place by closing the release lever. If you have other devices to install or remove, do so now; otherwise, go to “Completing the installation” on page 42. BladeCenter HS23 Types 7875 and 1929: Installation and User's Guide... -
Page 39: Removing A Hot-Swap Storage Drive
The blade server supports very low profile (VLP) DDR3 DIMMs with error code correction (ECC) in 4 GB, 8 GB, and 16 GB capacities. For a current list of supported DIMMs for the blade server, see http://www.ibm.com/systems/info/ x86servers/serverproven/compat/us/ . After you install or remove a DIMM, you must change and save the new configuration information by using the Setup utility. - Page 40 7 (channel 2). Table 2 lists each channel and which DIMM connectors belong to the channel. The following table shows the order that memory DIMMs are installed to use a mirrored channel mode. BladeCenter HS23 Types 7875 and 1929: Installation and User's Guide...
- Page 41 Table 4. DIMM population sequence for mirrored channel mode DIMM connectors One microprocessor Two microprocessors DIMM pair installed installed First 1 and 7 1 and 7 Second 3 and 5 14 and 16 Third 2 and 8 3 and 5 Fourth 4 and 6 9 and 11...
-
Page 42: Removing A Memory Module
Use this information to remove a dual inline memory module (DIMM) from the blade server. The following illustration shows how to remove a DIMM from the blade server. This information also applies to removing a DIMM filler. BladeCenter HS23 Types 7875 and 1929: Installation and User's Guide... - Page 43 After you install or remove a DIMM, you must change and save the new configuration information by using the Setup utility. When you turn on the blade server, a message indicates that the memory configuration has changed. Start the Setup utility and select Save Settings (see “Using the Setup utility” on page 47 for more information) to save changes.
-
Page 44: Installing A Microprocessor And Heat Sink
The following illustration shows how to install a microprocessor and heat sink in the blade server. Heat sink Microprocessor 1 Microprocessor 2 and heat sink Microprocessor heat sink filler BladeCenter HS23 Types 7875 and 1929: Installation and User's Guide... - Page 45 Attention: 1. Do not use any tools or sharp objects to lift the release levers on the microprocessor socket. Doing so might result in permanent damage to the system board. 2. Do not touch the contacts in the microprocessor socket. Touching these contacts might result in permanent damage to the system board.
- Page 46 Twist the handle on the microprocessor tool counterclockwise to insert the microprocessor into the socket. The microprocessor is keyed to ensure that the microprocessor is installed correctly. The microprocessor rests flush on the socket only if properly installed. BladeCenter HS23 Types 7875 and 1929: Installation and User's Guide...
- Page 47 Attention: v Do not press the microprocessor into the socket. v Do not touch exposed pins of the microprocessor socket. v Make sure that the microprocessor is oriented and aligned correctly in the socket before you try to close the microprocessor retainer. v Do not touch the thermal material on the bottom of the heat sink or on top of the microprocessor.
-
Page 48: Thermal Grease
4. Use a clean area of the cleaning pad to wipe the thermal grease from the microprocessor; then, dispose of the cleaning pad after all of the thermal grease is removed. BladeCenter HS23 Types 7875 and 1929: Installation and User's Guide... -
Page 49: Installing A Usb Flash Key
0.02 mL of thermal grease Microprocessor 5. Use the thermal-grease syringe to place nine uniformly spaced dots of 0.02 mL each on the top of the microprocessor. Note: 0.01mL is one tick mark on the syringe. If the grease is properly applied, approximately half (0.22 mL) of the grease will remain in the syringe. -
Page 50: I/O Expansion Cards
Attention: If the expansion card is not running at the speed supported by the card, you can change the maximum speed of the PCIe bus in the Setup Utility by selecting System Settings and Devices and I/O Ports. BladeCenter HS23 Types 7875 and 1929: Installation and User's Guide... -
Page 51: Removing A Horizontal-Compact-Form-Factor Expansion Card
To install a CFFh expansion card, complete the following steps: 1. Before you begin, read “Safety” on page v and “Installation guidelines” on page 17. 2. If the blade server is installed in a BladeCenter unit, remove it (see “Removing the blade server from the BladeCenter unit” on page 19 for instructions). -
Page 52: Installing A Ciov-Form-Factor Expansion Card
Attention: If the expansion card is not running at the speed supported by the card, you can change the maximum speed of the PCIe bus in the Setup Utility by selecting System Settings and Devices and I/O Ports. BladeCenter HS23 Types 7875 and 1929: Installation and User's Guide... -
Page 53: Removing A Ciov-Form-Factor Expansion Card
Expansion card To install a CIOv expansion card, complete the following steps: 1. Before you begin, read “Safety” on page v and “Installation guidelines” on page 17. 2. If the blade server is installed in a BladeCenter unit, remove it (see “Removing the blade server from the BladeCenter unit”... - Page 54 6. Locate the CIOv expansion connector (see “Blade server connectors” on page 15). Retaining clips Expansion card 7. Using your fingers, move the retaining clips away from the CIOv card; then, lift the card vertically out of the connector. BladeCenter HS23 Types 7875 and 1929: Installation and User's Guide...
-
Page 55: Installing A 10Gb Interposer Card
Installing a 10Gb interposer card Use these instructions to install a 10Gb interposer card in the blade server. Interposer card Expansion Card Standoff To install a 10Gb interposer card, complete the following steps: 1. Before you begin, read “Safety” on page v and “Installation guidelines” on page 17. -
Page 56: Removing A 10Gb Interposer Card
BladeCenter unit to electrical outlets, you must wait until the power-on LED on the blade server flashes slowly before you press the power-control button. BladeCenter HS23 Types 7875 and 1929: Installation and User's Guide... -
Page 57: Installing The Blade Server Cover
5. For certain optional devices, you might have to run the blade server Setup utility to configure the blade server (see Chapter 4, “Configuring the blade server,” on page 47). See the documentation that comes with your optional device for additional information. Installing the blade server cover Use these instructions for information about how to close the blade server cover. -
Page 58: Installing The Blade Server In A Bladecenter Unit
BladeCenter unit, complete the following steps. Statement 21 CAUTION: Hazardous energy is present when the blade server is connected to the power source. Always replace the blade cover before installing the blade server. BladeCenter HS23 Types 7875 and 1929: Installation and User's Guide... - Page 59 1. Before you begin, read “Safety” on page v and “Installation guidelines” on page 17. 2. Select the blade bay for the blade server; at least one blade bay is required. Notes: a. When any blade server or device is in blade bay 7 through 14, power modules must be installed in all four power-module bays.
-
Page 60: Updating The Blade Server Configuration
Ethernet-compatible I/O modules in the BladeCenter unit. Network signals to and from the blade server or any expansion cards are automatically routed to a same-network-interface I/O module through circuitry in the BladeCenter unit. BladeCenter HS23 Types 7875 and 1929: Installation and User's Guide... -
Page 61: Copyright Ibm Corp
“Setting the PXE boot protocol using the Setup utility” on page 54. The IBM Remote Deployment Manager (RDM) Version 4.4 program is available for purchase. You can use RDM to install a UEFI code update onto a blade server. For the latest information about RDM, including which operating systems that RDM supports and how to purchase the software, see http://www.ibm.com/systems/... -
Page 62: Setup Utility Menu
If you are managing the blade server from a remote location, see the IBM BladeCenter Management Module User's Guide, IBM BladeCenter Management Module Command-Line Interface Reference Guide, or IBM BladeCenter Serial over LAN Setup Guide for information and instructions. - Page 63 Select this choice to view or change the processor settings. – Memory Select this choice to view or change the memory settings. – Devices and I/O Ports Select this choice to view or change assignments for devices and input/output (I/O) ports. You can configure the remote console redirection, and enable or disable integrated Ethernet controllers.
- Page 64 Select this choice to view, add, delete, or change the device boot priority, boot from a file, select a one-time boot, or reset the boot order to the default setting. BladeCenter HS23 Types 7875 and 1929: Installation and User's Guide...
-
Page 65: Using Passwords
v System Event Logs Select this choice to access the System Event Manager, where you can view the POST event log and the system-event log. The POST event log contains the three most recent error codes and messages that were generated during POST. The system-event log contains POST and system management interrupt (SMI) events and all events that are generated by the baseboard management controller that is embedded in the integrated management module. -
Page 66: Using The Serverguide Setup And Installation Cd
. To download the free image, click IBM Service and Support Site. Note: Changes are made periodically to the IBM website. The actual procedure might vary slightly from what is in this document. The ServerGuide program performs the following tasks:... -
Page 67: Setup And Configuration Overview
When you use the ServerGuide Setup and Installation CD, you do not need setup diskettes. You can use the CD to configure any supported IBM blade server model. The setup program provides a list of tasks that are required to set up the blade server. -
Page 68: Installing The Operating System Without Using Serverguide
Several tools are available to help update the firmware and device drivers in the provisioning process. Use the instructions that are included with the downloaded files. v UpdateXpress System Packs BladeCenter HS23 Types 7875 and 1929: Installation and User's Guide... -
Page 69: Configuring Uefi Compatible Devices
® updates from UpdateXpress System Packs, which contain Windows and Linux firmware updates. Typically, use IBM ToolsCenter Bootable Media Creator for the initial set up of a blade server. For more information about the IBM Bootable Media Creator, see http://www.ibm.com/support/entry/portal/docdisplay?brand=5000008 &lndocid=TOOL-BOMC . -
Page 70: Configuring A Raid Array
Setup utility for your blade server (see “Configuring UEFI compatible devices” on page 55). 1. Turn on the blade server, and make sure that the blade server is the owner of the keyboard, video, and mouse. BladeCenter HS23 Types 7875 and 1929: Installation and User's Guide... -
Page 71: Using Lan Over Usb To Interface The Imm2
Because the IMM2 might obtain a random IP address for the LAN over USB interface, the IBM Advanced Settings Utility (ASU) and firmware flash utilities, DSA, and the IBM Director Agent use the Service Location Protocol (SLP) to discover the IMM2 IP address. These tools perform an SLP multicast discovery on the LAN over USB interface. -
Page 72: Configuring The Lan Over Usb Interface Manually
For more information about LAN over USB configuration on different operating systems, see http://www-947.ibm.com/support/entry/portal/ docdisplay?brand=5000008&lndocid=MIGR-5083207 . For more information about LAN over USB configuration on different operating systems, see http://www-947.ibm.com/support/entry/portal/ docdisplay?brand=5000008&lndocid=MIGR-5083207 . BladeCenter HS23 Types 7875 and 1929: Installation and User's Guide... - Page 73 Network Adapters. 11. Open a command prompt, type ipconfig, and press Enter. The local area connection for the IBM USB RNDIS appears with an IP address in the range of 169.254.xxx.xxx with a subnet mask set to 255.255.0.0.
- Page 74 169.254.xxx.xxx. For example: ifconfig IMM_device_name 169.254.1.102 netmask 255.255.0.0 This interface is configured to come up with an IP address in the 169.254.xxx.xxx range each time that the operating system is booted. BladeCenter HS23 Types 7875 and 1929: Installation and User's Guide...
-
Page 75: Chapter 5. Installing The Operating System
Use this information if you are using RDM to install the blade server operating system. You can use RDM to install a supported operating system on a blade server. Follow the instructions in the documentation that comes with RDM to install a supported operating system. © Copyright IBM Corp. 2012... -
Page 76: Downloading Installation Instructions
Note: To determine whether an RDM supports an operating system, see http://www.ibm.com/systems/management/ . Downloading installation instructions Use these instructions to download the operating-system installation instructions. To download operating-system installation instructions, go to http:// www.ibm.com/supportportal/ . BladeCenter HS23 Types 7875 and 1929: Installation and User's Guide... -
Page 77: Chapter 6. Solving Problems
BladeCenter unit, and then restart the blade server. If the blade server does not start after you have performed the preceding actions, see the Problem Determination and Service Guide for your blade server on the IBM Documentation CD. Diagnostic tools overview Use this overview to locate specific diagnostic tools to diagnose and solve hardware-related problems. -
Page 78: Serverguide Problems
(UEFI) configuration The diagnostic programs create a merged log that includes events from all collected logs. The information is collected into a file that you can send to IBM service and support. Additionally, you can view the information locally through a generated text report file. - Page 79 Symptom Suggested action The ServerGuide program will Make sure that the operating-system CD is supported by the ServerGuide not start the operating-system program. See the ServerGuide Setup and Installation CD label for a list of supported operating-system versions. The operating system cannot be Make sure that the operating system is supported on the blade server.
- Page 80 BladeCenter HS23 Types 7875 and 1929: Installation and User's Guide...
-
Page 81: Appendix. Getting Help And Technical Assistance
Appendix. Getting help and technical assistance If you need help, service, or technical assistance or just want more information about IBM products, you will find a wide variety of sources available from IBM to assist you. Use this information to obtain additional information about IBM and IBM products, determine what to do if you experience a problem with your IBM system or optional device, and determine whom to call for service, if it is necessary. -
Page 82: Using The Documentation
The troubleshooting information or the diagnostic programs might tell you that you need additional or updated device drivers or other software. IBM maintains pages on the World Wide Web where you can get the latest technical information and download device drivers and updates. -
Page 83: Ibm Taiwan Product Service
7 days a week. In the U.K., these services are available Monday through Friday, from 9 a.m. to 6 p.m. IBM Taiwan product service Use this information to contact IBM Taiwan product service. IBM Taiwan product service contact information: IBM Taiwan Corporation 3F, No 7, Song Ren Rd. - Page 84 BladeCenter HS23 Types 7875 and 1929: Installation and User's Guide...
-
Page 85: Notices
Consult your local IBM representative for information on the products and services currently available in your area. Any reference to an IBM product, program, or service is not intended to state or imply that only that IBM product, program, or service may be used. Any functionally equivalent product, program, or service that does not infringe any IBM intellectual property right may be used instead. -
Page 86: Important Notes
IBM makes no representations or warranties with respect to non-IBM products. Support (if any) for the non-IBM products is provided by the third party, not IBM. Some software might differ from its retail version (if available) and might not include user manuals or all program functionality. -
Page 87: Particulate Contamination
If IBM determines that the levels of particulates or gases in your environment have caused damage to the device, IBM may condition provision of repair or replacement of devices or parts on implementation of appropriate remedial measures to mitigate such environmental contamination. -
Page 88: Telecommunication Regulatory Statement
In the request, be sure to include the publication part number and title. When you send information to IBM, you grant IBM a nonexclusive right to use or distribute the information in any way it believes appropriate without incurring any obligation to you. -
Page 89: Australia And New Zealand Class A Statement
Klasse A ein. Um dieses sicherzustellen, sind die Geräte wie in den Handbüchern beschrieben zu installieren und zu betreiben. Des Weiteren dürfen auch nur von der IBM empfohlene Kabel angeschlossen werden. IBM übernimmt keine Verantwortung für die Einhaltung der Schutzanforderungen, wenn das Produkt ohne Zustimmung der IBM verändert bzw. -
Page 90: Japan Vcci Class A Statement
Interference (VCCI). If this equipment is used in a domestic environment, radio interference may occur, in which case the user may be required to take corrective actions. Japan Electronics and Information Technology Industries Association (JEITA) statement BladeCenter HS23 Types 7875 and 1929: Installation and User's Guide... -
Page 91: Korea Communications Commission (Kcc) Statement
Japan Electronics and Information Technology Industries Association (JEITA) Confirmed Harmonics Guidelines with Modifications (products greater than 20 A per phase) Korea Communications Commission (KCC) statement This is electromagnetic wave compatibility equipment for business (Type A). Sellers and users need to pay attention to it. This is for any areas other than home. Russia Electromagnetic Interference (EMI) Class A statement People's Republic of China Class A electronic emission statement... - Page 92 BladeCenter HS23 Types 7875 and 1929: Installation and User's Guide...
-
Page 93: Index
77 drive SAS hard disk drive 24 CIOv-form-factor expansion card connectors 15 how to send DSA data to IBM 19 I/O expansion card 38, 39 option, SAS 24 installing 38 removing 39 Class A electronic emission notice 74... - Page 94 LEDs password type supported 24 activity 11 power-on 51 SAS hard disk drive blade-error 11 PCI bus control settings 48 hot-swap storage device 24 information 11 installing 24 location 11 BladeCenter HS23 Types 7875 and 1929: Installation and User's Guide...
- Page 95 UEFI compatible devices save settings 48 configuring 55 SCSI 24 United States electronic emission Class A sending DSA data to IBM 19 notice 74 Serial Attached SCSI (SAS) United States FCC Class A notice 74 hard disk drive updating firmware 54...
- Page 96 BladeCenter HS23 Types 7875 and 1929: Installation and User's Guide...
- Page 98 Part Number: 90Y5585 Printed in USA (1P) P/N: 90Y5585...
Need help?
Do you have a question about the BladeCenter HS23 and is the answer not in the manual?
Questions and answers