Denon AVR-1709 Owner's Manual
Av surround receiver
Hide thumbs
Also See for AVR-1709:
- Owner's manual (72 pages) ,
- Specification sheet (2 pages) ,
- Getting started (2 pages)
Table of Contents
Advertisement
Quick Links
Download this manual
See also:
Service Manual
Advertisement
Table of Contents

Related Manuals for Denon AVR-1709


Summary of Contents for Denon AVR-1709
- Page 1 DENON AV SURROUND RECEIVER AVR-1709 Owner's Manual Manuel de l'Utilisateur...
-
Page 2: Accessories
ENGLISH FRANCAIS SAFETY INSTRUCTIONS SAFETY PRECAUTIONS Read Instructions - All the safety and operating instructions should be read 13. Power-Cord Protection - Power-supply cords should be routed so that they ELECTR~C before the product is operated. are not likely to be walked on or pinched by items placed upon or against Retain Instructions - The safety and operating instructions should be them, paying particular attention to cords at plugs, convenience receptacles, RISK OF... - Page 3 2. IMPORTANT NOTICE: DO NOT MODIFY THIS PRODUCT This product, when installed as indicated in the instructions contained in this manual, meets FCC requirements. Modification not expressly approved by DENON may void your authority, granted by the FCC, to use the product. 3. NOTE This product has been tested and found to comply with the limits for a Class B digital device, pursuant to Part 15 •...
-
Page 4: Table Of Contents
ENGLISH Contents Operations Surround Modes .. 18 Standard Playback ..·31 Menu Map· Getting Started Examples of Front Display ..18 Surround Playback of 2-channel Sources ···31 Playing Multi-channel Sources (Dolby Digital, DTS, etc.) · .. 31 · · ..·..2 Accessories·... -
Page 5: Getting Started
Turning the Power On Multi-zone Settings with the Amp Assign Function ·51 Selecting the Input Source ·39 Thank you for purchasing this DENON product. To ensure proper Multi-zone Settings and Operations with Zone Output Setting the Input Mode ··39 Multi-zone Operations operation, please read this owner's manual carefully before using the Operations During Playback···... -
Page 6: Cautions On Handling
• Before turning the power switch on In addition to the AVR-1709, the included main remote control unit • The supplied batteries are only for verifying operation. (RC-l098) can also be used to operate the equipment listed below. -
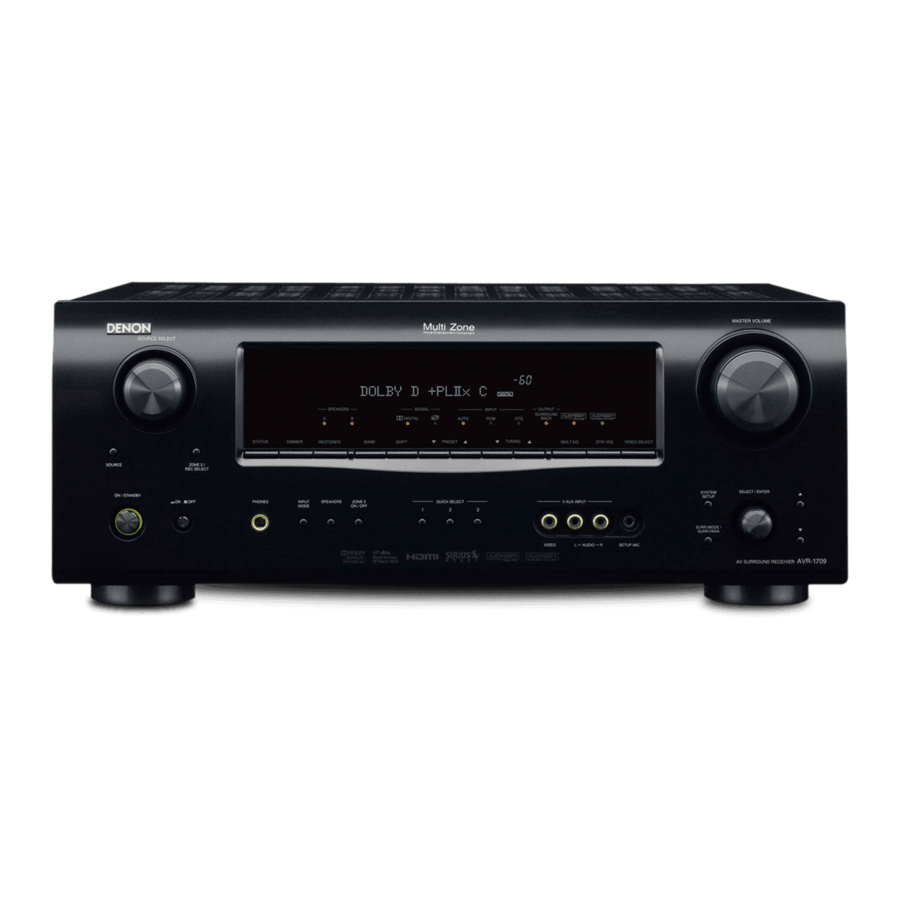
Page 7: Front Panel
ENGLISH INPUT mode indicators .. ······ .. ··· (39) DYNAMIC VOLUME button········· (36) Part Names and Functions About Dynamic Volume SIGNAL indicators Audyssey Dynamic Volume™ solves the problem flDisplay For buttons not explained here, see the page indicated in parentheses ( ). of large variations in volume level between SPEAKERS indicators, (40) -
Page 8: Rear Panel
ENGLISH Rear Panel AC OUTLETS AC 120V 6{)Hz (c·~···:c·:::··: · ,..: · · c=:::J: c=:::J • • • • • • • • • • • • • • • • • •# SWITCHED TOTAL 120W(lA.) MAX. 8Z0NE2 connectors HDMI connectors •... -
Page 9: Remote Control Unit
4D> Volume control buttons (VOLUME) ... (50, 54) Muting button (MUTE) ..(50, 54) SHIFT button (50) DENON ~ FAVORITES DIRECT PLAY button········· (50) -N'O- button cannot be used. -N,n- FAVORITES DIRECT PLAY button can function If buttons on the front or rear are pressed strongly, the button on the opposite side will be activated too. -
Page 10: Connections
Please select the types of connections suited for the equipment you are connecting. With some types of connections, certain settings must be made on the AVR-1709. For details, refer to the instructions for the Cables Used for Connections respective connection items below. -
Page 11: Cables Used For Connections
Video Conversion Function Speaker Connections ' " : :t • This function automatically converts various formats of video signals input to the AVR-1709 into the I"""S!""'p"""e"""a"""k"""e"""r"""ln'"'"s'"'"t=a=Ua=t=io=n===!"""""===!"""""!""""".......-=,... " ! """""=I format used to output the video signals from the AVR-1709 to a monitor. -
Page 12: Speaker Connections
For surround back speakers: The protection circuit may be activated if the core • By default, the AVR-1709's "Amp Assign" setting is set to "ZONE2". To use as the surround back wires touch the rear panel or if the + and - sides speaker for the main zone, change the "Amp Assign"... -
Page 13: Connecting Equipment With Hdmi Connectors ·10
' " ... • The audio and video signals input to the AVR-1709's HOMI input connector are output unchanged from the AVR-1709. Input the audio signal the HOMI output connector. Because of this, the sound is output from the monitor connected using the "tl... -
Page 14: Connecting The Monitor
• The component video connectors may be indicated differently on your monitor. For details. see the monitor's operating instructions. • To play the sound by AVR-1709, make analog or digital audio output connections to AVR-1709's audio input connectors . • The signals output from the HDMI connectors are only the HDMI input signals. -
Page 15: Ipod
Select the terminal to use and connect the device. Use a DENON control dock for iPod (ASD-l R, ASD-3N or ASD-3W, sold separately) to connect the iPod to the AVR-1709. For instructions on the control dock for iPod settings, refer to the control dock for iPod's CD player operating instructions. -
Page 16: Tv/Cable Tuner
26). "' • When recording via the AVR-1709, the playback device's cable must be of the same type as the cable used to connect the AVR-1709's VCR OUT connector. Example: TV IN ---+ S-Video cable: VCR OUT ---+ S-Video cable TV IN ---+ Video cable: VCR OUT ---+ Video cable •... -
Page 17: Cd Recorder / Md Recorder / Tape Deck
"EXT. IN" (l(1f'page 39). • The video signal can be connected in the same way as a DVD player l@,page 11). • To play copyright-protected discs, connect the AVR-1709's EXT. IN connector with the DVD player's analog multi-channel output connector. -
Page 18: Sirius Connector
SIRIUS connector When connecting the Optical terminal, set the input Optical terminal allocations for "System Setup" - • The AVR-1709 is a SIRIUS Satellite Radio Ready® receiver. You can receive SIRIUS@ Satellite Radio by "Input Setup" - "Digitalin Assign", in "SIRIUS". -
Page 19: Antenna Terminals
ENGLISH Antenna terminals An F-type antenna cable plug can be connected directly. Direction of broadcasting station FM"",", AM loop antenna (supplied) Jl75010hms Coaxial cable '~~~~"";~I~;-- indoor antenna (supplied) . Connee:tion of antennas I ~. 1. Push the 2. Insert the 3. -
Page 20: Multi-Zone
ENGLISH Multi-zone Connecting the Power Cord Wait until all connections have been completed before connecting the power cord. ZONE2 Out Connections T~~~t'_p_ow_er_co_rd_~~ If another pre-main (integrated) amplifier is connected, the ZONE2 out connectors can be used to playa different program source in ZONE2 the same time ((jf'page 51 - 54). To household power outlet Pre-main amplifier... -
Page 21: Operations
ENGLISH Operations Menu Map Examples of Front Display Some typical examples are described below. Auto Setup (~page 19 - 21) When the setup microphone is connected. Item number Start Menu • Step 1: Speaker Detection Currently selected line • Step 2: Measurement •... -
Page 22: Preparations
ENGLISH Auto Setup • Audyssey MultEO automatically measures the acoustical problems Preparations • Symbols used to indicate buttons in this manual in the listening environment to create the best audio experience for your home theater. Button located on both the main unit and the remote control <SPEAKERS>... -
Page 23: Auto Setup
Turn the AVR-1709 Cell phones should be placed away from all audio electronics during off, check the speaker connections and repeat the measurement the measurement process as Radio Frequency Interference (RFI) process from the beginning. -
Page 24: Fj Error Messages
· The surround back speaker was detected, but the surrounds were ( Step 5 : Store not detected. • The auto setup measurement results are stored in the AVR-1709. with • Check the polarities of the displayed Displayed speaker connected <l Press while "Store<"... -
Page 25: System Setup
ENGLISH C> System Setup ' " Make detail settings for various parameters. I II • Symbols used indicate buttons in this manual S ~ ' i : : : : " , =~=; ===_ Button located on both the main unit and the remote control System setup operation i =: e=,."... -
Page 26: Speaker Setup
2.In 3.C!F -kltn. Distance Crossover Frequencv By default, the AVR-1709's "Amp Assign" setting is set to "ZONEr. Test Tone To use as the surround back speaker for the main zone, change the Restore "Amp Assign" setting (lI2iT'page 28). [Selectable items] Subwoofer •... -
Page 27: Distance
ENGLISH 1m - II II - II Distance CrOSSOVer Frequency -If in the "Advanced" settings, "Subwoofer Mode Setup" (Grpage Set distance from listening position to speakers. Select crossover frequency from which subwoofer handles low 23) in the "System Setup" is set to "LFE (Normal)", it is possible range signal. -
Page 28: Input Setup
ENGLISH Test Tone Start Restore Input Setup <l I> Press <l to select "Yes", then press to select "Auto" or Use this procedure to select the Input source and make the settings After the Auto Setup measurements, it is possible to return those "Manual". -
Page 29: Ipod Assign
ENGLISH t> • • Digital In Assign Component In Assign: See "Relationship between Video Signals and Monitor Output" (@"page Select digital input connector to assign to this source. Select component video input to assign to this source. 62) for details of video signal and monitor output relations. [Display] [Display] Ir-1-.-~-,... -
Page 30: Ext. In Subwoofer Level
ENGLISH Ed~t EXT. IN Subwoofer Level I] Parental Lock Lock Code Set the subwoofer level for playback. For any channel, set tl1e.radio reception limits. Change the password (See "Parental Lock"). Select according to the player in use. <D <I. <I. Press Press [Display]... -
Page 31: Option Setup
ENGLISH .. Mute Level • • Volume Control This sets the amount of attenuation of the volume when the mute Set the main zone volume setting. mode is set in the main lone. Amp Assign [Display] [Selectable items] -~-:., Volume Control 1-1-.-:=--, r--c:;- -r-n-.-.-C-l... - Page 32 ENGLISH 1£1 ZONE2 Power On Level Subwoofer 2ch Direct/Stereo Custom This sets the volume set when the ZONE2's power is turned on, Select subwoofer use. Make speaker settings for 2-ehannel mode playback. [Selectable items] [Selectable items] [Display] I-i-.-~-, Last Use the memorized setting from the last session, Select subwoofer use.
-
Page 33: Iiii Direct Mode Setup Ifj Remote Id Setup
Default settings are indicated in ( ). [Selectable items] -No•• When using the AVR-1709 with only the included remote control unit (RC-1098), there is no need to make settings. When using a separately sold remote control unit (RC-7000CI, etc.). this function can be used. Match the 10 setting of the remote control unit and the receiver. -
Page 34: Surround Modes
ENGLISH Surround Modes & ODTS NEO:6 Standard Playback Symbols used to indicate buttons in this manual Cinema This mode is suited for movie sources. This is the mode for enjOYing surround sound according to the Button located on both the main unit and the remote control program source Music : This mode is suited for music sources. -
Page 35: Dsp Simulation Playback
@ DSP Simulation Playback Direct Playback The desired mode according to the prograr'l source and viewing situation can be selected from among 7 DENON original surround Selecting the mode modes The surround parameters can be adjusted ((If'page 58, 59! to <SELECT/ENTER>... -
Page 36: Parameter
' " ( ') • If no adjustment is made for a period of about 5 seconds, the Cinema EO § adjustments made up that point are registered and the AVR-1709 L..-...o() D. Comp returns to the original mode, Center Image <:... -
Page 37: Mode
ENGLISH DMode liD. Comp Center Width Select the mode to match the source (cinema source, music source, Compress dynamic range (difference between loud and soft sounds). Assign center channel signal to front left and right channels for wider etc.). sound. [Selectable items] [lJ - In the PLIIx or PLII mode... -
Page 38: Iiii Bass
-n·na Adopt "7.1CW for the AMP Assign setting. . The default setting for the Amp Assign mode of AVR-1709 is When the "Dynamic EO" setting is "ON'; setting is not possible. "ZONE2': ·If the settings of speakers for which "None" has been determined Adopt a setting other than "OFF"... - Page 39 ENGLISH DV Setting (Dynamic Volume Setting) Dynamic EQ Dynamic Volume Audyssey Dynamic Volume solves the problem of large variations in Set Dynamic Volume effect. Audyssey Dynamic EO solves the problem of deteriorating sound volume level between television programs, commercials, and between quality as volume is decreased by taking into account human perception [Selectable items] and room acoustics.
-
Page 40: Restorer
ENGLISH RESTORER Night Mode This function restores compressed audio signals to how they were Optimized setting for late-night listening. before compression and corrects the sense of volume of the bass and Set the dynamic range compression of the output audio. treble to obtain richer playback sound. -
Page 41: Information
ENGLISH Information Information on the main unit's various settings (Status) and on input SymbOls Indicat8 UNCI. buttons in this ",anua' signals (Audio Input Signal) is shown on the display. <STATUS>. The information displayed changes each time you press Button located on both the main unit and the remote control The information is displayed for several seconds before the display BUTTON unit... -
Page 42: Preparations
ENGLISH Playback Symbols used indicate buttons in this manual Setting the Input Mode Preparations Button located on both the main unit and the remote control Set the input mode for this source. BUITON unit Turning the Power On <BUITON> <INPUT MODE> [INPUn. -
Page 43: Operations During Playback
ENGLISH Checking the currently playing program source, etc. Operations During Playback Listening to FMIAM Broadcasts <STATUS>. Press The current program source and various settings are indicated on Adjusting the Master Volume I· <-.~ the display. Basic Qperatiol1 . <MASTER VOLUME> [MASTER (~page Either turn... -
Page 44: Presetting Radio Stations (Preset Memory)
ENGLISH ·1 Presetting Radio Stations Listening to Preset Stations Symbols used indicate buttons In this manual (Preset Memory) SHIFT Press to select the memory block (A to G). Button located on both the main unit and the remote control _Your favOfit~ broad<;ast stations can preset that you can tune... -
Page 45: Listening To Preset Stations
ENGLISH Listening to SIRIUS Satellite Radio Programs What is SIRIUS Satellite Radio? CATEI30F.:'.,.' 5EAF.:CH SimplyThe Best Radio on RadioTM with all your favorite entertainment <STATUS> Press until "SIG." appears on the display. including 100% commercial-free music, plus superior sports coverage, The display will switch as shown below, depending on the _.!::C!:P~, T "'::~...!F:::':' F~'~ ~ - . -
Page 46: Ipod@ Playback
When using an ASD-3N or ASD-3W control dock for iPod. Make.the necessary preparations. • With the default settings, the iPod can be used connected to the VCR <ON/STANDBY> <STATUS> CDSet the iPod in the DENON control dock for iPod. (iPod) connector. (~See the control dock for iPod's operating instructions.) •... -
Page 47: Listening To Audio
When viewing a still picture, perform the same operation as with ASD- -n·ha • Depending on the type of iPod and the software version, some functions may not operate. • DENON will accept no responsibility whatsoever for any loss of iPod data. -
Page 48: Other Operations And Functions
ENGLISH Other Operations and Functions & Symbols used to indicate buttons in this manual Other Operations <ZONE2/REC SELECT>, <SOURCE SELECT> • To cancel, press then turn Button located on both the main unit and the remote control until "ZONE2 SOURCE" is displayed. BUTTON unit •... -
Page 49: Quick Select Function
ENGLISH ,,;' Quick: Select FU!'Ction ,.' - Last Function lYIemory .>- With this function, the currently'playing input source, volume" This stores the settings as they were directlY before the standby mode was set. • level. surrOund mode, MuItEO. settings, Dynamic Volume,' DV,;, setting and front speaker can be stored in the. -
Page 50: Remote Control Unit Operations
Set to the AUDIO side for the CD position, and to the VIDEO side Presetting for the DVDNDp, VCR, SAT/CABLE orTV position. • DENON and other makes of components can be operated by [ZONE2 OFF] [MAIN setting the preset memory. - Page 51 ENGLISH Functions of Buttons Component Front Blu-ray Video Disc Satellite Device CD Player iPod Tuner DVD Player Video Deck Cable TV operated Disc Player Player Receiver (Monitor) SOURCE AUDIO VIDEO CONTROL 1 [ON/SOURCE] [OFF]L iPod/ SOURCE TUNER DVD/VDP SAT/CABLE CONTROL 2 NETWORK Power off Power off...
- Page 52 Switching Switching Switching DISPLAY the display display the display the display the display Return Return RETURN Return Return Return Default DENON DENON *2DENON HITACHI HITACHI setting (111 ) 11111 11211 (108) (0071 1134) (Preset code) Special 0,G:l Remarks [Special Remarks] Only one device can be set in the preset memory for each mode.
-
Page 53: Punch Through Function
(RC-1108) ... . . and'" 'on CD. iPod/NE1WORK. TUNER. DVD/ The sub remote control unit IRe-11 081 Included With the AVR-1709 VDP orVCR components when in the SAT/CABLE orTV mode. By can be used as the exclUSive multi-zone remote control unit. -
Page 54: Multi-Zone Settings With The Amp Assign Function ·51
Multi-zone Settings with the Amp Assign Function ~I)) The amp assign function lets you assign the amplifiers for the different channels built into the AVR-1709 to the speaker outputs for the different zones. Select the desired playback environment from among" Setting 1" to "Setting 3", then set the corresponding "Amp Assign"... - Page 55 ENGLISH • ". '" " -.~··I ~;:c' Setting 3: . , " ' ,.-. -. Setting 2: .7.1-channel eMaklng bi-,mp ccmnections for the FL and FA-channels In the m"n,zone'!' playback and conducting 5.1-ehannel playbaCk ' -- .. Main zone --- (switching with other modes not possible) RIWC ~~{}...
-
Page 56: Multi-Zone Settings And Operations With Zone Output
Connectors for audio output Audio signals ZONE2 OUT Stereo Main zone (7.1-channel system) ZONE2 Monitor (§J (§J Pre-main amplifier l~oo~~oQI AVR-1709 DVD player ~lo=l© ..•.. 0·..tie ZONE2 Input audio output Remote control unit - - - - : Multi-zone audio cable... -
Page 57: Multi-Zone Operations
ENGLISH T.mponiriIY;~l-·;I=~,J ~boIs Tumi,ng off ther$ound Multi-zone Operations • usedtOlndiClptiutto.ns In this manuai Button located on both the main unit and the remote control [SOURCE CONTROL 1] [SOURCE CONTROL 2] to "AUDIO" and BUTTON unit • "lONE2" (main remote control unit). Turning the Power On and Off <BUTTON>... -
Page 58: Other Information
ENGLISH Other Information ® Number of surround back speakers Setting for primarily watching movies using diffusion type About Speaker Installation speakers for the surround speakers We recommend using 2 speakers. For the greatest sense of surround sound envelopment, diffuse When using dipolar speakers in particular, be sure to use 2 speakers. radiation speakers such as bipolar types, or dipolar types, provide Surround back speakers a wider dispersion than is possible to obtain from a direct radiating... - Page 59 "Dolby'; "Pro Logic" and the double-D symbol are trademarks of DTS NEO:6™ Surround Dolby Laboratories. The AVR-1709 is equipped with a digital signal processing circuit that DTS NEO:6™ is a matrix decoding technology for achieving 6.1- lets you play program sources in the surround mode to achieve the channel surround playback with 2-channel sources.
- Page 60 ENGLISH Audyssey HDMI (High-Definition Multimedia Interface) Audyssey MultEQ® HDMI is a digital interface standard for next generation TVs based Audyssey MultEO is a room equalization solution that calibrates any on DVI (Digital Visual Interface) standards and optimized for use in audio system so that it can achieve optimum performance for every consumer equipment.
-
Page 61: Surround Modes And Parameters
ENGLISH Surround Modes and Parameters Signals and adjustability in the different modes Channel output Parameter (default values are shown in parentheses) Surround mode Surround Back D. Comp Front UR Center Surround UR Subwoofer SB CH OUT Cinema EO. Mode Room Size Effect Level DelayTime Subwoofer... - Page 62 ENGLISH Signals and adjustability in the different modes Parameter (default values are shown in parentheses) NEO:6 MUSIC Surround mode EXT IN only PRO LOGIC II!IIx MUSIC mode only mode only Dynamic EO Dynamic Volume Tone Control Night Mode DV Setting RESTORER MultEO (NOTE6)
- Page 63 ENGLISH Differences in Surround Mode Names Depending on the Input Signals Input signals Button DOLBY DIGITAL Note LINEAR PCM DTS ES DTS ES DOLBY DOLBY DOLBY DOLBY ANALOG LINEAR PCM Surround mode DOLBY (Multi chI DSCRT MTRX DTS (5.1ch) DTS 96/24 DIGITAL EX DIGITAL EX DIGITAL...
- Page 64 ENGLISH Button Input signals DOLBY DIGITAL Note LINER PCM DTS ES DTS ES DOLBY DOLBY DOLBY DOLBY Surround mode ANALOG LINEAR PCM DOLBY (Multi ch) DSCRT MTRX DTS (51chl DTS 96/24 DIGITAL EX DIGITAL EX DIGITAL DIGITAL DIGITAL (2ch) (With Flag) (With Flagl (With Flag) (With no Flag)
-
Page 65: Relationship Between Video Signals And Monitor Output
ENGLISH Relationship between Video Signals and Monitor Output Input signals Monitor output Video Convert COMPONENT S-VIDEO VIDEO HDMI COMPONENT S-VIDEO VIDEO HDMI VIDEO VIDEO VIDEO S-VIDEO S-VIDEO S-VIDEO S-VIDEO S-VIDEO VIDEO 1480i/576i - nop) COMPONENT (480i/576i - nop) COMPONENT VIDEO VIDEO (480i/576i - nop) COMPONENT... -
Page 66: Troubleshooting
AVR-1709 rear panel. speakers. speaker cables is faulty. <: Even applying • The AVR-1709 amplifier circuit • Switch off the power and please • Device you want to play and set • Select appropriate input power, the power has failed. - Page 67 ·DVD player is not compatible • Use a DTS-compatible player. with DTS sound playback. • The AVR-1709's "Input Mode" • Set to the "Auto" or "DTS" setting is set to other than mode. "DTS':...
- Page 68 10 - 17 iPod cannot be ·The input source assigned to • Switch input source appears. AVR-1709 and monitor are faulty. played. control dock for iPod is not assigned at control dock for ·The monitor's input setting is • Set properly. selected.
-
Page 69: Specifications
ENGLISH Specifications Tuner section Audio section [FMI [AMI • Power amplifier (note: IJV at 75 O/ohms, 0 dBf = 1 x 10· Front Receiving Range: Rated output: S75 MHz - 1079 MHz 520 kHz - 1710 kHz " " SO W + SO W (S O/ohms, 20 Hz - 20 kHz with O.OS % TH.D.I Usable Sensitivity: 1.0 IJV (11.2 dB!) - Page 70 024,049 Technics Oaytron 003,049 Cybarnex Aiwa 004,005, 006, 018, 026, 029, 087,092 025, 055, 059, 074, 089, 093, Oimensia 045,061,062,085 Denon 014, [1111*,121 Daewoo 013,017, 020, 041, 059, 089, 095, 096 Toshiba Oixi 007,015, 027 Nikko 098, 099, 117 Hitachi...
-
Page 71: Satellite Receiver
Sharp 100, 104, 121 8urmster Regency Siemens Carvery 003,035 Samsung 014,023 Signature 045,144 [111r, 044 Denon 004, 024, 025 Scientific Atlanta Simpson Emerson 004,005,006,007 Signal 043, 046, 138, 146, 150 Sony Fisher 003, 008, 009, 01 0 Sl Marx 030; 050, 062... - Page 74 DENON www.denon.com D&M Holdings Inc. Denon Brand Company, 5411 10032 009D Printed ,n China...
-
Page 75: Getting Started
DENON DENON Getting Started Getting Started Mise en route Mise en route AVR-1709 / AVR-1609 AVR-1709 / AVR-1609 AVR-689/ AVR-589 AVR-689/ AVR-589 DVD Player DVD Player LecteurDVO LecteurDVO Speakers Speakers Haut-parleurs Haut-parleurs "==r---~-----I& "==r---~-----I& ..--t ..--t 10-01 10-01 Cable/Satellite Cable/Satellite... - Page 76 Check Check & & choose your VIDEO connection. choose your VIDEO connection. Verifiez et choisissez votre connexion VIDEO. Verifiez et choisissez votre connexion VIDEO. Check Check Verifiez Verifiez Check Check DVD Player DVD Player Lecteur DVD Lecteur DVD Verifiez Verifiez AN Receiver AN Receiver 'R8cepteur AV...
-
Page 77: Dvd Player
Please make sure your video Please make sure your video DVD Player DVD Player connection matches to the TV connection matches to the TV Lecteur DVD Lecteur DVD connection (STEP-1) connection (STEP-1) Verifiez si votre connexion video correspond Verifiez si votre connexion video correspond connexion TV (ETAPE 1) connexion TV (ETAPE 1) ITI ·... - Page 78 REMARQUE: Pour la connexion Surround arriere/Zone2. (AVR-1609/1709/689) REMARQUE: Pour la connexion Surround arriere/Zone2. (AVR-1609/1709/689) Need more information? Need more information? Avez-vous besoin d'autres informations? Avez-vous besoin d'autres informations? www.denon.com www.denon.com 5421 10001 0080 5421 10001 0080 Denon Brand Company Denon Brand Company...
- Page 79 Finland Soundata Oy Hameentie 157 5th floor 00560 Helsinki Finland Tel: +358-(0)9-47693300 Fax: +358-(0)9-47693310 France DENON FRANCE A division of D&M France SAS Tour Ventose. 2 rue des Bourets. 92156 Suresnes Cedex, France Tel:+33(0)1-41-383230 Fax: +33(0)1-41-380110 Germany DENON DEUTSCHLAND A division of D&M Germany GmbH An der Landwehr 19. D-41334 Nettetal, Germany...
-
Page 80: Limited Warranty
DENON ELECTRONICS (USA}, LLC (a D&M Holdings Company) 100 Corporate Drive Mahwah, NJ 07430-2041 (800) 497-8921 (888) 544-8434 Fax DENON REGIONAL SUPER SERVICE CENTERS (Repair only-No parts orders please) PYRAMID AUDIO UNITED RADIO SERVICE AUDIO SERVICES 305 E. Braker Lane 5717 Enterprise Parkway 544 Centra I Dr., Su ite 101... - Page 81 Except as specified below, this Warranty covers all defects in material and workmanship in this product occurring during the above warranty periods. The following are not covered by the Warranty: (I) Any product which is not distributed in the U.S.A. by DENON ELECTRONICS (USA), LLC. (2) Any product which is not purchased in •...
- Page 82 Length of Non-Transferable Warranty This warranty on your DENON product which is distributed and warranted by D&M CANADA INC. remains in effect for the following periods from the date of the original consumer purchase from an AUTHORIZED D&M CANADA INC. DEALER.
- Page 83 Ie produil. b) reparation ou tentative de reparation par quelqu'un non reconnu par DENON, c) tout envoi du produit (1'1 reclamation doit etre presentee autransportcur), (5) Articles sujets " delerioration par I'usage (tetes de magnelophone, cellules phono, poinles de lecture phono, piles, etc,), (6) Verification periodique qui ne revele aucun c1efaul.
Need help?
Do you have a question about the AVR-1709 and is the answer not in the manual?
Questions and answers
Do denon 1709 have on screen display menu?
Yes, the Denon AVR-1709 has an on-screen display menu.
This answer is automatically generated