Table of Contents
Advertisement
Quick Links
MODEL 461821707 • PRODUCT GUIDE
THIS GRILL IS FOR OUTDOOR USE ONLY.
CAUTION:
Read and follow all safety statements, assembly
instructions, and use and care directions before
attempting to assemble and cook.
INSTALLER/ASSEMBLER:
Leave this manual with consumer.
CONSUMER:
Keep this manual for future reference.
If you have any questions or need assistance during assembly, please call 1-800-435-5194.
To insure your satisfaction and for follow-up service, register your grill online at www.grillregistration.com
WARNING:
Failure to follow all manufacturer's instructions
could result in serious personal injury and/or
property damage.
CAUTION:
Some parts may contain sharp edges –
especially as noted in the manual! Wear
protective gloves if necessary.
461821707 • 80009773 • 03-15-07
Advertisement
Table of Contents

Subscribe to Our Youtube Channel
Related Manuals for Thermos 461821707


Summary of Contents for Thermos 461821707
- Page 1 MODEL 461821707 • PRODUCT GUIDE THIS GRILL IS FOR OUTDOOR USE ONLY. CAUTION: WARNING: Read and follow all safety statements, assembly Failure to follow all manufacturer’s instructions instructions, and use and care directions before could result in serious personal injury and/or attempting to assemble and cook.
- Page 2 Date Purchased CAUTION CAUTION CAUTION: Indicates a potentially hazardous situation or For residential use only. Do not use for commercial unsafe practice which, if not avoided, may result in minor cooking. or moderate injury. 2 • 461821707...
-
Page 3: Table Of Contents
Registration Card ........27 modification to this assembly will void your warranty and create the risk of a gas leak and fire. Use only authorized replacement parts supplied by manufacturer. 461821707 • 3... - Page 4 Check the telephone Retainer Strap by the sun. directory under “Gas Companies” for nearest certified LP • Do not store an LP cylinder in an area where children play. dealers. 4 • 461821707...
-
Page 5: For Your Safety
Continued on next page. Nipple has to be centered into the LP cylinder valve. WARNING If “growing” bubbles appear do not use or move the LP cylinder. Contact an LP gas supplier or your fire department! 461821707 • 5... -
Page 6: Grill Service Center
• Do not use grill until leak-tested. • If a leak is detected at any time, STOP and call the fire department. • If you cannot stop a gas leak, immediately close LPcylinder valve and call LP gas supplier or your fire department! 6 • 461821707... - Page 7 • Always close LP cylinder valve and remove burning off food residue on HI. If grill has not been coupling nut before moving LP cylinder from regularly cleaned, a grease fire can occur that may damage the product. specified operation position. 461821707 • 7...
- Page 8 If sideburner does NOT light, turn knob to OFF, wait 5 minutes, abrasive cloth. then repeat lighting procedure. Sideburner Match Lighting 1. Turn on gas at LP cylinder. 2. Place lit match near burner. 3. Turn sideburner knob to HI. Be sure burner lights and stays lit. 8 • 461821707...
-
Page 9: Spider Alert
• Store grill indoors ONLY if LP cylinder is turned off and disconnected, removed from grill and stored outdoors. • When removing grill from storage, follow “Cleaning the Burner Assembly” instructions before starting grill. 461821707 • 9... - Page 10 For more information call: USDA Meat and Poultry Hotline at • When reheating takeout foods or fully cooked meats like hot 1-800-535-4555 In Washington, DC (202) 720-3333, 10:00 am- dogs, grill to 165° F, or until steaming hot. 4:00 pm EST. 10 • 461821707...
-
Page 11: Parts List
Outdoor Cooking Collection and Design™, Patio Bistro™, PrecisionFlame™, Pro-Check™, QuickSet Grills and Design™, SmokerTents™, The Big Easy™, The Minute Grill™, The Edge™, The Tuscan Collection™, and The Urban Grill™ are Trademarks of the W.C. Bradley Company. Universal Grill Parts and Design™ is a trademark of the Thermos Company and its affiliates. -
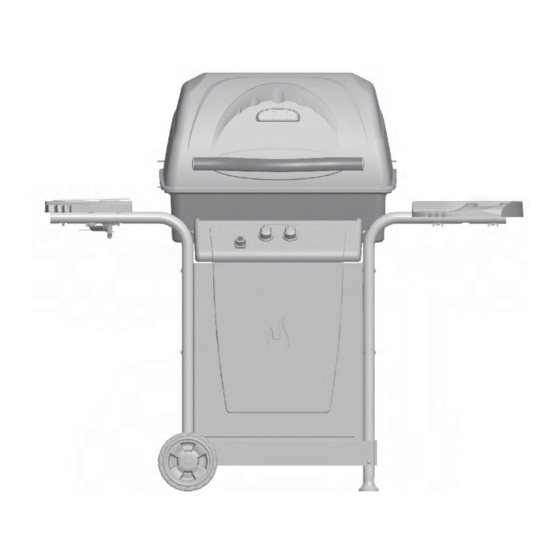
Page 12: Parts Diagram
PARTS DIAGRAM – Model No. 461821707 12 • 461821707... -
Page 13: Assembly
ASSEMBLY – Model No. 461821707 A Attach right leg assembly to bottom shelf with 2 #10-24x2" carriage bolts and #10-24 Plastic wing nuts. B Push end caps into the bottom of the right legs. C Place left leg assembly into bottom shelf. Insert axle bolts into wheels, legs and bottom shelf. Secure with hitch pins. - Page 14 Place valve/hose/regulator onto control panel. Attach with #10-24x3/8" machine screws. NOTE: Make sure the two valve stems are centered in their clearance holes; otherwise, this can cause main burner level problems. Snap the electronic ignition module into the control panel as shown. #10-24x3/8" Machine Screw Qty: 2 Electronic Ignition Module Valve/Hose/Regulator 14 • 461821707...
-
Page 15: Assembly
C Attach ignitor wire to electronic ignition module. #10-24x3/8" Burner Assembly Machine Screw Qty: 2 Qty: 6 #10-24 Silicon Washer Flange Nuts Qty. 4 #10-24x1-1/4" Machine Screw Qty: 4 Firebox Correct burner-to-valve engagement Front Panel 461821707 • 15... - Page 16 Wing Nut Burner Clip Qty: 1 Tool Holder Sideburner T-Wing Flange Nut Screw #10-24x2” Carriage Bolts Qty: 1 #10-24 X 2” Sideburner Machine Screw Valve Qty. 2 Sideburner Knob Sideburner Grate Correctly assembled vale in sideburner tube 16 • 461821707...
- Page 17 Attach lower lid hinges to back of firebox using #10-24x1/2" machines screws, silicon washers and #10-24 flange nuts per hinge.The center flat portion of the hinge should be at the bottom (see inset). #10-24 Qty: 8 #10-24X1/2’ Flange Nuts silicon Washer Machine Screw Qty. 4 Qty: 4 Lower Hinge Center flat portion of hinge on bottom. 461821707 • 17...
- Page 18 Insulation Washer Qty:2 Flange Nuts Qty. 4 Place lid assembly onto firebox, aligning hinges. Hinges on lid fit inside hinges on firebox. Secure with hinge pins and hitch pins. 1” Hitch Pin Qty. 2 Hinge Pin Qty. 2 18 • 461821707...
- Page 19 Place AAA battery into electronic ignition with the negative ( ) side facing outward. P ush button onto ignitor module and turn right 1/4 turn to lock in place. Push control knobs onto valves. Turn 1/4 Back of button Correct position Pivot Wire Swing Away 461821707 • 19...
- Page 20 Cylinder valve must face to front of cart once tank is attached. Failure to install cylinder correctly may allow gas hose to be damaged in operation, resulting in the risk of fire. Always keep LP cylinders in upright position during use, transport, and storage. 20 • 461821707...
-
Page 21: Troubleshooting
• Clean wire and/or electrode with rubbing alcohol and clean swab. cooking residue. • Wires are loose or disconnected. • Reconnect wires or replace electrode/wire assembly. • Wires are shorting (sparking) between • Replace ignitor wire/electrode assembly. ignitor and electrode. 461821707 • 21... - Page 22 • The worn nozzles don’t have enough “bite” to engage the valve. Try cylinder. with worn threads. a second LP dealer. One burner does not • Grease buildup or food particles in • Clean carry-over tube(s) with wire brush. light from other end(s) of carryover tube(s). burner(s). 22 • 461821707...
- Page 23 • Electrodes are wet. • Has moisture accumulated on electrode and/or in burner • Use paper towel to remove moisture. ports? • Electrodes cracked or • Inspect electrodes for broken “sparks at cracks. • Replace cracked or broken electrodes. crack”. 461821707 • 23...
-
Page 24: Limited Warranty
Consumer returns will not be accepted unless a valid Return Authorization is first acquired by calling 1-800-241-7548 and then clearly marked on the outside of the package and the package is shipped freight/postage pre-paid to the address above. 24 • 461821707... - Page 25 Page intentionally blank 461821707 • 25...
- Page 26 Page intentionally blank 26 • 461821707...
-
Page 27: Registration Card
Please register your grill online at: WWW.GRILLREGISTRATION.COM (If you register online, you do not need to send in this registration card.) La parrilla estaba ensamblada Chimenea / Envíelo a: 461821707 • 27... - Page 28 STOP Should you encounter a problem with our product CALL US FIRST Do not return this product to the store. WE CAN HELP GRILL SERVICE CENTER 1-800-435-5194 HOURS 8AM-6PM EST Mon-Fri Please ensure your warranty registration is complete. Grilling Safety Checklist Read and understand owners manual.
Need help?
Do you have a question about the 461821707 and is the answer not in the manual?
Questions and answers