Table of Contents
Advertisement
Advertisement
Table of Contents

Related Manuals for Yamaha PianoCraft MCR-940


Summary of Contents for Yamaha PianoCraft MCR-940
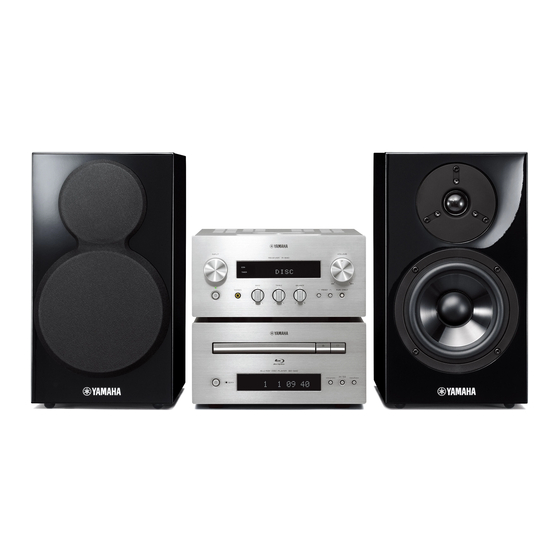
- Page 1 MCR-940 (R-840 + BD-940 + NS-BP300) RECEIVER/BLU-RAY DISC PLAYER OWNER'S MANUAL...
- Page 2 Class 1 LASER Product fire, damage to this unit, and/or personal injury. Yamaha will not be held responsible for any damage resulting from use of this unit Wave length: 788 nm (CDs)/654 nm (DVDs)/405 nm with a voltage other than specified.
-
Page 3: Table Of Contents
CONTENTS INTRODUCTION TUNER OPERATIONS FEATURES ............. 2 DAB (DIGITAL AUDIO BROADCASTING) SUPPLIED ACCESSORIES ......... 2 TUNING.............26 ABOUT DISCS ............3 Preparing the DAB tuning ........26 Types of Discs that Can Be Used with This Player ... 3 Tuning DAB stations ..........26 Discs that Cannot Be Used with This Player..... -
Page 4: Introduction
FEATURES INTRODUCTION FEATURES Receiver (R-840) BD player (BD-940) • Minimum RMS output power per channel • Plays Blu-ray Discs, DVDs, Audio CDs • Supports BD-LIVE. When using a BD-LIVE 65W + 65W (6Ω, 1kHz, 10% THD) compatible disc, you can connect the BD player •... -
Page 5: About Discs
ABOUT DISCS • BD/DVD video players and discs have region codes, Types of Discs that Can Be Used which dictate the regions in which a disc can be played. • BD/DVD Video operations and functions may be with This Player different from the explanations in this manual and some operations may be prohibited due to disc •... -
Page 6: Controls And Functions
CONTROLS AND FUNCTIONS CONTROLS AND FUNCTIONS Receiver (R-840) ■ Front panel 234 5 VOLUME INPUT PRESET TUNED STEREO SLEEP iPod TIMER BASS TREBLE BALANCE PHONES PRESET PURE DIRECT Front view Top view 1 INPUT B PHONES jack Selects an input source. Outputs audio signals for private listening with headphones. -
Page 7: Bd Player (Bd-940)
CONTROLS AND FUNCTIONS BD player (BD-940) ■ Front panel MP3 WMA TRACK TOTAL REMAIN PROG RANDOM REP OFF S ALL A-B QUICK 1 Disc tray 9 Front panel display Holds a disc to be played back. Shows the current status of the BD player. 2 p (play) indicator Appears during playback. -
Page 8: Remote Control
CONTROLS AND FUNCTIONS Remote control This remote control can operate the system components (including tuner functions) and an iPod stationed in the iPod dock on the top of the receiver. To operate the BD player, tuner functions, or an iPod using the remote control, you need to set the receiver to corresponding input mode (☞8Input selection keys). - Page 9 CONTROLS AND FUNCTIONS A TP S SHUFFLE Enters TP (Traffic Program) data service receiving mode Selects mode of Shuffle Play (☞p.36). (☞p.33). T REPEAT B TIMER Selects mode of Repeat Play (☞p.36). Shows the current time on the front panel display of the U TUNING / d d receiver.
-
Page 10: Preparation
• If there is a problem of weak radio wave reception in your area or you want to improve radio reception, we recommend that you use commercially available outdoor antennas. For details, consult the nearest authorized Yamaha dealer or service center. -
Page 11: Connecting A Recorder (Cdr, Mdr, Etc.), Av Receiver Or Decoder (Cdr, Mdr, Etc.)
PREPARATIONS Connecting a TV to the system 1 Connect the system and your TV via the HDMI jack, COMPONENT jacks or VIDEO jack of the BD player and the corresponding jack(s) of your TV. 2 Set “TV screen” according to your TV (see “Setting the TV display” on page 13). BD player (BD-940) Composite video cable (supplied) -
Page 12: Connecting An Ipod
PREPARATIONS Connecting an iPod™ Connecting to the Internet The receiver is equipped with the iPod dock on the top You can enjoy a variety of contents with interactive panel where you can station your iPod and control functions by connecting to the internet when playing BD- playback of your iPod using the supplied remote control. -
Page 13: Installing The Batteries In The Remote Control
PREPARATIONS Installing the batteries in the Using the remote control remote control The remote control transmits a directional infrared beam. Be sure to aim the remote control directly at the remote control sensor on the front panel of the receiver during operation. -
Page 14: Adjusting The Clock
PREPARATIONS Adjusting the Clock Set the hour using / , and press The minute digits start flashing. Before starting playback operation, follow the procedure below to adjust the clock setting of the receiver. Notes • Use the remote control to set the clock. You cannot set the clock with the buttons on the receiver. -
Page 15: Setting The System
SETTING THE SYSTEM SETTING THE SYSTEM Turn on the TV and the system Press to select “Settings”, and then press ENTER. Make sure that you have completed all the necessary connections (see “Connecting a TV to the system” on Audio Video Settings page 9). -
Page 16: Audio, Subtitle And Disc Menu Languages
SETTING THE SYSTEM Audio, Subtitle and Disc menu languages Press SETUP. Press to select “Settings”, and then press ENTER. Press to select “Playback Setting”, and then press ENTER. Press to select “Disc Language”, and then press ENTER. Press to select the item below. •... -
Page 17: Basic Operations
SYSTEM OPERATIONS BASIC OPERATIONS SYSTEM OPERATIONS Follow the procedure below to select an input source and adjust the sound settings on the system. (On/Standby) TREBLE VOLUME Basic system operations PURE INPUT BASS BALANCE DIRECT Press (On/Standby) to turn on the receiver. Depending on input mode of the receiver, the BD player also turns on by the system control connection VOLUME... -
Page 18: Changing The Brightness Of The Front Panel Display
SYSTEM OPERATIONS ■ Muting the sound (MUTE) Press MUTE to reduce the current volume level by approximately 20dB. “MUTE ON” appears on the front panel display. Press MUTE again to restore the audio output to the previous volume level. Changing the brightness of the front panel display You can dim the front panel display of the receiver. -
Page 19: Disc Operations
DISC OPERATIONS DISC OPERATIONS This chapter explains how to play discs. Using the on-screen display Playback operations When the input source is DISC, you can operate various See page 3 for more details on supported disc types and functions and settings by using the on-screen menus that file formats. -
Page 20: Rewind And Fast Forward
DISC OPERATIONS Rewind and fast forward Slow-motion playback During playback, you can rewind or fast forward at You can play BD/DVD in slow motion. You can also play various speeds. DVD in reverse slow motion. Press to rewind or to fast forward. The rewind or forward speed changes each time you press The speed is displayed on-screen. -
Page 21: Selecting Languages And Audio
DISC OPERATIONS Selecting languages and audio Notes • With some discs, you can only select subtitles by using the Some BD/DVD discs have soundtracks in multiple disc’s menu. Use TOP MENU/TITLE LIST and POP UP MENU to display the disc’s menu. languages or audio formats, such as Dolby Digital and •... -
Page 22: Repeat Playback Of A Specified Part (A-B Repeat)
DISC OPERATIONS During playback, press REPEAT. Press ENTER at the scene where you want to The Repeat menu appears on-screen. set the end point. The section between start point and end point is played back repeatedly. Playback Title Playback Chapter Scene Selection “REP”... -
Page 23: Playing Back Still Images In A Selected Folder
DISC OPERATIONS ■ Setting the slideshow speed or repeat Playing back movies recorded on a playback DVD-R/DVD-RW Press SETUP. You can play back a recorded disc (DVD: VR format The Setup menu appears on-screen. finalized disc only). Select “Picture”, and then press ENTER to open the picture selection screen. -
Page 24: Using "Function Control Screen" For Bd/Dvd
DISC OPERATIONS ■ Playback by selecting a title Press to select the title, then press ENTER. Load a recorded disc. Playback of the selected title will begin. The Title List screen is displayed. To stop playback, press If the Title List screen is not displayed, press TOP MENU/TITLE LIST. -
Page 25: Using "Functions" Menu For Audio Cd
DISC OPERATIONS Function control screen Using “Functions” menu for Audio BD-VIDEO 1 / 3 Load an audio CD. 2 English The CD Operation Screen is displayed. 5 . 1 c h Press D when the CD Operation Screen is displayed. Select Enter ENTER... -
Page 26: Enjoying Bonusview And Bd-Live
BD-LIVE data in the USB memory device. P in P Notes • Yamaha cannot guarantee that all brands’ USB memory devices will operate with this player. • Do not use a USB extension cable when connecting a USB Primary video... - Page 27 DISC OPERATIONS • The time required to download the provided programs into the USB memory device connected to this player varies depending on the internet connection speeds and the data volume of the programs. • BD-LIVE programs provided through the internet may not be able to display the connection depending on the status (updating) of the provider.
-
Page 28: Tuner Operations
DAB (DIGITAL AUDIO BROADCASTING) TUNING TUNER OPERATIONS DAB (DIGITAL AUDIO BROADCASTING) TUNING DAB (Digital Audio Broadcasting) uses digital signals for Tuning DAB stations clearer sound and more stable reception compared to analog signals. This unit can also receive DAB+ (an upgraded version of DAB) that allows for more stations using MPEG-4 audio codec (AAC+), which has a more efficient transmission method. -
Page 29: Dab Station Information
DAB (DIGITAL AUDIO BROADCASTING) TUNING DAB station information Presetting DAB stations ■ Switching the information of DAB You can store your favorite DAB stations with the preset function. Use this feature to display various information about the DAB service currently being received. DISPLAY TUNER MEMORY... -
Page 30: Using Dab Option Menu
DAB (DIGITAL AUDIO BROADCASTING) TUNING Using DAB option menu You can set the following functions in DAB option menu. Function Description PRESET DELETE Deletes unnecessary preset DAB stations. TUNER STATION ORDER Enables you to change the station order. ALPHA-NUMERIC: Stations are OPTION listed in alphabetical order. -
Page 31: Dab Frequency Information
DAB (DIGITAL AUDIO BROADCASTING) TUNING ■ TUNE AID DAB frequency information Press TUNER repeatedly to set the unit to the This unit can receive Band III only. DAB mode. Frequency Channel label Press OPTION to display the DAB option 174.928 MHz menu. -
Page 32: Fm Tuning
FM TUNING FM TUNING There are 2 tuning methods: automatic and manual. You can also use the automatic and manual preset tuning features to store up to 30 stations. Automatic tuning Automatic preset tuning Automatic tuning is effective when station signals are Follow the procedure below to preset radio stations strong and there is no interference. -
Page 33: Manual Preset Tuning
FM TUNING Manual preset tuning Selecting preset stations You can store up to 30 stations. You can tune into any desired station simply by selecting the preset station under which it was stored (☞p.30). PRESET u / d TUNER MEMORY PRESET u / d Tune into a radio station you want to preset. -
Page 34: Radio Data System Tuning (Europe Model Only)
RADIO DATA SYSTEM TUNING (EUROPE MODEL ONLY) RADIO DATA SYSTEM TUNING (EUROPE MODEL ONLY) Radio Data System (Europe model only) is a data transmission system used by FM stations in many countries. The Radio Data System function is carried out among the network stations. This receiver can receive various Radio Data System information such as PS (program service), PTY (program type), RT (radio text), CT (clock time) and TP (traffic program) when receiving Radio Data System broadcasting stations. -
Page 35: Using The Tp (Traffic Program) Data Service
RADIO DATA SYSTEM TUNING (EUROPE MODEL ONLY) Using the TP (traffic program) data CT (clock time) settings service You can use the CT information received from the Radio Data System stations to adjust the built-in clock of the Use this feature to receive the TP (traffic program) data receiver. -
Page 36: Other Operations
SETTING THE TIMER OTHER OPERATIONS SETTING THE TIMER The receiver is equipped with 2 types of timer functions. The BD player also turns on or sets to standby mode automatically by the system control connection (☞p.8). Setting the clock timer Press to select “ON”... -
Page 37: Setting The Sleep Timer
SETTING THE TIMER To cancel the timer setting operation Press TIMER during the operation. You can return to the previous screen by pressing RETURN. Setting the sleep timer The sleep timer sets the receiver to standby mode after the specified time elapses. SLEEP Press SLEEP repeatedly to select the desired duration. -
Page 38: Controlling Ipod
CONTROLLING iPod™ CONTROLLING iPod™ In addition to controlling the receiver (R-840) and BD player (BD-940), you can operate your iPod stationed in the iPod dock using the supplied remote control. Using iPod™ Once you have stationed your iPod to the iPod dock, you can enjoy playback of your iPod using the supplied remote control. -
Page 39: Settings Of The Bd Player
SETTINGS OF THE BD PLAYER This chapter describes various menu of this unit. After your turn on this unit and a TV (☞p.13), you can change settings on the TV screen using the remote control. You can select menu items and change settings in the same way as the procedure of “Setting the TV display” (☞p.13). Note When you select “Parental Control”... - Page 40 SETTINGS OF THE BD PLAYER “HDMI Output” options Settings on this Player Output Resolution When you set “Audio Out” to “HDMI Output”, select one Video Out HDMI Video Component CVBS Out of the following options. Select Bitstream: Outputs a bitstream audio signal. Auto 480i/576i Select this option when connecting an HDMI...
-
Page 41: Quick Start
SETTINGS OF THE BD PLAYER For BD Quick Start No Limit*: Does not restrict playback of BD. 0-99 year(s): Prohibits playback of BD with corresponding The Quick Start function lets you start this unit quickly. ratings. Yes: Enables the Quick Start function. The QUICK indicator lights up in standby Country code mode (☞p.5). -
Page 42: Communication Setup
SETTINGS OF THE BD PLAYER Notes Press to select “Change”, then press • The available functions differ depending on the disc. ENTER. • Regarding playback method of BD-LIVE contents, etc., perform the operations in accordance with the instructions in Setting the info. of the Ethernet the BD disc manual. - Page 43 SETTINGS OF THE BD PLAYER For setting the proxy server, press Press to select “Complete”, then press select “Yes” or “No”, then press ENTER. ENTER. ■ The operation procedure for inputting Do you use the proxy server? characters manually Address Note Port Numeric characters such as IP address can be entered on the input...
- Page 44 SETTINGS OF THE BD PLAYER Press D (Complete) to fix the numbers which have been input. IP Address Netmask Gateway Repeat step 1 to 5 to finish inputting all the required characters. Input character list 1ABC (Alphabet/ Num. PQRS WXYZ Spc.
-
Page 45: Version
Press / , select “Yes”, and press ENTER. Note Yamaha cannot guarantee that all brands’ USB memory devices will operate with this player. Start the process. USB Memory Management The screen for the current operation will display. -
Page 46: Country Code List
SETTINGS OF THE BD PLAYER Country Code List USA / CANADA / JAPAN / GERMANY / FRANCE / UK / ITALY / SPAIN / SWISS / SWEDEN / HOLLAND / NORWAY / DENMARK / FINLAND / BELGIUM / HONG KONG / SINGAPORE / THAILAND / MALAYSIA / INDONESIA / TAIWAN /PHILIPPINE / AUSTRALIA / RUSSIA / CHINA Language List English / Français / Deutsch / Italiano / Español / Japanese / Svenska / Nederlands... -
Page 47: Changing The Settings When
CHANGING THE SETTINGS WHEN CONNECTING AN HDMI OR COMPONENT CABLE You can change the settings when an HDMI or a component cable is connected using the keys on the BD player. Also see page 37. Notes • Even in Pure Direct mode, you can display and change settings on the front panel display of the BD player. •... -
Page 48: Additional Information
Refer to the table below when this system does not function properly. If the problem you are experiencing is not listed below or if the instruction below does not help, turn off this system, disconnect the power cable, and contact the nearest authorized Yamaha dealer or service center. Receiver (R-840) ■... - Page 49 TROUBLESHOOTING ■ DAB reception Problem Cause Remedy page Cannot tune into The initial scan operations were not performed. Perform the initial scan operations. any DAB stations. There is no DAB coverage in your area. Check with your dealer or WorldDMB online at —...
-
Page 50: Remote Control
TROUBLESHOOTING ■ iPod Note If a transmission error occurs but no status message is displayed on the front panel display of the receiver, check the connection between the receiver and your iPod (☞p.10). Status message Cause Remedy page CONNECT ERR There is a problem with the signal path Turn off the receiver and try resetting your iPod. - Page 51 TROUBLESHOOTING Problem Cause Remedy page Disc playback does You may use a recordable disc that is not Finalize the recordable disc. — not start. finalized. The disc label may not be facing up. Place the disc in the disc tray with the label facing —...
-
Page 52: Network
TROUBLESHOOTING Problem Cause Remedy page Block noise (mosaic) Block noise may appear in fast-moving appears on the scenes due to the characteristics of digital screen. image compression technology. Sound or images are The sound or image may not be output not output properly. - Page 53 TROUBLESHOOTING Error message Possible Error Remedy This USB memory is Occurs if there is a formatting error. Format the USB memory again. not formatted properly. Occurs if the USB memory is not formatted with Format the USB memory with your PC. Please format the FAT 32/16.
-
Page 54: About The Jpeg File Format
ABOUT THE JPEG FILE FORMAT ABOUT THE JPEG FILE FORMAT JPEG is a type of file format for storing still-image files (photos, illustrations, etc.). The Player lets you play JPEG format still-image files. ■ File formats that are not compatible ■... -
Page 55: Notes About Handling Discs
NOTES ABOUT HANDLING DISCS • Always handle with care so that the playing surface is • Use a soft-tipped pen when writing on the label side of not scratched. Do not warp discs. the disc. • When a disc is not being used, remove it from this unit and store in an appropriate case. -
Page 56: Specifications
SPECIFICATIONS ■ JPEG (Joint Photographic Experts ■ Progressive Scan Group) A method of displaying all scanning lines in a frame at once, reducing flicker noticeable on a larger screen and A standardized image compression system proposed by creating a sharp and smooth image. the Joint Photographic Experts Group. - Page 57 SPECIFICATIONS iPod™ “iPod” is a trademark of Apple Inc., registered in the U.S. and HDMI, the HDMI logo and High-Definition Multimedia other countries. Interface are trademarks or registered trademarks of HDMI Licensing LLC. “Made for iPod” means that an electronic accessory has been designed to connect specifically to iPod and has been certified by the developer to meet Apple performance standards.
-
Page 58: Language, Country Lists
LANGUAGE, COUNTRY LISTS LANGUAGE, COUNTRY LISTS Language list ■ Language (abbreviation), code number Japanese (ja), 1001 Bhutani (dz), 0426 Kirghiz (ky), 1125 Sinhalese (si), 1909 English (en), 0514 Esperanto (eo), 0515 Latin (la), 1201 Slovak (sk), 1911 French (fr), 0618 Estonian (et), 0520 Lingala (ln), 1214 Slovenian (sl), 1912... - Page 59 ■ For U.K. customers CAUTION If the socket outlets in the home are not suitable for the Use of controls or adjustments or performance of procedures plug supplied with this appliance, it should be cut off and other than those specified herein may result in hazardous an appropriate 3 pin plug fitted.
- Page 60 (http://www.yamaha-hifi.com/ or http://www.yamaha-uk.com/ for U.K. resident). The product is guaranteed to be free from defects in workmanship or materials for a period of two years from the date of the original purchase. Yamaha undertakes, subject to the conditions listed below, to have the faulty product or any part(s) repaired, or replaced at Yamaha’s discretion, without any charge for parts or labour.
Need help?
Do you have a question about the PianoCraft MCR-940 and is the answer not in the manual?
Questions and answers