Yamaha BD-S1900 Owner's Manual
Blu-ray disc player
Hide thumbs
Also See for BD-S1900:
- Release note (4 pages) ,
- Owner's manual (328 pages) ,
- Owner's manual (59 pages)
Table of Contents
Advertisement
Available languages
Available languages
Quick Links
Download this manual
See also:
Owner's Manual
Advertisement
Chapters
Table of Contents

Related Manuals for Yamaha BD-S1900


Summary of Contents for Yamaha BD-S1900
- Page 1 BLU-RAY DISC PLAYER BD-S1900 OWNER’S MANUAL MANUAL DE INSTRUCCIONES QUICK PURE DIRECT...
-
Page 2: Important Safety Instructions
IMPORTANT SAFETY INSTRUCTIONS Read these operating instructions carefully before using the unit. Follow the safety instructions on the unit and the applicable safety instructions listed below. Keep these operating instructions handy for future reference. Read these instructions. Protect the power cord from being walked on or pinched Keep these instructions. - Page 3 - and, most importantly, without affecting your sensitive hearing. Since hearing damage from loud sounds is often undetectable until it is too late, Yamaha and the Electronic Industries Association’s Consumer Electronics Group recommend you to avoid prolonged exposure from excessive volume levels.
- Page 4 NMB-003 du Canada. unit with a higher voltage than specified is dangerous and may cause fire, damage to this unit, and/or personal injury. Yamaha will not be held responsible for any damage resulting RS-232C CLASS 1 LASER PRODUCT LASER KLASSE 1 PRODUKT...
-
Page 5: Table Of Contents
Contents JPEG File Playback .......... 28 1. INTRODUCTION Playing back still images in sequence......28 Playing back still images in a selected folder ....28 About Discs ............2 Playing back Slide Show..........28 Types of Discs that Can Be Used with This Player..2 Setting slide show speed/repeat playback..... -
Page 6: Introduction
INTRODUCTION About Discs ■ Types of Discs that Can Be Used Region management information with This Player Model BD-Video DVD-Video Australia Region code “B” or Region number “4” – The following discs can be played back in this “ALL” or “ALL” Player. -
Page 7: Discs That Cannot Be Used With This Player
About Discs ■ Discs that Cannot Be Used with When using the unit to play a CD-RW/R disc with still images stored (recorded). This Player – With CD-RW/R discs on which still images are The following discs cannot be played back or will not play mixed in with music or movies, you will be able to back properly on this Player. -
Page 8: Disc Precautions
– Never use commercially available cleaning discs. The use of these discs can damage the lens. – Request the nearest service center approved by Yamaha to clean the lens. Warnings about dew formation – Condensation may form on pick up lens or disc in the following conditions: –... -
Page 9: Getting Started
Getting Started ■ Supplied accessories ■ Copyright Make sure the following accessories are provided with the – Audio-visual material may consist of copyrighted product. works which must not be recorded without the authority of the owner of the copyright. Refer to Remote Batteries (x2) relevant laws in your country. -
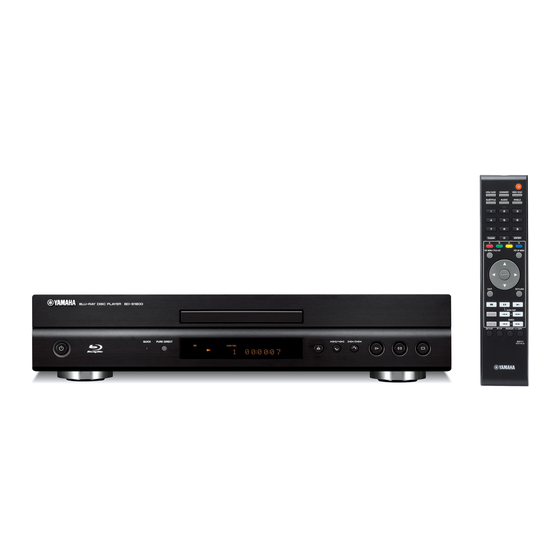
Page 10: Controls And Functions
Controls and Functions ■ Front panel QUICK PURE DIRECT 1 p (Power) (p. 20) (Search backward/Skip backward) (p. 20) 2 QUICK indicator (p. 33) (Search forward/Skip forward) 3 PURE DIRECT (p. 21) (p. 20) 4 Front panel display (p. 16) (Play) (p. -
Page 11: Remote Control
EXIT RETURN ID function You can change the remote control ID to prevent unwanted operation of the other Yamaha player such as SLOW/SKIP DVD player. If you have changed the remote control ID, STATUS make sure that you select the same ID for the main unit. -
Page 12: Connection
CONNECTION Introduction to Connections This Player is equipped with the terminals/jacks listed below. Find the corresponding terminal/jack on your video/audio equipment. We recommend that you use the HDMI terminal which provides high quality digital audio and video on a single connection. If you use the other terminals/jacks, connect the video first. Then connect the audio. ■... -
Page 13: Hdmi Connection
HDMI Connection ■ Connecting to the HDMI Terminal – You can enjoy high quality digital picture and sound through the HDMI terminal. – Firmly connect an HDMI cable (commercially available) to the HDMI terminals (1 and 2). – See page 38 for information on the audio output formats. –... -
Page 14: Video Connections
Video Connections ■ Connecting to the Component Jacks – You can enjoy accurate color reproduction and high quality images through the component jacks. – Firmly connect a component video cable (commercially available) to the component jacks (1 and 2). Caution! Be sure to turn off this Player and the equipment before making any connections. -
Page 15: Connecting To The S Video Or Video Jack
Video Connections ■ Connecting to the S Video or Video Jack – Connect either the S-video jack or video jack. – Firmly connect a S-video cable (commercially available) to the S-video jacks or a video pin cable (supplied) to the video jacks (1 and 2, or 3 and 4). -
Page 16: Audio Connections
Audio Connections ■ Connecting to the Digital Audio Jack/Terminal – You can connect audio equipment or the TV to the DIGITAL OUT Jack/terminal. – Firmly connect a digital audio pin cable (commercially available) or optical cable (commercially available) to the coaxial digital audio jack or optical digital audio terminal (1 and 2, or 3 and 4). -
Page 17: Connecting To The Audio Jacks
– You can connect a subwoofer to the SUBWOOFER jack directly. When you connect TV to this Player directly, connect an active subwoofer such as Yamaha Active Servo Processing Subwoofer System to this jack. – You need to select “7.1ch Audio Output” in “Settings” - “Audio Video Settings” - “Audio Out” to output the audio signal from the 8ch discrete jacks. -
Page 18: Broadband Internet Connection
Broadband Internet Connection ■ Connecting to the NETWORK terminal and USB BD STORAGE/SERVICE terminal – You can enjoy a variety of contents with interactive functions by connecting to the internet when playing BD-LIVE compatible discs. Refer to pages 24 and 25 regarding further information on BD-LIVE functions. –... -
Page 19: Other Connections
To remote control in control out jack jack REMOTE CONTROL IN REMOTE CONTROL OUT IR flasher or Yamaha Infrared signal receiver component or Yamaha component (such as AV receiver) Hint – The RS-232C terminal is a control expansion terminal for commercial use. Consult your dealer for... -
Page 20: Disc Playback
DISC PLAYBACK Before Starting Playback ■ Loading the Batteries in the ■ Turning the Power On Remote Control OPEN/CLOSE DIMMER VIDEO-RESET SUBTITLE AUDIO ANGLE QUICK PURE DIRECT 1 Press the part and slide the battery compartment cover off. 2 Insert the two supplied batteries (AAA, R03, UM-4), Turning the power on following the indications (+/–) on the inside of the Press p on the remote control or on the Player to turn on... -
Page 21: Setting The On-Screen Display Language
TOP MENU/TITLE LIST POP UP MENU To check for the availability of a software update, visit http://www.yamaha.co.jp/english/product/av/down/ agreement.html. When a software update is performed, the software ENTER update data must be written onto the USB memory device in advance using a PC. -
Page 22: Setting The Audio Output
Before Starting Playback – The current version of this unit software and the Hint version of the update file on the USB memory device are displayed. To update this Player software – You can clear the 4-digit number by pressing with update file, select “Yes”, and press ENTER. - Page 23 Before Starting Playback Notes – HDMI control function may not work properly depending on the TV. – Functions other than ones shown above may work depending on the TV or AV receiver. – In order to make the HDMI control function available, set up settings for the HDMI control function on ALL the components (this Player, TV, and AV receiver).
-
Page 24: Bd/Dvd/Cd Playback
BD/DVD/CD Playback This section explains playback of commercially available Buttons Functions BD Video and DVD Video discs (like movies), CDs, and Pauses or stops playback recorded DVD-RW/R discs. Skips backward/Skips forward ■ Loading a Disc Search backward/Search forward (search) Pauses playback Playback The search speed will change each time you press the button. -
Page 25: Enjoying Pure Hi-Fi Sound (Pure Direct Function)
BD/DVD/CD Playback ■ Enjoying pure hi-fi sound – Press RETURN to cancel without setting the type of Repeat Playback. (Pure Direct function) – For Audio CD, you can select “Playing Disc”, This Player is compatible with Pure Direct mode which “Playing Track”... -
Page 26: Using Bd/Dvd Menus
BD/DVD/CD Playback – If you press again (within about 5 seconds) the player will skip to the beginning of the previous Using the pop-up menu chapter (track). BD-V – For Repeat Playback of a Specified Part, set the start and end points within the same title. 1 Press POP UP MENU during playback. - Page 27 BD/DVD/CD Playback Playback by selecting a title Playback by selecting a chapter 1 Load a recorded disc. 1 Press B while the Thumbnail screen is displayed. – The Title List screen is displayed. – The chapter screen is displayed. Program Program Program Chapter...
-
Page 28: Using The Audio Cd Playback Menu
BD/DVD/CD Playback ■ Using the Audio CD Playback – The “Functions” menu is activated. Menu AUDIO CD When you load an audio CD, following screen is displayed. Select Enter Return Track select 2 Press to select the desired setting, then press ENTER. -
Page 29: Function Control Screen
Notes displayed vary depending on the programs provided through the internet. Operate by following the – Yamaha cannot guarantee that all brands’ USB directions on the screen. memory devices will operate with this player. – Do not use a USB extension cable when connecting... -
Page 30: Function Control Operation Procedure
BD/DVD/CD Playback Function control operation procedure Functions which can be set TOP MENU/TITLE LIST POP UP MENU OPEN/CLOSE DIMMER VIDEO-RESET ENTER SUBTITLE AUDIO ANGLE EXIT RETURN SLOW/SKIP STATUS SEARCH ON SCREEN CLEAR ENTER SETUP P in P REPEAT 1 Press ON SCREEN during playback. TOP MENU/TITLE LIST POP UP MENU –... -
Page 31: Displaying The Disc Information
BD/DVD/CD Playback ■ Displaying the disc information Icons Functions Descriptions – Shows the currently selected subtitle language. If subtitles are provided in other languages, you can switch to Subtitle SLOW/SKIP Language your preferred language. STATUS You can also select the subtitle Press STATUS during playback. -
Page 32: Jpeg File Playback
JPEG File Playback 4 Press to replace one image with another. CD-R CD-RW JPEG JPEG – The same operation can be performed by pressing – Press RETURN if you wish to return to the folder TOP MENU/TITLE LIST POP UP MENU selection screen. -
Page 33: Settings
SETTINGS Settings The “Menu” enables various audio/visual settings and adjustments on the functions using the remote control unit. Menu/Submenu Function Page Audio Video Settings TV Aspect Ratio Sets the screen aspect ratio of the connected TV, and adjust the video output. -
Page 34: Audio Video Settings
Settings – You can use ENTER on the lower right of the Audio Video Settings Number buttons instead of ENTER in the Cursor Speaker Settings buttons. Quick Start 6 Press to select the parental control level for Auto Power Off DVD VIDEO, BD-ROM, and then select the country HDMI Control Playback Setting... -
Page 35: Hdmi Video Out
Settings No video output when 1080p signal is output from the HDMI terminal. HDMI Video Out This sets the resolution of the HDMI video output. – If the video equipment connected to each of the Some TV are not fully compatible with the Blu-ray disc terminals is not compatible with the resolution of the player, which may cause the image distortion. -
Page 36: Speaker Settings
Settings 5 Press to select a speaker you want to Note configure, then press ENTER. L (Front Left), C (Center), R (Front Right), RS – When “Secondary Audio” is set to “On”, PCM is (Surround Right), RB (Surround Back Right), LB automatically selected as the audio output mode. -
Page 37: Quick Start
Settings ■ Quick Start Country code Sets the country code. Refer to the Country Code List (page 38) This turns the Quick Start function on and off. because the ratings differ according to the country. When the Quick Start function is on: –... -
Page 38: Version
Settings ■ Version 5 Press to select “Change”, then press ENTER. When you select “Version”, the system software version is Current Ethernet setup info. displayed. IP Address : Auto Setup ■ System Reset Netmask : Auto Setup Gateway : Auto Setup You can reset all settings to the factory presets. - Page 39 Settings – The Ethernet connection speeds can be set when you – When inputting other values (IP address, etc.); select “Yes”, then press ENTER. “Numeric” / “Edit” – As automatic detection is made (factory preset 3 Press to select a number/character, then press mode), this setting is not normally necessary.
-
Page 40: Usb Memory Management
If you want to delete only the unneeded software update data after the software is updated, delete the Note data on the USB memory device using a PC. – Yamaha cannot guarantee that all brands’ USB memory devices will operate with this Player. -
Page 41: Software Update
Settings Erase Erases BD-VIDEO data on USB memory. Format Erase all contents on USB memory including protected contents. Note – Data which has been saved to the Player’s internal memory (game score, etc.) will also be deleted. 6 Press , select “Yes”, and press ENTER. 7 Start the process. - Page 42 Settings Country Code List USA / CANADA / JAPAN / GERMANY / FRANCE / UK / ITALY / SPAIN / SWISS / SWEDEN / HOLLAND / NORWAY / DENMARK / FINLAND / BELGIUM / HONG KONG / SINGAPORE / THAILAND / MALAYSIA / INDONESIA / TAIWAN /PHILIPPINE / AUSTRALIA / RUSSIA / CHINA Language List English / Français / Deutsch / Italiano / Español / Japanese / Svenska / Nederlands...
-
Page 43: Additional Information
Refer to the table below when this unit does not function properly. If the problem you are experiencing is not listed below or if the instruction below does not help, turn off this unit, disconnect the power cable, and contact the nearest authorized Yamaha dealer or service center. ■ Power... -
Page 44: Sound
Troubleshooting Screen freezes and operation buttons – Press , then restart playback. do not work. – Turn off the power and turn on the power again. – If the power is not turned off, perform a reset. (Page 41) – Is the disc damaged or dirty? Check the condition of the disc. (Page 4) There is just audio with no video. -
Page 45: Other
Player is ready for use. – When the problem persists even after performing a reset, unplug the power cable and plug it in again. If this does not solve the problem, contact the nearest service center approved by Yamaha. Keylock function You can set the keylock to prevent accidental operations. -
Page 46: Glossary
Glossary AVCHD Interlace format AVCHD is a new format (standard) for high definition Interlace format shows every other line of an image as a video cameras that can be used to record and play high- single “field” and is the standard method for displaying resolution HD images. -
Page 47: Specifications
The copyrights for the software components and various relevant documents included with this product that were developed or written by Yamaha are owned by Yamaha and are protected by the Copyright Act, international treaties, and other relevant laws. This product also makes use of freely distributed software and software components whose copyrights are held by third parties. -
Page 48: Precauciones De Seguridad Importantes
PRECAUCIONES DE SEGURIDAD IMPORTANTES Lea atentamente estas instrucciones de funcionamiento antes de utilizar este aparato. Siga las instrucciones de seguridad de la unidad y las instrucciones de seguridad pertinentes que aparecen más abajo. Mantenga a mano estas instrucciones de funcionamiento para su consulta en el futuro. - Page 49 Queremos que escuche toda la vida Yamaha y el Grupo de Electrónica de Consumo de la Asociación de Industrias Electrónicas deseamos que saque el mejor partido a su equipo utilizándolo en un nivel seguro. Un nivel que permite que el sonido llegue alto y claro pero sin ser retumbante o con molestas distorsiones y, lo que es más importante, sin afectar a sus sensibles oídos.
- Page 50 KLASS 1 LASER APPARAT aparato y/o lesiones a las personas. Yamaha no se hará PRODUIT LASER DE CLASSE 1 responsable de ningún daño debido al uso de este aparato con una tensión diferente de la especificada.
- Page 51 Índice general Utilización del menú de reproducción de CDs de 1. INTRODUCCIÓN audio ................. 24 Disfrute de BONUSVIEW o BD-LIVE......24 Acerca de los discos ......... 2 Pantalla de control de funciones ........25 Tipos de discos que se pueden utilizar con este Visualización de la información del disco ....
-
Page 52: Acerca De Los Discos
INTRODUCCIÓN Acerca de los discos ■ Tipos de discos que se pueden Información de gestión de la región utilizar con este reproductor Modelo Vídeo BD Vídeo DVD Australia Código de región Número de región – Con este reproductor se pueden reproducir los “B”... - Page 53 Acerca de los discos ■ Discos que no se pueden utilizar Al utilizar la unidad para reproducir un disco CD-RW/R con imágenes fijas con este reproductor guardadas (grabadas). Los siguientes discos no se podrán reproducir o no se – Con discos CD-RW/R en los que las imágenes fijas reproducirán debidamente en este reproductor.
-
Page 54: Precauciones Con Los Discos
– No utilice nunca discos de limpieza de venta en el comercio. La utilización de esos discos podría dañar la lente. – Solicite la limpieza de la lente en el centro de atención al cliente aprobado por Yamaha más cercano. -
Page 55: Para Empezar
Para empezar ■ Accesorios suministrados ■ Propiedad intelectual Asegúrese de que con el producto se han suministrado los – El material audio-visual puede consistir de productos con propiedad intelectual que no se deben grabar sin siguientes accesorios. la autorización del poseedor de dicha propiedad intelectual. -
Page 56: Panel Delantero
Controles y funciones ■ Panel delantero QUICK PURE DIRECT 1 p (alimentación) (pág. 20) (Búsqueda hacia atrás/Salto hacia atrás) (pág. 20) 2 Indicador QUICK (pág. 33) (Búsqueda hacia adelante/Salto 3 PURE DIRECT (pág. 21) hacia adelante) (pág. 20) 4 Visor del panel delantero (pág. 16) (Reproducción) (pág. -
Page 57: Mando A Distancia
EXIT RETURN Función ID Puede cambiar la ID del mando a distancia para impedir operaciones no deseadas de otros reproductores Yamaha SLOW/SKIP tales como un reproductor DVD. Si ha cambiado la ID del STATUS mando a distancia, asegúrese de que selecciona la misma SEARCH ID para la unidad principal. -
Page 58: Introducción A Las Conexiones
CONEXIONES Introducción a las conexiones Este reproductor está equipado con los terminales/tomas que se listan más abajo. Encuentre el terminal/toma que corresponde a su equipo de vídeo/audio. Le recomendamos que utilice el terminal HDMI que proporciona vídeo y audio de alta calidad en una única conexión. Si utiliza otros terminales/tomas, conecte primero el vídeo. A continuación, conecte el audio. -
Page 59: Conexiones Hdmi
Conexiones HDMI ■ Conexión con el terminal HDMI – Puede disfrutar de imagen y sonido digital de alta calidad a través del terminal HDMI. – Conecte firmemente un cable HDMI (disponible en el comercio) en los terminales HDMI (1 y 2). –... -
Page 60: Conexiones Para Vídeo
Conexiones para vídeo ■ Conexión con las tomas de componente – Puede disfrutar de una reproducción de color precisa y de imágenes de alta calidad a través de las tomas de componente. – Conecte firmemente un cable de vídeo componente (de venta en el comercio) en las tomas de componente (1 y ¡Precaución! Antes de realizar cualquier conexión, asegúrese de apagar este reproductor y el equipo. -
Page 61: Conexión Con La Toma De Vídeo O De S-Vídeo
Conexiones para vídeo ■ Conexión con la toma de vídeo o de S-vídeo – Conecte la toma de vídeo o la de S-vídeo. – Conecte con firmeza un cable de S-vídeo (de venta en el comercio) en las tomas de S-vídeo o un cable de vídeo con clavijas (suministrado) en las tomas de vídeo (1 y 2, o 3 y 4). -
Page 62: Conexiones De Audio
Conexiones de audio ■ Conexión con el terminal/toma de audio digital – Puede conectar el equipo de audio o el televisor en el terminal/toma DIGITAL OUT. – Conecte con firmeza un cable de audio digital con clavijas (de venta en el comercio) o un cable óptico (de venta en el comercio) en la toma de audio digital coaxial o en terminal de audio digital óptico (1 y 2, o 3 y 4). -
Page 63: Conexión Con Las Tomas De Audio
Consejos – Puede conectar directamente un subwoofer en el terminal SUBWOOFER. Cuando conecte directamente el televisor con este reproductor, conecte en este terminal un subwoofer activo, por ejemplo, el sistema Yamaha Active Servo Processing Subwoofer System. – Necesita seleccionar “Salida Audio 7.1ch” en “Ajustes” - “Ajustes De Audio Vídeo” - “Salida De Audio” para dar salida a la señal de audio desde los terminales de 8 canales discretos. - Page 64 Conexión a Internet de banda ancha ■ Conexión con los puertos NETWORK y USB BD STORAGE/SERVICE – Cuando reproduce discos compatibles con BD-LIVE puede disfrutar de contenido variado con funciones interactivas a través de la conexión a Internet. Para información adicional sobre las funciones BD-LIVE, consulte las páginas 24 y 25.
-
Page 65: Otras Conexiones
REMOTE CONTROL OUT Repetidor de infrarrojos o Receptor de señales componente Yamaha infrarrojas o componente Yamaha (por ejemplo, un receptor A/V) Consejo – El terminal RS-232C es un terminal de expansión de control sólo para su uso comercial. Consulte los... -
Page 66: Antes De Comenzar A Reproducir
REPRODUCCIÓN DE DISCOS Antes de comenzar a reproducir ■ Instalación de las pilas en el ■ Conexión de la alimentación mando a distancia OPEN/CLOSE DIMMER VIDEO-RESET SUBTITLE AUDIO ANGLE QUICK PURE DIRECT 1 Pulse la parte y deslice la tapa del compartimiento de las pilas para quitarla. - Page 67 TOP MENU/TITLE LIST POP UP MENU archivo excepto los datos de actualización del software. Para comprobar si existe una actualización del software, visite http://www.yamaha.co.jp/english/ product/av/down/agreement.html. ENTER Cuando se lleva a cabo una actualización del software, hay que escribir antes los datos de actualización del...
-
Page 68: Configuración De La Salida De Audio
Antes de comenzar a reproducir – Se visualizan la versión del software de esta unidad Consejo y la versión del archivo de actualización que existe en el dispositivo de memoria USB. Seleccione “Sí” y – Puede borrar la cifra de 4 dígitos pulsando CLEAR. pulse ENTER para actualizar el software de este –... - Page 69 Antes de comenzar a reproducir Notas – Es posible que la función de control HDMI no funcione correctamente dependiendo del televisor. – Otras funciones, aparte de las que se han mencionado anteriormente, pueden funcionar según el televisor o receptor A/V. –...
-
Page 70: Reproducción De Bd/Dvd/Cd
Reproducción de BD/DVD/CD En esta sección se explica la reproducción de discos de venta Teclas Funciones en el comercio de vídeo BD y de vídeo DVD (p. ej. Pausa o interrumpe la reproducción películas), discos compactos y discos grabados DVD-RW/R. Salta hacia adelante/atrás ■... -
Page 71: Reproducción Repetida
Reproducción de BD/DVD/CD ■ Disfrute de sonido puro de alta – Pulse RETURN para cancelar sin configurar el tipo de reproducción repetida. fidelidad (función Pure Direct) – Para los discos compactos de audio se puede Este reproductor es compatible con el modo Pure Direct seleccionar “Reproducción disco”, “Reproducción que le permite disfrutar de la salida de señales analógicas pista”... -
Page 72: Utilización De Los Menús Bd/Dvd
Reproducción de BD/DVD/CD – Si pulsa otra vez (antes de que pasen 5 segundos), el reproductor saltará al principio del Utilización del menú emergente capítulo (pista) anterior. BD-V – Para la reproducción repetida de una parte especificada, configure los puntos de inicio y final 1 Pulse POP UP MENU durante la reproducción. - Page 73 Reproducción de BD/DVD/CD Reproducción seleccionando un título Reproducción seleccionando un capítulo 1 Cargue un disco grabado. 1 Pulse B mientras se visualiza la pantalla de miniaturas. – Se visualizará la pantalla de Lista Títulos. – Se visualizará la pantalla de capítulo. Programa Programa Programa...
-
Page 74: Disfrute De Bonusview O Bd-Live
Reproducción de BD/DVD/CD ■ Utilización del menú de – Se activa el menú “Funciones” reproducción de CDs de audio AUDIO CD La siguiente pantalla se visualiza cuando se carga un CD de audio. Selecc Intro. Volv. Selecc Pista 2 Pulse para seleccionar la configuración deseada y, a continuación pulse ENTER. -
Page 75: Pantalla De Control De Funciones
– Los contenidos y los métodos de funcionamiento de Notas BD-LIVE varían en función de los programas que se proporcionan por Internet. Siga las indicaciones en – Yamaha no puede garantizar que todas las marcas de pantalla para operar. dispositivos de memoria USB funcionen con este reproductor. - Page 76 Reproducción de BD/DVD/CD Procedimiento para el control de las Funciones que se pueden configurar funciones TOP MENU/TITLE LIST POP UP MENU OPEN/CLOSE DIMMER VIDEO-RESET SUBTITLE AUDIO ANGLE ENTER EXIT RETURN SLOW/SKIP STATUS CLEAR ENTER SEARCH ON SCREEN SETUP P in P REPEAT TOP MENU/TITLE LIST POP UP MENU...
- Page 77 Reproducción de BD/DVD/CD ■ Visualización de la información Iconos Funciones Descripciones del disco – Muestra el idioma del subtítulo seleccionado actualmente. Si hay subtítulos provistos en otros Idioma de idiomas, podrá cambiar a su idioma subtítulo preferido. SLOW/SKIP STATUS También puede seleccionar el idioma de los subtítulos pulsando Pulse STATUS durante la reproducción.
-
Page 78: Reproducción De Archivos Jpeg
Reproducción de archivos JPEG 4 Pulse para reemplazar una imagen por CD-R CD-RW otra. JPEG JPEG – La misma operación se puede realizar pulsando TOP MENU/TITLE LIST POP UP MENU – Pulse RETURN si desea volver a la pantalla de selección de carpetas. -
Page 79: Operaciones Habituales
AJUSTES Ajustes El “Menú” permite realizar diversos ajustes y configuraciones audiovisuales en las funciones utilizando el mando a distancia. Menú/Submenú Función Página Ajustes De Audio Vídeo Relación Aspecto TV Ajusta la relación de aspecto de la pantalla del televisor conectado, y ajusta la salida de vídeo. -
Page 80: Ajustes De Audio Vídeo
Ajustes – Puede utilizar ENTER en la parte inferior derecha Ajustes De Audio Vídeo de las teclas Numéricas en vez de ENTER en las Configuración de los altavoces teclas de Cursor. Inicio Rápido 6 Pulse para seleccionar el nivel de control Apagado Automático paterno para DVD VIDEO y BD-ROM y, a Control HDMI... - Page 81 Ajustes No hay salida de vídeo cuando desde el terminal HDMI salen señales de 1080p. Salida De Vídeo HDMI Aquí se ajusta la resolución de la salida de vídeo HDMI. – Si el equipo de vídeo conectado en cada uno de los Algunos televisores no son totalmente con el reproductor terminales no es compatible con la resolución de la de disco Blu-ray y ello puede producir distorsión de la...
-
Page 82: Configuración De Los Altavoces
Ajustes 5 Pulse para seleccionar el altavoz que Nota desea configurar y, a continuación, pulse ENTER. L (delantero izquierdo), C (central), R (delantero – Cuando el “Audio Secundario” esté en “Encender”, derecho), RS (surround derecho), RB (surround PCM se selecciona automáticamente como el modo de salida de audio. -
Page 83: Control Hdmi
Ajustes ■ Inicio Rápido Código del país Ajusta el código de país. Consulte la lista de códigos de país Aquí se activa y desactiva la función de inicio rápido. (página 38) porque las clasificaciones varían en función del país. Cuando la función de inicio rápido está activada: –... -
Page 84: Reinicio Sistema
Ajustes ■ Versión 5 Pulse para seleccionar “Cambiar” y, a continuación, pulse ENTER. Cuando selecciona “Versión” se visualiza la versión del Información actual de la configuración Ethernet. software del sistema. ■ Reinicio Sistema Dirección IP : Auto-Configurar Máscara De Red : Auto-Configurar Puerta De Enlace : Auto-Configurar... - Page 85 Ajustes – Las velocidades de conexión Ethernet se pueden – Cuando se introduzca la dirección del servidor configurar seleccionado “Sí” y, después, pulsando proxy; ENTER. “1ABC” (Carácter Alfabeto/Numérico) / “Carácter” – Como se realiza detección automática (modo / “Editar” preajustado en la fábrica), este ajuste usualmente no –...
-
Page 86: Manejo De Memoria Usb
Si únicamente desea borrar los datos de actualización del software que no necesita después de actualizar el – Yamaha no puede garantizar que todas las software, borre en el PC los datos del dispositivo de marcas de dispositivos de memoria USB memoria USB. -
Page 87: Actualiz. Software
Ajustes Borrar Borra datos BD-Vídeo en la memoria USB. Formatear Borra todo el contenido en la memoria USB incluyendo contenido protegido. Nota – También se borrarán los datos que se hayan guardado en la memoria interna del reproductor (puntuación de juegos, etc.) 6 Pulse para seleccionar “Sí”... - Page 88 Ajustes Lista de códigos de países EE. UU. / CANADÁ / JAPÓN / ALEMANIA / FRANCIA / REINO UNIDO / ITALIA / ESPAÑA / SUIZA / SUECIA / HOLANDA / NORUEGA / DINAMARCA / FINLANDIA / BÉLGICA / HONG KONG / SINGAPUR / TAILANDIA / MALASIA / INDONESIA / TAIWAN / FILIPINAS / AUSTRALIA / RUSIA / CHINA Lista de idiomas English / Frangals / Deutsch / Italiano / Español / Japanese / Svenska / Nederlands...
-
Page 89: Resolución De Problemas
Consulte la tabla inferior cuando el equipo no funcione correctamente. Si el problema que usted tiene no aparece en la lista inferior o las instrucciones no le sirven de ayuda, apague esta unidad, desenchufe el cable de alimentación y póngase en contacto con un centro de servicio o concesionario Yamaha autorizado. ■ Alimentación... - Page 90 Resolución de problemas La pantalla se congela y las teclas de – Pulse y, después, reinicie la reproducción. operación no responden. – Desconecte la alimentación y conéctela de nuevo. – Si la alimentación no está apagada, ejecute un reinicio. (Página 41) –...
-
Page 91: Mensajes Relacionados Con Discos Bd Y Dvd
– Cuando el problema persista incluso después de llevar a cabo un reinicio, desenchufe el cable de alimentación y enchúfelo de nuevo. Si esto no resuelve el problema, póngase en contacto con el centro de servicio aprobado por Yamaha más cercano. Función de bloqueo de teclas Puede ajustar el bloqueo de teclas para impedir operaciones fortuitas. - Page 92 Glosario AVCHD Formato entrelazado AVCHD es un nuevo formato (estándar) para cámaras El formato entrelazado muestra las líneas alternas de de vídeo de alta definición que se puede utilizar para una imagen como un único “campo” y es el método grabar y reproducir imágenes de alta definición (HD).
-
Page 93: Rendimiento De Audio
Información sobre la licencia de software para este producto Composición del software El software que se incluye en este producto se compone de diversos componentes de software sobre los cuales Yamaha o terceros tienen derechos de propiedad intelectual. Software desarrollado por Yamaha y software de código abierto Los derechos de propiedad intelectual de los componentes de software y diversos documentos relacionados que se incluyen con este producto y que fueron desarrollados o escritos por Yamaha son propiedad de Yamaha y están protegidos por la Ley de propiedad intelectual, tratados internacionales y otras leyes... -
Page 94: Information About Software
Information about software Información sobre el software This product uses the following software. For information (copyright, etc) about each software, read the original sentences stated below. ■ About linux and busybox conditions, and telling the user how to view a copy of this License. (Exception: if the Program itself is interactive but does not normally print such an GNU GENERAL PUBLIC LICENSE announcement, your work based on the Program is not required to print an... - Page 95 It is not the purpose of this section to induce you to infringe any patents or other The hypothetical commands ‘show w’ and ‘show c’ should show the appropriate parts property right claims or to contest validity of any such claims; this section has the sole of the General Public License.
- Page 96 Note that it is possible for a library to be covered by the ordinary General Public If distribution of object code is made by offering access to copy from a designated License rather than by this special one. place, then offering equivalent access to copy the source code from the same place satisfies the requirement to distribute the source code, even though third parties are not GNU LIBRARY GENERAL PUBLIC LICENSE compelled to copy the source along with the object code.
- Page 97 10. Each time you redistribute the Library (or any work based on the Library), the <one line to give the library’s name and a brief idea of what it does.> recipient automatically receives a license from the original licensor to copy, Copyright (C) <year>...
- Page 98 For example, on rare occasions, there may be a special need to encourage the widest 3. You may opt to apply the terms of the ordinary GNU General Public License possible use of a certain library, so that it becomes a de-facto standard. To achieve this, instead of this License to a given copy of the Library.
- Page 99 It may happen that this requirement contradicts the license restrictions of other LIBRARY “AS IS” WITHOUT WARRANTY OF ANY KIND, EITHER proprietary libraries that do not normally accompany the operating system. Such a EXPRESSED OR IMPLIED, INCLUDING, BUT NOT LIMITED TO, THE contradiction means you cannot use both them and the Library together in an executable IMPLIED WARRANTIES OF MERCHANTABILITY AND FITNESS FOR A that you distribute.
- Page 100 SHALL THE OpenSSL PROJECT OR ITS CONTRIBUTORS BE LIABLE FOR Jean-loup Gailly Mark Adler ANY DIRECT, INDIRECT, INCIDENTAL, SPECIAL, EXEMPLARY, OR jloup@gzip.org madler@alumni.caltech.edu CONSEQUENTIAL DAMAGES (INCLUDING, BUT NOT LIMITED TO, If you use the zlib library in a product, we would appreciate *not* receiving lengthy PROCUREMENT OF SUBSTITUTE GOODS OR SERVICES;...
-
Page 101: Laser Safety
LASER Specification: SA172WJ CAUTION: CLASS 2 VISIBLE AND INVISIBLE LASER Class 1 LASER Product RADIATION WHEN OPEN. DO NOT STARE INTO THE BEAM. ACHTUNG: BEI GEÖFFNETER ABDECKUNG IST SICHTBARE UND UNSICHTBARE LASERSTRAHLUNG DER KLASSE 2 IM Wave length: 788 nm (CDs)/654 nm (DVDs)/405 nm GERÄTEINNEREN VORHANDEN. - Page 104 © 2009 Yamaha Corporation All rights reserved. Printed in Malaysia WU26310...