Table of Contents
Advertisement
INSTRUCTION MANUAL
IMPORTANT INFORMATION: Please read these instructions carefully
GB
and make sure you understand them before using this unit. Retain these
instructions for future reference.
MANUEL D'INSTRUCTIONS
RENSEIGNEMENTS IMPORTANTS: Avant d'utiliser cet appareil,
FR
veuillez lire atentivement les instructions et assurez--vous de les avoir
comprises. Conservez les instructions pour référence ultérieure.
BETRIEBSANWEISUNG
WICHTIGE INFORMATION: Lesen Sie diese Hinweise zur Handha-
DE
bung des Geräts aufmerksam durch. Verwenden Sie es erst, wenn
Sie sicher sind, daß Sie alle Anweisungen verstanden haben und
gut aufbewahren.
MANUAL DE INSTRUCCIONES
INFORMACIÓN IMPORTANTE: Lea atentamente las instrucciones y
ES
asegúrese de entenderlas antes de utilizar esta aparato. Conserve las
instrucciones para la referencia en el futuro.
115165526 Rev. 1 7/15/09 BRW
Advertisement
Table of Contents

Related Manuals for Partner P842


Summary of Contents for Partner P842
- Page 1 INSTRUCTION MANUAL IMPORTANT INFORMATION: Please read these instructions carefully and make sure you understand them before using this unit. Retain these instructions for future reference. MANUEL D’INSTRUCTIONS RENSEIGNEMENTS IMPORTANTS: Avant d’utiliser cet appareil, veuillez lire atentivement les instructions et assurez--vous de les avoir comprises.
-
Page 2: Identification Of Symbols
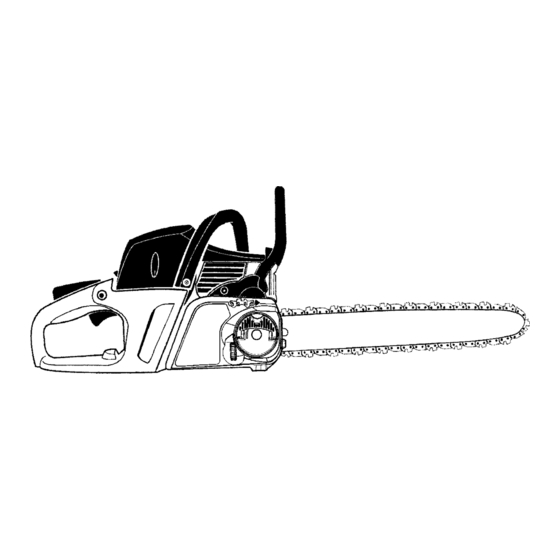
IDENTIFICATION (WHAT IS WHAT?) Front Handle Chain Front Hand Guard Idle Speed Screw Adjustment Tool Starter Rope (Bar Tool) ON/STOP Switch Choke/ Fast Idle Chain Muffler Lever Bar Oil Fill Cap Bumper Primer Bulb spike Starter Housing Fuel Mix Fill Cap Cylinder Cover Chain Brake... -
Page 3: Safety Rules
IDENTIFICATION OF SYMBOLS Starting Reminder Chain Tensioning Lift lever on bar knob and Move ON/STOP switch to turn counterclockwise 1 turn the ON position. to loosen clutch cover. Slowly press primer bulb 6 times. Turn adjusting wheel (downward direction) to tension chain until chain solidly contacts bottom of guide bar rail. -
Page 4: Safety Notice
S Keep all parts of your body away from the S Chain brake. Your chain saw is equipped chain when the engine is running. with a chain brake that is designed to stop S Keep children, bystanders, and animals a the chain from moving. - Page 5 S Do not twist the saw as the bar is with- teners securely tightened. drawn from an undercut when bucking. S Use only Partner accessories and replace- ment parts as recommended. Avoid Pull- - In: S Always begin cutting with the engine at full HANDLE FUEL WITH CAUTION speed and the saw housing against wood.
-
Page 6: Maintain Control
S Do not attempt cuts starting with the tip of help avoid kickback and other forces which the bar (plunge cuts). can result in serious injury. S Watch for shifting logs or other forces that S Reduced- -Kickback Guide Bar, designed could close a cut and pinch or fall into chain. - Page 7 ASSEMBLY Protective gloves (not provided) should be worn during assembly. ATTACHING THE BUMPER SPIKE (If not already attached) The bumper spike may be used as a pivot when making a cut. 1. Loosen and remove bar knob completely by lifting lever and turning counterclock- wise.
-
Page 8: Chain Tension
CHAIN TENSION (Including units 3. Using the screwdriver end of the chain adjustment tool (bar tool), move chain with chain already installed) around guide bar to ensure all links are in bar groove. WARNING : Wear protective gloves 4. While lifting tip of guide bar, tighten bar when handling chain. -
Page 9: Operating Your Unit
OPERATING YOUR UNIT Use only 40 --- 45 cm of rope per pull. BEFORE STARTING ENGINE Hold saw firmly while pulling starter rope. WARNING : Be sure to read the fuel Starter Rope Handle information in the safety rules before you be- gin. -
Page 10: Cutting Methods
CHOKE/FAST IDLE LEVER mm) thick. Repairs on a chain brake should be made by an authorized service dealer. Take your unit to the place of purchase if purchased from a servicing dealer, or to the nearest autho- rized master service dealer. HALF S This saw is equipped with a chain brake. -
Page 11: Tree Felling Techniques
NOTCH CUT AND FELLING THE S Keep the engine at full speed the entire time you are cutting. TREE S Allow the chain to cut for you. Exert only S Make notch cut by cutting the top of the light downward pressure. notch first. -
Page 12: Limbing And Pruning
Important points S Roll the log over and finish with a second overcut. S Cut only one log at a time. S Give special attention to logs under strain S Cut shattered wood very carefully; sharp to prevent the saw from pinching. Make pieces of wood could be flung toward oper- the first cut on the pressure side to relieve ator. -
Page 13: Service And Adjustments
PRUNING S Be alert for springback. Watch out for branches that are bent or under pressure. WARNING Avoid being struck by the branch or the : Limit pruning to limbs saw when the tension in the wood fibers is shoulder height or below. Do not cut if released. -
Page 14: Spark Plug
CHAIN SHARPENING After each use, ensure ON/STOP switch is in the STOP position, then clean all sawdust WARNING from the guide bar and sprocket hole. : Improper chain sharpen- To maintain guide bar: ing techniques and/or depth gauge mainte- S Move ON/STOP switch to the STOP posi- nance will increase the chance of kickback tion. -
Page 15: Carburetor Adjustment
The carburetor has been carefully set at the All Cutters Remove Damage factory. Adjustments may be necessary if Same Length you notice any of the following conditions: S Chain moves at idle. See IDLE SPEED- -T adjusting procedure. Top Plate S Saw will not idle. -
Page 16: Troubleshooting Table
We, Husqvarna AB, SE- -561 82 Huskvarna, Sweden, Tel: +46- -36- -146000, as authorised representative in the Community, declare that the chain saw model Partner P842 SAS-AV from serial numbers 2009- -031(N or D)00001 and onwards (the year is clearly stated on the rating plate, followed by the serial number), comply with the requirements of the COUNCIL’S... -
Page 17: Technical Data Sheet
TECHNICAL DATA SHEET P842 Noise levels P842 Engine Equivalent (see note 1) noise Cylinder volume, cm pressure level at operator’s ear, Stroke, mm measured according to relevant Idle speed, rpm 3,000 international standards, dB(A) 99,7 Recommended max. Equivalent (see note 1) noise...
Need help?
Do you have a question about the P842 and is the answer not in the manual?
Questions and answers