Table of Contents
Advertisement
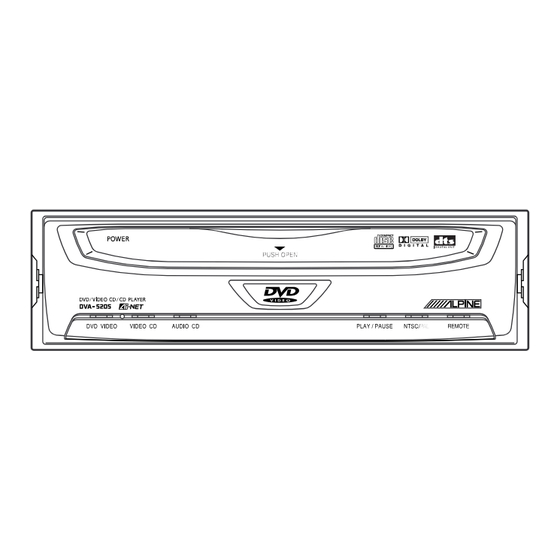
DVA-5205
DVD/VIDEO CD/
CD PLAYER
• OWNER'S MANUAL (Page 2-67)
Please read this manual- to maximize your
enjoyment of the outstanding performance and
feature capabilities of the equipment, then retain
the manual for future reference.
• MODE D'EMPLOI (Page 72-137)
Veuillez lire ce mode d'emploi pour tirer
pleinement profit des excellentes performances et
fonctions de cet appareil, et conservez-le pour
toute référence future.
• MANUAL DE OPERACION (Página 138-??)
Lea este manual, por favor, para disfrutar al
máximo de las excepcionales prestaciones y
posibilidades funcionales que ofrece el equipo,
luego guarde el manual para usarlo como
referencia en el futuro.
DIGITAL VIDEO
R
Advertisement
Table of Contents

Related Manuals for Alpine DVA-5205


Summary of Contents for Alpine DVA-5205
- Page 1 DVA-5205 DVD/VIDEO CD/ CD PLAYER • OWNER’S MANUAL (Page 2-67) Please read this manual- to maximize your enjoyment of the outstanding performance and feature capabilities of the equipment, then retain the manual for future reference. • MODE D’EMPLOI (Page 72-137) Veuillez lire ce mode d’emploi pour tirer...
-
Page 2: Warnings And Cautions
Precautions This symbol means important instructions. Warning Failure to heed them can result in serious injury or death. DO NOT DISASSEMBLE OR ALTER. Doing so may result in an accident, fire or electric shock. KEEP SMALL OBJECTS SUCH AS BATTERY OUT OF THE REACH OF CHILDREN. - Page 3 HALT USE IMMEDIATELY IF A PROBLEM APPEARS. Failure to do so may cause personal injury or damage to the product. Return it to your authorized Alpine dealer or the nearest Alpine Service Center for repairing.
- Page 4 Do not attempt to play cracked, warped, or damaged discs. Playing a bad disc could severely damage the playback mechanism. Maintenance If you have problems, do not attempt to repair the unit yourself. Return it to your Alpine dealer or the nearest Alpine Service Station for servicing. Never Attempt the Following Do not grip or pull out the disc while it is being pulled back into the player by the automatic reloading mechanism.
-
Page 5: Table Of Contents
CONTENTS Precautions Custom setting – Changing the Closed Caption setting ....35 Warnings and Cautions ....... 2 Custom setting – Changing the Ai-NET settings ..36 Contents ............5 Custom setting – Changing the H.U. Control settings ......38 Quick Guide Digital Audio Processor (Optional) About DVDs .......... -
Page 6: About Dvds
About DVDs About DVDs Music CDs and DVDs have grooves (tracks) in Moreover, DVDs offer a variety of functions. which the digital data is recorded. The data is represented as microscopic pits recorded into • Multiple audio* (page 19) the track – these pits are read by a laser beam Movies can be recorded in up to eight to play the disc. -
Page 7: Discs Playable On This Dvd Player
Discs playable on this DVD player Discs playable on this DVD player • Playable discs • DVD region number (playable region number) The discs listed below can be played on this DVD player. Other discs cannot be played. This DVD player will play back any disc whose region number is 1 (or All). -
Page 8: When Using Remote Control
Switching to “AUDIO” makes it possible remote control. to operate Alpine audio products as well. Operate while viewing the white characters on the remote control unit. • Point the remote control at the remote sensor within about 2 meter. -
Page 9: Loading And Unloading Discs
Loading and unloading discs Loading and unloading discs Video CD Turn on the power before loading and unloading discs. (Refer to page 10 “Turning the power on and off”.) Loading discs Close the door. Be sure to close the door to prevent dust Press the door in gently then from getting inside. -
Page 10: Turning The Power On And Off
• When connected with an Ai-NET compatible head unit, the power cannot be turned off from the stopped when the power is turned ON remote control unit. Turn off the DVA-5205’s again. power by switching the head unit’s source. For The play position memory is released if details, refer to “Operating from the head unit”... -
Page 11: Switching Between Ntsc And Pal Configuration
Switching between NTSC and PAL configuration Adjusting the volume Switching between Adjusting the volume NTSC and PAL Adjust the volume for connecting only with the Digital Audio Processor (PXA- configuration H510). Switch the video output configuration to NTSC or PAL according to the type of Move the rotary encoder to the television and the disc recording method. -
Page 12: Playing Discs
Playing discs Playing discs Video CD • With some DVDs, certain operations Caution are disabled. Such operations are not possible on such DVDs. • The DVD functions described in this manual are not supported by all DVDs. See the individual DVDs instructions for details on the features supported. -
Page 13: Stopping Playback
Stopping playback DVD menu Stopping Video CD Use the “Joystick” or the number keys (“0” to “9” playback and ”+10”) to select the desired item, then press “ENT” or “ : ”. Press the stop button during playback to stop playback. -
Page 14: Fast-Forwarding/Fast-Reversing
Fast-forwarding/fast-reversing Finding the beginnings of chapters or tracks Fast-forwarding/ Video CD fast-reversing During playback, press “c ” (fast- reverse) or “ f ” (fast-forward) for at least 2 seconds. Press “ : ” to return to normal playback. Notes: • No sound or subtitles are played during fast- forwarding/fast-reversing. -
Page 15: Playing Still Frames (Pausing)
Playing still frames (pausing) Frame-by-frame playback Slow motion playback Frame-by-frame Note: Some DVDs do not have chapters. Video CD playback MUTE In the pause mode, Supplementary explanation press “ ”. “Chapters” are divisions of movies or The picture advances by musical selections on DVDs. -
Page 16: Searching By Title Number
Searching by title number Searching by title number Use this function to easily find positions on the DVD using the DVD’s title menu. During playback, press “GO TO”. The mode switches each time the button is pressed. Select “TITLE”. TITLE CHAPT TIME Normal playback... -
Page 17: Searching Directly By Chapter Or Track Number
Searching directly by chapter or track number Notes: Press “ : ” or “ENT”. • This function cannot be used on discs on which Playback starts from the selected title no chapter numbers are recorded. number. • Press “CLR” to delete the last digit in the chapter/ track number. -
Page 18: Searching By Elapsed Time
Searching by elapsed time Searching by Video CD elapsed time Use this function to search by specifying the elapsed time. During playback, press “GO TO”. The mode switches each time the button is pressed. Select “TIME”. DVD Video Normal playback TITLE CHAPT TIME... -
Page 19: Chapter/Track/Title Repeat Playback
Chapter/track/title repeat playback Switching the audio language Switching the Press “ : ” or “ENT”. Video CD audio language Playback starts from the specified elapsed time. On DVDs including multiple audio modes or multiple audio languages, the audio language can be switched during playback. During playback, press “AUDIO”... -
Page 20: Switching The Angle
Switching the angle Switching the subtitles (subtitle language) Switching the angle With DVDs on which images photo- graphed from multiple angles are recorded, the angle can be switched during playback. During playback, press “ANGLE” for at least 2 seconds. The angle switches between the angles recorded on the disc each time the button is pressed. -
Page 21: Displaying The Subtitles
Displaying the subtitles Displaying the disc status Displaying the Displaying the subtitles disc status With DVDs on which subtitles are recorded, Use the procedure described below to display the status (title number, chapter number, etc.) of you can select whether to display the subtitles the currently playing DVD on the screen. -
Page 22: Displaying The Disc Status
Displaying the disc status Displaying the Video CD disc status Use the procedure described below to display the status (track number, etc.) of the currently playing video CD or music CD on the screen. During playback, press DISP. “DISP.”. TUNER The playback status is displayed. -
Page 23: Video Output On/Off
CVA-1005/IVA-C800. Use the RCA connectors at the rear of the DVA-5205 to feed audio to your Rear monitor. Set AUX OUT of “Selecting Rear Monitor” on the CVA-1005/IVA- C800 side to AUX 1. -
Page 24: Changing The Default Settings (Setup)
Changing the default settings (setup) SET UP Changing the language settings Changing the default settings (setup) The factory default settings can be changed to suit your personal prefer- ences and usage. In the stop mode, press “SET” for at least 2 seconds. -
Page 25: Set Up
SET UP Changing the language settings ORIGINAL Use the “Joystick” to The disc is played with the audio make the selection, then language set as the priority language for press “ENT”. the disc. (AUDIO only) AUTO The disc is played with the subtitle language set as the priority language for the disc. -
Page 26: Changing The Default Settings
SET UP Changing the TV screen settings Changing the TV screen settings Use the procedure described below to set the output screen according to the type of TV monitor being used. Select “TV SCREEN” under “Changing the default settings (SET UP)” on page 24. Use the “Joystick”... -
Page 27: Changing The Country Code Setting
SET UP Changing the country code setting 16 : 9 WIDE Press “ENT” to reset the Select this when connected to a wide screen country code. TV. This is selected upon shipment from the factory. Use keys “0” to “9” to input the Displays the setting contents. -
Page 28: Setting The Rating Level (Parental Lock)
SET UP Setting the rating level (parental lock) Setting the rating level (parental lock) Use this function to restrict the viewing of movies to children of appropriate age levels only. Select “RATING LEVEL” under “Changing the default settings (SET UP)” on page 24. Press “ENT”. - Page 29 SET UP Setting the rating level (parental lock) Use the “Joystick” to select the • Changing the rating level temporarily rating level, then press “ENT”. Some discs may request that you change the Tips rating level set in the default settings during Select “OFF”...
-
Page 30: Changing The Downsampling Setting
SET UP Changing the down sampling setting Changing the down sampling setting Converts linear PCM (LPCM) voice signals recorded on the DVD disc to downsampling 48 kHz/16 bit digital signals and outputs them from the optical cable. Select “DOWN SAMPLING” under “Changing the default settings (SET UP)”... - Page 31 SET UP Changing the down sampling setting Displays the setting contents. Note: Press “RTN” to return to the previous screen. Press “SET” for at least 2 seconds. The settings are stored and the set up mode is canceled. SET UP...
-
Page 32: Changing The Digital Output Setting
Changing the digital output setting Changing the digital output setting Use the following procedure to set the audio signal output from the DVA-5205. Select “DIGITAL OUT” under “Changing the default settings (SET UP)” on page 24. Use the “Joystick” to make the selection, then press “ENT”. - Page 33 SET UP Changing the digital output setting Displays the setting contents. Press “SET” for at least 2 seconds. The set up are stored and the set up mode is canceled. Note: Press “RTN” to return to the previous screen. • Audio output/Optical digital audio output Disc Audio recording Digital output...
-
Page 34: Changing The Led Indicator Setting
SET UP Changing the LED indicator setting Changing the LED indicator setting Use the following procedure to set whether or not the product’s LED indicators are on or off. Select “LED INDICATOR” under “Changing the default settings (SET UP)” on page 24. Use the “Joystick”... -
Page 35: Custom Setting
SET UP Custom setting – Changing the Closed Caption Displays the setting contents. Move the “ Joystick” up and down to select “ON” or “OFF”, then press “ENT”. Note: Press “RTN” to return to the previous screen. Press “SET” for at least 2 seconds. -
Page 36: Custom Setting - Changing The Ai-Net Settings
SET UP Custom setting – Changing the Ai-NET settings Custom setting – Changing the Ai-NET settings The Ai-NET settings are used to output the sound of connected Ai-NET products. Select “CUSTOM SETUP” under “Changing the default settings (SET UP)” on page 24. Use the “Joystick”... - Page 37 SET UP Custom setting – Changing the Ai-NET settings Press “SET” for at least Set to “DVD” when connected to the CVA-1005/ 2 seconds. IVA-C800. The settings are stored Operations can be performed using the CVA- and the set up mode is 1005/IVA-C800’s main menu screen.
-
Page 38: Custom Setting - Changing The H.u. Control Settings
SET UP Custom setting – Changing the H.U. CONTROL settings Custom setting – Changing the H.U. CONTROL settings When connecting this equipment with an Ai-NET compatible head unit or an Ai- NET compatible AV head unit (CVA-1005/ IVA-C800), set the equipment so that it is possible to control from the head unit. - Page 39 SET UP Custom setting – Changing the H.U. CONTROL settings Possible to operate from an Ai-NET compatible head unit or an Ai-NET compatible AV head unit (CVA-1005/IVA- C800). Not possible to operate from an Ai-NET compatible head unit or an Ai-NET compatible AV head unit (CVA-1005/IVA- C800).
-
Page 40: Operating The Digital Audio Processor (Optional)
(optional) When used with a digital audio processor (PXA- H510), operation is possible from the remote control unit included with the DVA-5205. Also refer to the PXA-H510’s operating instructions. During playback, press “A.PROC”. The setting menu appears. -
Page 41: Adjusting The Parametric Equalizer
Adjusting the parametric equalizer Adjusting the Use the “Joystick” to select the band width (Q-FACT), then press parametric equalizer “ENT”. Select “PARAMETRIC-EQ” under “Operating the digital audio processor (optional)” on page 40. Use the “Joystick” to adjust the Use the “Joystick” to select the band width, then press “ENT”. -
Page 42: Adjusting The Surround Settings
Adjusting the surround settings Adjusting the surround settings This adjustment is not possible when Dolby Digital or Pro Logic is turned on for the DVA- 5205’s audio output. Select “SURROUND” under “Operating the digital audio processor (optional)” on page 40. Use the “Joystick”... -
Page 43: Storing The Surround Settings
Storing the surround settings Use the “Joystick” to select the Use the “Joystick” to select “WRITE”, then press “ENT”. time (echo time), then press “ENT”. Use the “Joystick” to adjust the time, then press “ENT”. Use the “Joystick” to select the number at which you want to store Note: Press “RTN”... -
Page 44: Recalling The Surround Settings
Recalling the surround settings Recalling the Video CD surround settings Select “PRIVATE-MEMORY” under “Operating the digital audio processor (optional)” on page 40. Use the “Joystick” to select the number of the settings you wish to recall (“PRIVATE-MEMORY 1” to “PRIVATE-MEMORY 6”), then press “ENT”. -
Page 45: Adjusting The Time Compensation
Adjusting the time compensation Using the Pro Logic mode Adjusting the Using the Pro Video CD Video CD time compensation Logic mode Select “DOLBY SURROUND Select “TIME-CORRECTION” MODE” under “Operating the under “Operating the digital audio digital audio processor (optional)” processor (optional)”... -
Page 46: Adjust - Setting The Speaker Mode
ADJUST – Setting the speaker mode ADJUST – Video CD Setting the speaker mode This adjustment cannot be made when Dolby Pro Logic is set to “OFF”. Select “ADJUST” under “Operat- ing the digital audio processor (optional)” on page 40. Use the “Joystick”... -
Page 47: Adjust - Adjusting The Acoustic Image
ADJUST – Adjusting the acoustic image Press “A.PROC” Use the “Joystick” to select the to close the level item, then press “ENT”. digital audio processor screen and return to the play- back screen. ADJUST – Video CD Adjusting the Use the “Joystick” to adjust the level, then press “ENT”. -
Page 48: Adjust - Mixing The Rear Audio Channels
ADJUST – Mixing the rear audio channels ADJUST – Video CD Mixing the rear audio channels Use this function to mix the audio signals for the front to those output from the rear speakers. Select “ADJUST” under “Operat- ing the digital audio processor (optional)”... -
Page 49: Adjust - Center Speaker Time Compensation
ADJUST – Center speaker time compensation ADJUST – Video CD Use the “Joystick” to adjust the level, then press “ENT”. Center speaker time compensation Compensation is not possible when the center speaker is set to “OFF”. Select “ADJUST” under “Operat- ing the digital audio processor (optional)”... -
Page 50: Adjust - Rear Speaker Time Compensation
ADJUST – Rear speaker time compensation ADJUST – Video CD Rear speaker time compensation Compensation is not possible when the rear speakers are set to “OFF”. Select “ADJUST” under “Operat- ing the digital audio processor (optional)” on page 40. Use the “Joystick” to select “REAR DELAY”, then press “ENT”. -
Page 51: Adjust - Achieving Powerful Sound At Low Volumes
ADJUST – Achieving powerful sound at low volumes ADJUST – Video CD Press “A.PROC” Achieving powerful to close the digital audio sound at low volumes processor screen This setting is only possible with Dolby and return to the play- Digital outputs. back screen. -
Page 52: Adjust - Adjusting The Speaker Level
ADJUST – Adjusting the speaker level ADJUST – Video CD Adjusting the speaker level Select “ADJUST” under “Operat- ing the digital audio processor (optional)” on page 40. Press “BAND” for at least 2 seconds to switch the “ADJUST” screen. Use the “Joystick” to select “TEST TONE”, then press “ENT”. -
Page 53: Mode - Adjusting The Volume, Fader And Balance
MODE – Adjusting the volume, fader and balance MODE – Video CD Use the “Joystick” to select the speaker, then press “ENT”. Adjusting the volume, Adjust so that the volume level from the fader and balance different speakers is the same. When a head unit is connected using Ai-NET connections, adjust the volume, fader and balance from the head unit. -
Page 54: Mode - Adjusting The Subwoofer
MODE – Adjusting the subwoofer MODE – Video CD Adjusting the subwoofer Select “MODE” under “Operating the digital audio processor (optional)” on page 40. Use the “Joystick” to select “SUB- W”, then press “ENT”. Use the “Joystick” to select the mode (“ON”... -
Page 55: Mode - Turning The Defeat Function On And Off
MODE – Turning the defeat function on and off MODE – Video CD Use the “Joystick” to adjust the level, then press “ENT”. Turning the defeat function on and off Select “MODE” under “Operating the digital audio processor (optional)” on page 40. Use the “Joystick”... -
Page 56: Operating From The Head Unit (Cda-7965)
The DVA-5205 can also be operated from the head unit. This section describes operations from the CDA-7965 (the recommended head unit). Note that some of the functions cannot be operated from the DVA-5205. Playing DVDs, video CDs and CDs Press “SOURCE” and select the CD (DVA-5205) mode. - Page 57 Operating from the head unit Displaying the CD title Press “TITLE” to display the CD title, etc., on the head unit’s display. Press “TITLE” on the head unit. The display pattern changes each time the button is pressed. Operation display Clock display mode Text display mode Text display mode...
-
Page 58: Operating From The Head Unit's Remote Control Unit
Operating from the head unit’s remote control unit Operating from the head unit’s remote control unit The DVA-5205 can be operated from the remote control unit included with the head unit. Remote control operations Remote Control RUE-4185 RUE-4160 RUE-4165 unit... - Page 59 First see “Remote control operations” (page 58). Press “SOURCE” , “AUDIO SEL” or “A. SEL”to set the CD (DVA-5205) mode. The DVA-5205’s power is on when the CD mode is selected, off when other modes are selected. To set the pause mode, press “...
-
Page 60: Terminology
Terminology Terminology Dolby Digital (AC-3) Dolby Digital (AC-3) is a digital audio This is a home-use digital sound format of compression technology developed by the DTS Sound System, a high quality Dolby Laboratories. It is compatible with sound system for use in movie theaters not only stereo (2-channel) sound, but which was developed by Digital Theater also 5.1-channel surround sound. -
Page 61: List Of Language Codes
List of language codes List of language codes (For details, see page 25.) Abbreviation Code Language Abbreviation Code Language 6565 Afar 7289 Armenian 6566 Abkhazian 7365 Interlingua 6570 Afrikaans 7369 Interlingue 6577 Amharic 7375 Inupiak 6582 Arabic 7378 Indonesian 6583 Assamese 7383 Icelandic... -
Page 62: In Case Of Difficulty
List of language codes List of language codes (Continued) (For details, see page 25.) Abbreviation Code Language Abbreviation Code Language 8083 Pashto, Pushto 8387 Swahili 8084 Portuguese 8465 Tamil 8185 Quechua 8469 Telugu 8277 Rhaeto-Romance 8471 Tajik 8278 Kirundi 8472 Thai 8279 Romanian... -
Page 63: List Of Country Codes
List of country codes List of country codes Abbreviation Code Country Abbreviation Code Country 6568 Andorra 6776 Chile 6569 United Arab Emirates 6777 Cameroon 6570 Afghanistan 6778 China 6571 Antigua and Barbuda 6779 Colombia 6573 Anguilla 6782 Costa Rica 6576 Albania 6785 Cuba... - Page 64 List of country codes List of country codes (Continued) Abbreviation Code Country Abbreviation Code Country 7183 South Georgia and the 7683 Lesotho South Sandwich Islands 7684 Lithuania 7184 Guatemala 7685 Luxembourg 7185 Guam 7686 Latvia 7187 Guinea-Bissau 7689 Libyan Arab Jamahiriya 7189 Guyana 7765...
- Page 65 List of country codes List of country codes (Continued) Abbreviation Code Country Abbreviation Code Country 8072 Philippines 8474 Tajikistan 8075 Pakistan 8475 Tokelau 8076 Poland 8477 Turkmenistan 8077 Saint Pierre and Miquelon 8478 Tunisia 8078 Pitcairn 8479 Tonga 8082 Puerto Rico 8480 East Timor 8084...
- Page 66 • If operation freezes, the screen goes black or the unit should otherwise not function properly, try turning the power off then back on. Alternatively, try the following methods in the order listed until the DVA-5205 returns to normal playbak mode: 1) Change the source from DVD to another source then return to DVD mode.
-
Page 67: Specifications
Specifications Signal system ........NTSC/PAL Horizontal resolution ......500 lines or greater Video output level ......1Vp-p (75 ohms) Video S/N ratio ........DVD: 60 dB Audio S/ N ratio DVD: 95 dB CD: 93 dB Frequency response ......DVD: 5 Hz to 22 kHz ( 1 dB) (48 kHz sampling) DVD: 5 Hz to 44 kHz ( 1 dB) (96 kHz sampling) CD: 5 Hz to 20 kHz ( 1 dB) Dynamic range... -
Page 68: Functions Of Remote Control Unit Buttons
Functions of remote control unit buttons Operating the DVA-5205 DVD Video Player When operating the DVA-5205 set the DVD/AUDIO switch to the “DVD” side. 1 Joy Stick Selects the items displayed on the screen. 2 ENT button Determines the selected item. - Page 69 Functions of remote control unit buttons 9 RPT Button u SUB T. Button Repeat playback. Press for at least 2 seconds to change the subtitles. p POWER Button i –ON/OFF Button Turns the power ON and OFF. Press for at least 2 seconds to turn the NTSC/PAL Button subtitles ON and OFF.
- Page 70 Functions of remote control unit buttons Operating audio for the Alpine Ai-NET When operating audio for the Alpine Ai-NET, set the DVD/AUDIO switch to the “AUDIO” side. 1 Joy Stick Music Sensor/Fast Forward/Rewind/ Disc Change/Preset Selection/SEEK 2 ENT Button Play/Pause...
- Page 71 Memo...
- Page 72 Tel.: 1-800-ALPINE-1 (1-800-257-4631) Alpine Electronics of Canada, Inc. Suite 203, 7300 Warden Ave. Markham, Ontario L3R 9Z6, Canada Tel.: 1-800-ALPINE-1 (1-800-257-4631) Alpine Electronics of Australia Pty. Ltd. 6-8 Fiveways Boulevarde Keysborough, Victoria 3173, Australia Tel.: (03) 9769-0000 Alpine Electronics GmbH...
- Page 73 à cette unité. Lors de la connexion DVA-5205 a la caja de fusibles, asegúrese de que el vehicle. When in doubt, consult your ALPINE dealer. du DVA-5205 au boîtier à fusible, s’assurer que le fusible designado para el circuito del DVA-5205 sea del fusible du circuit désigné...
- Page 74 (M6) 8 . o Ai-NET Cable (Included with CD Shuttle) Brancher cette borne à la borne de sortie numérique, avec le Conectar el conductor de salida video de un DVA-5205 a esta entrada. ; Ai-NET Connector i Terminal de entrada digital (Óptico) câble de fibre optique d’un DVA-5205.
- Page 75 //////ILPINE, Z;.$$f /NOTE/NOTE/NOTA ‘JT’~-I/-rIc3~)i(f-C~~)~i~t~~a,~~~~ zoxEe\ lRFt47~Y ~~~~TL~~~~~~~~~~~~~~~~~, EO3a) imlTL~7 7 lm;$mlcck 0 Bmaa5 cl ~e/-lJv, _________-___--------------- Caution when mounting to the rear deck In this case, the bracket covers more than half of the air ventilation holes. It is no problem for the remaining air ventilation holes and the cooling effect with fan.
- Page 76 //////ILPINE. CAUTION/ATTENTION/PRECAUCl6N CAUTION-Laser radiation when open, DO NOT STARE INTO BEAM (Bottom side of unit) (c&b infbrieur de I’appareil) (Lado inferior de la unidad) CAUTION - Laser radiation when open, DO NOT STARE INTO BEAM ATTENTION -Rayonnement laser quand I’appareil est ouvert, NE PAS FIXER LE FAISCEAU PRECAUCldN - Radiaci6n lkser al abrirse, NO MIRE FIJAMENTE EL...
- Page 77 Warranty We suggest that you read rt thoroughly Should you have <!ny questlox please cotltaci ~OI.II Dealer or contact Alpine at one of the telephone numbers listed below product was shipped to an Authorized Alpine Ser- vice Center or AlpIne. AlpIne WIII pay the return shop-...
- Page 78 Wglage B la sorhe d’usine Off 1 Rhglage a la sortie d’usine: On (“SETUP”) menu screen. Si le DVA-5205 est connect6 a un systi?me Alpine Ai- (If the disc has started playing, set the stop mode NET, il n’est pas necessaire de changer le rbglage de first.)
- Page 79 IN THE UNITED STATES BUSINESS REPLY MAIL FIRST CLASS MAIL PERMIT N. 320 TORRANCE, CA.90509 POSTAGE WILL BE PAID BY ADDRESSEE ALPINE ELECTRONICS OF AMERICA, INC. Attention : MARKETING SERVICES P.O. Box 2859 Torrance, CA 90509-9939 III1 I I II...
- Page 80 No Postage Stamp Necessary If Mailed In Canada Postage will be paid by ALPINE ELECTRONICS OF CANADA, INC. Suite 203, 7300 Warden Ave. Markham, Ontario L3R 9Z6 T FOR USE IN CANADA, PLEASE FOLD HERE AND ENSURE THAT CANADIAN ADDRESS FACES UP.
- Page 81 2 .J Two or More times n DATE OF PURCHASE: Months Year -~-i WWhen you purchased this Alpine unit,did you compare it with other brands? n lf navigation system, which monitor? 1. D Yes + (Brand Name) ~ 1. il Alpine + (Model No.) 2.
- Page 82 1, 0 First time 2. 0 Secretarial/Clerical 7. 0 Farming/Fishing 8. 0 Retired 3. 0 Sales When you purchased this Alpine unit,did you compare it 4. Cl General Labor 9. 0 Student with other brands? 5. 0 Professional 10. 0 Other 1.
Need help?
Do you have a question about the DVA-5205 and is the answer not in the manual?
Questions and answers