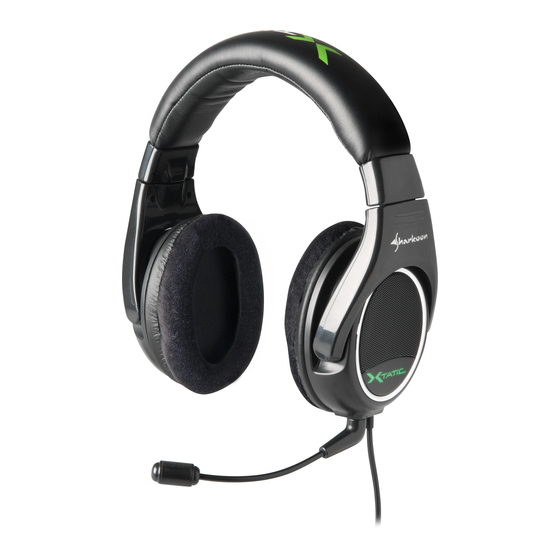
Summary of Contents for Sharkoon Xtatic Digital
- Page 1 Handbuch Manual Manuel d‘utilisation Guia usario Manuale d´istruzioni Gebruiksaanwijzing Guia usário Instukcja obstugi 매뉴얼 ユーザー マニュアル 使用手冊...
-
Page 2: Table Of Contents
Content 1. Features 1.1 X-Tatic Digital 1.2 X-Tatic Sound Control Unit (SCU) 2. Specifications 2.1 X-Tatic Digital 2.2 X-Tatic SCU 3. Compatibility 3.1 X-Tatic Digital 3.2 X-Tatic SCU 4. Parts and accessories 4.1 X-Tatic Digital 4.2 X-Tatic SCU 5. The headset at a glance 5.1 The volume controller 5.2 The connectors 5.3 Connecting the microphone to the headset... -
Page 3: Features
Dear customer! Congratulations for purchasing one premium quality SHARKOON product. For a long life time and to take full advantage of this product we recommend that you read this manual completely. Have a good time with our product! SHARKOON Technologies GmbH 1. -
Page 4: Compatibility
3. Compatibility 3.1 X-Tatic Digital • PC / MAC / other sources: analogue input (via cable adapter) 3.2 X-Tatic SCU • Xbox / Xbox 360: optical input • PS2 / PS3: optical input / USB microphone connection • PC / MAC: optical input / analogue or USB microphone input •... -
Page 5: X-Tatic Digital
If you are missing any of the items listed above, please contact customer service via e-mail at support@sharkoon.com or call: + 49 (0) 6403 – 775 6100 In case you have purchased the X-Tatic Digital outside of Europe/USA you will find two separate power supplies included with the headset: one to power the SCU, the second to power the headset. -
Page 6: The Headset At A Glance
5. The headset at a glance A – Headband B – Headphones C – Detachable, adjustable microphone D – Microphone connector X-TATIC DIGITAL... -
Page 7: The Volume Controller
5.1 The volume controller – Volume adjustment for each channel after pressing the according button (button illuminated) or main volume adjustment respectively (all buttons illuminated) as well as volume on/off (by pressing this controller) – Microphone volume (only Xbox 360) –... -
Page 8: The Connectors
5.2 The connectors A – Headset connectors – 9-pin analog connector – ISO power connector B – Cable adapter – 9-pin analog jack – 3.5 mm stereo plug for each channel: – Microphone connector (pink) – Subwoofer connector (orange) – Connector for rear speakers (black) –... -
Page 9: The Scu At A Glance
2. Turn the microphone until the indications on the microphone and on the headset are opposite to each other (fig. 3). fig. 3 3. Press the microphone’s plug into the headset’s jack completely and turn the micro- phone to the front and into the desired position. 6. -
Page 10: Sound Settings / Sound Technologies
C D E A – Optical audio input (S/PDIF) – USB connector (for PS3 microphone) – Buttons for volume (- / +) resp.Time-Delay (- / +) D – On / off button for Pro Logic resp. Dynamic Range Control (DRC) –... -
Page 11: Volume / Dolby Pro Logic (Vol / Pl)
6.1.1 Volume / Dolby Pro Logic (VOL / PL) Dolby Pro Logic is a Dolby technology which enables the transformation of a 2-channel signal into a 5.1-channel signal. 1. Toggle the switch (fig. 1 / A) into the “VOL / PL ” position. 2. -
Page 12: Restore The Factory Default / Reset
6.2 Restore the factory default / reset To restore the factory settings press and hold the buttons “Vol -” and “Vol +” (fig. 3 / A) simultaneously while the SCU is switched off then press the power button (fig.3 / B).The LED display (fig. 4) will flash 3 times to confirm the successful reset. fig. -
Page 13: Using The X-Tatic Digital With The Xbox / Xbox 360
8. Using the X-Tatic Digital with the Xbox / Xbox 360 1. Connect the optical cable (remove protective caps!) to the optical audio output of your Xbox / Xbox 360 and the SCU’s optical audio input. 2. Connect the X-Tatic to the SCU by plugging the headset cable’s 9-pin connector to the SCU’s 9-pin plug. -
Page 14: The Power Supply
Under “Settings” > “Audio Device Settings” define “C-Media USB Audio Device” as input device and “C-Media USB Audio Device” as output device. Note: From the PS2’s settings menu select Dolby Digital 5.1 as output format. 10. Connecting the headset to a PC or any other source (analog) 1. -
Page 15: Important Notes
All named products and descriptions are trademarks and / or registered trademarks of the respective manu- facturers and are accepted as protected. As a continuing policy of product improvement at SHARKOON, the design and specifications are subject to change without prior notice. National product specifications may vary.


Need help?
Do you have a question about the Xtatic Digital and is the answer not in the manual?
Questions and answers