Table of Contents
Advertisement
Advertisement
Table of Contents

Related Manuals for JVC UX-G28


Summary of Contents for JVC UX-G28
-
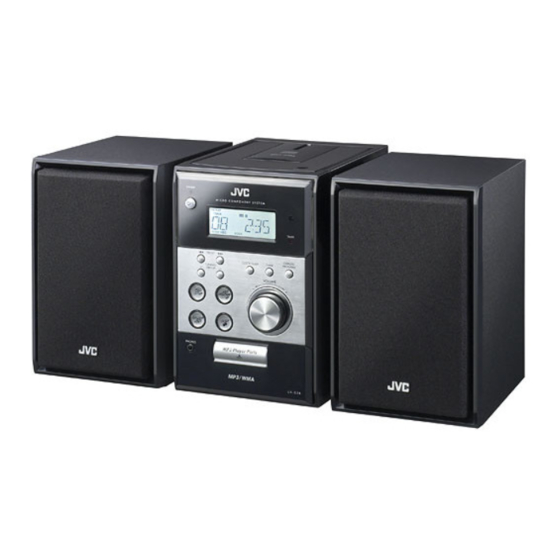
Page 1: Micro Component System
MICRO COMPONENT SYSTEM UX-G28 —Consists of CA-UXG28 and SP-UXG28 For Customer Use: INSTRUCTIONS Enter below the Model No. and Serial No. which are located either on the rear, bot- tom or side of the cabinet. Retain this information for future reference. - Page 2 SUR LE MATERIEL BROUILLEUR; “APPAREILS Consult the dealer or an experienced radio/TV NUMERIQUES”, NMB-003 EDICTEE PAR LE technician for help. MINISTRE DES COMMUNICATIONS. CAUTION Changes or modifications not approved by JVC could void the user’s authority to operate the equipment.
- Page 3 Some of the model information is located on Sur certains modèles, l’information les concernant the bottom. est située à la partie inférieure. WARNING: TO REDUCE THE RISK OF FIRE AVERTISSEMENT: POUR DIMINUER LE RISQUE OR ELECTRIC SHOCK, DO NOT EXPOSE D'UN INCENDIE OU D'UNE SECOUSSE ELECTRIQUE, THIS APPLIANCE TO RAIN OR MOISTURE.
- Page 4 IMPORTANT FOR LASER PRODUCTS 1. CLASS 1 LASER PRODUCT CAUTION: Do not open the top cover or cabinet. There are no user serviceable parts inside the unit; leave all servicing to qualified service personnel. CAUTION: (For U.S.A.) Visible and/or invisible class II laser radiation when open. Do not stare into beam.
- Page 5 CAUTION ATTENTION • Do not block the ventilation openings or holes. • Ne bloquez pas les orifices ou les trous de (If the ventilation openings or holes are blocked ventilation. (Si les orifices ou les trous de by a newspaper or cloth, etc., the heat may not ventilation sont bloqués par un journal un tissu, be able to get out.) etc., la chaleur pent ne pas être évacuée...
-
Page 6: Table Of Contents
Contents Contents ..............1 Introduction ............2 Precautions ................. 2 How to Read This Manual ..........3 Getting Started ...........4 Step 1: Unpack ..............4 Step 2: Prepare the Remote Control ........4 Step 3: Hook Up ..............5 Before Operating the System ......7 Daily Operations—Playback ......8 Listening to the Radio ............ -
Page 7: Introduction
Introduction Others Thank you for purchasing a JVC product. Please read all instructions carefully before operation, to • Should any metallic object or liquid fall into the System, ensure your complete understanding and to obtain the best unplug the AC power cord and consult your dealer before possible performance from the unit. -
Page 8: How To Read This Manual
How to Read This Manual To make this manual as simple and easy-to-understand as possible, we have adapted the following methods: • Button and control operations are explained as listed in the table below. In this manual, the operations using the remote control is mainly explained;... -
Page 9: Getting Started
Getting Started Step : Unpack Step 1 :Unpack the package and check the accessories. After unpacking, check to be sure that you have all the following items. The number in parentheses indicates the quantity of each piece supplied. • FM antenna (1) •... -
Page 10: Step 3: Hook Up
Step : Hook Up If you need more detailed information, see page 6 Illustrations of the input/output terminals below are typical examples. When you connect Digital Audio Player, etc., refer also to their manuals since the terminal names actually printed on the rear may vary. - Page 11 To connect the AM loop antenna To connect the speaker cords Make sure to connect the wire correctly. Make sure the both speakers are connected correctly and firmly. 1 Hold 3 Release 3 Lock 1 Unlock 2 Insert 2 Insert For better FM/AM reception When connecting the speaker cords, match the polarity of Outdoor FM...
-
Page 12: Before Operating The System
Before Operating the System The indications on the display teach you a lot of things while you are operating the System. Before operating the System, be familiar with when and how the indicator illuminates on the display. 1 REPEAT mode indicator 3 4 5 6 7 8 9 •... -
Page 13: Daily Operations-Playback
Daily Operations —Playback Turn on the power. The STANDBY lamp on the main unit turns off. Select the source. Playback automatically starts if the selected source is ready to start. Numeric • If you press AUX, start playback source on the buttons external component. -
Page 14: Listening To The Radio
To preset the stations Listening to the Radio You can preset 20 FM and 10 AM stations. To select the band (FM or AM) Tune in to a station you want to preset. FM/AM/AUX Activate the preset number entry mode. FM MONO DISPLAY/ PROG. -
Page 15: Playing Back A Disc
Playing Back from the USB mass storage class device Playable media and files This system can playback following types of media and files. This System is equipped with a USB MEMORY terminal on the front panel. You can connect a USB mass storage class Media Audio CD, CD-R/RW, USB mass device such as a USB flash memory device, Digital Audio... -
Page 16: Playing Back Other Equipment
To select a track/group Playing Back Other Equipment To select a track: To connect other equipment Increases the track numbers. By using a stereo mini plug cord (not supplied), you can connect equipment with analog audio output jacks such as a Decreases the track numbers. -
Page 17: Adjustments
Daily Operations —Sound & Other Adjustments Adjusting the Volume Remote control You can adjust the volume level from level 0 (VOL MIN) to level 31 (VOL MAX). Remote control: Main unit: CLOCK/ SLEEP VOLUME Remote ONLY To drop the volume in a moment To restore the volume, press again, or FADE MUTING... -
Page 18: Setting The Clock
Setting the Clock Turning Off the Power Automatically To turn off the System after a certain period of Without setting the built-in clock, you cannot use the Daily Timer (see page 17). time—Sleep Timer Turn off (standby) Activate the sleep timer mode. sec. -
Page 19: Advanced Disc/Usb Mass Strage Class Device Operations
Advanced Disc/USB mass strage class device Operations Programming the Playing Order— Remote control Program Play You can arrange the playing order of the tracks (up to 32) before you start playback. • You can repeat one programmed track or all the programmed tracks by pressing REPEAT. - Page 20 To check the programmed contents Then select a track. While the PROG. indicator is shown on the display and PROG. MP3 CD before playback... DISPLAY/ PROGRAM Track number ISPLAY/ PROGRAM To modify the program While the PROG. indicator is shown on the display and before playback...
-
Page 21: Playing At Random-Random Play
Playing at Random—Random Play Remote Playing Repeatedly—Repeat Play Remote ONLY ONLY You can play back all the tracks on the disc, USB mass You can repeat playback. storage class device at random. For CD: You can play back all the tracks on the disc at random. REPEAT REPEAT1 REPEAT... -
Page 22: Timer Operations
Timer Operations Setting the Timer Remote control Using Timer, you can wake up with music, etc. • You can set the Timer when the System turns on. • To exit from the timer setting, press 7 as required. TIMER How Timer actually works Once the Timer has been set, the timer ( ) indicator lights on the display. - Page 23 To inactivate the TIMER. Set Off Time 1 Set Off Time setting. When the System turns on. TIMER TIMER 2 Set time. The timer ( ) indicator on the display and the TIMER See the step 2 1, 2 lamp of the main unit go out. You can not set On time and Off time on the same time setting.
-
Page 24: Additional Information
Additional Information Daily Operations—Sound & Other Adjustments Learning More about This System (see pages 12 and 13) Daily Operations—Playback Adjusting the Volume: (see pages 8) • Be sure to turn down the volume before connecting or putting Listening to the Radio: the headphones. -
Page 25: Troubleshooting
Timer Operations: Troubleshooting Daily Timer does not work. If you are having a problem with your System, check this list ] The System has been turned on when the on-time comes. for a possible solution before calling for service. Timer starts working only when the System is turned off. ] There might have been a power failure. -
Page 26: Specifications
Specifications Amplifier section Output Power: 8 W per channel, min. RMS, driven into 4 Ω at 1 kHz with no more than 10% total harmonic distortion. 4 Ω – 8 Ω Speakers/Impedance: Terminals AUX IN Input sensitivity/Impedance (250mV/50kΩ) USB Ver.2.0 (Full Speed) Compatible device: Mass Storage Class Compatible File System: FAT16, FAT32... -
Page 27: Parts Index
Parts Index Refer to the pages to see how to use the buttons and controls. Remote control LO K/ SLEEP TIMER 8, 13, 18 DISPLAY/ 9, 14 PROGRAM 10, 14 MEMORY FM/AM/AUX 10, 14 PRESET STOP 11, 17 10, 15 TUNING/GROUP 9, 11 FADE... - Page 28 Main unit 11, 17 9, 11 8, 12 10, 14 8, 20 10, 11 10, 15...
- Page 29 TO OUR VALUED CUSTOMER THANK YOU FOR PURCHASING THIS JVC PRODUCT. WE WANT TO HELP YOU ACHIEVE A PERFECT EXPERIENCE. NEED HELP ON HOW TO HOOK UP? NEED ASSISTANCE ON HOW TO OPERATE? NEED TO LOCATE A JVC SERVICE CENTER?
- Page 30 WHAT WE WILL DO: If this product is found to be defective within the warranty period, JVC will repair or replace defective parts with new or rebuilt equivalents at no charge to the original owner. Such repair and replacement services shall be rendered by JVC during normal business hours at JVC authorized service centers.
- Page 31 MEMO...
- Page 32 © 2007 Victor Company of Japan, Limited 1007KMMCREMTS...
Need help?
Do you have a question about the UX-G28 and is the answer not in the manual?
Questions and answers