
Related Manuals for JVC 1209YAMMDWMTS


Summary of Contents for JVC 1209YAMMDWMTS
-
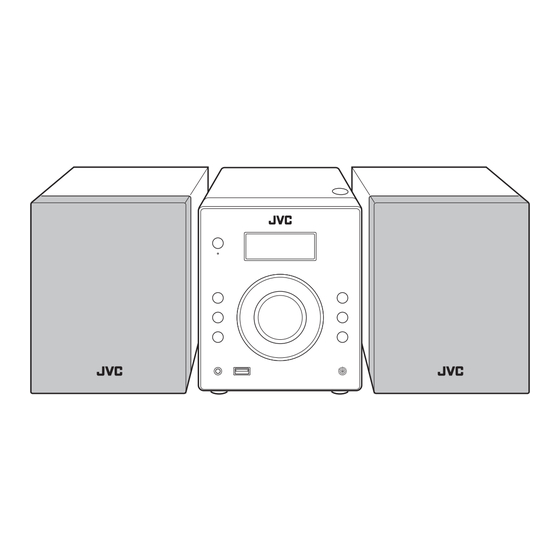
Page 1: Micro Component System
MICRO COMPONENT SYSTEM SYSTEME DE MICROCOMPOSANTS UX-G210 —Consists of CA-UXG210 and SP-UXG210 —Composée du CA-UXG210 et du SP-UXG210 INSTRUCTIONS MANUEL D’INSTRUCTIONS LVT2071-006A... - Page 2 Warnings, Cautions and Others Mises en garde, précautions et indications diverses CAUTION RISK OF ELECTRIC SHOCK DO NOT OPEN CAUTION: TO REDUCE THE RISK OF ELECTRIC SHOCK, DO NOT REMOVE COVER (OR BACK). NO USER SERVICEABLE PARTS INSIDE. REFER SERVICING TO QUALIFIED SERVICE PERSONNEL. The lightning flash with arrowhead symbol, within an equilateral triangle, is intended to alert the user to the presence of uninsulated...
- Page 3 For Canada/pour le Canada THIS DIGITAL APPARATUS DOES NOT EXCEED THE CLASS B LIMITS FOR RADIO NOISE EMISSIONS FROM DIGITAL APPARATUS AS SET OUT IN THE INTERFERENCE-CAUSING EQUIPMENT STANDARD ENTITLED “DIGITAL APPARATUS,” ICES-003 OF THE DEPARTMENT OF COMMUNICATIONS. CET APPAREIL NUMERIQUE RESPECTE LES LIMITES DE BRUITS RADIOELECTRIQUES APPLICABLES AUX APPAREILS NUMERIQUES DE CLASSE B PRESCRITES DANS LA NORME SUR LE MATERIEL BROUILLEUR;...
- Page 4 CAUTION • Do not block the ventilation openings or holes. (If the ventilation openings or holes are blocked by a newspaper or cloth, etc., the heat may not be able to get out.) • Do not place any naked flame sources, such as lighted candles, on the apparatus. •...
-
Page 5: Table Of Contents
Contents Introduction ... 2 Precautions ...2 How to Read This Manual ...2 Getting Started ... 3 Step 1: Unpack ...3 Step 2: Prepare the Remote Control ...3 Step 3: Hook Up ...4 Display Indicators ... 5 Daily Operations—Playback ... 6 Listening to the FM Radio ...7 Playable Media and Files...8 Playing Back a Disc...8... -
Page 6: Introduction
Thank you for purchasing a JVC product. Please read all instructions carefully before operation, to ensure your complete understanding and to obtain the best possible performance from the unit. Precautions Installation • Install in a place which is level, dry and neither too hot nor too cold—between 5°C and 35°C. -
Page 7: Getting Started
Step 1 :Unpack the package and check the accessories. Step 2 : Prepare the remote control. Step 3 : Connect the FM antenna and speakers (see page 4). Finally plug in the AC power cord. Now you can operate the System. Getting Started Step : Unpack... -
Page 8: Step 3: Hook Up
Step : Hook Up Turn the power off to all components before connections. FM antenna (supplied) Extend it so that you can obtain the best reception. To a wall outlet Plug in the AC power cord only after all connections are complete. For better FM reception Disconnect the supplied FM antenna, and connect to an outdoor FM antenna... -
Page 9: Display Indicators
Display Indicators The indications on the display teach you a lot of things while you are operating the System. Before operating the System, be familiar with when and how the indicators illuminate on the display. REPEAT1 GROUP RANDOM PROG. TRACK WMA MP3 CD SLEEP HBS JAZZ... -
Page 10: Turn On The Power
Daily Operations Number buttons PRESET 1,y, TUNING/ GROUP MEMORY AUDIO IN —Playback Turn on the power. The STANDBY lamp on the main unit turns off. Select the source. Playback automatically starts if the selected source is ready to start. • If you select AUDIO IN, start playback on the external device. -
Page 11: Listening To The Fm Radio
Listening to the FM Radio This system cannot receive AM broadcast. To select FM AUDIO IN FM(PRE) A-IN (AUDIO IN) To tune in to a station While FM is selected... sec. TUNING/GROUP Station searching starts and the frequency indication starts changing on the display. -
Page 12: Playable Media And Files
Playable Media and Files This System can play back following types of discs/files. • Audio CD • MP3/WMA files on a CD-R, CD-RW, or USB mass storage class device Audio CD CD-R • This System may not play back some files even though their formats are listed above. -
Page 13: Playing Back Discs/Files
Playing Back Discs/Files To select a track/group To select a track: PRESET Selects the next track. Selects the previous track. To select a group (MP3/WMA only): TUNING/GROUP Selects the next group. Selects the previous group. To locate a particular position While playing a disc, press and hold until the position you want is reached. -
Page 14: Daily Operations
Daily Operations Remote control CLOCK/ SLEEP PRESET SOUND MODE Main unit VOLUME CLOCK/ SLEEP —Sound & Other Adjustments Adjusting the Volume You can adjust the volume level from level 0 (“VOL MIN”) to level 31 (“VOL MAX”). Remote control: VOLUME To drop the volume in a moment To restore the volume, press again, or FADE... -
Page 15: Setting The Clock
Setting the Clock You can set the clock only when the System is turned off (on standby). Turn off (standby) the System. Activate the clock setting mode. sec. REPEAT1 GROUP CLOCK/ TRACK WMA SLEEP SLEEP HBS JAZZ Adjust the hour. CLOCK/ PRESET SLEEP... -
Page 16: Advanced Disc/Usb Mass Storage Class Device Operations
Advanced Disc/USB Mass Storage Class Device Operations Remote control Number buttons CD 6 PRESET TUNING/ GROUP RANDOM Main unit DISPLAY/ PROGRAM ∧ ∨ Programming the Playing Order— Program Play You can arrange the playing order of the tracks (up to 32) before you start playback. - Page 17 (2) Select a track. • You can also use number PRESET buttons to select a track. PROG. Track number Confirm the selection. DISPLAY/ PROGRAM Next program step is indicated. Program step PROG. Group number Repeat steps 3 and 4 to program other tracks. Start playback.
-
Page 18: Playing At Random-Random Play
Playing at Random—Random Play You can play back all the tracks at random. Select the source. MEMORY Start Random Play. RANDOM Playback starts in the random order. Random Play ends when all tracks are played. To skip a track: To pause: MEMORY To release, press again. -
Page 19: Daily Operations—Sound & Other Adjustments
– Some USB mass storage class devices may not be recognized or may not work properly. – The compatible format is FAT16/FAT32. – JVC bears no responsibility for any loss of data in the USB mass storage class device while using this System. MP3/WMA groups/tracks configuration This System plays back MP3/WMA tracks as follows. -
Page 20: Troubleshooting
Troubleshooting If you are having a problem with your System, check this list for a possible solution before calling for service. General: Adjustments or settings are suddenly canceled before you finish. sThere is a time limit. Repeat the procedure again. Operations are disabled. -
Page 21: Specifications
Specifications Amplifier section Output Power: 5 W per channel, min. RMS, driven into 4 Ω at 1 kHz with no more than 10% total harmonic distortion. (IEC268-3) 4 Ω – 8 Ω Speakers/Impedance: Terminals AUDIO IN: Input sensitivity/Impedance: 250 mV/50 kΩ USB MEMORY: USB specification Compatible with USB 2.0 Full-... -
Page 22: Parts Index
Parts Index Refer to the pages to see how to use the buttons and controls. Remote control 6, 7, 9 6, 8, 12, 13, 14 9, 11, 12, 13, 14 7, 9, 12 Main unit 6, 11 7, 9, 12, 13 6, 7, 9 6, 11 7, 9, 12, 13... - Page 23 Sommaire Introduction ... 2 Précautions...2 Comment lire ce manuel ...2 Pour commencer... 3 Étape 1: Déballage ...3 Étape 2: Préparation de la télécommande...3 Étape 3: Connexions ...4 Indicateurs d’affichage ... 5 Opérations quotidiennes—Lecture... 6 Écoute de la radio FM ...7 Supports et fichiers pouvant être lus...8 Lecture d’un disque ...8 Lecture d’un périphérique USB à...
-
Page 24: Introduction
Merci pour avoir acheté un produit JVC. Veuillez lire attentivement toutes les instructions avant d’utiliser l’appareil afin de bien comprendre son fonctionnement et d’obtenir les meilleures performances possibles. Précautions Installation • Installez la chaîne dans un endroit plat, sec, et ni trop chaud, ni trop froid—entre 5°C et 35°C. -
Page 25: Pour Commencer
Étape 1 : Déballage et vérification des accessoires. Étape 2 : Préparation de la télécommande. Étape 3 : Connectez l’antenne FM et les enceintes (voir page 4). Finalement, branchez le cordon d’alimentation. Maintenant, vous pouvez utiliser la chaîne. Pour commencer Étape : Déballage Après le déballage, vérifiez que tous les éléments suivants... -
Page 26: Étape 3: Connexions
Étape : Connexions Mettez tous les appareils hors tension avant les connexions. Antenne FM (fournie) Étendez-la de façon à obtenir la meilleure réception possible. À une prise murale Branchez le cordon d’alimentation secteur uniquement après que toutes les connexions sont terminées. Pour une meilleure réception FM Déconnectez l’antenne FM fournie et connectez l’appareil à... -
Page 27: Indicateurs D'affichage
Indicateurs d’affichage Les indications sur l’affichage vous donnent beaucoup d’informations pendant l’utilisation de la chaîne. Avant d’utiliser la chaîne, familiarisez-vous avec les indicateurs, et en particulier, quand et comment ils s’allument sur l’affichage. GROUP REPEAT1 RANDOM PROG. TRACK WMA MP3 CD SLEEP HBS JAZZ ROCK... -
Page 28: Opérations Quotidiennes-Lecture
Opérations quotidiennes Touches numériques PRESET 1,y, 4, x TUNING/ GROUP/PTY MEMORY AUDIO IN Mise sous tension de l’appareil. Le témoin STANDBY s’éteint sur l’appareil. Sélection de la source. La lecture automatique démarre si la source choisie est prête. • Si vous choisissez AUDIO IN, démarrez la lecture sur l’appareil extérieur. -
Page 29: Écoute De La Radio Fm
Écoute de la radio FM Cette chaîne ne peut pas recevoir les émissions AM. Pour choisir FM AUDIO IN FM(PRE) A-IN (AUDIO IN) Pour accorder une station Quand FM est choisi... sec. TUNING/GROUP La recherche de station démarre et l’indication de la fréquence change sur l’affichage. -
Page 30: Supports Et Fichiers Pouvant Être Lus
Supports et fichiers pouvant être lus Cette chaîne peut reproduire les types de disques/fichiers suivants. • CD Audio • Fichiers MP3/WMA sur un CD-R, CD-RW ou sur un périphérique USB à mémoire de grande capacité CD Audio CD-R • Cette chaîne peut ne pas reproduire certains fichiers même si leur format apparaissent dans la liste ci-dessus. -
Page 31: Lecture De Disques/Fichiers
Lecture de disques/fichiers Pour choisir une plage/groupe Pour choisir une plage: PRESET Choisit la plage suivante. Choisit la plage précédente. Pour choisir un groupe (MP3/WMA uniquement): TUNING/GROUP Choisit le groupe suivant. Choisit le groupe précédent. Pour localiser une position particulière Lors de la lecture d’un disque, maintenez la touche pressée jusqu’à... -
Page 32: Opérations Quotidiennes
Opérations quotidiennes Télécommande CLOCK/ SLEEP PRESET 4, x SOUND MODE Appareil principal VOLUME CLOCK/ SLEEP —Ajustement du son et autres ajustements Ajustement du volume Vous pouvez ajuster le niveau du volume de 0 (“VOL MIN”) à 31 (“VOL MAX”). Télécommande: VOLUME Pour couper le volume momentanément Pour rétablir le volume, appuyez de... -
Page 33: Réglage De L'horloge
Réglage de l’horloge Vous pouvez régler l'horloge uniquement quand la chaîne est hors tension (en attente). Mettez la chaîne hors tension (en attente). Mettez en service le mode de réglage de l’horloge. sec. REPEAT1 GROUP CLOCK/ TRACK WMA SLEEP SLEEP HBS JAZZ Ajustez les heures. -
Page 34: Opérations Avancées Des Disques/Périphériques Usb À Mémoire De Grande Capacité
Opérations avancées des disques/périphériques USB à mémoire de grande capacité Télécommande Touches numériques CD 6 PRESET TUNING/ GROUP RANDOM Appareil principal DISPLAY/ PROGRAM ∧ ∨ Programmation de l’ordre de lecture— Lecture programmée Vous pouvez arranger l’ordre de lecture des plages (32 maximum) avant de démarrer la lecture. - Page 35 (2) Choisissez une plage. • Vous pouvez aussi utiliser PRESET les touches numériques pour choisir une plage. PROG. Numéro de plage Validez le choix. DISPLAY/ PROGRAM Le prochain pas du programme est indiqué. Pas de programme PROG. Numéro de groupe Répétez les étapes 3 à...
-
Page 36: Lecture Dans Un Ordre Aléatoire-Lecture Aléatoire
Lecture dans un ordre aléatoire—Lecture aléatoire Remote ONLY Vous pouvez reproduire toutes les plages dans un ordre aléatoire. Choisissez la source. MEMORY Démarrez lecture aléatoire. RANDOM La lecture dans un ordre aléatoire démarre. La lecture aléatoire s’arrête quant toutes les plages ont été... -
Page 37: Informations Additionnelles
être reconnus ou peuvent ne pas fonctionner correctement. – Le format compatible est FAT16/FAT32. – JVC ne peut être tenu responsable pour toute perte de données dans le périphérique USB à mémoire de grande capacité lors de l’utilisation de cette chaîne. -
Page 38: Guide De Dépannage
Guide de dépannage Si vous des problèmes avec votre chaîne, cherchez d’abord une solution dans cette liste avant d’appeler un réparateur. Général: Les ajustements ou les réglages sont annulés soudainement avant la fin. sIl y a un temps limite. Recommencez la procédure. La chaîne ne fonctionne pas. -
Page 39: Spécifications
Spécifications Section de l’amplificateur Puissance de sortie: 5 W par canal, min. RMS, entraîné sur 4 Ω à 1 kHz avec moins de 10% de distorsion harmonique totale. (IEC268-3) 4 Ω – 8 Ω Enceintes/Impédance: Prises AUDIO IN: Sensibilité/Impédance d’entrée: 250 mV/50 kΩ... -
Page 40: Nomenclature
Nomenclature Référez-vous aux pages indiquées pour savoir comment utiliser les touches et les commandes. Télécommande 6, 7, 9 6, 8, 12, 13, 14 9, 11, 12, 13, 14 7, 9, 12 Appareil principal 6, 11 7, 9, 12, 13 6, 7, 9 6, 11 7, 9, 12, 13 6, 7, 9... - Page 41 EN, FR © 2009 Victor Company of Japan, Limited 1209YAMMDWMTS...
Need help?
Do you have a question about the 1209YAMMDWMTS and is the answer not in the manual?
Questions and answers