Table of Contents
Advertisement
Advertisement
Chapters
Table of Contents

Related Manuals for Daikin FTQ-PA


Summary of Contents for Daikin FTQ-PA
- Page 1 EDUS281008 Split System Air Conditioners Air Handling Unit FTQ-PA + RZQ-P9...
- Page 2 EDUS281008 Part 1 FTQ-PA + RZQ-P9..............1 1. External appearance ...................2 1.1 Indoor unit ....................2 1.2 Outdoor unit....................2 2. Model name, power supply and nomenclature ...........3 2.1 Model name and power supply ..............3 2.2 Nomenclature ....................3 3.
- Page 3 EDUS281008 Part 3 Detail information of options ..........59 1. Accessories....................60 1.1 Indoor unit ....................60 1.2 Outdoor unit....................60 2. RZQ......................61 2.1 KKPJ5F180 — Central drain plug .............. 61 2.2 K-KYZP15C — Wire fixture for preventing overturning ......63 2.3 KPT-60B160 —...
-
Page 4: Table Of Contents
EDUS281008 Part 1 FTQ-PA + RZQ-P9 1. External appearance ...................2 1.1 Indoor unit ....................2 1.2 Outdoor unit....................2 2. Model name, power supply and nomenclature ...........3 2.1 Model name and power supply ..............3 2.2 Nomenclature ....................3 3. Specifications ....................4 3.1 FTQ ...................... -
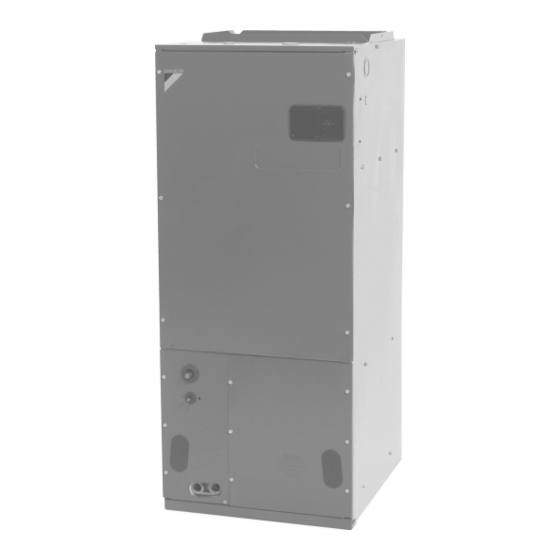
Page 5: External Appearance
External appearance EDUS281008 1. External appearance Indoor unit FTQ18PAVJU FTQ24PAVJU Outdoor unit RZQ18PVJU9 RZQ24PVJU9 FTQ-PA + RZQ-P... -
Page 6: Model Name, Power Supply And Nomenclature
VJ : 1 phase, 208/230V, 60Hz Indicates major design category Capacity indication in cooling 18 : 18,000 Btu/h 24 : 24,000 Btu/h Refrigerant Q : R-410A Indicates that this is a RZ : Outdoor unit for inverter (heat pump type) FTQ-PA + RZQ-P... -
Page 7: Specifications
4. Air filter is not standard accessory, but please mount it in the duct system of the suction side. 5. The second drain pan (sub drain pan) must be needed as field supply parts. A secondary field-supplied drain pan may be required. FTQ-PA + RZQ-P... -
Page 8: Dimensions And Service Space
EDUS281008 Dimensions and service space 4. Dimensions and service space Indoor unit 4.1.1 FTQ (Air handling unit) FTQ18PAVJU / FTQ24PAVJU FTQ-PA + RZQ-P... -
Page 9: Wired Remote Controller (Optional)
Dimensions and service space EDUS281008 Wired remote controller (Optional) BRC1E71 FTQ-PA + RZQ-P... -
Page 10: Outdoor Unit
EDUS281008 Dimensions and service space Outdoor unit RZQ18PVJU9 / RZQ24PVJU9 FTQ-PA + RZQ-P... -
Page 11: Installation Service Space
Dimensions and service space EDUS281008 Installation service space RZQ18PVJU9 / RZQ24PVJU9 3D064213 FTQ-PA + RZQ-P... - Page 12 EDUS281008 Dimensions and service space 3D06421 FTQ-PA + RZQ-P...
- Page 13 (2) Obstacle on the discharge side suction side measurements : inches (1) One row of stand-alone installation (2) Rows of series installation (2 or more) The relations between H, A, and L are as follows: Cannot be installed FTQ-PA + RZQ-P...
-
Page 14: Piping Diagrams
EDUS281008 Piping diagrams 5. Piping diagrams Indoor unit FTQ18PAVJU / FTQ24PAVJU Refrigerant pipe connection port diameters (in.) Model Liquid φ5/8 φ3/8 FTQ18PAVJU/FTQ24PAVJU C: 4D068194 FTQ-PA + RZQ-P... -
Page 15: Outdoor Unit
Piping diagrams EDUS281008 Outdoor unit RZQ18PVJU9 / RZQ24PVJU9 FTQ-PA + RZQ-P... -
Page 16: Wiring Diagrams
FTQ18PAVJU / FTQ24PAVJU 3D065036F NOTE: This unit is not equipped with a return air sensor. A remote sensor is required when not using a BRC1E71 Controller or if this controller is not positioned to sense space temperature. FTQ-PA + RZQ-P... -
Page 17: Outdoor Unit
Wiring diagrams EDUS281008 Outdoor unit RZQ18PVJU9 / RZQ24PVJU9 FTQ-PA + RZQ-P... -
Page 18: External Connection Diagram
EDUS281008 Wiring diagrams External connection diagram RZQ18PVJU9 / RZQ24PVJU9 3D064230 FTQ-PA + RZQ-P... -
Page 19: Electrical Characteristics
Units are suitable for use on electrical systems where voltage supplied to unit terminals is not below or above listed range limits. 2. Maximum allowable voltage imbalance between phases is 2%. 3. Select wire size based on MCA. FTQ-PA + RZQ-P... -
Page 20: Electric Heater
EDUS281008 Electrical characteristics Electric heater FTQ-PA + RZQ-P... -
Page 21: Outdoor Unit
4. MCA represents maximum input current. MOP represents capacity which may accept MCA. 5. Select wire size based on the value of MCA. 6. MOP is used to select the circuit breaker. (ground leakage circuit breaker). C: 3D064227C FTQ-PA + RZQ-P... -
Page 22: Safety Devices Setting
EDUS281008 Safety devices setting 8. Safety devices setting FTQ18PAVJU / FTQ24PAVJU C: 3D068195A FTQ-PA + RZQ-P... -
Page 23: Capacity Tables
2 . C a p a c i t i e s a r e n e t , i n c l u d i n g a d e d u c t i o n f o r c o o l i n g ( a n a d d i t i o n f o r h e a t i n g ) f o r i n d o o r f a n m o t o r h e a t . s h o w s n o m i n a l M A X c a p a c i t i e s FTQ-PA + RZQ-P... -
Page 24: Capacity Correction Ratio
EDUS281008 Capacity tables Capacity correction ratio RZQ18PVJU9 / RZQ24PVJU9 FTQ-PA + RZQ-P... -
Page 25: Operation Limits
Operation limits EDUS281008 10. Operation limits RZQ18PVJU9 / RZQ24PVJU9 3D064229 FTQ-PA + RZQ-P... -
Page 26: Part 2 Installation Of Indoor / Outdoor Unit
EDUS281008 Part 2 Installation of indoor / outdoor unit 1. Center of gravity..................24 1.1 Outdoor unit....................24 2. Installation of indoor unit ................25 2.1 FTQ18PAVJU / FTQ24PAVJU..............25 3. Installation of outdoor unit .................41 3.1 RZQ18PVJU9 / RZQ24PVJU9..............41 Installation of indoor / outdoor unit... -
Page 27: Center Of Gravity
Center of gravity EDUS281008 1. Center of gravity Outdoor unit RZQ18PVJU9 / RZQ24PVJU9 Unit (in.) 4D064214 Installation of indoor / outdoor unit... -
Page 28: Installation Of Indoor Unit
EDUS281008 Installation of indoor unit 2. Installation of indoor unit FTQ18PAVJU / FTQ24PAVJU SPLIT SYSTEM Air Conditioners Installation manual CONTENTS • If refrigerant gas leaks during installation, ventilate the area immediately. Refrigerant gas may produce toxic 1. SAFETY CONSIDERATIONS ........... 1 gas if it comes in contact with fi... - Page 29 Daikin are used, fi re or explo- Plastic parts may deteriorate and fall off or result in sion may occur.
-
Page 30: Selecting Installation Site
EDUS281008 Installation of indoor unit FOR THE FOLLOWING ITEMS, TAKE SPECIAL CARE BEFORE INSTALLATION DURING CONSTRUCTION AND CHECK AFTER INSTALLATION IS FINISHED. WARNING a. Items to be checked after completion of work • Entrust installation to the place of purchase or a qualifi ed serviceman. - Page 31 Installation of indoor unit EDUS281008 • Where piping between indoor and outdoor units is WARNING possible within the allowable limit. (Refer to the installa- • When installing the unit horizontally, be sure to tilt the unit in tion manual for the outdoor unit.) the direction shown in Fig.
- Page 32 EDUS281008 Installation of indoor unit Table 1 Check if the unit is horizontally level. CAUTION 53-1/4 14-1/2 19-5/8 15/16 15/16 • Make sure the unit is installed level using a level tube: four sides. (One thing to watch out for in particular is if the unit is Make sure the range of the unit’s external static pres- installed so that the slope is not in the direction of the drain sure is not exceeded.
- Page 33 Installation of indoor unit EDUS281008 REFRIGERANT PIPING WORK • Cut off the pipe end with a tube cutter. (Both liquid line and gas line) 〈Observe the requirements listed below for refrigerant piping sizes.〉 Cut with a tube cutter Liquid 3/8 in. 5/8 in.
-
Page 34: Drain Piping Work
EDUS281008 Installation of indoor unit Install drain piping as described Fig. 6. CAUTION In case of vertical installation • Be sure to insulate any fi eld piping all the way to the piping connection inside the unit. Any exposed piping may cause condensation or burns if touched. -
Page 35: Installing The Duct
Installation of indoor unit EDUS281008 • To keep the piping from becoming clogged with dirt, • When an electric heater (optional) is installed, use metal avoid bends where possible and install so that traps can duct and wrap the duct with a glass-wool insulation. -
Page 36: Wiring Example
EDUS281008 Installation of indoor unit Length of the transmission wiring and remote controller wiring Table 2 Terminal block Tightening torque (ft · lbf) Max. 3280 ft. Outdoor unit – Indoor unit Remote controller / transmission (Total wiring length: 6560 ft.) 0.58 –... - Page 37 Installation of indoor unit EDUS281008 How to use insulation tube. Terminal block (3P) • Use the insulation tube to cover the wiring. • Joint the insulation tube with the tape and cut off the tube sticking out of the unit. Tape Insulation tube Insulation tube large (3)
- Page 38 EDUS281008 Installation of indoor unit • Outside the air conditioners, separate the low voltage wiring When using 2 remote controllers for 1 indoor unit. (remote controller and transmission wiring) and high voltage Power supply wiring (ground wire and power supply wiring) by at least 5 in. 208/230V Outdoor unit so that they do not pass through the same place together.
-
Page 39: Field Setting And Test Run
Installation of indoor unit EDUS281008 Turn the MAIN/SUB changeover switch on one of the FIELD SETTING AND TEST RUN two remote controller PC boards to “S”. 〈Field settings may have to be performed using the re- (Leave the switch of the other remote controller set to “M”.) mote controller, depending on the type of installation.〉... - Page 40 EDUS281008 Installation of indoor unit 10-2 REMOTE CONTROL SETTING Take off the part on the bottom of the front panel. • Forced off and ON/OFF operation should be selected by select- ing the SECOND CODE NO. as shown in the table Table 4. Table 4 FIRST SECOND...
-
Page 41: Installation Of Outdoor Unit
Installation of indoor unit EDUS281008 • Purchase and install the electric heater kit as in Table 7. Insert the heater element in the electric heater kit into the electric heater slot, and use six of the screws taken out • Also refer to the installation and operating instructions that come with the electric heater kit. - Page 42 EDUS281008 Installation of indoor unit Check that the circuit breaker is turned off, and con- (11) Confi rm that there are no mistakes with the wiring, nect the heater kit to the wiring on site. and install the front panel (upper). Power supply wiring HKR-05C, 08C, 10C * When using HKR-03, 06, connect the power supply wire...
- Page 43 Installation of indoor unit EDUS281008 (12) -3 Electric heater ON/OFF temperature setting Terminal No. Input/output signal • While in heating operation, the heater control (ON/OFF) is 7, 8 Receives input: Humidifi er operation ON signal. (dry contact) conducted as shown below; 9, 10 Receives input: Forced closure of Indoor Unit Electronic Set temperature...
-
Page 44: Safety Considerations
EDUS281008 Installation of outdoor unit 3. Installation of outdoor unit RZQ18PVJU / RZQ24PVJU SPLIT SYSTEM Air Conditioners Installation manual CONTENTS DANGER 1. SAFETY CONSIDERATIONS ........... 1 • Refrigerant gas is heavier than air and replaces oxygen. 2. INTRODUCTION ............... 3 A massive leak can lead to oxygen depletion, especially in basements, and an asphyxiation hazard could occur 3. - Page 45 • Indoor units are for indoor installation only. Outdoor than those specifi ed by Daikin are used, fi re or explo- units can be installed either outdoors or indoors. sion may occur.
-
Page 46: Introduction
EDUS281008 Installation of outdoor unit • This air conditioner is an appliance that should not be Technical specifi cations accessible to the general public. ∗<a> and ∗<b> in the table indicate the operating condition • The wall thickness of fi eld-installed pipes should be (shown i fi... -
Page 47: Before Installation
Installation of outdoor unit EDUS281008 Main components • If strong wind whose velocity is or more blows to the outdoor unit from the air outlet side, the air fl ow For main components and function of the main components, rate of the outdoor unit is reduced, the outlet air is refer to the Engineering Data Book. - Page 48 EDUS281008 Installation of outdoor unit When two or more outdoor units are installed side Branch switch Branch switch and overcurrent and overcurrent by side protective device protective device • When an obstruction is present on the both sides Indoor unit Indoor remote controller (in.)
- Page 49 Installation of outdoor unit EDUS281008 (B) When an obstruction is present on the air outlet side • When the upward area is open • When the upward area is open When one outdoor unit is installed individually When one outdoor unit is installed individually L>H When two or more outdoor units are installed side When two or more outdoor units are installed side...
- Page 50 EDUS281008 Installation of outdoor unit When only two outdoor units are installed side by • When an obstruction is present also in the upward area side When one outdoor unit is installed individually The dimensional relationship between H, L and A is as shown in the table below.
-
Page 51: Cautions On Installation
Installation of outdoor unit EDUS281008 (D) When outdoor units are stacked When two or more outdoor units are installed side When an obstruction is present on the air outlet by side side The dimensional relationship between H, L and A is as NOTE shown in the table below. -
Page 52: Refrigerant Piping Work
EDUS281008 Installation of outdoor unit REFRIGERANT PIPING WORK Location Working period Protection method 1 month or more Pinch pipes CAUTION Outdoor Less than 1 month Pinch or tape pipes <To piping technician> Indoor Regardless of period • Make sure to open the stop valves after fi nishing the piping work. - Page 53 Installation of outdoor unit EDUS281008 Cautions on connecting the connection piping Tightening Flare dimension Pipe size Flare shape (in.) torque (ft·lbf) A (in.) • When it is expected that water condensed in the stop valve will reach the indoor unit through the gap between the heat R0.016 φ3/8”...
- Page 54 EDUS281008 Installation of outdoor unit • Charge the refrigerant to the liquid pipe in its liquid state. • Vacuum drying - Use a vacuum pump can evacuate Since R410A is a mixed refrigerant, its composition changes up to if charged in a state of gas and normal system operation [Procedure] would no longer be assured.
-
Page 55: Electric Wiring Work
Installation of outdoor unit EDUS281008 C: 3PA60114-14Y [Stop valve operation method] Stop valve operation Prepare hexagon wrenches (whose size is 4 mm and 6 mm). Cautions on handling the stop valve How to open the stop valve • The fi gure below shows the name of each part required in Insert a hexagon wrench into the valve stem, and turn the handling the stop valve. - Page 56 EDUS281008 Installation of outdoor unit 〈Precautions when knocking out knock holes〉 • Perform the electric wiring work in accordance with the “electric wiring diagram label”. • To punch the knockout hole, hit it with a hammer. Make sure to turn OFF the branch switch and overcurrent •...
- Page 57 Installation of outdoor unit EDUS281008 CAUTION • After fi nishing the electric wiring work, confi rm that all the wirings are connected securely. Screw 〈〈Precautions when laying power wiring〉〉 (accessory) • Two electric wires of different thickness cannot be connected Lock nut Cover to the power terminal block.
-
Page 58: Checks After Completion Of Work
EDUS281008 Installation of outdoor unit Transmission wiring connection procedure Piping size and heat insulation: Refer to “6-1 Selection of piping material”, “6-5 Heat • If an excessive force is applied while connecting a cable insulation of the piping”. to the terminal block on the PC board, the PC board may Check of stop valve: be damaged. - Page 59 Installation of outdoor unit EDUS281008 • In the check operation, the status of the outdoor unit is <Cautions on check operation> checked, and incorrect wiring is checked for. • If the air conditioner is started within about 12 minutes after the power of the indoor/outdoor unit is turned on, the H2P (1) •...
-
Page 60: Caution For Refrigerant Leaks
EDUS281008 Installation of outdoor unit When a malfunction code is displayed in the remote When nothing is displayed in the remote controller controller • There might be a problem with the connection or transmis- (Check a malfunction code in the remote controller connected sion between the indoor unit and the remote controller. - Page 61 Installation of outdoor unit EDUS281008 Pay a special attention to the place, such as a basement, etc. where refrigerant can stay, since refrigerant is heavier than air. Procedure for checking maximum concentration Check the maximum concentration level in accordance with steps 1 to 4 below and take whatever action is necessary to comply.
-
Page 62: Part 3 Detail Information Of Options
EDUS281008 Part 3 Detail information of options 1. Accessories....................60 1.1 Indoor unit ....................60 1.2 Outdoor unit....................60 2. RZQ......................61 2.1 KKPJ5F180 — Central drain plug .............. 61 2.2 K-KYZP15C — Wire fixture for preventing overturning ......63 2.3 KPT-60B160 — Fixture for preventing overturning ........65 Detail information of options... -
Page 63: Accessories
Accessories EDUS281008 1. Accessories Indoor unit 1.1.1 Optional accessories (For unit) Model FTQ18PAVJU FTQ24PAVJU Item 1 Air filter FIL 48-61 2 Insulation kit (Vertical installation) DPI 48-60/20 3 Insulation kit (Horizontal installation) DPIH 48-61 HKR-03, HKR-05C, HKR-06, HKR-08C, HKR-10C, HKR- 15C, HKR-20C. -
Page 64: Rzq
EDUS281008 2. RZQ KKPJ5F180 — Central drain plug KKPJ5F180 Model KKPJ5F180 Item φ31/32 (inside diameter) Connecting drain hose Dimensions Unit:in. Drain socket Drain cap Drain receiver 1-13/32 1-1/32 1-1/32 JC : D3K1342A Detail information of options... - Page 65 EDUS281008 Installation Failure to attach them correctly will result in leakage. 31/32 i n ches If the hose is too long and hangs down, arrange it carefully to prevent kinks. to part A as shown in the bottom left Never insert them into the wrong drain holes as it will drawing.
-
Page 66: K-Kyzp15C - Wire Fixture For Preventing Overturning
EDUS281008 K-KYZP15C — Wire fixture for preventing overturning K-KYZP15C Item K-KYZP15C Model Adjustor pin: 1 piece Bolt, nut, plain washer: Accessories 1 set Installation manual. Dimensions Unit:in. Wire rope (SUSφ3/32in.×65-5/8ft.) Attachment Plate (1) 9/32×23/32 Oblong hole 1-1/4 3/16 1-3/8 Attachment Plate (2) 15/16 Gripple 13/32... - Page 67 EDUS281008 Installation INSTALLATION Outdoor unit fixture Folded-plate roof fixture 1. For seam jointed-roofs, attach and fix the folded-plate Attachment For seam-jointed roofs clamp to the roof and then attach the attachment plates (1) Attachment plate (2) to the clamp as shown in the figure. plate (2) Wire rope Wire rope...
-
Page 68: Kpt-60B160 - Fixture For Preventing Overturning
EDUS281008 KPT-60B160 — Fixture for preventing overturning KPT-60B160 Model KPT-60B160 Item Material Steel plate (t 1/8 in.) Colour Ivory white Screw : 4 Accessories Installation manual. · Allows the outdoor unit to be secured to the foundation. → Prevents tipping of the outdoor unit due to strong gusts. - Page 69 EDUS281008 Installation (1) Check that this kit contains the following parts. Metal fixture N Metal fixture Q Metal fixture O Screws (4 pieces) Metal fixture P (2) Installation Procedure 1. Install the metal fixtures N=~ Q to the base legs as 2.
- Page 70 Daikin Industries, Ltd.’s products are manufactured for export to numerous countries throughout the world. Daikin Industries, Ltd. does not have control over which products are exported to and used in a particular country. Prior to purchase, please therefore confirm with your local authorized importer, distributor and/or retailer whether this product conforms tot he applicable standards, and is suitable for use, in the region where the product will be used.
Need help?
Do you have a question about the FTQ-PA and is the answer not in the manual?
Questions and answers