Advertisement
Quick Links
Download this manual
See also:
Owner's Manual
®
VISIT THE LIFETIME WEB SITE
WWW.LIFETIME.COM
For Assistance, including missing or broken parts,
Call Customer Service at:
1 (800) 225-3865
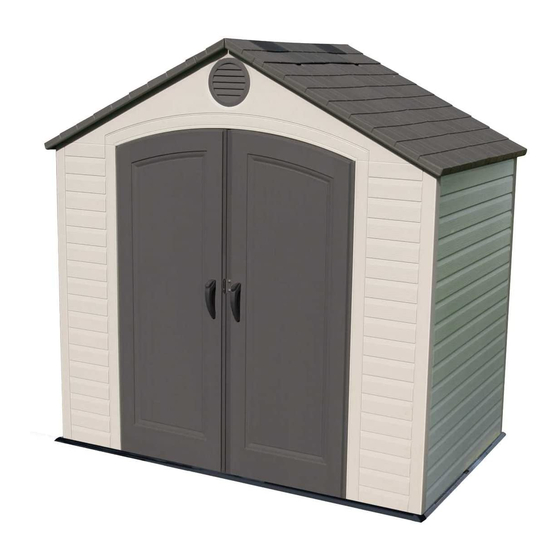
8' x 5' Outdoor Shed
MODEL #6418
ASSEMBLY
INSTRUCTIONS AND
OWNER'S MANUAL
Save this instruction in the event that the manufacturer has to be contacted for
replacement parts.
1
Advertisement

Related Manuals for Lifetime 6418


Summary of Contents for Lifetime 6418
- Page 1 ® VISIT THE LIFETIME WEB SITE WWW.LIFETIME.COM For Assistance, including missing or broken parts, Call Customer Service at: 1 (800) 225-3865 8’ x 5’ Outdoor Shed MODEL #6418 ASSEMBLY INSTRUCTIONS AND OWNER’S MANUAL Save this instruction in the event that the manufacturer has to be contacted for...
-
Page 2: Safety Instructions
MODEL #6418 REGISTER YOUR LIFETIME PRODUCT TODAY! There are benefi ts to registering your Lifetime product. With our new online product registration form, it’s fast and easy! Register with us at www.lifetime.com and enjoy these great benefi ts: • Receive exclusive money-saving offers from BuyLifetime.com, our online store, as well as NEW product notifi... - Page 3 Read This First! Before Beginning Assembly: A. Read the “Congratulations” letter on pages 4-5. B. Remove Parts List from the center of these instructions and make sure all parts are present and in good condition. C. Find the color “Construction Tips“ fl yer and refer to it during assembly. Indicates a helpful hint or important note.
- Page 4 IMPORTANT! Please Read...
-
Page 6: Site Selection
Before Beginning! Remove the Parts List from the center of this manual, and locate color “Construction Tips” insert in box. Site Selection a. The actual dimensions of your shed (at its widest and longest points) are 8’ x 5’. Be sure to select a site that will accommodate these measurements. - Page 7 Place the 2” x 4” x 90 1/2” boards on the inside of the frame. Nail each board in place with the 16d nails. To be sure to have studs in the correct location to nail plywood in the next step, start measuring here &...
- Page 8 OPTION 2: Filled Wood Frame Item Qty. 2” x 6” x 53” treated board* Be sure you use lumber that is treated and approved for 2” x 4” x 96” treated board* outdoor use. Cut outside frame to 8’ x 5’ outside dimensions: 8d 3.8cm common nails 2.54cm ‘L’...
- Page 9 2 Assemble Floor CAUTION Sharp objects may damage your 2.1: Lay Outer Floor Panel (109) fl at on the ground. Hold floor. If resting sharp, heavy the other Outer Floor Panel (109) at an angle (as shown) objects on your shed fl oor, place a and fi...
- Page 10 Assemble Left Wall SS (10) 4.1: Snap a Wall Panel (108) into place along shorter side of shed. Look to make sure holes line up and then fasten panels together with Screws (SS). Hardware Bag: Drill/Screwdriver 1001634 A second person should apply pressure on opposite side of the wall for easy insertion of screws.
- Page 11 Assemble Back Wall SS (10) 5.1: Insert two Wall Panels (108) along back side of shed. Fasten panels with Screws (SS). Ensure holes line up. Hardware Bags: Drill/Screwdriver 1001634 Second person should apply pressure Do Not Over- on opposite side of the wall for easy Tighten Screws insertion of screws.
- Page 12 Assemble Right Wall SS (5) 6.1: Snap a Wall Panel (108) into place along shorter side of shed. Ensure holes line up and then fasten panels together with Screws (SS). Drill/Screwdriver Hardware Bags: 1001634 Do Not Over-Tighten Screws Second person should apply pressure on opposite side of the wall for easy insertion of screws.
- Page 13 Left Door Assembly HM (2) 7.1: Rest Left Door (118) with front side down. Position Deadbolt Latches (HM) in slots at top and bottom of door then slide Door End Channel (AE) onto the door. (Not Actual Size) Hardware Bags: Rubber Mallet 1033168 Back of...
- Page 14 Right Door Assembly 8.1: Rest Right Shed Door (119) with front side down, then slide Door End Channel (AE) onto the door. Back of Door VC (3) 8.2: Fit Thumb Lever 8.3: Rotate the Thumb Lever into Knobs into Handle Grooves. the handle and slide forward until the knobs fi...
- Page 15 8.5: Attach Door Handle hardware to Right Door. HB (2) HX (2) HR (2) HH (2) Hardware Bags: 7/16” Wrenches (2) Screwdriver 1033168 You may need to nudge the Door End Channel to make the holes line up with the gap in the door. 8.6: Attach Door Spring (HD) to handle assembly.
- Page 16 Front Gable Assembly 9.1: Insert End Plugs (GB) into ends of Gable Support Square Tube (AF). Attach Gable Support Square Tube to Front Gable (111), and secure with Screws (GA). GA (6) Hardware Bags: Drill/Screwdriver 1020803 Only use a hand screwdriver on this step The Square Tube must be oriented...
-
Page 17: Before Beginning Assembly
Before Beginning Assembly Remove this Parts List and Hardware Identifi er from the Instructions and take an inventory of all Two Adults Required for Assembly parts in both boxes. ( + one Adult suggested as an instruction reader) Parts List Box 1 Reorder# Part#... - Page 18 Shed Parts (Not Actual Size) Back view Front view Back view Front view...
- Page 19 Small Hole Rectangle **U.S. and Canada customers ONLY** IF ASSISTANCE IS NEEDED, DO NOT CONTACT THE STORE! CALL OUR CUSTOMER SERVICE DEPARTMENT at 1 (800) 225-3865 HOURS: 7:00 a.m. to 5:00 p.m. Monday through Friday (Mountain Standard Time) **Call, or visit our Web site for Saturday hours** **For customers outside the U.S.
- Page 20 Shed Hardware (Actual Size) HV (1)
- Page 21 Install Doors and Front Gable 10.1: Push a Door Hinge Bushing (HU) up through the hole in the fl oor. 10.2: Hang the Left Door on the left front corner. Make sure bottom of HU (1) Hinge Pin fi ts into the Bushing. (Not Actual Size) Hardware Bags: 1033168 One person should hold doors in place...
- Page 22 10.6: Install Front Gable assembly. Top Hinge pins fi t into holes on underside of Front Gable 10.7: Secure both sides of Front Gable with Screws (SS). SS (6) Drill/ Hardware Bags: 1001634 Screwdriver...
- Page 23 Assemble Rear Gable SS (4) 11.1: Assemble the two halves of the Rear Gable (112 & 113). Hardware Bags: Drill/Screwdriver 1001634 11.2: Install Vent into the Rear Gable. Set aside until later. PB (5) VC (5) Drill/ Hardware Bags: HH11900 Screwdriver Second person should apply pressure on opposite side of the...
- Page 24 11.3: Attach the Rear Wall Support (AD) to the Gable assembly using six (6) 1/4” x 1 1/8” Pan-head Screws (GA) and one (1) #10 x 1 1/4” GC (1) Pan-head Screw (GC). 11.4: Insert the two (2) End Plugs (GB) into the ends of the Rear Wall Support.
- Page 25 Assemble Truss 12.1: Attach Brace (AB) to two Roof Truss Channels (AC) (one on each side of Brace). TC (4) HK (4) Secure Brace with Screws (TC) and Nuts (HK). TD (1) Hardware Bags: 3/8” Wrench (1) 1021658 The nut goes on outside of the truss.
- Page 26 12.3: Slide a Threaded Rod (SA) through the Roof Truss Brace and the top of the Truss Connector. HL (2) SA (1) Hardware Bags: 3/8” Wrench (1) 1001882 12.4: Secure the top and bottom of the Threaded Rod with a 1/4” Cap Nut (HL). Repeat Steps A-D for each Truss.
- Page 27 Be sure to carefully read and follow the roof installation instructions and notes. Following each step in the order listed will minimize potential complications during installation. 13.2: Place a Roof Panel (114) between the Truss and the Front Gable. Be sure the alignment nub in the roof panel fi...
- Page 28 13.4: Bottom lip of Roof Panel fi ts over wall panel and ridge fi ts into the top of the wall. Secure the Roof panel along the bottom edge with Screws (SS). SS (4) Be sure the ridge in the bottom of the Roof Panel fi...
- Page 29 13.6: Position the Front Roof Cap (115) as shown. Secure to Front Gable with Screws (SS). SS (4) Drill/Screwdriver Hardware Bags: 1001634 13.7: Install Rear Gable assembly. SS (14) Hardware Bags: Drill/Screwdriver 1001634...
- Page 30 13.8: Install Next Roof Panel. (Not actual size) AG (2) SS (22) Hardware Bags: Drill/Screwdriver 1001634 Note: The holes in the Roof Support Strips are for manufacturing purposes only. 13.9: Install last Roof Panel.
- Page 31 13.10: Position and Secure Center Roof Cap (117) along Truss. SS (4) Hardware Bags: Drill/Screwdriver 1001634 13.11: Connect centers of Front Roof Cap (115) and Center Roof Cap (117) with Screws (SS). SS (2) Only use a hand Hardware Bags: screwdriver on Drill/Screwdriver 1001634...
- Page 32 LA (6) Skylight Installation 14.1: Pre-fold Skylight before installing. LB (6) Screwdriver Hardware Bags: 1000315 14.2: Push folded skylight up through opening; open skylight; use tabs to pull skylight down into place. 14.3: Fasten skylight in place with screws (pull on tabs while inserting screw to provide resistance).
- Page 33 16 Anchor the Shed 16.1: After assembling your shed, you will need to anchor it to the ground through the four indentations in the shed fl oor. Consult your local hardware store for suggestions on the best hardware to use for anchoring your shed. 8’...
- Page 34 Attach Support Channels Here. Additional Shelf Locations Additional Shelves and Support Channels can be purchased from Buy Lifetime. These Shelves and Support Channels can be installed on any of the side walls, including Window Wall Panels. Two Shelf Support Channels...
- Page 35 ® Outdoor Shed purchase. By following the instructions below, your new Lifetime shed should provide you with years of service and enjoyment. Cleaning and Care The polyethylene walls and shelves are stain- and solvent resistant. To clean, use a mild soap and a soft-bristled brush.
- Page 36 CLAIMS IF PARTS ARE UNAVAILABLE OR OBSOLETE. 1. Lifetime outdoor sheds are warranted to the original purchaser to be free from defects in material or workmanship for a period of ten years from the date of original retail purchase. The word “defects” is defi ned as imperfections that impair the use of the product.
Need help?
Do you have a question about the 6418 and is the answer not in the manual?
Questions and answers