Table of Contents
Advertisement
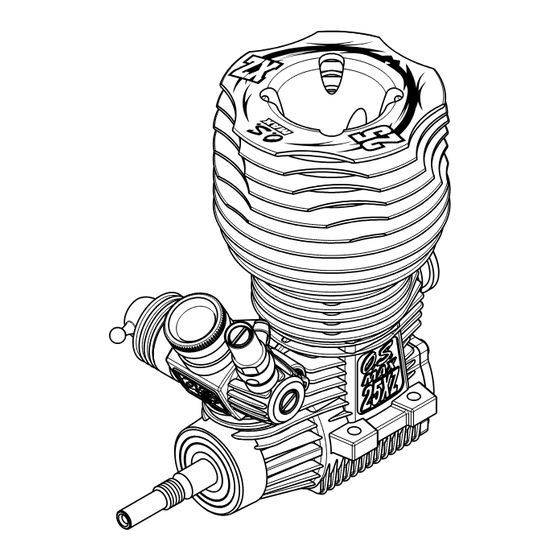
Expressly for 1/8 off-road truck (Truggy)
racing competitions
It is of vital importance, before attempting to operate
your engine, to read the general 'SAFETY
INSTRUCTIONS AND WARNINGS' section on
pages 2-5 of this booklet and to strictly adhere to the
advice contained therein.
Also, please study the entire contents of this
instruction manual, so as to familiarize yourself
with the controls and other features of the engine.
Keep these instructions in a safe place so that you
may readily refer to them whenever necessary.
It is suggested that any instructions supplied with
the vehicle, radio control equipment, etc., are
accessible for checking at the same time.
2 5
6
7
8
9
10-12
13
ENGINE EXPLODED VIEW & PARTS LIST
14
15
16
1
CONTENTS
19-23
24-26
27-29
30-33
34-35
36-37
38-39
17
18
40
Advertisement
Table of Contents

Related Manuals for O.S. engine MAX-25XZ


Summary of Contents for O.S. engine MAX-25XZ
-
Page 1: Table Of Contents
Expressly for 1/8 off-road truck (Truggy) racing competitions It is of vital importance, before attempting to operate your engine, to read the general 'SAFETY INSTRUCTIONS AND WARNINGS' section on pages 2-5 of this booklet and to strictly adhere to the advice contained therein. -
Page 2: Safety Instructions And Warnings About Your O.s. Engine
SAFETY INSTRUCTIONS AND WARNINGS ABOUT YOUR O.S. ENGINE Remember that your engine is not a "toy", but a highly efficient internal- combustion machine whose power is capable of harming you, or others, if it is misused. As owner, you, alone, are responsible for the safe operation of your engine, so act with discretion and care at all times. - Page 3 NOTES This engine is intended for model cars. • • The wearing of safety glasses is also Do not attempt to use it for any other strongly recommended. purpose. Mount the engine in your model • Take care that the glowplug clip or •...
-
Page 4: Engine Construction
Near TDC ENGINE CONSTRUCTION With this engine, the piston will feel tight at the top of its stroke Piston (TDC) when the engine is cold. Cylinder Liner This is normal. The cylinder bore has a slight taper. The piston and cylinder are designed to Crankshaft achieve perfect... -
Page 5: Notes On Operation
NOTES ON OPERATION While Operating GUARANTEE Please do not run on a public street, this This engine is constructed from the very could cause serious accidents, personal best materials available and to the very injuries and/or propetry damage. highest engineering standards, using the most advanced precision machinery. -
Page 6: Before Starting
BEFORE STARTING Tools, accessories, etc.The following items are M2000 EXHAUST HEADER PIPE ASSEMBLY necessary for operating the engine. This is designed to use with the T-2060 Tuned Silencer. Optional Extras GLOW PLUG T-Type (Turbo Plug) T-2060 WN TUNED SILENCER ASSEMBLY P3 is supplied with the engine. -
Page 7: Basic Engine Parts
Model engine fuel is also highly 7.2V BATTERIES FOR STARTER BOX flammable. Keep it away from open Batteries for starter box. flame, excessive heat, sources of Select according to the sparks, or anything else which might starter box used. Be sure to ignite it. -
Page 8: Carburetor Controls
CARBURETOR CONTROLS 21JN Four adjustable controls are provided on this carburetor. Carburetor Reducer The Needle-Valve(Adjusted at the factory): For adjusting the mixture strength when the throttle is fully open. Needle Valve The Mixture Control Valve: For changing the mixture strength at mid Dust Cover speed and acceleration. -
Page 9: Installation Of The Standard Accessories
INSTALLATION OF THE STANDARD ACCESSORIES Install the exhaust seal ring supplied. Installing the glow plug. Insert P3 plug supplied into heatsink-head carefully, making sure that it is not cross-threaded before tightening firmly. (All the O.S. T-Type plugs including the P3 are not supplied with a washer.) Exhaust Seal Ring... -
Page 10: Engine Installation
ENGINE INSTALLATION Make sure that the vehicle's engine mounting surfaces are level and in the same plane. Poor installation may cause distortion of the crankcase, bearings, etc., resulting in erratic running and loss of performance. Do not allow bottom The recommended screws for securing the of crankcase to engine are 3mm or 4-40 steel Allen hexagon touch chassis. - Page 11 The carburetor is set as shown below at the The following procedure is suitable for this factory. Start the engine as it is. engine when the O.S. T-2060WN tuned si- lencer and a fuel containing up to 30% ni- The needle-valve is set approx. 3.5 turns tromethane are used.
- Page 12 When the engine starts, warm it up by If the engine is allowed to run with the throttle repeatedly increasing the rpm to medium too far open under ''no load'' conditions (i.e. speed and back again to a fast idle with the with the driving wheels not in contact with the mixture very...
-
Page 13: Final Adjustment
FINAL ADJUSTMENT Final adjustment should be carried out only Run the vehicle (with throttle fully open) over after the running-in has been completed. the longest available straight course, in order to observe the model's speed. Next return Needle Valve the car to the starting point, close the Needle- Valve 15˚... -
Page 14: Care And Maintenance
Finally, beyond the nominal break-in period, Carburetor Body Ball Link a slight readjustment toward a leaner needle setting may be required to maintain Rotate the Metering Needle maximum performance. until its slotted head is flush with the ball link body. CARBURETOR CLEANLINESS This is the basic position. -
Page 15: Checking The Engine
5. Finally, when cleaning the exterior of the engine, use methanol or a household cleaning agent. Do not use gasoline, kerosene, or any petroleum based chemical which can damage silicone fuel tubing. Dirt and dust may lodge in marked places. CHECKING THE ENGINE If the engine will not develop normal performance after long time running due to wearing of parts. -
Page 16: Trouble Shooting
TROUBLE SHOOTING Symptom Engine fails to fire. Corrective action Cause Fuel tank is empty. Fill the tank with fuel and repeat Fuel not reaching the engine. Priming procedure. Glowplug element is burnt out. Replace glowplug. Glowplug battery discharged Recharge or replace the battery. Clean or replace fuel filter. - Page 17 Symptom Unstable idle Corrective action Cause Unsuitable glowplug Use suggested glowplug in the instructions. Do not use extremely high nitro or low oil content fuel. Unsuitable fuel Extremely light flywheel Add heavier flywheel. Install silencer securely. Silencer is disconnected or is loose Symptom Not reaching expected peak r.p.m.
-
Page 19: Carburetor Exploded View
CARBURETOR EXPLODED VIEW S.M3x3 Type of screw S...Set Screw CARBURETOR PARTS LIST Code No. Description 23781400 Ball Link No.3 26381501 Retaining Screw 23981520 Dust Cover 23818340 Metering Needle Assembly 27881820 "O" Ring (2pcs.) 22848210 Slide Valve 71533000 Carburetor Reducer 8mm (RED) 22615000 "O"... -
Page 20: O.s. Genuine Parts & Accessories
O.S. GENUINE PARTS & ACCESSORIES T-2060SC WN M2000SC EXHAUST GLOWPLUG TUNED SILENCER ASSEMBLY HEADER PIPE ASSEMBLY (71641300) (72106440) (72106130) Header Pipe Spring (2pcs.) Exhaust Seal Ring (2pcs.) (71641400) (72101272) (22826140) Joint Spring (3pcs.) Exhaust Seal Ring (2pcs.) (72106042) (22826140) T-2060SC WN TUNED M2000 EXHAUST T-2060WN TUNED SILENCER COMPLETE SET... -
Page 21: Three View Drawing
THREE VIEW DRAWING 4.09cc (0.25cu.in.) Displacement 17.5mm (0.689in.) Bore 17.0mm (0.6691in.) Stroke 4,000-39,000 r.p.m. Practical R.P.M. 3.1ps / 33,000 r.p.m. Power output 370g (13.05oz.) Weight 4- 3.3 UNF1/4-28 31.6 29.5 21.6 Dimensions (mm) 6-15 3-Chome Imagawa Higashisumiyoshi-ku Osaka 546-0003, Japan TEL.
Need help?
Do you have a question about the MAX-25XZ and is the answer not in the manual?
Questions and answers