Advertisement
Table of Contents
BRUKSANVISNING
BRUGSANVISNING
BRUKSANVISNING
GEBRAUCHSANWEISUNG
INSTRUCTIONS FOR USE
ISTRUZIONI PER L´USO
INSTRUKCJA OBS£UGI
»HC"P"K÷»fl œOÀ‹«Œ¬¿"EÀfl
NÁVOD K POU®ITÍ
HASZNÁLATI UTASÍTÁS
NAVODILA ZA UPORABO
KÄYTTÖOHJEET
MODE D'EMPLOI
8218-2221-70
S T I G A
DUO LINE
D U O L I N E +
15
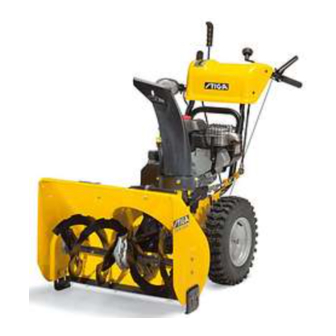
S N O W S T O R M
S N O W B L I Z Z A R D
SV .... 7
S N O W F L A KE
FI ... 15
S N O W P O W E R
DA . 23
NO. 31
DE .. 39
EN .. 48
FR ... 56
IT .... 64
PL ... 73
RU .. 82
CS... 92
HU100
SL.. 108
Advertisement
Table of Contents

Related Manuals for Stiga DUO LINE


Summary of Contents for Stiga DUO LINE
- Page 1 S T I G A DUO LINE D U O L I N E + S N O W S T O R M S N O W B L I Z Z A R D BRUKSANVISNING SV ..7 S N O W F L A KE KÄYTTÖOHJEET...
-
Page 3: Before Starting
SNOW FLAKE SNOW STORM 13 11 SNOW POWER SNOW BLIZZARD... -
Page 4: Adjusting Belt Guide
3 mm 12 - 13 mm... -
Page 5: Adjusting Control Wires
“A”... -
Page 7: Safety Instructions
ENGLISH PREPARATIONS 1 SYMBOLS • Check the area to be cleared and remove any loose or foreign objects. The following symbols appear on the machine. They are • Disengage all controls before starting the engine. there to remind you of the care and attention required in use. This is what the symbols mean: •... - Page 8 ENGLISH out of its place of storage. In this case ensure the door to 3 ASSEMBLY the storage place is open. Exhaust fumes are toxic. • Never drive across a slope. Move from the top down, and Note: Instructions to the left and right sides start from the from the bottom to the top.
- Page 9 ENGLISH CONTROL KNOB - GEAR LEVER, FIG. 5 4.10 ELECTRIC CABLE – ELECTRICAL START (10) 1. Screw the nut (J) onto the gear lever. Supplies power to the starting motor. Connect the cable to a 2. Mount the control knob (K) onto the gear lever. 220/230 volt earthed socket via an earthed extension lead.
-
Page 10: Fill Up The Petrol Tank
ENGLISH 4. Turn the choke to position . Note: A warm engine does 5 USING THE SNOW THROWER not need the choke (fig. 5. Press the rubber primer-start 2 or 3 times. Make sure the hole is covered when pressing the primer-start (fig 9). GENERAL Note: Do not use this function when the engine is warm. -
Page 11: Maintenance
ENGLISH 3. Turn the adjustment lever and set the deflector to throw 6 MAINTENANCE the snow in the direction of the wind. 4. Set the gear lever to a suitable position. The gear stick must not be moved if the driving OIL CHANGE clutch lever is depressed. -
Page 12: Service And Repairs
5. Remove the tension pulley (C) from the belt. See fig. 15. 6. Replace the belt (E in fig. 15). NOTE! Only genuine STIGA belts are to be used. 8 SERVICE AND REPAIRS 7. Adjust the belt tension according to the above instructions. - Page 13 ENGLISH ADJUSTING THE BELT GUIDE 8.6.2 ADJUSTING THE FRICTION WHEEL 1. Remove the spark plug protection. Dismantle the parts and measure according to the instructions in items 1-4 above. 2. Remove the belt protective cover (1) by loosening the screws (2). See fig. 16. 1.
- Page 14 Empty the petrol tank outdoors when the engine is The use of non-genuine spare parts cold. Do not smoke. Empty into a container The use of accessories not supplied or approved by Stiga designed for petrol. Neither does the guarantee cover: 3.
- Page 15 w w w. s t i g a . c o m G G P S w e d e n A B · B o x 1 0 0 6 · S E - 5 7 3 2 8 T R A N Å S...
Need help?
Do you have a question about the DUO LINE and is the answer not in the manual?
Questions and answers