
Related Manuals for INSTEON 75790WH


Summary of Contents for INSTEON 75790WH
- Page 1 INSTEON® Wireless IP Camera Owner’s Manual Model No. 75790WH (White) / 75790 (Black) Rev. 08.27.12...
-
Page 2: Table Of Contents
CONTENTS 1.0 WELCOME ....................................2 1.1 Features....................................2 1.2 What’s in the Box? ................................. 2 1.3 Product views ..................................3 1.4 Before Camera Use ................................4 2.0 SOFTWARE OPERATION ................................ 5 2.1 IP Camera Tool ..................................5 2.2 Camera Login ..................................8 2.3 Device Status .................................. - Page 3 INSTEON® Wireless IP Camera 4.1 Frequently Asked Questions ..............................37 4.4 Specifications ..................................43 5.0 OBTAINING TECHNICAL SUPPORT ............................. 44 insteon.com...
-
Page 4: Welcome
Remotely set up, access, control and manage the camera from anywhere via the embedded web page (supported by all versions of Internet Explorer, Safari, Firefox and Chrome) or home management software such as HouseLinc. Or, integrate it with the INSTEON SmartLinc Hub (sold separately) to use with the INSTEON iOS/Android smartphone and tablet app. -
Page 5: Product Views
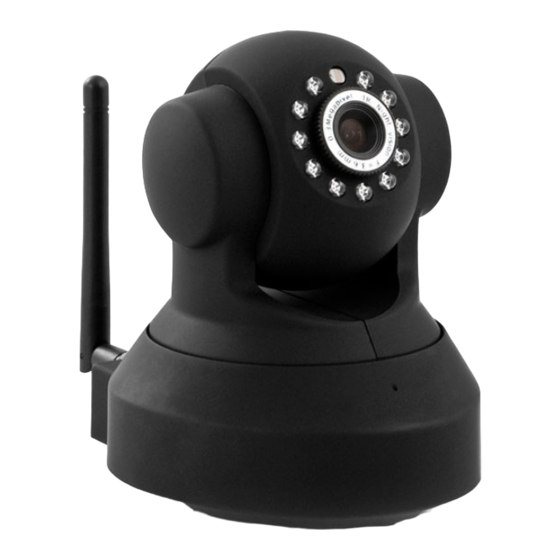
INSTEON® Wireless IP Camera 1.3 Product views 1.3.1 Front View 1.3.2 Back View insteon.com... -
Page 6: Before Camera Use
INSTEON® Wireless IP Camera 1.3.3 Bottom View The reset button is on the bottom of the camera. To reset the camera to factory default settings, make sure that power is supplied to the camera, then press and hold reset button for 15 seconds. After reset, your username and password will return to the factory default administrator username and password. -
Page 7: Software Operation
INSTEON® Wireless IP Camera Upon installation completion, restart computer. The IP Camera Tool icon will appear on the desktop automatically. NOTE: If you use Windows 7 and there is no icon on desktop after installation of the IP Camera Tool, check the camera software installation path. - Page 8 INSTEON® Wireless IP Camera There are three possible scenarios: 1) If no camera is found on the LAN: after about one minute of searching, the field will display “IP Server not found” and automatically shut down IP Camera Tool program. Check if DHCP is enabled on your router, or disable MAC address filtering if on WiFi.
- Page 9 INSTEON® Wireless IP Camera one is a wired MAC, and the other is a WiFi MAC. • Network Configuration: Configure network parameters • Obtain IP from DHCP server: If checked, camera will obtain its IP address from your DHCP server •...
-
Page 10: Camera Login
Access the camera through the IP Camera Tool, Internet Explorer (IE), Firefox, Chrome, Safari or the INSTEON iOS/Android smartphone and tablet app (requires SmartLinc Hub, sold separately). 1) Double-click the camera’s IP address. Your default browser will be automatically open and display the camera login page. - Page 11 INSTEON® Wireless IP Camera Internet Explorer Setup: Fill in the “admin” user name and click the first login button. The first time you log into the UI, you will receive an ActiveX prompt (as shown above). Right click on the active prompt and choose Run Add-on.
- Page 12 INSTEON® Wireless IP Camera Select Run on the next prompt. You will return to the login screen. Fill in the “admin” user name and click login again. You will see a live video feed. insteon.com...
- Page 13 INSTEON® Wireless IP Camera NOTE: If you cannot view live video after running ActiveX, change the port number to a number other than 80 and try again. Make sure all firewall or antivirus software on your computer is not set to block your camera. If you are unable to run the ActiveX control, try disabling your firewall or antivirus program.
-
Page 14: Device Status
INSTEON® Wireless IP Camera 2.3 Device Status Internet Explorer: If camera is connected properly, device status LED will be green. If LED is yellow, check that ActiveX is enabled, or change the port and try again. If you want to view the device information, choose For Administrator, then click Device Info. -
Page 15: For Visitor
INSTEON® Wireless IP Camera Firefox, Chrome and Safari: When you login to the UI, you will see Device Status which is the same as Device Info in Internet Explorer. 2.4 For Visitor Internet Explorer: insteon.com... -
Page 16: For Operator
INSTEON® Wireless IP Camera Multi-device window: The firmware inside the camera can support a maximum of nine simultaneous cameras. Add cameras in multi-device settings. OSD: Add a timestamp to the video with five character colors Add timestamp on record: Add a timestamp to a prerecorded video... - Page 17 INSTEON® Wireless IP Camera If you click here, the camera will horizontally and vertically rotate and then stop at the center Turn off IR light Turn on IR light Pre-determined location (vertical arrow): Rotate camera up and down. Click to stop.
- Page 18 INSTEON® Wireless IP Camera Audio: Listen to the IP Camera’s built-in microphone. We recommend connecting headphones or speakers to your computer. CloseAudio: Turn off camera audio. NOTE: If you receive a message stating you require a plugin, install VLC Media Player before using this function.
-
Page 19: For Administrator
INSTEON® Wireless IP Camera During installation, select the Mozilla plug-in. 2.6 For Administrator Internet Explorer: Click For Administrator. The Device Status will appear with the device ID, firmware version and other information about the camera. insteon.com... -
Page 20: Alias Settings
INSTEON® Wireless IP Camera Firefox, Chrome and Safari: Click Device Management to enter the administrator settings page. Device Info: This is similar to Device Status which will have the same information as IE. Multi-Device Settings: Since this function is controlled by ActiveX, it is not available in Firefox or Chrome. -
Page 21: User Settings
INSTEON® Wireless IP Camera Figure 3.2c 3.3 User Settings Set permissions for a visitor, operator and administrator, then click Submit. The camera will reboot. insteon.com... -
Page 22: Multi-Device Settings
INSTEON® Wireless IP Camera Here you can set the record file path and the alarm record file path for the camera. Record Path will store the file of a manual recording. Alarm record path will store the file of the recording when it is activated by motion (you must set motion alarm first). - Page 23 INSTEON® Wireless IP Camera To test, choose For Visitor and then click the button that corresponds with however many cameras you added. You will see the simultaneous live feeds from all the cameras. insteon.com...
- Page 24 INSTEON® Wireless IP Camera 3.4.2 Add Cameras in WAN If you want to view all cameras remotely, you will need to add them to use DDNS domain name. First, make sure all the cameras you added can be accessed over the Internet. (See Set DDNS settings in the Quick Start Guide.)
- Page 25 INSTEON® Wireless IP Camera If you have several cameras, you can use the same DDNS domain name; you only need to set a different port number for each camera. Click Multi-Device Settings. Choose the additional camera and fill in its name, DDNS domain name and port number.
- Page 26 INSTEON® Wireless IP Camera Go back to video window. You will see all of the cameras accessible through the Internet. When you are away from home, you can use the first camera’s DDNS domain name and port to view all the cameras via the Internet.
-
Page 27: Basic Network Settings
INSTEON® Wireless IP Camera 3.5 Basic Network Settings Set a static IP for the camera by choosing Basic Network Settings and selecting an address within your LAN. Follow the same procedure to access these settings in the IP Camera Tool. -
Page 28: Adsl Settings
INSTEON® Wireless IP Camera 3.7 ADSL Settings When directly connected to the Internet through ADSL, you can enter the ADSL username and password obtained from your ISP. 3.8 UPnP Settings Check Using UPnP to MAP Port, then click Submit. The camera’s software will be configured to port forwarding. We recommend you manually configure port forwarding on your router. - Page 29 INSTEON® Wireless IP Camera Make sure your sender address supports SMTP. Four recipients can be added to receive images. Use the correct SMTP port for your server; some SMTP servers require a specific port such as 587 or 465, so check with your ISP.
-
Page 30: Ftp Service Settings
INSTEON® Wireless IP Camera 6) Receiver is denied by server. This may be due to the anti-spam privacy of the server. 7) Message is denied by server. This may be due to the anti-spam privacy of the server. 8) Server does not support the authentication mode used by the device Report Internet IP by Mail: If selected, you will receive emails which contain internet IP information, such as when the camera is powered or the Internet IP has changed. - Page 31 INSTEON® Wireless IP Camera FTP server: Set up FTP Server to work with your camera (see topmost image). If you have a FTP server that can be accessed on the internet (see above image). FTP Port: Usually port 21 FTP Upload Folder: Make sure the folder in which you plan to store images exists and is erasable. The camera will not automatically create a folder.
-
Page 32: Alarm Service Settings
INSTEON® Wireless IP Camera Filename: Fill in a name for the uploaded image file. This name is different from the alarm image. You cannot change the name of the alarm image. Click Submit, then click Test. The following screen will appear if successful: The following errors may occur: 1) Cannot connect to the server. - Page 33 INSTEON® Wireless IP Camera Select it If the number is bigger and the sensibility is higher This will reduce false alarms such as light changes. If motion is detected after you enable Motion Detect Armed, the Alarm Status will update to Motion Detect Alarm.
- Page 34 INSTEON® Wireless IP Camera Select this option If you want the camera to send a motion detection email only during a specific time frame, use Scheduler to set the time range for motion alarm. 5) Upload images via FTP server when motion is detected. Set FTP Service Settings first and then...
- Page 35 INSTEON® Wireless IP Camera 2) Set a daily alarm schedule. Activate the camera alarm by selecting the time range in Scheduler. Click any hour between 00 and 23 in the Set row to highlight the row and activate a daily motion-detect alarm for that hour.
-
Page 36: Pan/Tilt Settings
INSTEON® Wireless IP Camera If you want the camera alarm activated most of the time, click Set All to highlight all boxes, then click the times you want the alarm deactivated. Click Submit. 3.14 Pan/Tilt Settings The standard pan/tilt (PT) speed is 3, but is easily adjusted from 1 to 10 (the higher the number, the slower the PT speed). -
Page 37: Upgrade Device Firmware
Note: Patrol rounds horizontal/vertical has no relation to the rotation rounds when the camera reboots. 3.15 Upgrade Device Firmware For latest firmware updates, visit INSTEON.com. 3.16 Backup and Restore Settings Click Submit to save all the parameters you have set. These parameters will be stored in a .bin that can be restored to load the previously set parameters. -
Page 38: Reboot Device
INSTEON® Wireless IP Camera 3.18 Reboot Device Click Reboot Device to power cycle the camera. To manually reboot, unplug the camera and plug it back in. 3.19 Log The log displays the users who have accessed the camera. 3.20 Back This will take you back to the video window. -
Page 39: Appendix
INSTEON® Wireless IP Camera 4.0 APPENDIX 4.1 Frequently Asked Questions Always confirm connectivity with your LAN and the internet prior to testing your camera. 4.1.1 I forgot my username and/or password. Reset the administrator username and password by making sure the camera is powered on, then pressing and holding the camera reset button for 15 seconds. - Page 40 INSTEON® Wireless IP Camera If ActiveX is running but you still cannot see live video, a red cross is displayed in the center of the video and a yellow light appears in the device status, change the port number (do not use port number 80).
- Page 41 INSTEON® Wireless IP Camera 3. Port forwarding is not successful (see How to Set DDN Service Settings in the Quick Start Guide). 4.1.5 IP Camera Tool can’t find my camera’s IP. 1. Verify that the network cable is securely fastened to the camera 2.
-
Page 42: Default Parameters
INSTEON® Wireless IP Camera 4.1.10 Why won’t my camera connect wirelessly? If your camera cannot connect wirelessly after you enable the wireless settings, power cycle the camera by unplugging the power cable and plugging it back in. Make sure your wireless settings are correct and match your wireless router or access point. - Page 43 INSTEON® Wireless IP Camera Netgear 1. Type your router’s address into an Internet browser. By default, this should be 192.168.0.1; the information should be provided in your router’s instructions or on the router itself. 2. You will be prompted to enter a username and a password. For Netgear devices, the default username is "admin"...
- Page 44 INSTEON® Wireless IP Camera 5. Enter the camera’s IP address (found in the IP Camera Tool device list) into the Server IP Address field. 6. In the "UPD/TCP" field select "Both." 9. You will need to specify a port range to have open for your camera. 8000-8999 is a good range to work with, but make sure the port you open does not conflict with any ports you may already have open (from your list of Services on the "Port Forwarding"...
-
Page 45: Specifications
INSTEON® Wireless IP Camera 10. After making sure you are not connected to your local wireless connection, open your smartphone’s Internet browser and enter your camera IP address followed immediately by a colon and the port you have opened (for example http://192.168.1.4:8030). You should see the camera login screen. -
Page 46: Obtaining Technical Support
5.0 OBTAINING TECHNICAL SUPPORT If you have tried these suggested solutions, reviewed this Owner’s Manual and still cannot resolve an issue you are having with INSTEON Wireless IP Camera, please call the INSTEON Support Line at 800-762-7845 or visit www.insteon.com/support.
Need help?
Do you have a question about the 75790WH and is the answer not in the manual?
Questions and answers