
Related Manuals for Lenovo B5400 Touch


Summary of Contents for Lenovo B5400 Touch
-
Page 1: User Guide
Lenovo User Guide Read the safety notices and important tips in the included manuals before using your computer. - Page 2 Notes • Before using the product, be sure to read Lenovo Safety and General Information Guide first. • The features described in this guide are common to most models. Some features might not be available on your computer and/or your computer might include features that are not described in this user guide.
- Page 3 Lenovo User Guide Instructions and technical information in this manual are applicable to the following Lenovo notebook computers unless otherwise stated. Model name Lenovo B5400/B5400 Touch 20278, 80B6 Lenovo M5400/M5400 Touch 20281, 80B5...
-
Page 5: Table Of Contents
Contents Chapter 1. Getting to know your computer .......... 1 Top view ........................1 Left-side view ......................6 Right-side view......................9 Front view ........................10 Bottom view .......................12 Chapter 2. Learning the basics............13 Configuring the operating system for the first time ..........13 Putting the computer to sleep or shutting it down ..........13 Connecting to a wireless network ................14 Help and support ......................14 Operating system interfaces (for the Windows 8 operating system) ....15... -
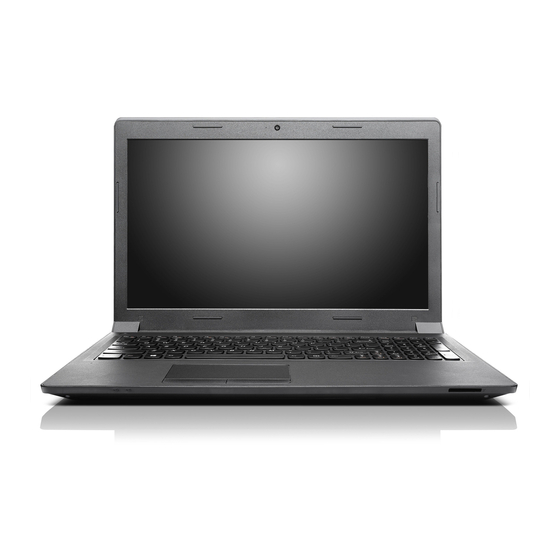
Page 7: Chapter 1. Getting To Know Your Computer
- - - - - - - - - - - - - - - - - - - - - - - - - - - - - - - - - - - - - - - - - - - - - - - - - - - - - - - - - - - - - - - - - - - - - - - - - - - - - - - - - - - - - - - - - - - - - - - - - - - - - - - - - - - - - - - - - - - - - B5400/B5400 Touch... - Page 8 Chapter 1. Getting to know your computer M5400/M5400 Touch Notes: • The dashed areas indicate parts that are invisible from outside. • The illustrations may differ from the actual product. Please refer to the actual product. Attention: • Do not open the display panel beyond 130 degrees. When closing the display panel, be careful not to leave pens or any other objects in between the display panel and the keyboard.
- Page 9 Chapter 1. Getting to know your computer Integrated Used for video communication or taking photos. camera (on select models) Built-in Captures sound which can be used for video conferencing, voice narration, or audio recording. microphone Wireless Connect to a wireless adapter to receive and send wireless radio signals.
-
Page 10: Using The Keyboard
Chapter 1. Getting to know your computer Using the keyboard Your computer has a numeric keypad and function keys incorporated in its standard keyboard. Numeric keypad The keyboard has a separate numeric keypad. To enable or disable the keypad, press the Numeric Lock key (Num Lock). Note: The numeric lock indicator is on when the numeric keypad is enabled. - Page 11 Chapter 1. Getting to know your computer The following is a brief introduction to the function key combinations. • On the Windows 7 operating system: Press Fn+Esc to open the camera and audio settings window. The camera preview is turned on. Change the Fn+Esc: camera and audio settings as desired.
-
Page 12: Left-Side View
• You are responsible for evaluating, selecting, and implementing the locking devices and security features. Lenovo offers no comment, judgment, or warranty regarding the function, quality, or performance of locking devices and security features. Ventilation slots Dissipate internal heat. -
Page 13: Connecting Usb Devices
Chapter 1. Getting to know your computer Connecting USB devices You can connect a USB device to your computer by inserting its USB plug (Type A) into the USB port on your computer. The first time you plug a USB device into a particular USB port on your computer, Windows automatically installs a driver for that device. -
Page 14: Connecting To A Wired Network
Chapter 1. Getting to know your computer Connecting to a wired network Wired connections are a reliable and safe way to connect the computer to the Internet. Cable Internet services use a cable modem connected to Cable the residential cable TV line. DSL is a family of related technologies that bring highspeed network access to homes and small businesses over ordinary telephone lines. -
Page 15: Right-Side View
To use the Lenovo OneLink connector, you need to remove the connector cover from the Lenovo OneLink connector first. Note: Ensure that you keep the connector cover. Reattach it to the Lenovo OneLink connector when you are not using the Lenovo OneLink connector. -
Page 16: Front View
Chapter 1. Getting to know your computer Front view - - - - - - - - - - - - - - - - - - - - - - - - - - - - - - - - - - - - - - - - - - - - - - - - - - - - - - - - - - - - - - - - - - - - - - - - - - - - - - - - - - - - - - - - - - - - - - - - - - - - - - - - - - - - - - - - System status For details, see “System status indicators”... - Page 17 Chapter 1. Getting to know your computer Using memory cards (not supplied) Your computer supports the following types of memory card: • Secure Digital (SD) card • Secure Digital High Capacity (SDHC) card • SD eXtended Capacity (SDXC) card •...
-
Page 18: Bottom View
Chapter 1. Getting to know your computer Bottom view - - - - - - - - - - - - - - - - - - - - - - - - - - - - - - - - - - - - - - - - - - - - - - - - - - - - - - - - - - - - - - - - - - - - - - - - - - - - - - - - - - - - - - - - - - - - - - - - - - - - - - - - - - Battery Keeps the battery pack secured in place. -
Page 19: Chapter 2. Learning The Basics
Chapter 2. Learning the basics Configuring the operating system for the first time - - - - - - - - - - You need to configure the operating system when it is first used. The configuration process may include the procedures below: •... -
Page 20: Connecting To A Wireless Network
Chapter 2. Learning the basics Shutting down the computer If you are not going to use your computer for a long time, shut it down. To shut down your computer: • For the Windows 7 operating system: Click Start Shut down. -
Page 21: Operating System Interfaces (For The Windows 8 Operating System)
Chapter 2. Learning the basics Operating system interfaces (for the Windows 8 operating system) - - - - - - - - - - - - - - - - - - - - - - - - - - - - - - - - - - - - - - - - - - - - - - - - - - - - - - - - - - - - - - - - - - - - - - - - - - - - - - - - - - - - - - - - - - Windows 8 comes with two main user interfaces: the Start screen and the Windows desktop. -
Page 22: Charms And The Charms Bar (For The Windows 8 Operating System)
Chapter 2. Learning the basics Charms and the charms bar (for the Windows 8 operating system) - - - - - - - - - - - - - - - - - - - - - - - - - - - - - - - - - - - - - - - - - - - - - - - - - - - - - - - - - - - - - - - - - - - - - - - - - - - - - - - - - - - - - - - - - Charms are navigation buttons that let you access basic tasks quickly. - Page 23 Chapter 2. Learning the basics Share charm The Share charm lets you send links, photos, and more to your friends and social networks without leaving the app you are in. Start charm The Start charm is a fast way to go to the Start screen. Devices charm The Devices charm enables you to connect or send files to connected external devices, including digital cameras, TVs, and printers.
-
Page 24: Chapter 3. Recovery System
Solving recovery problems on the Windows 7 operating system To reinstall the Windows 7 operating system, do one of the following: • Start the computer. When the Lenovo logo is displayed, press F11 and then follow the on-screen instructions to start the Product Recovery program. - Page 25 Chapter 3. Recovery system If you are unable to access the OneKey Recovery Pro workspace or the Windows environment, do one of the following: • Use a rescue medium to start the OneKey Recovery Pro workspace. • Use recovery media if all other methods of recovery have failed and you need to restore the hard disk drive to the factory default settings.
-
Page 26: Using The Windows Recovery Program On The Windows 8 Operating System
Chapter 3. Recovery system Using the Windows recovery program on the Windows 8 operating system - - - - - - - - - - - - - - - - - - - - - - - - - - - - - - - - - - - - - - - - - - - - - - - - - - - - - - - - - Your computer comes with a built-in recovery program provided by Windows. - Page 27 Chapter 3. Recovery system • Advanced startup options Advanced startup options enable you to start up from an external drive or disc, change your computer settings, change the startup settings of the Windows operating system, or restore the Windows operating system from a system image.
-
Page 28: Chapter 4. Troubleshooting
Where can I find warranty information? For the warranty applicable to your computer, including the warranty period and type of warranty service, see the Lenovo limited warranty flyer that came with your computer. ... -
Page 29: Recovery System
BIOS setup utility and set boot mode to UEFI or Legacy Support on the boot menu. Getting help How can I contact the customer support center? See “Chapter 3. Getting help and service” of Lenovo Safety and General Information Guide. -
Page 30: Troubleshooting
Chapter 4. Troubleshooting Troubleshooting - - - - - - - - - - - - - - - - - - - - - - - - - - - - - - - - - - - - - - - - - - - - - - - - - - - - - - - - - - - - - - - - - - - - - - - - - - - - - - - - - - - - - - - - - - - - - - Display problems When I turn on the •... - Page 31 • If you forget your user password, you must ask the system administrator to reset your user password. • If you forget your HDD password, a Lenovo authorized servicer cannot reset your password or recover data from the hard disk. You must take your...
- Page 32 - The combo audio jack is not used. - The speakers are selected as the playback device. Battery problems • Reset the battery gauge using Lenovo Energy Your computer shuts down before the power and Management. If the problem persists, replace with a battery status indicator new battery pack.
- Page 33 Chapter 4. Troubleshooting Other problems Your computer does not • To turn off your computer, press and hold the power respond. button for 4 seconds or more. If the computer still does not respond, remove the battery pack and the AC power adapter.
-
Page 34: Appendix A. Cru Instructions
Notes: • The illustrations used in this chapter are of the Lenovo M5400, unless otherwise stated. • The illustrations in this manual might differ from the actual product. Please refer to the actual product. - Page 35 Appendix A. CRU instructions 3 Unlock the manual battery latch . While holding the spring-loaded battery latch in the unlocked position , remove the battery pack in the direction shown by the arrow 4 Install a fully charged battery pack. 5 Slide the manual battery latch to the locked position.
-
Page 36: Replacing The Backup Battery
Appendix A. CRU instructions Replacing the backup battery - - - - - - - - - - - - - - - - - - - - - - - - - - - - - - - - - - - - - - - - - - - - - - - - - - - - - - - To replace the backup battery, do the following: 1 Turn off the computer. - Page 37 Appendix A. CRU instructions 5 Unplug the backup battery connector, and then remove the backup battery 6 Install a new backup battery. Insert the backup battery connection firmly. 7 Reinstall the computer cover, and then reinstall the screws. 8 Reinstall the battery. For details, see “Replacing the battery pack” on page 28.
-
Page 38: Replacing The Hard Disk Drive
- - - - - - - - - - - - - - - - - - - - - - - - - - - - - - - - - - - - - - - - - - - - - - - - - - - - - - - You can increase the storage capacity of your computer by replacing the hard disk drive with one of greater capacity. You can purchase a new hard disk drive from your reseller or Lenovo marketing representative. Notes: •... - Page 39 Appendix A. CRU instructions To replace the hard disk drive, do the following: 1 Turn off the computer; then disconnect the AC power adapter and all cables from the computer. 2 Close the computer display, and then turn the computer over. 3 Remove the battery pack.
- Page 40 Appendix A. CRU instructions 5 Remove the frame fixing screw 6 Remove the hard disk drive by gently pulling in the direction of the arrow 7 Remove the screws and detach the metal frame from the hard disk drive. 8 Attach the metal frame to a new hard disk drive and tighten the screws. 9 Slide the new hard disk drive firmly into place, and then reinstall the frame fixing screw to secure the drive.
-
Page 41: Replacing Memory
Appendix A. CRU instructions Replacing memory - - - - - - - - - - - - - - - - - - - - - - - - - - - - - - - - - - - - - - - - - - - - - - - - - - - - - - - - - - - - - - - - - - - - - - - - - - - - - - - - - - - - - - - - You can increase the amount of memory in your computer by installing double data rate three synchronous dynamic random access memory (DDR3 SDRAM)-available as an option-in the memory slot of your computer. - Page 42 Appendix A. CRU instructions 6 If two DDR3 SDRAM modules are already installed in the memory slot, remove one of them to make room for the new one by pressing out on the latches on both edges of the socket at the same time. Be sure to save the old DDR3 SDRAM for future use.
- Page 43 Appendix A. CRU instructions Note: If only one DDR3 SDRAM module is installed in the computer you are servicing, the card must be installed in SLOT-0 ( : lower slot), and not in SLOT-1 ( : upper slot). To make sure that the DDR3 SDRAM module is installed correctly, do as follows: 1 Turn the computer on.
-
Page 44: Replacing The Wireless Lan Card
Appendix A. CRU instructions Replacing the wireless LAN card - - - - - - - - - - - - - - - - - - - - - - - - - - - - - - - - - - - - - - - - - - - - - - To replace the wireless LAN card, do the following: 1 Turn off the computer;... - Page 45 Appendix A. CRU instructions 6 Remove the wireless LAN card 7 Install the new wireless LAN card. 8 Reinstall and tighten the screw. 9 Reconnect the two wireless LAN cables (one black, one white). Note: When installing or reinstalling the wireless LAN card, make sure to plug the black cable into the jack labeled AUX and the white cable into the jack labeled MAIN.
-
Page 46: Replacing The Optical Drive
Appendix A. CRU instructions Replacing the optical drive - - - - - - - - - - - - - - - - - - - - - - - - - - - - - - - - - - - - - - - - - - - - - - - - - - - - - - - - - - - - - - - To replace the optical drive, do the following: 1 Turn off the computer;... - Page 47 Appendix A. CRU instructions 6 Gently pull the optical drive out 7 Insert a new optical drive, and then reinstall the screw to secure the drive. 8 Reinstall the bottom slot cover, and then reinstall the screws to secure the cover.
- Page 48 Appendix A. CRU instructions The following table provides a list of CRUs for your computer, and informs you of where to find replacement instructions. Self-service CRUs Setup Poster User Guide AC power adapter × Power cord for AC adapter × Battery pack ×...
-
Page 49: Trademarks
Trademarks The following terms are trademarks of Lenovo in the United States, other countries, or both: Lenovo OneKey Microsoft and Windows are either registered trademarks or trademarks of Microsoft Corporation in the United States and/or other countries. Other company, products, or service names may be trademarks or service marks... - Page 50 en-US Rev. AA00...
Need help?
Do you have a question about the B5400 Touch and is the answer not in the manual?
Questions and answers