Table of Contents
Advertisement
Advertisement
Table of Contents

Related Manuals for Suzuki SP-67


Summary of Contents for Suzuki SP-67
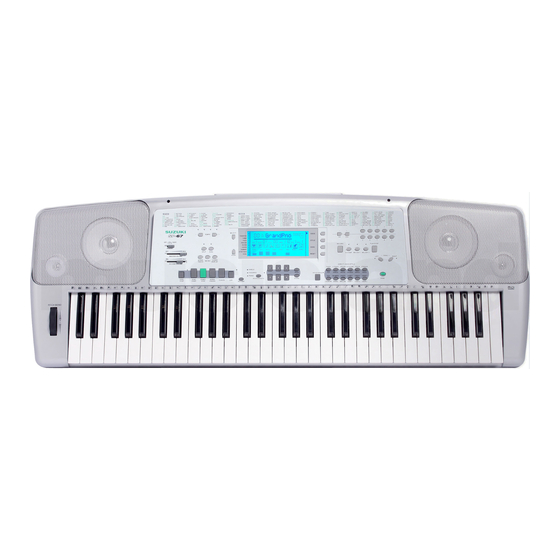
- Page 1 SUZUKI Pianos SP-67 PORTABLE KEYBOARD OWNER’S MANUAL SUZUKI...
- Page 3 WELCOME! We would like to express our appreciation and congratulate you for purchasing this Suzuki portable keyboard. This keyboard has been designed to provide you with years of musical enjoyment. State of the art electronics are combined with an elegant and user friendly control panel desing.
- Page 4 GENERAL PRECAUTIONS CAUTION RISK OF ELECTRIC SHOCK DO NOT OPEN CAUTION: TO REDUCE THE RISK OF ELECTRIC SHOCK, DO NOT REMOVE COVER OR BACK NO USER-SERVICEABLE PARTS INSIDE REFER SERVICING TO QUALIFIED SERVICE PERSONNEL INSTRUCTIONS PERTAINING TO A RISK OF FIRE, ELECTRIC SHOCK OR INJURY: The lightning flash with arrowhead symbol, within an equilateral triangle, is intended to alert the user to the presence of not insulated or “dangerous voltage”...
- Page 5 TAKING CARE OF YOUR DIGITAL PIANO This Suzuki digital piano will supply you with years of musical enjoyment if you follow the simple rules listed below. LOCATION CLEANING Do not expose the instrument to the follow- Clean the cabinet and panel with a dry ing conditions to avoid deformation, discol- soft cloth.
-
Page 6: Table Of Contents
TABLE OF CONTENTS EASY SET UP AND QUICK PLAY ..........7 PANEL CONTROLS ..............8 WHEEL ..................18 DISPLAY ................... 19 DEMO ..................21 KEYBOARD VOICES ..............22 Voice Selection ................22 Dual (Layer) ................23 Split (Lower)................23 RHYTHM SECTION ..............24 Rhythm Style Select .............. -
Page 7: Easy Set Up And Quick Play
Please note, to prevent possible damage due to battery leakage, remove the batteries from the instrument if it is not to be used for an extended period of time. Battery leakage is not covered under the Suzuki warranty. USING THE AC POWER ADAPTOR: Plug the output cable of the sup-... -
Page 8: Panel Controls
ENDING ACCOMP This Suzuki Keyboard control panel is user friendly. The following is a brief description of all the features located on the control panel. POWER SWITCH - Slide the power switch to the middle, ON setting, to turn the piano on. - Page 9 PANEL CONTROLS SUZUKI – TEMPO SELECT TRANSPOSE SP- 67 TUNING TOUCH PERCUSS STANDBY REVERB CHORUS SPLIT DUAL HARMONY AFTER TOUCH VOICE MODE AFTER METRO CHORD MASTER VOLUME TOUCH DISPLAY ACCOMP VOLUME SINGLE FINGERED PIANO REGISTER/OTS SYNC SYNC START/ INTRO/ FILL IN...
- Page 10 PANEL CONTROLS SUZUKI – TEMPO SELECT TRANSPOSE SP- 67 TUNING TOUCH PERCUSS STANDBY REVERB CHORUS SPLIT DUAL HARMONY AFTER TOUCH VOICE MODE AFTER METRO CHORD MASTER VOLUME TOUCH DISPLAY ACCOMP VOLUME SINGLE FINGERED PIANO REGISTER/OTS SYNC SYNC START/ INTRO/ FILL IN...
- Page 11 PANEL CONTROLS SUZUKI – TEMPO SELECT TRANSPOSE SP- 67 TUNING TOUCH PERCUSS STANDBY REVERB CHORUS SPLIT DUAL HARMONY AFTER TOUCH VOICE MODE AFTER METRO CHORD MASTER VOLUME TOUCH DISPLAY ACCOMP VOLUME SINGLE FINGERED PIANO REGISTER/OTS SYNC SYNC START/ INTRO/ FILL IN...
- Page 12 PANEL CONTROLS SELECT TRANSPOSE VOICE TUNING TOUCH STYLE PERCUSS REVERB CHORUS SONG HARMONY AFTER TOUCH RESET VOICE MODE SINGLE VOICE/STYLE FINGERED PAGE PIANO STORE REGISTER/OTS ACCOMP SELECT - The SELECT button is used to adjust or change the parameter of a num- ber of settings.
- Page 13 PANEL CONTROLS SELECT TRANSPOSE VOICE TUNING TOUCH STYLE PERCUSS REVERB CHORUS SONG HARMONY AFTER TOUCH RESET VOICE MODE SINGLE FINGERED VOICE/STYLE PAIGE PIANO STORE REGISTER/OTS ACCOMP SONG - This “music training” feature can be used as an aid to learn 100 songs built into this piano.
- Page 14 PANEL CONTROLS SELECT TRANSPOSE VOICE TUNING TOUCH STYLE PERCUSS REVERB CHORUS SONG HARMONY AFTER TOUCH RESET VOICE MODE SINGLE VOICE/STYLE FINGERED PAGE PIANO STORE REGISTER/OTS ACCOMP REGISTER (REGISTRATION) / OTS (ONE TOUCH SETTING) Registration is used to save keyboard settings so your favorites can be recalled instantly.
- Page 15 PANEL CONTROLS – VOICE STYLE RECORD PLAY/STOP SONG ACCOMP MEL 1 MEL 2 LEFT —— SONG —— RIGHT RESET PIANO E.PIANO ORGAN N.GUITAR VIOLIN STRINGS TECH.POP DANCE S.BALLAD SWING RHUMBA VOICE/STYLE TRUMPET SYNTH USER1 USER 2 USER 3 DEMO COUNTRY ROCK BOOGIE USER 1...
- Page 16 PANEL CONTROLS – VOICE STYLE RECORD PLAY/STOP SONG ACCOMP MEL 1 MEL 2 LEFT —— SONG —— RIGHT RESET PIANO E.PIANO ORGAN N.GUITAR VIOLIN STRINGS TECH.POP DANCE S.BALLAD SWING RHUMBA VOICE/STYLE TRUMPET SYNTH USER1 USER 2 USER 3 DEMO COUNTRY ROCK BOOGIE USER 1...
- Page 17 PANEL CONTROLS – VOICE STYLE RECORD PLAY/STOP SONG ACCOMP MEL 1 MEL 2 LEFT —— SONG —— RIGHT RESET PIANO E.PIANO ORGAN N.GUITAR VIOLIN STRINGS TECH.POP DANCE S.BALLAD SWING RHUMBA VOICE/STYLE TRUMPET SYNTH USER1 USER 2 USER 3 DEMO COUNTRY ROCK BOOGIE USER 1...
-
Page 18: Wheel
WHEEL The wheel is located on the left of the keyboard. PITCH BEND – PITCH BEND WHEEL - The PITCH BEND wheel allows you to smoothly raise or lower the pitch. During or immediately after a note or notes have been played on the key- board, roll the PITCH BEND wheel up, away from you, to raise the pitch, or down, towards you, to lower the pitch of the note(s) played. -
Page 19: Display
DISPLAY This Suzuki piano is equipped with a backlit LCD multi-display. It will display the voice, accompaniment type and other parameter changes in real time. SELECT TRANSPOSE 001 : Grand Pno REVERB VOICE TUNING CHORUS TOUCH VOICE STYLE TEMPO PAGE... - Page 20 DISPLAY SELECT TRANSPOSE off : Harmony REVERB VOICE TUNING CHORUS TOUCH VOICE STYLE TEMPO PAGE STYLE PERCUSS REVERB CHORUS SONG A.VOL BASS CHD1 CHD2 PHRS1 PHRS2 HARMONY AFTER TOUCH RESET VOCAL MODE SELECT MENU INDICATOR - As the SELECT button is pressed this indicator will point to the available menu options.
-
Page 21: Demo
DEMO PLAYING THE DEMO SONGS - This piano has ten different demonstration songs that are designed to showcase the different sampled voices that are available. The display will show the song number with a “d” prefix. When playing all the songs, “ALL” will appear on the dis- play initially, and will change to the demo song number as it plays. -
Page 22: Keyboard Voices
KEYBOARD VOICES VOICE SELECTION - There are 138 GM (General MIDI) voices available on this piano. There is a complete list of all 138 voices in the back of the manual and on the piano cabinet. PIANO E.PIANO ORGAN N.GUITAR VIOLIN STRINGS TECH.POP... -
Page 23: Dual (Layer)
KEYBOARD VOICES USER DEFINED QUICK SELECTION BUTTON - You can assign a favorite voice to a quick select button in the follow manner. Select the desired voice by using the numeric pad or the +/YES, –/NO buttons. Please refer to selecting one of the 138 voices. Press, and hold, one of the USER buttons, USER 1, USER 2, or USER 3. -
Page 24: Rhythm Section
RHYTHM RHYTHM STYLE SELECTION - This piano offers 100 professionally produced rhythm styles and a variation of each style pattern to choose from. There is a complete list of all 100 styles in the back of the manual and listed on the keyboard cabinet. For dynamic effect you may select from 10 different drum kits. -
Page 25: Adjusting The Tempo
RHYTHM SELECTING ONE OF THE 100 STYLES Press the STYLE button to engage the style selection mode, the indicator will light up. STYLE Use the numeric pad or the +/YES, –/NO buttons to select a style number while the indicator is lit. Please note, when using the number pads, you must enter two digits to select a style number from 00-99. -
Page 26: Starting And Stopping The Rhythm Style
RHYTHM STARTING AND STOPPING THE RHYTHM STYLE - There are several ways to start and stop the rhythm style. SYNC SYNC START/ INTRO/ FILL IN STOP START STOP ENDING STRAIGHT START - The START/STOP button starts the selected rhythm style immediately with the percussive rhythm. Press the START/STOP button again to stop the accompaniment. -
Page 27: Variation
RHYTHM SYNC SYNC START/ INTRO/ FILL IN STOP START STOP ENDING VARIATION - The main pattern of the rhythm style is played in a loop. There is a main pattern and a variation for most styles and their introduction, ending and fill-in patterns. To select the variation of the main patterns, press the VARIATION button. -
Page 28: Auto Accompaniment (Auto Base Chord)
AUTO ACCOMPANIMENT AUTO ACCOMPANIMENT (AUTO BASS CHORD) - Most rhythm styles have their own auto accompaniment, dedicated to that rhythm style. These auto accompaniments create fully orchestrated rhythm, bass and chord progressions based on the chords that you play with your left hand. The selected rhythm style determines the characteristics of the auto accompaniment. -
Page 29: Chord Display
AUTO ACCOMPANIMENT CHORD DISPLAY - When the chord display feature is engaged the display screen will show the names of the chords as you play them while the auto accompaniment is engaged, depending on the fingering mode. Press the CHORD DISPLAY button, the chord display icon will be underlined in the display screen. -
Page 30: Fingered
AUTO ACCOMPANIMENT FINGERED MODE - The fingered mode is ideal if you already know how to play chords on the keyboard. It allows you to play the chords in the auto accompaniment section of the keyboard that produce the selected auto accompaniment pattern. Please note, if a chord played cannot be recognized (fingered beyond the table), the previous chord will keep playing. -
Page 31: Piano
AUTO ACCOMPANIMENT PIANO CHORD MODE - When the Piano fingering chord mode is engaged you may enter chords anywhere on the keyboard, SINGLE and the auto accompaniment will make complete styled arrangements. You are not limited to the auto accompani- FINGERED ment section or the range of the split point. -
Page 32: Starting And Stopping The Auto Accompaniment
AUTO ACCOMPANIMENT STARTING AND STOPPING THE AUTO ACCOMPANIMENT SYNC SYNC START/ INTRO/ FILL IN STOP START STOP ENDING STRAIGHT START - The START/STOP button starts rhythm style imme- diately, the auto accompaniment will start as soon as you play a recognized chord in the auto accompaniment section of the key- board, depending on the mode selected. -
Page 33: Variation
AUTO ACCOMPANIMENT SYNCHRONIZED STOP - Synchronized Stop allows you to start and stop the accompaniment as you play in the accompaniment section of the keyboard. Press the SYNCH STOP button to engage the synchronized stop mode, the indicator will light up. Start the rhythm style, SYNC STOP after you begin to play in the accompaniment section of the... -
Page 34: Select Controls
SELECT CONTROLS The Select mode is used to set up or to adjust various parameters related to the operation of this keyboard. The SELECT button will access a menu for Transpose, Tuning, Touch sensitivity, Percussion mode and drum kit selection, Reverb and reverb level, Chorus and chorus level, and Harmony and harmony type selection, the After Touch level, and Vocal prompting. -
Page 35: Transpose
SELECT CONTROLS TRANSPOSE - The transpose feature can shift the pitch of the keyboard up or down in semitone intervals up to a maximum of 12 semitones, one octave. Transposing the pitch of the keyboard makes it easier to play in difficult key signatures. Please note, transpose does not affect notes that are sounding, or the keyboard percussion. -
Page 36: 04 : Tune
SELECT CONTROLS TUNE - The pitch of this piano is very accurate and stable, it is automatically set to stan- dard A440 pitch when the piano is turned on. The tuning feature makes it possible to tune the pitch of the instrument in fine intervals. If necessary, you can match the piano to another instrument or singer. -
Page 37: Touch
SELECT CONTROLS TOUCH - The piano offers four types of keyboard touch sensitivity settings, soft, normal, hard, and off. These are also known as velocity or dynamic curves and are designed to suit your style of playing. The normal setting is selected automatically when the piano is turned on. -
Page 38: Keyboard Percussion (Drum Kit)
SELECT CONTROLS KEYBOARD PERCUSSION (DRUM KIT SELECTION) - When keyboard percussion has been engaged, the entire keyboard will play the percussion voices from the selected Drum kit. These voices are graphically depicted above the keys. There are ten drum kits, based on the Standard Kit, that can be assigned. Kit 10 is a sound effects kit. -
Page 39: Reverb
SELECT CONTROLS REVERB (REVERB LEVEL SETTING) - Reverb simulates the effect of playing in a big room or hall where the sound reverberates off the walls and ceiling. The reverb effect is engaged automatically when the power is turned on. You can switch the reverb feature on and off or change the level of reverb from the Select controls menu. -
Page 40: Chorus
SELECT CONTROLS CHORUS (CHORUS LEVEL SETTING) - The Chorus effect enriches your performance by adding depth and texture to the selected sound. Use the Select controls menu to engage the chorus effect and the level of chorus. When chorus has been engaged the chorus icon will appear on the display screen. -
Page 41: Harmony
SELECT CONTROLS HARMONY (HARMONY TYPE SELECTING) - When harmony is engaged, a single note on the right-hand section of the keyboard will sound with additional auto harmony notes, when the auto accompaniment is engaged. There are three types of harmony that can be selected. -
Page 42: After Touch
SELECT CONTROLS AFTER TOUCH - When after touch, or sustain, is engaged all volumes of the keys, as they are played, will decay gradually as if you were continuing to hold down the piano keys. To engage the after touch AFTER feature press the AFTER TOUCH button, the after touch icon will TOUCH... -
Page 43: Vocal Prompt (Grade)
SELECT CONTROLS VOCAL (GRADE) - Grade is a setting used in the music training course. The training system will evaluate your performance and give a vocal comment, with a screen display of your percentage correct. The grading values are, “OK”, “Good”, “Very good”, and “Excellent”. -
Page 44: One Touch
ONE TOUCH When the one touch setting feature is engaged the piano will automatically change to an ideal setting for each rhythm style in one quick operation. There are six one touch settings for each rhythm style. The selected one touch settings may be edited to create a unique setting of your own, and then saved in the registration memory. -
Page 45: Registration Memory
REGISTRATION MEMORY A registration is a particular set up of style, voice, chord and other parameters or features you are using. This piano has 24 registration memories, four banks each with six registra- tions, for your favorite settings to be saved and recalled quickly by pressing a button. The unit is equipped with a backup battery, so the data in the registration memory is non- volatile and will not be lost when the power is turned off. - Page 46 REGISTRATION MEMORY PAIGE STORE REGISTER/OTS RECALL CONTENTS IN THE REGISTRATION MEMORY If necessary press the REGISTRATION/OTS button to engage the registration memory mode, the indicator will light up. REGISTER/OTS Select the bank you desire by repeatedly pressing the PAGE button until that bank number shows on the display screen. PAIGE Press the number button 1-6 buttons that corresponds to the registration memory in the selected bank that you desire.
-
Page 47: Record
RECORD This piano is equipped with a real time recorder, able to store one song, with a 3-track sequencer. It will record all note events and the accompaniment flow exactly as they are performed. This recorded information is nonvolatile and therefore will not be lost when the power is turned off. - Page 48 RECORD RECORDING (continued) Record - Your performance can be recorded in the following ways: Record Melody Track Only If the MELODY 1 or MELODY 2 buttons are selected the record- ing will begin as soon as you play on the keyboard. MEL 1 MEL 2 Please note, turn the fingering mode to off when recording on a...
-
Page 49: Playback
RECORD RECORD PLAY/STOP ACCOMP MEL 1 MEL 2 PLAYBACK - To hear your recording follow these directions. Press the track buttons that you wish to hear, if there is recorded information the indicator will light up. If the indicators of the recorded tracks are lit up and if you do not wish to hear a track, press the corresponding track button to turn that track off. -
Page 50: Training
TRAINING The SONG button will access a music teaching package that can be used to improve your playing. There are 100 songs built into the piano as reference for your performing exer- cises. Please note, if you press the SONG button, and then press the START/STOP button, the training songs will play back. - Page 51 TRAINING Right hand exercise - Press the RIGHT button, the indicator will LEFT —— SONG —— RIGHT light up. Then press the START/STOP button, after the metro- nome sound the auto accompaniment will playback, and you should play the right hand melody following the rhythm. Left hand exercise - Press the LEFT button.
-
Page 52: M I D I
Whether you interface with computers, sequencers, expanders or other keyboards your musical horizons will be greatly enhanced. For further information on MIDI and MIDI equipment that is available, please contact your local Suzuki music store. FOOT SUSTAIN... - Page 53 M I D I Output from an external MIDI devise - Connect the MIDI In terminal of the piano and the MIDI Out terminal of an external device. Data generated on another devise can sound on your piano. — MIDI — Output to and external sound generator - Connect the MIDI Out terminal of the piano and the MIDI in terminal of an external device, keyboard, synthesizer, or sound module, and the external...
-
Page 54: Midi Implementation Chart
MIDI IMPLEMENTATION CHART Function Transmitted Recognized Remark Basic Channel 1 CH 1-16 CH Channel changed 1-16 CH 1-16 CH Default Mode Note Number 9-120 0-127 Velocity: Note On Velocity: Note Off Pitch Bender Control Change: 0 Variation page Modulation Portamento value 7, 10 Volume, Pan Expression... -
Page 55: Voice List
VOICE LIST No. VOICE No. VOICE No. VOICE No. VOICE STRINGS SYNTH LEAD SOUND EFFECT PIANO 041 Violin 081 Square 121 Guitar Fret Noise 001 Grand Piano 042 Viola 082 Sawtooth 122 Breath Noise 002 Bright Piano 043 Cello 083 Caliope 123 Seashore 003 Electric Piano 044 Contra bass... -
Page 56: Style List
STYLE LIST STYLE STYLE STYLE STYLE DISCO JAZZ BALLROOM Disco 1 Pop 1 Jazz 1 Waltz 1 Disco 2 Pop 2 Jazz 2 Waltz 2 Disco 3 Pop 3 BeBop Waltz 3 Disco 4 Pop 4 Jive Waltz 4 Disco 5 Pop 5 R &... -
Page 57: Drum Kit List
DRUM KIT LIST DRUM KIT LIST 1 No.-Key Standard (0) Room (8) Power (16) Electronic (24) TR-808 (25) P-1: Standard P-2: Room P-3: Power P-4: Electronic P-5: TR-808 27-E High Q High Q High Q High Q High Q 28-E1 Slap Slap Slap... - Page 58 DRUM KIT LIST DRUM KIT LIST 2 No.-Key Jazz (32) Brush (40) Orchestra (48) Chinese (58) Effects (56) P-6: Jazz P-7: Brush P-8: Orchestra P-9: Chinese P-10: SFX 27-E High Q High Q High Q Drum + Hey! 28-E1 Slap Slap Slap Low Pai Gu...
- Page 59 DRUM KIT LIST Please note: In the drum kit lists on the previous two pages, the first title row, the number in the bracket after the kit name, is the MIDI program number. The Drum kit name and number that are shown on the LCD display are listed in the second title row.
-
Page 60: Connector Panel / Pedals
CONNECTOR PANEL / PEDALS These connector jacks are located on the back panel of the piano. FOOT SUSTAIN HEADPHONES/ DC 12VIN VOLUME PEDAL AUX OUT — MIDI — MIDI OUT / MIDI IN - This piano contains MIDI in and MIDI output ports. MIDI jacks allow communication with other products equipped with MIDI interfaces. -
Page 61: Specifications
SPECIFICATIONS SPECIFICATIONS KEYBOARD Pitch Bend Wheel 61-note, weighted touch sensitive keyboard with aftertouch AUTO BASS CHORD MODE Single Fingered VOICES Piano 138 Voices ( including ten Asian folk instrument voices) 9 Drum kits AUTO ACCOMPANIMENT STYLE 1 Effects kit 100 Auto accompaniment styles 12 quick select voice buttons twelve quick select style buttons VOICE MODE... -
Page 62: Warranty
WARRANTY This product, except the exterior cosmetic parts, is warranted by the Suzuki Corporation to the original purchaser to be free from defects in material and workmanship under normal use as follows: 1. For a period of 90 days from the date of purchase, the Suzuki Corporation will pay the labor charges to repair the defective product. - Page 64 SUZUKI DIGITAL PIANOS SP-67 OWNER’S MANUAL SUZUKI P.O. BOX 261030 SAN DIEGO, CALIFORNIA 92196 (858) 566-9710 Visit us on the web at www.suzukimusic.com Copyright 2003 Suzuki Musical Instrument Corporation...
Need help?
Do you have a question about the SP-67 and is the answer not in the manual?
Questions and answers