
Related Manuals for Optoma EH1060


Summary of Contents for Optoma EH1060
- Page 1 Delta Elec. Inc. EH1060 PROJECTOR EH1060_ DP486-57A SERVICE MANUAL Company Confidential Optoma__________________ Delta________________ 2010/03/17...
-
Page 2: Table Of Contents
Delta Elec. Inc. EH1060 CONTENTS 1.COMPLIANCE OF SAFE REPAIR..................4 1-1.Caution During Disassembling And Assembling.............4 1-2.Lamp..........................4 1-3.Lens..........................4 2.SPECIFICATIONS.........................5 2-1.Summary Specifications....................5 2-2.Views of projector parts……..…………………………………….…………………………..7 2-3.Remote control parts…………..................13 2-4.Block Diagram……………………………………………………………………………...…16 3.TROUBLE SHOOTING......................17 4.DISASSEMBLY AND ASSEMBLY..................25 5.Firmware Download......................41 5-1. OSD Setting…………………………………………………………………………………..41 5-2. - Page 3 Delta Elec. Inc. EH1060 16.Table of supported Frequency .................…. 94 17.Spare parts list…………………………………………………………………………..….…..96 Revised History Date Description 2010-03-08 Draft Edit 2010-03-17 Preliminary Company Confidential Optoma__________________ Delta________________ 2010/03/17...
-
Page 4: Compliance Of Safe Repair
Delta Elec. Inc. EH1060 1. COMPLIANCE OF SAFE REPAIR Be sure to read this Service Manual before providing services. In the projector, full consideration is taken to ensure safety for fire, electric shock, injury, harmful radiation, and substance. Therefore, observe the notice described in this Service Manual so that safety is kept when providing services. -
Page 5: Specifications
Delta Elec. Inc. EH1060 2. SPECIFICATIONS 2-1. Summary Specifications Model EH1060 Display type “TI” DMD 12 , ∘ 0.65” 1080P, Type A, Dark Chip 2 Resolution 1920x1080 Native (1080P) Weight <8.1 lbs Projection distance 1 meters ~ 10 meters Projection screen size 30”~280”... - Page 6 Delta Elec. Inc. EH1060 Composite Video x 1 HDMI IN-1 / HDMI IN-2 AUDIO IN x 1 ( L& R) RCA jack AUDIO IN x 1 (3.5mm mini jack) VGA x 1 Output Terminals AUDIO OUT x 1 RS-232C RJ45(LAN)
-
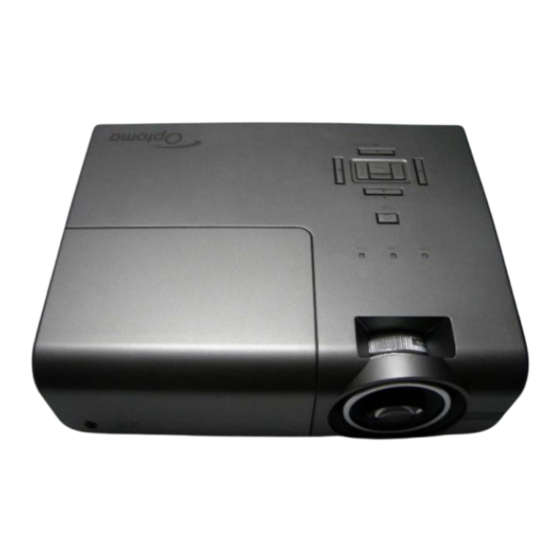
Page 7: 2-2.Views Of Projector Parts
Delta Elec. Inc. EH1060 2-2. Views of projector parts A. MAIN UNIT Company Confidential Optoma__________________ Delta________________ 2010/03/17... - Page 8 Delta Elec. Inc. EH1060 ABEL ESCRIPTION Tilt-Adjuster Button Push to release height adjuster Tilt-Adjuster Feet Adjusts level of projector Lens cap Protect lens when not in use LED Indicators Display the LED blink status Power Button Turning on the projector.
- Page 9 Delta Elec. Inc. EH1060 B. Display (OSD) buttons and LEDS Company Confidential Optoma__________________ Delta________________ 2010/03/17...
- Page 10 Delta Elec. Inc. EH1060 ABEL ESCRIPTION LED0 POWER LED Display the power on/off sequence status LED1 LAMP LED Display the the lamp status LED2 TEMP LED Display the thermal status KEY0 Turns the projector On or Off. (Power button) Navigates and changes settings in the OSD Quick Menu – For KEY1 ▲...
- Page 11 Delta Elec. Inc. EH1060 C. Connection ports ABEL ESCRIPTION AC IN Connect the POWER CABLE Connect the USB CABLE from a computer Component VIDEO Connect the COMPONENT CABLE from a video device S-VIDEO IN Connect the S-VIDEO CABLE from a video device...
- Page 12 Delta Elec. Inc. EH1060 DC OUT Output 12Vdc(200ma) for display screen motor use Kensington Lock Secure to permanent object with a Kensington® Lock system Speaker Outputs audio sound IR RECEIVE Receive IR signal from remote control AUDIO IN (L and R)
-
Page 13: 2-3.Remote Control Parts
Delta Elec. Inc. EH1060 2-3. Remote control parts. Company Confidential Optoma__________________ Delta________________ 2010/03/17... - Page 14 Delta Elec. Inc. EH1060 Important: 1. Avoid using the projector with bright fluorescent lighting turned on. Certain high-frequency fluorescent lights can disrupt remote control operation. 2. Be sure nothing obstructs the path between the remote control and the projector. If the path between the remote control and the projector is obstructed, you can bounce the signal off certain reflective surfaces such as projector screens.
- Page 15 Delta Elec. Inc. EH1060 ABEL ESCRIPTION Laser Press to operate the on-screen pointer Right Right key when connected through USB to a PC Down Down key when connected through USB to a PC Right key when connected through USB to a PC...
-
Page 16: 2-4.Block Diagram
Delta Elec. Inc. EH1060 2-4. Block Diagram Company Confidential Optoma__________________ Delta________________ 2010/03/17... -
Page 17: Trouble Shooting
Delta Elec. Inc. EH1060 3. TROUBLE SHOOTING By checking operations during normal usage time, it is possible to carry out judgments on malfunction to a certain extent. Carry out the following checks before disassembling the equipment. Connect the power cord <... - Page 18 Delta Elec. Inc. EH1060 Turn the power ON < Powering up > Power: Flashing Green Lamp: OFF Temp: OFF < Normal operation > Power: Light Green Lamp: OFF Temp: OFF < System error > • Lamp Cover A’ssy is not attached Power: Blink 4 (Green) •...
- Page 19 Delta Elec. Inc. EH1060 Ignition sound doesn’t exist. • Power Board Ass’y malfunction (CN102 doesn’t output 370 V) < Lamp-Lit error > • Ballast Connector (CJ4) or (CJ1) disconnected Power: Flashing 0.5Sec (Green) • Main Board (CN705) disconnected Lamp: Steady Light (Red) •...
- Page 20 Delta Elec. Inc. EH1060 Image Display • CW Sensor Board Ass’y malfunction Projector logo • Main Board Ass’y malfunction screen display • DMD Set malfunction Confirmation with none-signal state • Lamp deterioration (malfunction/usage time) • Power Supply Unit malfunction Still dark after the (No change occurs even after lamp replacement.)
- Page 21 Delta Elec. Inc. EH1060 Check the projection Screen Check using all black/white screens with PC connection • Black lines on screen (horizontal and vertical) Are abnormalities → DMD Set malfunction noticeable on • Missing pixels (Missing white: 1 or more, missing black: 5 or more, or...
-
Page 22: Common Problems And Solutions
Delta Elec. Inc. EH1060 Common problems and solutions These guidelines provide tips to deal with problems you may encounter while using the projector. If the problem remains unsolved, contact your dealer for assistance. Often after time spent troubleshooting, the problem is traced to something as simple as a loose connection. -
Page 23: Lamp Problems
Delta Elec. Inc. EH1060 Problem: The image is streaked 1. Set the Frequency and Phase settings on the Computer menu of the OSD to the default settings. 2. To ensure the problem is not caused by a connected PC’s video card, connect to another computer. -
Page 24: Remote Control Problems
Delta Elec. Inc. EH1060 Remote Control Problems Problem: The projector does not respond to the remote control 1. Direct the remote control towards remote sensor on the projector. 2. Ensure the path between remote and sensor is not obstructed. 3. Turn off any fluorescent lights in the room. -
Page 25: Disassembly And Assembly
Delta Elec. Inc. EH1060 4. DISASSEMBLY Removing the Lamp Cover and Lamp Module Look the full set projector. Look at the IO side. Look at the case of top side. Look at the keypad of top side. Remove this screw. - Page 26 Delta Elec. Inc. EH1060 Removing the Lamp Cover and Lamp Module Review the projector Loose the three screws. Remove the lamp modules. Look the Lamp #1. Look the Lamp #2. Look the Lamp #3. Company Confidential Optoma__________________ Delta________________ 2010/03/17...
- Page 27 Delta Elec. Inc. EH1060 Removing Top Cover Remove the ten screws. Review the five screws ( S02)&(S03) Review the two screws ( Review the three screws ( S03) S04) Remove the two screws. Review the two screws. (S05) Company Confidential...
-
Page 28: Removing The Main Board
Delta Elec. Inc. EH1060 Removing the Main Board Remove these screws. Review the five piece screws ( S06) Review the seven piece screws (S05) Remove the four screws. and take off the main shield. Review the six screws ( S07) - Page 29 Delta Elec. Inc. EH1060 Review the Main Board Review the main board#1. Review the main board#2. Company Confidential Optoma__________________ Delta________________ 2010/03/17...
- Page 30 Delta Elec. Inc. EH1060 Review the Main Board Connector CN703 (Index) CN201 (Front IR) CN207 (RJ45) CN204 (Engine Fan) CN200 (Keypad) CN706 (C/W) Remove the Connectors. Remove the Connectors. CN211 (IO CONN) CN705 (Ballast) CN201 (Blower Fan1) CN203 (Power Fan3)
- Page 31 Delta Elec. Inc. EH1060 Removing Optical Engine Remove the three screws. Review the three screws ( S08) The Optical Engine is removed. Review the Optical Engine #1. Review the Optical Engine #2. Review the Optical Engine #3. Company Confidential Optoma__________________...
- Page 32 Delta Elec. Inc. EH1060 Removing LAMP CHANNEL and Fans Remove these eight screws and notice Review the four screws (S03). the ballast connector Review the four screws (S03). Review the lamp channel. Remove the two FANS. Review the FANS. Company Confidential...
- Page 33 Delta Elec. Inc. EH1060 Removing the Optical cap, shield and Fan Remove the four screws. Remove the Optical cap and shield. Review the Optical cap and shield. Remove the FAN.. Review the FAN. Company Confidential Optoma__________________ Delta________________ 2010/03/17...
- Page 34 Delta Elec. Inc. EH1060 Removing the Ballast Board Remove the screw. Remove the screw. Review the two screws ( Review the Ballast (Top side). S03) Review the Ballast (Bottom side). Remove the two screws. Company Confidential Optoma__________________ Delta________________ 2010/03/17...
- Page 35 Delta Elec. Inc. EH1060 Removing the Power Board Remove the two screws. Review the screw ( S09) Review other three screws ( Review the Power Board (Top Side). S03). Review the Power Board (Bottom Side). Company Confidential Optoma__________________ Delta________________ 2010/03/17...
- Page 36 Delta Elec. Inc. EH1060 Removing the I/O ASSY and RJ45 Board Remove the I/O ASSY. Review the I/0 ASSY. Remove the two screws. Review the two screws (S05). Remove the RJ45 wire. Review the RJ45 Board. Company Confidential Optoma__________________ Delta________________...
- Page 37 Delta Elec. Inc. EH1060 Removing the IO board and ADJ ASSY Remove these four screws. Remove the FCC wire . Review the four screws (S05). Review the IO BOARD Review the bottom cover. Remove the screw. Company Confidential Optoma__________________ Delta________________...
- Page 38 Delta Elec. Inc. EH1060 Removing the ADJ ASSY Push this remove the ADJ FOOT. Review the ADJ FOOT. Remove the two screws. Review the two screws (S03). Review the ADJ ASSY parts. Review the bottom cover. Company Confidential Optoma__________________ Delta________________...
- Page 39 Delta Elec. Inc. EH1060 Review the BOTTOM COVER Company Confidential Optoma__________________ Delta________________ 2010/03/17...
- Page 40 Delta Elec. Inc. EH1060 Appendix. Screw torque ITEM-S Screw Type Screw Driver Torque (KG-CM) M3*0.5*5 3105221300 1.5-2.0kgf.cm φ3*0.5*34 3109183300 5.5-6.5kgf.cm M 3*0.5*8 3106160400 5.5-6.5kgf.cm M 2*0.2*4 3105040800 1.5-2.0kgf.cm M3*0.5*6 3100320600 5.5-6.5kgf.cm M2*0.3*3 3105134900 1.5-2.0kgf.cm HEX 4.7*4 3461431703 4-5kgf.cm M3*0.5*10 3100301000 5.5-6.5kgf.cm...
-
Page 41: Firmware Download
Delta Elec. Inc. EH1060 5. Firmware Download 5-1. OSD Setting A. Press the “menu” key on the keypad or by remote control, select “SETUP”-->“Signal Power on”, then press the “►” key on the keypad to select “Signal Power off”. B. Press the “menu” key on the keypad or by remote control, select “SYSTEM”->“... -
Page 42: Projector Rs-232 Drivers Installation Guide
Delta Elec. Inc. EH1060 5-2. Projector RS-232 Drivers Installation Guide The document is to describe a Windows application Pixelworks software “FlashUpgrader” for projector firmware. Its main purpose is to provide a detailed procedure of upgrading the application software of a DLP projector. -
Page 43: Firmware Upgrade Procedure
Delta Elec. Inc. EH1060 5-4. Firmware upgrade procedure. Step 1. Plug the power cord. Step 2. Connect the “download cable” step through “RS-232” port between of Projector and PC. Step 3-a. Run “PW392 Downloader_V1.6” (for example),and input correct “COM:” port number (Fig 1-a). - Page 44 Delta Elec. Inc. EH1060 Step 3-b. Select the “PW392 Download” button. If you see below warning message of “No Action”, it means that the projector got something wrong or the RS232 cable did not get well connection. When “FlashUpgrader.exe” is running, the first window looks like “Fig 2”...
- Page 45 Delta Elec. Inc. EH1060 Step 4. Click on “Flash File” to the next step. You will see the window looks like “Fig 3”. Fig 3 Step 5. Select “FlashAll.inf” and then click on “Open”. You will see the window looks like “Fig 4”.
- Page 46 Delta Elec. Inc. EH1060 Step 6. Click on “Flash” to the next step. You will see the window looks like “Fig 5”. Fig 5 When download in progress you will see “Fig 6 ~ Fig 8”. Step 7. Now press “Power” key.
- Page 47 Delta Elec. Inc. EH1060 Fig 7 Fig 8 Company Confidential Optoma__________________ Delta________________ 2010/03/17...
-
Page 48: Calibration
Delta Elec. Inc. EH1060 6. Calibration Step of into Service Mode Step 1 : To turn on the projector, then press “Power” key => “Left” key => “Right” key => “Down” key => “Up” key. Step 2:If password is correct then go into Service Mode. -
Page 49: 6-1.Calibrate Analog Rgb (1920 X 1080 @ 60Hz)
Delta Elec. Inc. EH1060 6-1. Calibrate Analog RGB (1920x 1080 @ 60Hz): A. Function Description: ADC Calibration - VGA :Calibrating Analog RGB signal B. Calibrate Analog RGB (1920 x 1080 @ 60Hz): Step 1: Press “ADC Calibrating” to do DA Calibration VGA In this menu input pattern with 16-grays scalar for calibration the VGA Source. -
Page 50: 6-2.Calibrate Analog Ypbpr
Delta Elec. Inc. EH1060 6-2. Calibrate Analog YpbPr: A. Function Description: ADC Calibration - Component : Calibration YPbPr signal B. Calibrate YPbPr (480i @60Hz): Step 1: Press “Color Setting” to do DA Calibration YPbPr In this menu input pattern with 75% SMPTE pattern for calibration Component. -
Page 51: 6-3.Color Wheel Index, Dmd Contrast And Brightness Adjustment @ Rgb Source
Delta Elec. Inc. EH1060 6-3. Color Wheel Index, DMD Contrast and Brightness Adjustment @ RGB source A. Switch Timing to RGB (1920 x 1080 @ 60Hz) B. Then go into Service Mode. In the Service Mode. C. Select “CW Index”. -
Page 52: Projector Lamp
Delta Elec. Inc. EH1060 7. Projector LAMP The projector automatically detects the lamp life. When the lamp life is nearing the end of use, you will receive a warning message. When you see this message, please connect your local reseller or service center to change the lamp as soon as possible. - Page 53 Delta Elec. Inc. EH1060 Company Confidential Optoma__________________ Delta________________ 2010/03/17...
- Page 54 Delta Elec. Inc. EH1060 Company Confidential Optoma__________________ Delta________________ 2010/03/17...
- Page 55 Delta Elec. Inc. EH1060 Company Confidential Optoma__________________ Delta________________ 2010/03/17...
-
Page 56: How To Program By Rs232
Delta Elec. Inc. EH1060 8. How to program by RS232 8-1. OSD Setting Press the “menu” key on the keypad or by remote control, select “SYSTEM”->“ Network”, then press the “►” key on the keypad to select “RS232”. Please be sure the “Power Mode(Standby)” is “Eco.” mode. -
Page 57: Hardware Connection
Delta Elec. Inc. EH1060 8-2. RS-232 HARDWARE CONNECTION PC RS-232 pin alignment Company Confidential Optoma__________________ Delta________________ 2010/03/17... - Page 58 Delta Elec. Inc. EH1060 Company Confidential Optoma__________________ Delta________________ 2010/03/17...
- Page 59 Delta Elec. Inc. EH1060 Company Confidential Optoma__________________ Delta________________ 2010/03/17...
- Page 60 Delta Elec. Inc. EH1060 Company Confidential Optoma__________________ Delta________________ 2010/03/17...
- Page 61 Delta Elec. Inc. EH1060 Company Confidential Optoma__________________ Delta________________ 2010/03/17...
- Page 62 Delta Elec. Inc. EH1060 Company Confidential Optoma__________________ Delta________________ 2010/03/17...
- Page 63 Delta Elec. Inc. EH1060 Company Confidential Optoma__________________ Delta________________ 2010/03/17...
- Page 64 Delta Elec. Inc. EH1060 Company Confidential Optoma__________________ Delta________________ 2010/03/17...
-
Page 65: Hyper Terminal Setting Guide
Delta Elec. Inc. EH1060 8-3. Hyper Terminal setting guide 8-3-1 Connect the RS232 Cable between your computer and Projector. 8-3-2 Open HyperTerminal Window2000/XP HyperTerminal path: Start \ Programs \ Accessories \ Communications \ HyperTerminal。 8-3-3 Setting the HyperTerminal parameter: Step 1. Type the connection name . - Page 66 Delta Elec. Inc. EH1060 Step2. Choose the COM port for your RS232 Cable connected to. Step3. In Bits per second choose “ 9600 ” and in Flow control choose “ None ”。 Company Confidential Optoma__________________ Delta________________ 2010/03/17...
- Page 67 Delta Elec. Inc. EH1060 Step4. Click the File and choose Properties to setting Keyboard parameter。 Step5. In Setting page , choose Emulation type for your keyboard. Company Confidential Optoma__________________ Delta________________ 2010/03/17...
- Page 68 Delta Elec. Inc. EH1060 Step6. Click ASCII Setting icon to setup ASCII code parameter. Step7. Mark Send Line ends with line feeds and Echo typed characters locally and click OK bottom to complete setting. Company Confidential Optoma__________________ Delta________________ 2010/03/17...
-
Page 69: Edid
Delta Elec. Inc. EH1060 9. EDID a. Analog (08-09) ID Manufacturer Name ________________ = OTM (11-10) Product ID Code _____________________ = 1060(Hex), 4192(Dec) (12-15) Last 5 Digits of Serial Number ______ = 16843009(Dec), 01010101(Hex) (16) Week of Manufacture _________________ = 1... - Page 70 Delta Elec. Inc. EH1060 Preferred Timing Mode RGB Color Display (25-34) CHROMA INFO : RedX : 0.649 RedY : 0.338 GreenX : 0.318 GreenY : 0.626 BlueX : 0.144 BlueY : 0.065 WhiteX : 0.305 WhiteY : 0.349 (35) ESTABLISHED TIMING I :...
- Page 71 Delta Elec. Inc. EH1060 1600 X 1200 @ 60Hz 1920 X 1200 @ 60Hz ( 54- 71) Detailed Timing / Descriptor Block 1 : 1920 X 1080 : Pixel Clock : 148 MHz Horizontal Image Size : 0 mm Vertical Image Size : 0 mm...
- Page 72 Delta Elec. Inc. EH1060 (108-125) Detailed Timing / Descriptor Block 4 : Monitor Name : EH1060 (126) No Extension EDID Block(s) (127) CheckSum is OK Company Confidential Optoma__________________ Delta________________ 2010/03/17...
- Page 73 Delta Elec. Inc. EH1060 b. HDMI (08H-09H) ID Manufacturer Name _________________________ = OTM (0AH-0BH) Product ID Code ______________________________ = 1060 (0CH-0FH) Last 5 Digits of Serial Number _______________ = UNUSE (10H) Week of Manufacture __________________________ = 01 (11H) Year of Manufacture __________________________...
- Page 74 Delta Elec. Inc. EH1060 800 x 600 @ 56Hz (VESA) 800 x 600 @ 60Hz (VESA) (24H) ESTABLISHED TIMING II: 800 x 600 @ 72Hz (VESA) 800 x 600 @ 75Hz (VESA) 832 x 624 @ 75Hz (Apple,Mac II) 1024 x 768 @ 60Hz (VESA)
- Page 75 Delta Elec. Inc. EH1060 ______________________________________________________________________ (48H-59H) Detailed Timing / Descriptor Block 2: 1280x720 Pixel Clock: 130.00 MHz ______________________________________________________________________ Horizontal Image Size: 0 mm Vertical Image Size: 0 mm Refreshed Mode: Non-Interlaced Normal Display - No Stereo Horizontal: Active Count: 1280 pixels...
- Page 76 Delta Elec. Inc. EH1060 Extended Block Type: CEA 861B Detailed Timing Blocks start at Byte:(23H) Native Format: (0x1) (03H) DTV (Basic Audio) (03H) YCbCr (4:4:4) (03H) YCbCr (4:2:2) Video Short Block Description: (05H) 640 x 480 P 59.94/60Hz 4:3 (06H) 720 x 480 P 59.94/60Hz 4:3 (07H) 720 x 480 P 59.94/60Hz 16:9...
- Page 77 Delta Elec. Inc. EH1060 (16H) Linear PCM(IEC60958) Audio Supported: 32kHz, 44.1kHz, 48kHz Audio Bit Rate: 24Bit Speaker Short Block Description: Playload(3 bytes 1AH-1CH) Speakers (1AH): FL/FR 1BH: Reserved 1CH: Reserved Vendor Specific Short Block Description: Bytes: 03H, 0CH, 00H, 10H, 00H (23H - 35H) Detailed Timing Descriptions: 720x480 Pixel Clock: 27.00 MHz...
- Page 78 Delta Elec. Inc. EH1060 Border: 0 lines Frequency: 50.00 Hz Digital Separate, Horizontal Polarity (-) Vertical Polarity (-) (47H - 59H) Detailed Timing Descriptions: 1280x720 Pixel Clock: 74.25 MHz ______________________________________________________________________ Horizontal Image Size: 708 mm Vertical Image Size: 398 mm...
-
Page 79: Rj45
Delta Elec. Inc. EH1060 10. RJ45 10-1. OSD Setting Step1. Press the “menu” key on the keypad or by remote control, select “SYSTEM”->“ RS232”, then press the “ ” key on the keypad to select “Network”. ► Step2. Select “Network”, then press “... - Page 80 Delta Elec. Inc. EH1060 Step3. In below OSD, select “DHCP”, then press “ ” on the keypad, be sure the ► setting is “off” Company Confidential Optoma__________________ Delta________________ 2010/03/17...
- Page 81 Delta Elec. Inc. EH1060 For simplicity and ease of operation, the projector provides diverse networking and remote management features. The LAN/RJ45 function of the projector through a network, such as remotely manage: Power On/Off, Brightness and Contrast settings. Also, projector status information, such as: Video-Source, Sound-Mute, etc.
- Page 82 Delta Elec. Inc. EH1060 2. On the PC (Laptop), select Start ->Control Panel-> Network Connections. Right-click on Local Area Connection, and select Properties. Company Confidential Optoma__________________ Delta________________ 2010/03/17...
- Page 83 Delta Elec. Inc. EH1060 4. In the Properties window, select the General tab, and select Internet Protocol (TCP/IP). 5. Click Properties. Company Confidential Optoma__________________ Delta________________ 2010/03/17...
- Page 84 Delta Elec. Inc. EH1060 Click Use the following IP address and fill in the IP address and Subnet mask, then click OK. 7. Press the Menu button on the projector. 8. Select Installation II Advanced Network. 9. After getting into Network, input the following: DHCP: Off IP Address: 10.10.10.10...
- Page 85 Delta Elec. Inc. EH1060 12. In the address bar, input the IP address: 10.10.10.10 13. Press (Enter) / ►. The projector is setup for remote management. The NETWORK function displays as follows. Company Confidential Optoma__________________ Delta________________ 2010/03/17...
- Page 86 Delta Elec. Inc. EH1060 14. Base on network web-page for the input-string in [tools] tab, the limitation for input-Length is in the below list (“space” and the other punctuation key included): Company Confidential Optoma__________________ Delta________________ 2010/03/17...
-
Page 87: Service Note
Delta Elec. Inc. EH1060 11. SERVICE NOTE Cleaning the projector to remove dust and grime will help ensure trouble-free operation. a. Be sure to turn off and unplug the projector at least 30 minutes before cleaning. Failure to do so could result in a severe burn. - Page 88 Delta Elec. Inc. EH1060 Cleaning the Color Wheel Assy 1. The color filter is made of thin glass. Be very careful when handing the filter. 2. In case of fingerprints, etc. on the surface, clean in the same way as the projection lens unit.
- Page 89 Delta Elec. Inc. EH1060 6. Cleaning a Soiled Projector Main Unit. (1). Wipe with a lint-free, soft, dry cloth. When very dirty, wipe with a cloth that has been moistened with a diluted neutral detergent, then finish with a dry cloth. If a chemically-treated cloth is going to be used, please follow any written warnings.
-
Page 90: Inserting The Remote Control Batteries
Delta Elec. Inc. EH1060 12. Inserting the Remote Control Batteries Avoid excessive heat and humidity. • There may be battery damage if the battery is incorrectly replaced. • Replace only with the same or equivalent type recommended by the battery manufacturer. -
Page 91: Led Indicator Table
Delta Elec. Inc. EH1060 13. LED Indicator Table OWER RROR ESSAGES REEN Flashing Standby State 2 sec off (Input power cord) 2 sec on Flashing Power on (Warming) 0.5 sec off 0.5 sec on Power on & Lamp lighting Steady light Flashing 0.5 sec off... -
Page 92: Ceiling Mount Installation
EH1060 14. Ceiling Mount Installation 1. Top prevent damage to your projector, please use the Optoma Ceiling Mount. 2. If you wish to use a third party Ceiling mount kit, please ensure the screws used to attached a mount to the projector met the following specifications. -
Page 93: Screen Size And Projector
Delta Elec. Inc. EH1060 15. Screen Size and Projection Distance Company Confidential Optoma__________________ Delta________________ 2010/03/17... -
Page 94: Table Of Supported Frequency
Delta Elec. Inc. EH1060 16. Table of Supported Frequency The projector can display several resolutions. The following table outlines the resolutions that can be displayed by the projector. DVI/ OMPOSITE HDMI IGNAL ESOLUTION OMPONENT / S-V IDEO ANALOG DIGITAL NTSC —... - Page 95 — — — O: Frequency supported —: Frequency not supported The resolution of the panel for the EH1060 is 1280 x 800. Resolution other than native resolution may display with uneven size of text or lines. Company Confidential Optoma__________________ Delta________________...
-
Page 96: Spare Parts List
DC FAN ASSY BUB0612HB-SM03 L300/195 60 S 3622608211 DC FAN ASSY AUB0712MB-R00 L50/20 70 S 3622701811 DC FAN ASSY AUB0812H-SE17 L35/10 80 S 3622843011 PWB ASSY MAIN BOARD DP486-57A OPTOMA 5600601409 PWB ASSY POWER BOARD J4P+ 280W DP437-570 5600601408 PWB ASSY IO BOARD 5600601158... - Page 97 Delta Elec. Inc. EH1060 DESCRIPTION Q'ty PWB ASSY KEYPAD BOARD DP486-57A OPTOMA 5600601411 PWB ASSY RJ45 BOARD DP486-57A OPTOMA 5600601412 PWB ASSY INDEX BD HT-8600 BENQ J4P+ 5600601162 PWB ASSY IR BOARD DP-3636 LENOVO J4P+ 5600601060 LAMP DRIVER 280W UNISHAPE O3 TOP...
- Page 98 Delta Elec. Inc. EH1060 CABLE SIGNAL D-SUB D-SUB L1800 BLK 3081405002 CD SOFTWARE PACKING 3534130100 CARD QUICK START DP486-57A OPTOMA 5010092400 CARRYING CASE PLE 345*300*145 3523501500 REMOTE CONTROLLER 27KEYS 5041820600 Company Confidential Optoma__________________ Delta________________ 2010/03/17...
- Page 99 Delta Elec. Inc. EH1060 Company Confidential Optoma__________________ Delta________________ 2010/03/17...
- Page 100 Delta Elec. Inc. EH1060 Company Confidential Optoma__________________ Delta________________ 2010/03/17...
Need help?
Do you have a question about the EH1060 and is the answer not in the manual?
Questions and answers