Table of Contents
Advertisement
Quick Links
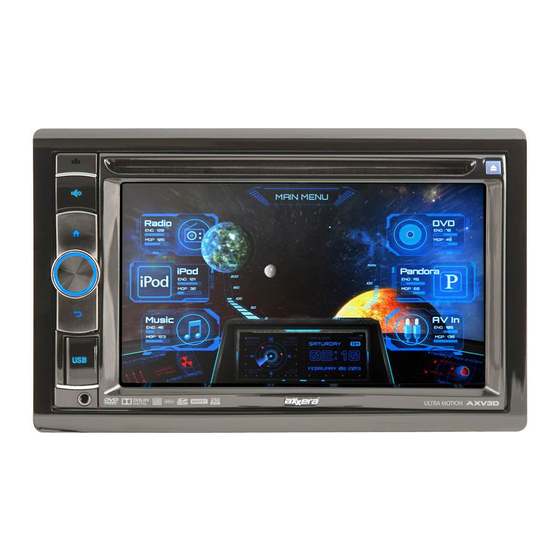
Multimedia DVD Receiver
with UltraMotion™ Display
AXV3D
Quick Start Guide
This Quick Start Guide gives you the basics to start using your AXV3D.
Please visit www.axxeraaudio.com/downloads/manuals/axv3d.pdf to download
a complete owner's manual or call customer service at 1-866-382-5476.
Safety Notes:
The DVD video display of the in-dash unit will not operate while the vehicle is moving. This is a safety
feature to prevent driver distraction. In-dash DVD video functions will only operate when vehicle is in
park and the parking brake is engaged. It is illegal in most states for the driver to view video while the
vehicle is in motion.
Advertisement
Table of Contents

Subscribe to Our Youtube Channel
Summary of Contents for Axxera Axxera AXV3D
- Page 1 Multimedia DVD Receiver with UltraMotion™ Display AXV3D Quick Start Guide This Quick Start Guide gives you the basics to start using your AXV3D. Please visit www.axxeraaudio.com/downloads/manuals/axv3d.pdf to download a complete owner's manual or call customer service at 1-866-382-5476. Safety Notes: The DVD video display of the in-dash unit will not operate while the vehicle is moving.
-
Page 2: Installation
AXV3D Installation Dash Board Mounting Sleeve Head Unit KEYS • Remove trim ring from unit. • Remove 2 transit screws located on top of the unit. • Insert the supplied keys into the slots as shown, and slide the unit out of the mounting sleeve. •... - Page 3 AXV3D Wiring Diagram - Inputs/Outputs AUX Line Input (R) White AUX Line Input (L) Yellow AUX Video Input Yellow Video Output Bluetooth Module (sold separately) Antenna Input SiriusXM Vehicle Tuner Kit (sold separately) Steering Wheel Interface Input Back-up Yellow Camera Input Black Subwoofer Out White...
-
Page 4: Control Locations
AXV3D Control Locations Open Mute Home SD Card iPod Radio Main Menu Disc Slot Eject Trim Ring Pandora Set up Music AV IN 1 Reset Volume / Select (Push) Back Remote Control Mute AS/PS Back Eject Home FF/LOC Power Mode Volume UP Enter Volume Down... -
Page 5: Tuner Mode
AXV3D Operation UltraMotion™ Menu The UltraMotion™ Menu displays availabe modes of operation. Press a mode icon to select and begin playback of the corresponding mode. Press the Main Menu icon at the top of the screen to access the Main Menu. Main Menu The UltraMotion™... -
Page 6: Music Mode
AXV3D Operation Music Mode Playing MP3/ WMA Files To play MP3/WMA les, insert a CD, USB drive or an SD card with MP3/WMA les. Track Select Press TRACK to skip to the beginning of the next song. Press TRACK to return to the beginning of the current song. Pressing TRACK again skips to the beginning of the previous song. - Page 7 AXV3D Operation iPod Operation iPod Menu Mode Press to enter the menu mode and toggle between Music, Video and Photo les. Navigate using the up and down arrow buttons. iPod Music Search Press MENU, and the main search menu will appear. To select a category, choose from the following options: Playlists, Artists, Albums, Genre, Songs, Composer, Audiobook and Podcasts.
-
Page 8: Auxiliary Inputs & Rear Camera Operation
AXV3D Operation Auxiliary Inputs & Rear Camera Operation Auxiliary Inputs & Rear Camera Operation Connect an optional audio/video source into the 3.5mm input on the front panel (AV1) or to the red/white/yellow RCA connectors on the back of the unit (AV2). Select AV1 or AV2 from the Main Menu to access audio or video. - Page 9 AXV3D Operation Bluetooth Operation (Optional) Receiving a Phone Call Incoming phone calls will automatically appear on the display, and a ring tone will be heard. Ending a Phone Call During an active phone call, press to end a phone call. If the phone call was received when listening to music in another mode, the AXV3D will resume the previous mode.
-
Page 10: Bluetooth Music
AXV3D Operation Bluetooth Music The AXV3D supports A2DP wireless streaming audio from your Bluetooth mobile device directly to the head unit. You can also control music from the front panel of the head unit using AVRCP (audio video remote control pro le). - Page 11 AXV3D Operation Preset EQ Settings Selecting the equalizer will access the equalizer options. There are 10 equalizer presets as well as two user presets. Equalizer User presets can be set at any desired levels and will automatically save for future use. To set a user preset, rst select either “User 1” or “User 2”, then adjust the equalizer band by pressing the level you desire.
- Page 12 AXV3D Operation SiriusXM Mode Connecting the SiriusXM Vehicle Tuner (sold separately) SiriusXM Satellite Radio operation requires the connection of the SiriusXM Connect Vehicle Tuner (sold separately). Note: The SiriusXM Connect Vehicle Tuner must have the SiriusXM Ready logo to be compatible with the AXV3D.
-
Page 13: Parental Control
AXV3D Operation Radio ID To view the Radio ID on the LCD, press TUNE or TUNE until channel 0 appears. The 8 character Radio ID will appear on the display. The Radio ID is also printed on the underside of the SiriusXM Vehicle Tuner. Note: The Radio ID does not use the letters I, O, S or F. -
Page 14: Limited One Year Warranty
AXV3D Limited One Year Warranty What to do? This warranty gives you speci c legal rights. You may also have other rights which vary from state to 1. Before you call for service, check the state. troubleshooting guide in your owner’s manual. A slight adjustment of any custom controls may save Dual Electronics Corp.


Need help?
Do you have a question about the Axxera AXV3D and is the answer not in the manual?
Questions and answers