
Related Manuals for Axxera AXV150BT


Summary of Contents for Axxera AXV150BT
- Page 1 AXV150BT INSTALLATION/OWNER’S MANUAL DVD Multimedia Receiver with Bluetooth ® Safety Note: The DVD video display of the in-dash unit will not operate while the vehicle is moving.
- Page 2 Copyright Notes This product incorporates copyright protection technology that is protected by method claims of certain U.S. patents and other intellectual property rights owned by Macrovision Corporation and other rights owners. Use of this copyright protection technology must be authorized by Macrovision Corporation, and is intended for home and other limited viewing uses only unless otherwise authorized by Macrovision Corporation.
-
Page 3: Table Of Contents
AXV150BT Table of Contents Page Warning Statement .......... -
Page 4: Warning Statement
AXV150BT WARNING Upon installation of this Monitor/DVD player (“unit”) into a vehicle, the driver of the vehicle must not operate this unit by watching videos or playing video games while driving. Failure to follow this instruction could lead to driver distraction which could result in serious injury or death to the vehicle’s occupants or persons outside... -
Page 5: Safety Information/Precautions
Please read all instructions carefully before attempting to install or operate. Due to its technical nature, it is highly recommended that your DUAL AXV150BT is installed by a professional installer or an authorized dealer. This product is only for use in vehicles with 12VDC negative ground only. -
Page 6: Preparation/Mounting
Install the AXV150BT into the RV Cabinet AXV150BT Dashboard or Installation Kit Step 2: Screw the AVX150BT mounting brackets into the RV Cabinet. AXV150BT Screw Dashboard or Installation Kit Step 3: Put the trim ring on the AXV150BT. AXV150BT Trim ring... -
Page 7: Wiring Diagram
AXV150BT Wiring Diagram - Inputs/Outputs Antenna Connector Video Output Bluetooth Antenna 10 AMP AGC Fuse Note: When replacing a fuse, make sure to use the correct type and amperage. Using an incorrect fuse could cause damage. The unit uses (1) 10 amp... -
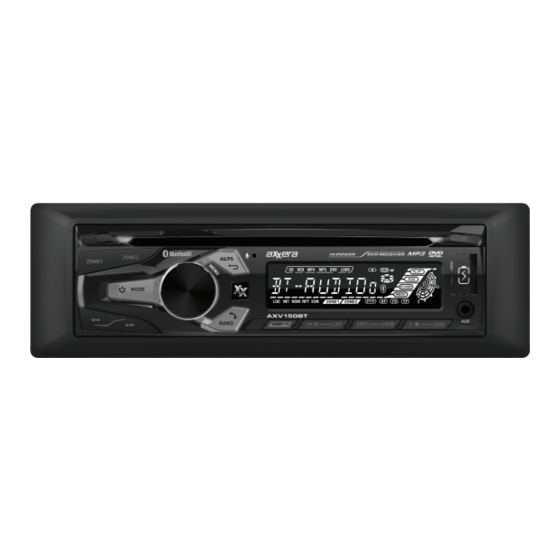
Page 8: Control Locations
AXV150BT Control Locations 12 11 Zone 1 Preset 6 / On Screen Display Display /End Call Zone 2 Preset 5 / Stop Band / Bluetooth Talk Volume Control / Menu Preset 4 / Random Power / Mode AS/PS / Go Back... -
Page 9: Remote Control Preparation
AXV150BT Remote Control Preparation Remove battery insulation tape . Notes: • The remote control uses one 3 volt Lithium CR2025 battery. Remove the battery if the remote will not be used for a month or longer. • Remove and dispose of battery properly. -
Page 10: General Operation
AXV150BT General Operation Momentarily press to turn the unit on. Press again to turn On/Off Power the unit off. Press RELEASE and pull away from the left side to remove. To Faceplate reinstall, insert right side of faceplate first, then push left side to Removal secure. -
Page 11: General Operation
AXV150BT General Operation Setup Menu Press and hold MENU for more than one second to access the Setup Menu to adjust the following options: Menu Function Options Stereo / Mono Rotate the volume knob to select STEREO or MONO playback. -
Page 12: Speaker Zone Operation
AXV150BT Speaker Zone Operation Zone 1 Button Press ZONE 1 to turn the sound from Zone 1 on or off. Zone 2 Button Press ZONE 2 to turn the sound from Zone 2 on or off. AM/FM Tuner Operation Press... -
Page 13: Cd Operation
AXV150BT CD Operation Insert CD With the label facing up, insert a standard size CD into the CD slot. Playback will begin automatically. Eject CD Press EJECT (located behind the front panel) to eject the CD. The unit will change to previous mode of operation. -
Page 14: Mp3 Operation
AXV150BT MP3 Operation Playing MP3 Files To play audio files from a disc, insert disc into the slot, and playback will begin automatically. Track Select Press TUNE to skip to the beginning of the next track. Press TUNE to return to the beginning of the current track. -
Page 15: Media Compatibility
AXV150BT Media Compatibility - CD/DVD File Type Level 1, Level 2 ISO9660 Level 3 Playback ISO9660 JOLIET File System Extension Filename 32 bytes Playback ROMEO Other Filename Extensions Apple ISO .mp3/.MP3/.Mp3/.mP3 File Extension .rmp/.m4a MPEG 1 ... -
Page 16: Media Compatibility
AXV150BT Media Compatibility Media Compatibility The following types of discs/files are compatible: • CD-DA, CD-ROM (ISO), CD-R, CD-RW • DVD Video, DVD+R/RW, DVD-R/RW • AVI - Max video resolution: 720x480, Max video bit rate: 5000 kbps • Mpeg2: Max video resolution: 720x480, Max video bit rate: 5000 kbps •... -
Page 17: Dvd Operation
AXV150BT DVD Operation Insert DVD With the label facing up, insert a standard size DVD into the DVD slot. Playback will begin automatically. Eject DVD Press EJECT (located behind the front panel) to eject the DVD. The unit will change to previous mode of operation. -
Page 18: Bluetooth Operation
Complete the pairing sequence from your Bluetooth device. Refer to the owner's manual for your device for more details. The device name is "Axxera BT". The Bluetooth passcode "1234". The unit can be in any mode of operation when pairing is performed. -
Page 19: Auxiliary Inputs/Rear Camera Operation
AXV150BT Front 3.5mm Aux Input & Rear RCA A/V Input Auxiliary Input Connect an optional audio source into the 3.5mm (front panel) input. Select auxiliary input from the Main Menu to listen to audio. Adjust volume on the external audio source as needed (if connected to the headphone output of the device). -
Page 20: Warranty
AXV150BT Limited Two Year Warranty This warranty gives you specific legal rights. You What to do? may also have other rights which vary from state to 1. Before you call for service, check the state. troubleshooting guide in your owner’s manual. A slight adjustment of any custom controls may save Dual Electronics Corp. -
Page 21: Specifications
AXV150BT Specifications Disc Frequency response: 20Hz-20kHz Channel separation @ 1kHz: >80dB D/A converter: 24 Bit FM Tuner Tuning range: 87.5MHz-107.9MHz Usable sensitivity: 10dBf 50dB quieting sensitivity: 20dBf Stereo separation @ 1kHz: 38dB Frequency response: 30Hz-13kHz AM Tuner Tuning range: 530kHz-1710kHz... -
Page 22: Troubleshooting
AXV150BT Troubleshooting General Problem Cause Action Yellow wire not connected or incorrect voltage Check connections for proper voltage (11~16VDC) Unit will not turn on Red wire not connected or incorrect voltage (no power) Black wire not connected Check connection to ground... - Page 23 AXV150BT Notes...
- Page 24 Dual Electronics Corp. Toll Free: 1-866-382-5476 Monday-Friday, 9AM-5PM EST www.axxeraaudio.com ©2017 Dual Electronics Corp. All rights reserved. NSC0317-V01 Printed in China...
Need help?
Do you have a question about the AXV150BT and is the answer not in the manual?
Questions and answers