Table of Contents
Advertisement
Quick Links
29J
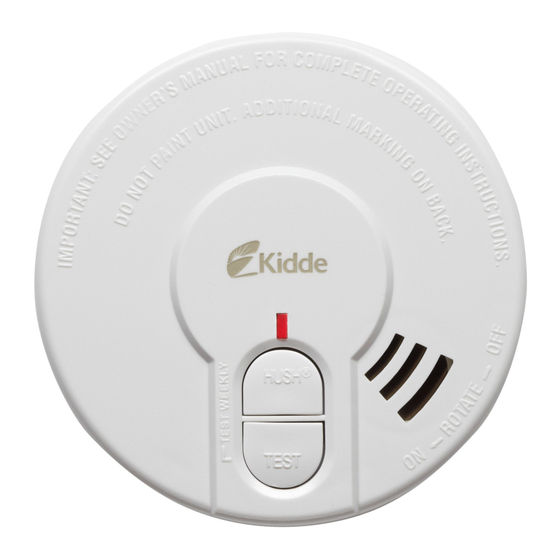
Photoelectric Smoke Alarm
User's Guide
9 Volt Battery Operated Photoelectric Smoke Alarm
Thank you for purchasing this smoke alarm. It is an important
part of your family's home safety plan. You can trust Kidde to
provide the highest quality safety protection. We know you
expect nothing less when the lives of your family are at stake.
For your convenience, write down the following
information. If you call our Consumer Hotline,
these are the first questions you will be asked.
Smoke Alarm Model Number
(located on back of alarm):
Date Code (located on back of alarm):
The National Fire Protection Association
(NFPA) and the manufacturer
recommend replacing this alarm
ten years from the date code.
Date of Purchase:
Where Purchased:
For models:
29J, 29HJ, 29HIJ
820-0914 REV. B
0307-7201-00
11/2006
Advertisement
Table of Contents

Subscribe to Our Youtube Channel
Related Manuals for Kidde 29J


Summary of Contents for Kidde 29J
- Page 1 9 Volt Battery Operated Photoelectric Smoke Alarm Thank you for purchasing this smoke alarm. It is an important part of your family’s home safety plan. You can trust Kidde to provide the highest quality safety protection. We know you expect nothing less when the lives of your family are at stake.
-
Page 2: Recommended Locations For Alarms
REMOVAL OF BATTERY WILL RENDER THE SMOKE ALARM INOPERATIVE. IMPORTANT! READ ALL INSTRUCTIONS BEFORE INSTALLA- TION AND KEEP THIS MANUAL NEAR THE ALARM FOR FUTURE REFERENCE. CONTENTS OF THIS MANUAL 1 -- RECOMMENDED LOCATIONS FOR SMOKE ALARMS 2 -- LOCATIONS TO AVOID 3 -- INSTALLATION INSTRUCTIONS 4 -- OPERATION AND TESTING 5 -- NUISANCE ALARMS... -
Page 3: Locations To Avoid
• When mounting an alarm on the ceiling, locate it at a minimum of 4” (10cm) from the side wall (see figure 1). • When mounting the alarm on the wall, use an inside wall with the top edge of the alarm at a minimum of 4” (10cm) and a maximum of 12”... -
Page 4: Installation Instructions
• In very humid areas. Moisture or steam can cause nuisance alarms. • In insect-infested areas. • Smoke alarms should not be installed within 3 ft (.9m) of the following: the door to a kitchen, the door to a bathroom con- taining a tub or shower, forced air supply ducts used for heating or cooling, ceiling or whole house ventilating fans, or other high air flow areas. - Page 5 CAUTION! BE SURE THE ALIGNMENT MARKS ON THE 29HIJ ALARM AND MOUNTING PLATE ARE LINED UP (SEE FIGURE 7) WHEN INSTALLING THE ALARM ON THE MOUNTING PLATE. THIS ALARM WILL ONLY ATTACH IN ONE ORIENTATION. 1.Remove the mounting plate from the back of the alarm by hold- ing the mounting plate and twisting the alarm in the direction indicated by the “OFF”...
- Page 6 Using this feature will help deter children and others from removing the alarm from the mounting plate. With the blocks removed the tamper resist feature will be activated when the alarm is installed on the mounting plate. 7.REMOVING ALARM WITH TAMPER RESIST FEATURE ACTIVE The tamper resist tab will have to be released in order to change the bat- tery.
-
Page 7: Operation And Testing
When products of combustion are sensed, the unit sounds a loud 85db pulsating alarm until the air is cleared. INTELLIGENT HUSH CONTROL Note: The model 29J does not have Hush ® The “HUSH ® ” feature has the capability of temporarily desensitiz- ing the alarm circuit for up to 8 minutes. - Page 8 NOTE: DENSE SMOKE WILL OVERRIDE THE “HUSH®” CON- TROL FEATURE AND SOUND A CONTINUOUS ALARM. CAUTION: BEFORE USING THE ALARM “HUSH®” FEATURE, IDENTIFY THE SOURCE OF THE SMOKE AND BE CERTAIN A SAFE CONDITION EXISTS. FLASHING LED LIGHT: This smoke alarm is equipped with a flash- ing Red indicator light with three modes of operation: Normal Operation The LED flashing every 40 - 45 seconds indicates that the smoke...
-
Page 9: Nuisance Alarms
Test by pushing the test button on the cover and holding it down for a minimum of 5 seconds (or until the unit sounds). This will sound the alarm if the electronic circuitry, horn, and battery are working. If no alarm sounds, the unit has defective batteries or other failure. - Page 10 to “chirp” approximately every 30 - 40 seconds for a minimum of seven (7) days when the battery gets low. Replace the battery when this condition occurs. These batteries are available at many local retail stores. USE ONLY THE FOLLOWING 9 VOLT BATTERIES FOR SMOKE ALARM REPLACEMENT.
-
Page 11: Fire Safety
(associated with fast flaming fires) sooner than Photoelectric alarms. Home fires develop in different ways and are often unpredictable. For maximum protec- tion, Kidde recommends that both Ionization and Photoelectric alarms be installed. • NFPA 72 states: Life safety from fire in residential occupancies is... -
Page 12: Good Safety Habits
8. GOOD SAFETY HABITS DEVELOP AND PRACTICE A PLAN OF ESCAPE • Make a floor plan indicating all doors and windows and at least two (2) escape routes from each room. Second story windows may need a rope or chain ladder. •... -
Page 13: Nfpa Required Protection
• Once outside, go to your selected meeting place and make sure everyone is there. • Call the fire department from your neighbor’s home - not from yours! • Don’t return to your home until the fire officials say that it is all right to do so. -
Page 14: Service And Warranty
If after reviewing this manual you feel that your smoke alarm is defective in any way, do not tamper with the unit. Return it for servicing to: The Asian business unit of Kidde Residential & Commercial Division, Fyrnetics (Hong Kong) Limited,21/F, Tower 2, Ever Gain Plaza, 88 Container Port Road, Kwai Chung, Hong Kong,TEL: 852-2553-4534 (See Warranty for in-warranty returns). -
Page 15: Five Year Limited Warranty
The obligation of Kidde under this warranty is limited to repair- ing or replacing the smoke alarm or any part which we find to be defective in...
Need help?
Do you have a question about the 29J and is the answer not in the manual?
Questions and answers