Table of Contents
Advertisement
Quick Links
Advertisement
Table of Contents

Summary of Contents for Extech Instruments EX520
- Page 1 User's Guide True RMS Industrial Multimeter Extech EX520...
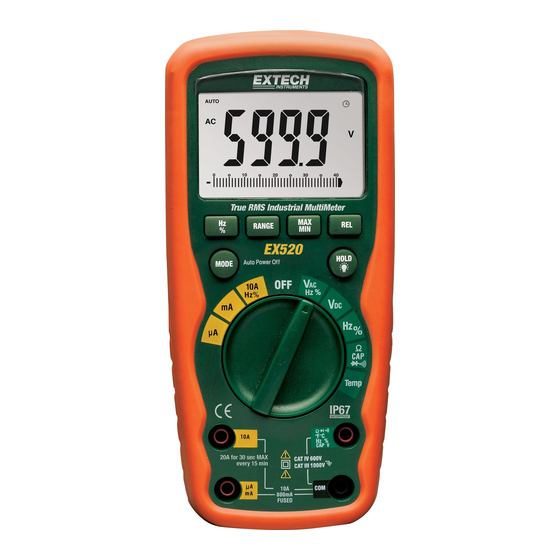
- Page 2 Introduction Congratulations on your purchase of the Extech EX520 True RMS Autoranging Multimeter. This meter measures AC/DC Voltage, AC/DC Current, Resistance, Capacitance, Frequency (electrical & electronic), Diode Test, and Continuity plus Thermocouple Temperature. It features a rugged design for heavy duty use. Proper use and care of this meter will provide many years of reliable service.
- Page 3 • Expired or damaged batteries can cause cauterization on contact with the skin. Always, therefore, use suitable hand gloves in such cases • See that the batteries are not short-circuited. Do not throw batteries into the fire. EX520-EU_ENG V2.3 1/08...
-
Page 4: Safety Instructions
NEVER operate the meter unless the back cover and the battery and fuse covers are in place and fastened securely. If the equipment is used in a manner not specified by the manufacturer, the protection provided by the equipment may be impaired. EX520-EU_ENG V2.3 1/08... - Page 5 (10 ) (ohms) Farads (capacitance) mega (10 ) (ohms) Ω Ohms Hertz (frequency) Volts Percent (duty ratio) Relative Alternating current AUTO Autoranging Direct current HOLD Display hold ºF Degrees Fahrenheit ºC Degrees Centigrade MAX Maximum Minimum EX520-EU_ENG V2.3 1/08...
-
Page 6: Dc Voltage Measurements
4. Read the voltage in the display. 5. Press the HZ/% button to indicate “Hz”. 6. Read the frequency in the display. 7. Press the Hz/% button again to indicate “%”. 8. Read the % of duty cycle in the display. EX520-EU_ENG V2.3 1/08... -
Page 7: Dc Current Measurements
10. Press the Hz/% button to indicate “Hz”. 11. Read the frequency in the display. 12. Press the Hz/% button again to indicate “%”. 13. Read the % duty cycle in the display. 14. Press the Hz/% button to return to current measurement. EX520-EU_ENG V2.3 1/08... -
Page 8: Resistance Measurements
4. Touch the test probes to the diode under test. Forward voltage will typically indicate 0.400 to 0.700V. Reverse voltage will indicate “OL”. Shorted devices will indicate near 0V and an open device will indicate “OL” in both polarities. EX520-EU_ENG V2.3 1/08... -
Page 9: Temperature Measurements
4. Touch the test probe tips to the circuit under test. 5. Read the frequency on the display. 6. Press the Hz/% button again to indicate “%” on the display. 7. Read the % of duty cycle on the display. EX520-EU_ENG V2.3 1/08... -
Page 10: Autoranging/Manual Range Selection
MODE button and turn the meter on. LOW BATTERY INDICATION icon will appear in the lower left conner of the display when the battery voltage becomes low. Replace the battery when this appears. EX520-EU_ENG V2.3 1/08... -
Page 11: Maintenance
You can hand over your used batteries / accumulators, gratuitously, at the collection points for our branches in your community or wherever batteries / accumulators are sold! Disposal Follow the valid legal stipulations in respect of the disposal of the device at the end of its lifecycle EX520-EU_ENG V2.3 1/08... -
Page 12: Replacing The Fuses
[SIBA 70-172-40], 10A/1000V fast blow for the 20A range [SIBA 50-199-06]). 7. Replace and secure the rear cover, battery and battery cover. WARNING: To avoid electric shock, do not operate your meter until the fuse cover is in place and fastened securely. EX520-EU_ENG V2.3 1/08... -
Page 13: Specifications
(20A: 30 sec max with reduced accuracy) All AC voltage ranges are specified from 5% of range to 100% of range NOTE: Accuracy is stated at 65 F to 83 F (18 C to 28 C) and less than 75% RH. EX520-EU_ENG V2.3 1/08... - Page 14 -45 to 750°C 1°C Note: Accuracy specifications consist of two elements: • (% reading) – This is the accuracy of the measurement circuit. • (+ digits) – This is the accuracy of the analog to digital converter. EX520-EU_ENG V2.3 1/08...
- Page 15 The UL mark does not indicate that this product has been evaluated for the accuracy of its readings. Copyright © 2008 Extech Instruments Corporation. All rights reserved including the right of reproduction in whole or in part in any form.


Need help?
Do you have a question about the EX520 and is the answer not in the manual?
Questions and answers