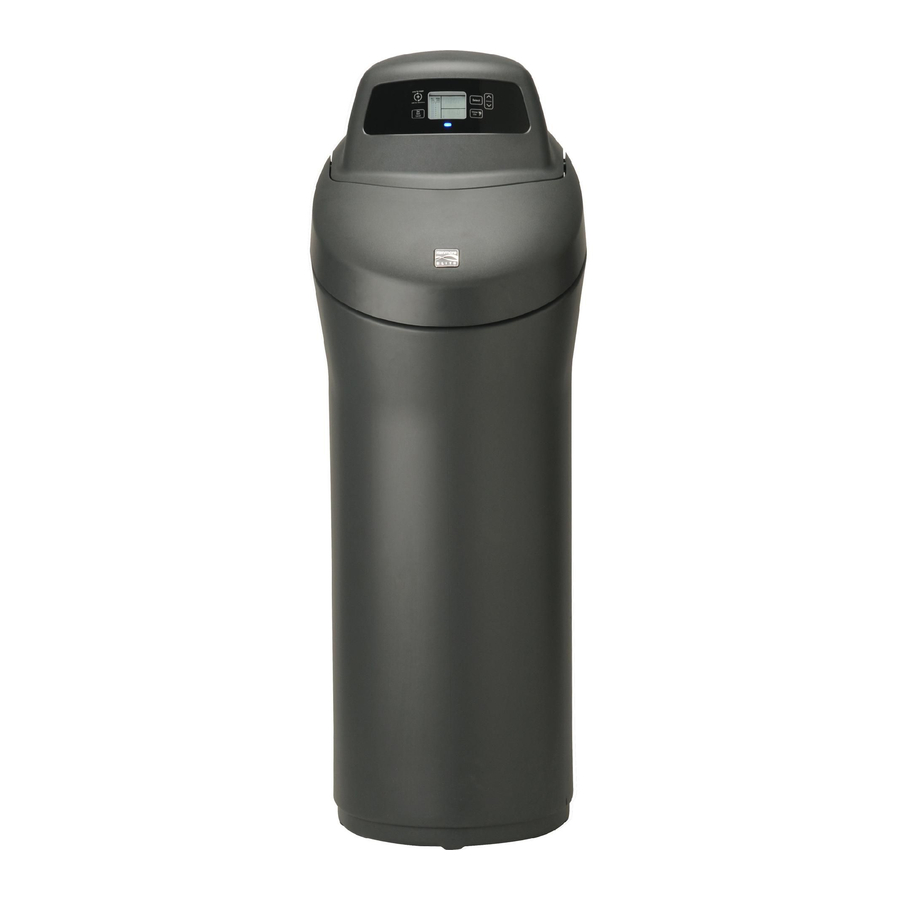
Kenmore 625.385200 Use & Care Manual
Hybrid water softener
Hide thumbs
Also See for 625.385200:
- Use & care manual (32 pages) ,
- Installation instructions manual (32 pages) ,
- Use & care manual (28 pages)
Table of Contents
Advertisement
Available languages
Available languages
Quick Links
Use & Care Guide
Manual
de Uso y Cuidado
English
/
Espa_ol
System tested and certifed
by NSIF nternat onal
against
NSIF/AIIqSI Standard
42 for the reductio_'_
of chlorine
taste and odor, and Star_da_'d 44 for
hardness
reductiorb
elf ciency and the reduct on
of barium
arid radium
226/228o
IEste s sterna ha sdo
probado
y certif cado pot
NSIF nternat orK,_l de acuerdo
a Norma
II",,,,I,
SIF::!ANSI 42
para la reducci6n
dd sabor y el olor a cloro, y
Irqorma 44 para la reducci6n
de la dureza_ ef ciencia
y la reducci6n
dd baio
y del radio 226/228,
Model
,/Modelo
No. 625.385200
Ilenmore Elite
@
A w_"lllll'@_ sef'lllll'@n@_ _ nd
_ who_e
home
fi_"lllll'@_ in en@
÷
°
Agu
Un ab_andado_
de agua con fi_o
in_eg_ado
papa toda
_a casa
Sears Brands Management
Corporation
3333 Beverly Road
Hoffman
Estates, IL 60179
U.S.A.
www.kenmorewater.com
www.kenmore.com
www.sears.com
®
Printed on recycled
paper/
Impreso en papel
reciclado
P/N
7329853
(Rev. A
7/25/11)
I_ II II I/:
Advertisement
Table of Contents

Related Manuals for Kenmore 625.385200


Summary of Contents for Kenmore 625.385200
- Page 1 Irqorma 44 para la reducci6n de la dureza_ ef ciencia y la reducci6n dd baio y del radio 226/228, Model ,/Modelo No. 625.385200 Ilenmore Elite A w_"lllll'@_ sef'lllll'@n@_ _ nd _ who_e home fi_"lllll'@_ in en@ ÷ °...
- Page 2 WARRANTY ON KENMORE ELITE®HYBRID WATER SOFTENER ONE YEAR LIMITED WARRANTY ON HYBRID WATER SOFTENER When installed, operated and maintained according to all instructions supplied with the product, if this Kenmore appliance fails due to a defect in material and workmanship within one year from the date of pur- chase, call 1-800-4-MY-HOME...
- Page 3 Warranty ..................Safety Guides .................. Specifications & Dimensions ..............Packing List ................... Plan Your Installation ................Installation .................. 7-11 Programming the Softener ..............12-13 Flushing the System ................Adding Salt to the Storage Tank ..............What Your Hybrid Water Softener Will Do ............
- Page 4 Model No. 625.385200 Model Code 11,000 @ 2.6 Ibs. Rated Softening Capacity (Grains @ Salt Dose) 24,700 @ Z8 Ibs. 31,100 @ 13.4 Ibs. Rated Efficiency (Grains/Pound of Salt @ Minimum Salt Dose) 4,230 @ 2.6 Ibs. Water Used During...
- Page 5 The parts required to assemble and install the water Remove and discard (or recycle) all packing materials. softener are included with the unit. Thoroughly check To avoid loss of small parts, we suggest you keep the the water softener for possible shipping damage small parts in the parts bag until you are ready to use them.
- Page 6 TYPICAL INSTALLATION WHERE TO INSTALL THE HYBRID WATER SOFTENER 5. Do not install in a place where the softener could freeze. Damage caused by freezing voids the war- Review the following points before you choose a place ranty by Sears Brands Management Corporation.
- Page 7 CHECK YOUR WATER PRESSURE BEFORE INSTALLING For your water softener to work properly, incoming psi, buy and install a pressure reducing valve in the water pressure in your house pipes must be no lower pipe supplying water to the softener's inlet.
- Page 8 ASSEMBLE INLET AND OUTLET PLUMBING INSTALL SINGLE BYPASS VALVE (cont.) Before installing the bypass valve and/or installation Measure, cut (thread if needed) and put together adaptors, make sure that the turbine and support pipe and fittings up to the main water pipe.
- Page 9 CONNECT THE VALVE DRAIN HOSE COPPER DRAIN TUBE: Local plumbing codes may require the use a copper valve drain tube. A copper Take a length of 3/8" inside diameter drain tubing tube is also best to use if running a drain line overhead. (supplied) and attach one end to the drain fitting...
- Page 10 METALPIPEGROUNDING RINSE OUT CARBON FINES Small particles of carbon filtration material are gener- ated during manufacturing and shipping, which will exit Valve Inlet the media tank with the first water flow. These carbon "fines" are not harmful, but give the water a gray color Ground and should be rinsed down the drain before...
- Page 11 LEAK TEST SINGLE BYPASS VALVE To check for leaks, complete the following steps: 1. Fully open two nearby cold water faucets down- stream from the softener. 2. Observe steady weater flow from both open faucets. Pull stem outward for Service 3 After about three minutes, open a hot water faucet...
- Page 12 REGENERATION button Display SELECT button UP button SET SALT LEVEL button BLUE LIGHT (see below) WATER USE button Figure DOWN button BLUE LIGHT SALT SIGNAL L-- _tFI SALT SIGNAL l 71.Fl Fl P, LEVEL LEVEL L=_2=_-LJ2L2_C !__t _C,uu When the Kenmore Elite ®...
- Page 13 SETWATERHARDNESS NUMBER The softener's default recharge start time is 2:00 AM. This is normally a time of day when water is not If you completed the previous step, the word "HARD- being used in the household. Hard water bypasses NESS" should show in the display. Otherwise, press the the softener if the household...
- Page 14 Your new Sears softener is now softening the water After all installation steps have been completed: your household needs. However, your WATER HEATER I. Make sure the bypass valve(s) is in the "service" is filled with hard water. To have fully soft water right (open) position.
- Page 15 The Kenmore Elite ® Hybrid Water Softener has been tered water from your kitchen faucet for food prepara- designed to include two different types of media, tion and drink, in the bath and shower which will reduce chlorine's aesthetic effect on your skin and hair, high quality media that reduces tastes and odors and a...
- Page 16 SALT MONITOR SYSTEM OPTIONAL SETTINGS: • SALT EFFICIENCY The water softener has a blue light that will flash to remind you to add salt to the storage tank. • CLEAN FEATURE NOTE: You must set salt level each time salt is added •...
-
Page 17: Features
2. Press SELECT again to display one of the "Clean" 4. Press SELECT again to display the "97%" screen. screens shown below. • SALT SIGNAL SALT SIGNAL FtF_ F_ LEVEL LEVEL LEVEL LEVEL • SALT SIGNAL SALT SIGNAL F, C C LEVELLEVEL LEVEL LEVEL w__FF... - Page 18 6. Press SELECT again to display the "Gallons or Liters" 8. Press SELECT again to display the "Backwash Time" screen. setting screen. SALT SIGNAL SALT SIGNAL SALT SIGNAL LEVEL LEVEL LEVEL LEVEL LEVEL LEVEL 2j _'N Bkwash TIME LITERS Figure 33 GALLONS Figure BACKWASH...
- Page 19 WATER FLOW THROUGH THE SOFTENER PROGRAM MEMORY To view the flow rate through the softener in gallons If electrical power to the softener goes off, the time dis- liters) per minute, press the WATER USE button. If soft play is blank but the electronic controller keeps the cor- water...
- Page 20 SALTBRIDGE Push tool into Sometimes, a hard crust or salt "bridge" forms in the salt bridge_ brine tank. It is usually caused by high humidity or the wrong kind of salt. When the salt "bridges," an empty to break _t space forms between the water and the salt.
- Page 21 TROUBLESHOOTING If your water softener does not work properly, make the following easy checks. Often, you will find what is wrong yourself and you won't have to call and wait for service. If you do not find anything wrong while making the checks, and your softener still does not work properly, call your Sears Service Department.
- Page 22 MANUALLY INITIATED ELECTRONIC DIAGNOSTICS 1. To enter diagnostics, press the SELECT button hold for three seconds. The display will change Motor show turbine count, valve cycle position, and position switch status (open or closed). -...---- Valve Position Indicator Position / Sensor •...
- Page 23 MANUAL ADVANCEREGENERATION CHECK Position Markers (valve in service) This check verifies proper operation of the valve motor, brine tank fill, brine draw, regeneration flow rates, and other controller functions. Always make the initial checks first, and perform the manually initiated elec- tronic diagnostics.
- Page 24 Valve Assembly See Pages 26 & 27 for parts Rating Decal Location Questions? Call the Kenmore Water Line 1-800-426-9345 or visit www.kenmorewater.com...
- Page 25 Part No. Description Part No. Description 7329803 Top Cover Brinewell Assembly • 7214375 (includes Key Nos. 19 & 20) Salt Lid (includes Kenmore badge 7330600 Brinewell & English instruction decal) Decal, Salt Level • 7329934 Instruction Decal, Spanish 1103200 7275907 Transformer, 24V, 1OVA Adaptor...
- Page 26 Wear Strip Cross-Section View Questions? Call the Kenmore Water Line 1-800-426-9345 or visit www.kenmorewaterocom...
- Page 27 Part No. Description Part No. Description 7224087 Screw, #8-32 x 1" (2 req.) Turbine & Support Assembly 7290931 (includes 1 ea. of Key Nos. 77, 78 • 7286039 Motor (incl. 2 ea. of Key No. 50) & 2 ea. of Key No. 72) 7231393 Motor Plate...
- Page 28 Your Home For expert troubleshooting and home solutions advice: managemylife Our Home For repair of carry-in items like vacuums, lawn equipment, and electronics, call anytime for the location of your nearest Sears Parts & Repair Service Center 1-800-488-1222 (U.S.A.) 1-800-469-4663 (Canada) www.sears.com www.sears.ca...
- Page 29 Irqorma 44 para la reducci6n de la dureza_ ef ciencia y la reducci6n dd baio y del radio 226/228, Model ,/Modelo No. 625.385200 Ilenmore Elite A w_"lllll'@_ sef'lllll'@n@_ _ nd _ who_e home fi_"lllll'@_ in en@ ÷ °...
- Page 30 GARANTJA PARA EL ABLANDADOR HJBRIDO DE AGUA KENMORE ELITE® GARANTJA LIMITADA DE UN AI_IO PARA EL ABLANDADOR HJBRIDO DE AGUA Cuando se haya instalado, operado y mantenido conforme a todas las instrucciones suministradas con el producto, si este artefacto Kenmore...
- Page 31 • El ablandador Nbrido de agua Kenmore Elite ® reducir6 piezas no met61icas. los minerales de la dureza del agua. Eso se mide en • El ablandador de agua funciona con presiones de agua granos por gal6n (gpg).
- Page 32 Modelo No. 625.385200 C6digo del modelo 11,000 a 2.6 lb. 24,700 a 7.8 lb. Capacidad de ablandado nominal (granos por dosis de sal) 31,100 a 13.4 lb. Eficiencia nominal (granos/libra de sal por dosis minima de sal) 4,230 a 2.6 lb.
- Page 33 Retire y deseche (o recicle) todos los materiales Las piezas necesarias para armar e instalar empaque. Para evitar la p_rdida de piezas peque_as, ablandador de agua se incluyen la unidad. Revise le sugerimos conservarlas en la balsa de piezas hasta minuciosamente el abJandador de agua...
- Page 34 INSTALACION TiPICA Figura 4 DONDE INSTALAR EL ABLANDADOR HJBRIDO DE AGUA 5. No instale el ablandador en un lugar donde pueda congelarse. El da_o causada par congelamiento Antes de seleccionar un lugar para instalar anula la garantia de Sears Brands Manacjement ablandador, examine los siguientes...
- Page 35 REVISE LA PRESION DEL AGUA ANTES DE LA INSTALACION Para que el ablandador de agua funcione correctamente, instale una v_lvula de reducci6n de presi6n en el tubo la presi6n del agua entrante en las tuberias de la casa que suministra agua a la entrada del ablandador.
- Page 36 INSTALELA VALVULA DE UNA DERIVACION ARME LA PLOMERIA DE ENTRADA Y SALIDA (cont.) Mida, corte (rosque si fuera necesario) y arme todos los tubos y las uniones hasta el tubo de agua principal. Antes de instalar la v61vula de derivaci6n Aseg0rese de que el tubo de suministro de agua...
- Page 37 CONECTE LA MANGUERA DE DESAGUE A fin de adaptar un tubo de desagLie de cobre al ablandador, compre una uni6n de compresi6n (1/4 pulg. PARA LA VALVULA de rosca hembra x 1/2 pulg. de D.E. de tubo) y la Tome una secci6n de tuberJa de desagLie de 3/8 pulg.
- Page 38 PUESTA A TIERRAPORTUBO METALICO PURGUE LAS PARTICULAS FINAS DE CARBONO Durante la fabricaci6n y el envio del producto generan pequefias particulas de material filtrante la entrada ¢arbono, las ¢uales saldr6n del tanque de medios de la v61vula filtrantes con el primer flujo de agua.
- Page 39 VALVULA DE UNA DERIVACION pausas para permitir que el ablandador se presurice gradualmente. 9. Deje que el ablandador finalice los ciclos de retrolavado y enjuague r6pido (lleva unos 20 Deslice el minutos). Cuando finalice la regeneraci6n, la v61vula v6stago hacia del ablandador regresar6 a la posici6n...
- Page 40 Bot6n "REGENERATION" Bot6n "SELECT" (Regeneraci6n) Pantalla (Seleccionar) Bot6n SUBIR Figura 15 Bot6n "SET SALT LEVEL" LUZ AZUL Bot6n "WATER USE" Bot6n BAJAR (Fi]ar el nivel de sal) (Ver m6s abajo) (Consumo de agua) LUZ AZUL SALT StGNAL E _tFI SALT SIGNAL l 71.F_FI ,,,, LEVEL...
- Page 41 FIJE EL NUMERO DE DUREZA DEL AGUA 1. La hora predeterminada de inicio de regeneraci6n del ablandador es 2:00 AM. Por Io general, es una Si cumpli6 el paso anterior, aparecer6 la palabra hora en que no se usa agua en la mayoria de las "HARDNESS"...
- Page 42 Despu6s de cumplir todos los pasos de la instalaci6n: El nuevo ablandador Sears ya est6 ablandando el agua para todas las necesidades de su vivienda. 1. Aseg6rese de que las v61vulas de derivaci6n embargo, su CALENTADOR DE AGUA est6 Ileno de encuentren en posici6n de "servicio"...
- Page 43 El ablandador hibrido de agua Kenmore Elite ® se ha grifo de la cocina para preparar alimentos y beber, en disefiado para incluir dos tipos diferentes de medios el bafio y la regadera para reducir el efecto estGtico filtrantes, un medio filtrante de alta calidad que reduce del cloro en la piel y el cabello,...
- Page 44 SISTEMA DE MONITOREO DE SAL AJUSTES OPCIONALES: • EFICIENCIA DE SAL El ablandador de agua tiene una luz azul que destellar_ para recordarle que debe agregar sal al tanque • FUNCION DE LIMPIEZA almacenamiento. • MINUTOS DE LA FUNCION DE LIMPIEZA NOTA: El nivel de sal debe fijarse cada vez que se agregue...
- Page 45 2. Presione nuevamente el bot6n SELECT (Seleccionar) 4. Presione nuevamente el bot6n SELECT (Seleccionar) para que aparezca una de las pantallas de limpieza para que aparezca la pantalla de la funci6n del 97%. que se ilustran a continuaci6n. SALT SIGNAL SALT SIGNAL SALT SIGNAL SALT SIGNAL...
- Page 46 6. Presione nuevamente el bot6n SELECT (Seleccionar) SALT SIGNAL LEVEL LEVEL para que aparezca la pantalla de galones o litros. __-9 M,N Bkwesh TIME SALT SIGNAL SALT SIGNAL LEVEL LEVEL LEVEL LEVEL Figure 33 TIEMPOS DE RETROLAVADO Y ENJUAGUE RAPIDO: LITERS GALLONS Si despu6s de la regeneraci6n...
- Page 47 FLUJO DE AGUA A TRAVI_S DEL ABLANDADOR MEMORIA DEL PROGRAMA Para ver el caudal del ablandador en galones (o litros) Si se interrumpe la electricidad del ablandador, por minuto, apriete el bot6n "WATER USE" (Consumo pantalla de la hora quedar6 en blanco pero el controlador...
- Page 48 Empuje la PUENTE DE SAL herramienta contra Algunas veces se forma una corteza dura o un "puente" puente de sal'_ de sal en el tanque de salmuera. Por Io general para romperlo ocasionado por la alta humedad o por usar un tipo de sal equivocado.
- Page 49 DETECCION Y SOLUCION DE PROBLEMAS Si el ablandador de agua no funciona correctamente, realice las siguientes comprobaciones f6ciles. A menudo, usted mismo detectar6 el problema y no necesitar6 Ilamar ni esperar al servicio t6cnico. Si, al realizar las comprobaciones, no detecta el problema y el ablandador sigue sin funcionar...
- Page 50 DIAGNOSTICO ELECTRONICO INICIADO MANUALMENTE 1. Para ingresar en el modo de diagn6stico, mantenga oprimido el bot6n SELECT (Seleccionar) durante tres segundos. Cambiar6 la pantalla para mostrar Motor recuento de la turbina, la posici6n en el ciclo de la v61vula y el estado del interruptor de posiciones (abierto o cerrado).
- Page 51 Marcadores de posici6n VERIFICACIONDE LA REGENERACION CON (v61vula en servicio) AVANCEMANUAL Esta verificaci6n revisa el funcionamiento adecuado motor de la v61vula, Ilenado del tanque de salmuera, extracci6n de salmuera, velocidades del flujo de regeneraci6n y otras funciones del controlador. Siempre realice primero las revisiones iniciales, y ejecute el diagn6stico...
- Page 52 Conjunto de la v_lvula Vea las piezas en las p6ginas 26 y 27 /--, 9S 8 Ubicaci6n de la calcomania clasificaci6n J" _Tiene preguntas? Llame a la Ifnea directa de I<enmore Water al 1-800-426-9345 o visite el sitio www.kenmorewater.com...
- Page 53 Clave Pieza No. Descripci6n Clave Pieza No. Descripci6n 7329803 Cubierta superior Conjunto del dep6sito de salmuera • 7214375 (incluye claves No. 19 y 20) Tapa de la sal (incluye la placa 7330600 de Kenmore y la calcomania Dep6sito de salmuera instrucciones en ingl6s) '1 _...
- Page 54 Banda antidesgaste Vista en corte transversal _:Tiene preguntas? Llame a la linea directa de I<enmore Water al 1-800-426-9345 o visite el sitio www.kenmorewater.com...
- Page 55 Clave Pieza No. Descripci6n Clave Pieza No. Descripci6n 7224087 Tornillo 8-32 x 1 pulg. (se necesitan 2) Conjunto de turbina y soporte • 7290931 (incluye 1 de las claves No. 77 y Motor (se incluye 2 c/u de la clave 7286039 78, y 2 de la clave No.
- Page 56 Your Home For expert troubleshooting and home solutions advice: managemylife Our Home For repair of carry-in items like vacuums, lawn equipment, and electronics, call anytime for the location of your nearest Sears Parts & Repair Service Center 1-800-488-1222 (U.S.A.) 1-800-469-4663 (Canada) www.sears.com www.sears.ca...
Need help?
Do you have a question about the 625.385200 and is the answer not in the manual?
Questions and answers