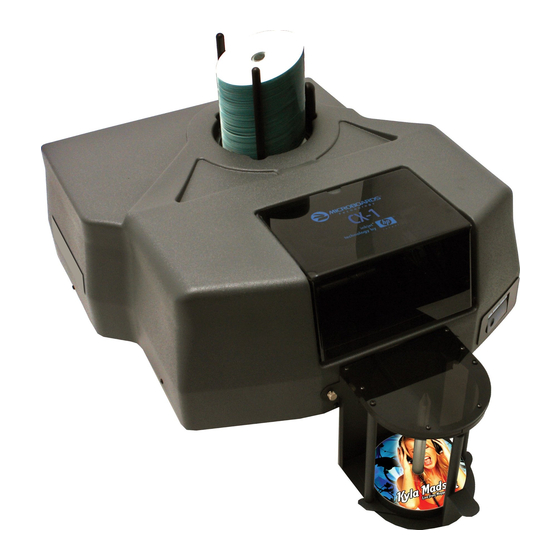
MicroBoards Technology CX-1 User Manual
Disc publisher for microsoft windows 7, vista, and xp
Hide thumbs
Also See for CX-1:
- User manual (26 pages) ,
- Specification sheet (2 pages) ,
- Quick reference manual (2 pages)

Subscribe to Our Youtube Channel
Related Manuals for MicroBoards Technology CX-1


Summary of Contents for MicroBoards Technology CX-1
-
Page 1: Users Manual
CX-1 Disc Publisher ® For Microsoft Windows 7, Vista, and XP Users Manual Microboards Technology LLC Version 4.00... -
Page 3: Table Of Contents
..................................17 LEANING ................................17 ALIBRATION ..........................18 UTOMATIC ARGIN ALIBRATION ................................18 RINT ................................18 XERCISE USING SURETHING DISC LABELER ........................18 THE CX-1 DISC PUBLISHER SOFTWARE .......................19 ............................19 ICROBOARDS RINT RITE 2 .................................19 RASSI ............................21 RINT ............................21 OBOTICS TILITIES Enable Configure Dialog............................21 Exercise Belts ................................21 Unload the Drive ................................21... - Page 4 Any unauthorized modification to this equipment may result in the revocation by the FCC of the user’s authority to operate this equipment. NOTE: This equipment has been tested and found to comply with the limits for a Class B digital device, pursuant to Part 15 of the FCC Rules.
-
Page 5: Introduction
Flexibility and Speed for Any Application While the CX-1 Disc Publisher was designed to fill a need in the high-volume arena, it also has the ability to print at 4800 x 1200 dpi on both DVD and CD media. With the included design software, users can enjoy its benefits whether making a few discs or a few hundred. -
Page 6: System Requirements
Assembly and Installation Assembly Instructions CX-1 Disc Publisher Assembly Remove the CX-1 Disc Publisher system from the shipping box and confirm you received all of the items. Place the CX-1 Disc Publisher on a stable, flat surface. You will need room both in front and behind the system, as discs will be accessed from both locations. -
Page 7: Front Panel Indicators And Buttons
Load the rest of the discs at an angle, against the wide input rod, as seen in figure 2. The CX-1 Disc Publisher will hold a maximum of 100 discs. DO NOT load more than 100 discs in the system, as this may cause the discs to load incorrectly. -
Page 8: Installing Ink Cartridges
CX-1 Disc Publisher to fail and may affect your warranty. Loading / Replacing Ink Cartridges Cartridges can be changed while the CX-1 Disc Publisher is on. The Out of Ink LED will light if any cartridge is beginning to run low on ink. -
Page 9: Replacing Empty Ink Cartridges
CX-1 DISC PUBLISHER Replacing Empty Ink Cartridges The CX-1 Disc Publisher will notify you when either cartridge is completely empty. Since the current print job will be cancelled at that point, it is strongly recommended that you replace the cartridges when you are notified that they are low rather than waiting until they are empty. -
Page 10: Cx-1 Disc Publisher Installation
The connection between the PC and the Microboards CX-1 Disc Publisher is done with one USB cable. 1. Confirm that the AC power cord to the back of the CX-1 Disc Publisher is connected and that the switch in the back is ON. -
Page 11: Windows Vista Hardware Installation
The Microboards CX-1 Installer should always be run when logged in as user with full Administrator rights. This is required for the driver pre-installation to be successful. Once the CX-1 is plugged into the PC via the USB connection, the hardware will automatically be found and installed on your PC. - Page 12 5. The following screen will appear: 8. If this message appears, click the 6. Select No, not this time and click Continue Anyway button. Next. 9. Click Finish to complete the 7. Click Next. installation.
-
Page 13: Printing Preferences
MICROBOARDS TECHNOLOGY, LLC CX-1 DISC PUBLISHER Printing Preferences Access the Printing Preferences by clicking the Start Button on your Windows computer. Select Settings and then select Printers. Right click on the Microboards PF3 icon, then select Printing Preferences. There are 7 tabs across the top of the window. Click each tab to see the available settings. -
Page 14: Advanced Tab
The Outer and Inner Diameters will change the size of the area to be printed. To avoid excessive ink buildup, these values should never be set so that the CX-1 Disc Publisher is printing off the media. The Parameter Unit should remain on 0.1mm setting maximum precision. -
Page 15: Ink Tab
To avoid excessive ink buildup, these values should never be set so that the CX-1 Disc Publisher is printing off the media. The default diameter settings are 1180 for the Outer and... -
Page 16: Print Quality Tab
Print Quality Tab The Print Quality tab controls the print resolution. Print Modes • Text and Graphics • Photo Print Quality • Normal • Best • MaxDPI Printing Recommendations Text and Graphics mode is used for printing mainly text information and small, simple graphics. Below are some examples for images in Fast, Normal and Best Modes: Text and Graphics –... -
Page 17: The Microboards Printer Toolbox
MICROBOARDS TECHNOLOGY, LLC CX-1 DISC PUBLISHER The Microboards Printer Toolbox To access the Microboards Toolbox, double-click the toolbox icon located in the tool tray. Select the Microboards PF3 and click the buttons to access a particular maintenance function of the Toolbox for the selected printer. -
Page 18: Automatic Margin Calibration
It is not necessary to load any media for this utility. Using SureThing Disc Labeler SureThing Disc Labeler is included with the CX-1 Disc Publisher and will be installed during the CX-1 Installation. For more information on using SureThing, please refer to the SureThing Help menu. -
Page 19: The Cx-1 Disc Publisher Software
PrintWrite is not supported on any PC running Windows 2000 as the Operating System. The first time you launch PrintWrite, you will be asked to confirm the configuration of the CX-1 Disc Publisher system. This only needs to be done the first time the software is used, or if there is a change to your hardware. - Page 20 Click the OK button. The system will now initialize the CX-1 Disc Publisher. The belts will be cleared of any discs and any discs in the recorders will be removed and rejected. Once initialization is complete, the system is ready for use.
-
Page 21: Zulu2 And Print Only Mode
Zulu2 and Print Only Mode While the CX-1 Disc Publisher was designed to be operated in Burn and Print mode, you can also use the CX-1 as a disc printer. SureThing Disc Labeler software is included with the CX-1 Disc Publisher, but you can print using many applications. -
Page 22: Software Re-Installation
Software Re-Installation The information in this section will only apply to a manual re-installation of the individual software packages. If you have not yet installed the CX-1 Disc Publisher using the Installer, it is recommended that you do so. Installing the CX-1 Disc Publisher in an incorrect order could result in an unsuccessful installation. -
Page 23: Surething Labeler Software Re-Installation
SureThing Labeler Software Re-Installation There are 3 methods of reinstalling SureThing should the need arise: A. (Recommended) Insert the Microboards CX-1 Disc Publisher Installation CD into the CD/DVD ROM drive on your computer and select the Repair option when the installer starts. -
Page 24: Troubleshooting
Remove any discs that are left on the belt. 2. Lift the cover and check for any discs on the front deck of the CX-1 Disc Publisher. Remove any discs found on the belts. Close the cover. -
Page 25: "No Printers Connected" Message
During the CX-1 installation, a shortcut to a utility to clear the print queue was added to your PC. Please note that this utility will clear all print jobs currently in the print queue for any printer. -
Page 26: Printing Specifications
Printing Specifications Print Speed: Depends upon percentage of coverage and print mode selected Photo: • Approx. 115 seconds for 100% full-color coverage, Photo Best Mode • Approx. 80 seconds for 100% full-color coverage, Photo Normal Mode Text & Graphics: • Approx. -
Page 27: Technical Support
MICROBOARDS TECHNOLOGY, LLC CX-1 DISC PUBLISHER Technical Support For technical questions or support issues, contact Microboards Technology technical support: United States Europe Japan PH: 952-556-1639 PH: +44 (0) 845 230 7800 PH: 03-3561-2266 FAX: 952-556-1628 www.microboards.co.uk www.microboards.co.jp support@microboards.com www.microboards.com Please have the Model and Serial Number of your Microboards Product available when contacting Technical Support.
Need help?
Do you have a question about the CX-1 and is the answer not in the manual?
Questions and answers