Table of Contents
Advertisement
Advertisement
Table of Contents

Related Manuals for Simmons SDHB2


Summary of Contents for Simmons SDHB2
- Page 1 SDHB2 Hybrid electronic Add-on pack User Manual www.simmonsdrums.net...
- Page 2 FCC Statements 1. Caution: Changes or modifications to this unit not expressly approved by the party responsible for compliance could void the user’s authority to operate the equipment. 2. Note: This equipment has been tested and found to comply with the limits for a Class B digital device, pursuant to Part 15 of the FCC Rules. These limits are designed to provide reasonable protection against harmful interference in a residential installation.
- Page 3 SDHB2 Congratulations! … on your purchase of the Simmons SDHB2 Hybrid Electronic Add-On Pack. To get the most enjoyment out of this product we recommend that you read over this manual at least once, then refer back to it to learn more about specific functions.
-
Page 4: Table Of Contents
Assembly Panels Top Panel Rear Panel Side Panel Connections Triggers and Pads Audio Equipment Headphones MP3/CD Player Power Supply Power Switch Using the SDHB2 Triggers and Pads Playing the Triggers and Pads Metronome Kit Mode Selecting a Drum Kit Global Reverb Voice Mode Selecting the Drum Voice Adjusting Level Adjusting Pan Adjusting Tuning Saving User Kits... -
Page 5: Assembly
SDHB2 assembly The SDHB2 Simmons Electronic Add-On Pack is a unique product that allows you to seamlessly mix your acoustic drum set with the unique electronic drum capabilities of the Simmons SD7K. This kit contains: Brain Module Stand and clamps to hold 2 x Simmons SDPSZP Pro 9” pads the Brain Module and pads 2 x 3’ and 2 x 8’ cables to connect the 2 x Simmons SDADT Piezo triggers pads and the triggers to the Brain Module Attaching the Drum Module wing screw Spread the stand’s legs and insert top of stand into base. - Page 6 Place one trigger on each drum. To attach your triggers, simply remove the protective backing of the adhesive and attach the trigger to your drum. We recommend plac- ing the trigger approximately 1” from the rim of your snare drum and 1”–2” from the rim of your bass drum. Note: In order to optimize the response and avoid double triggering, it’s recommend that you use internal muffling in your bass drum (i.e. a pillow, blanket, or commercial muffling system). Once set, the SDADT mounting clip ensures that the audio jack stays in place. After placing your triggers on the drum head, simply remove the closest tension rod and insert it into the mount clip before re-tightening the rod. This trigger mount fastens to any tension rod. Bass Drum Trigger Snare Drum Trigger A note on terminology— Here, “Trigger” and “Pads” are used interchangeably. SDHB2 User’s Manual...
-
Page 7: Panels
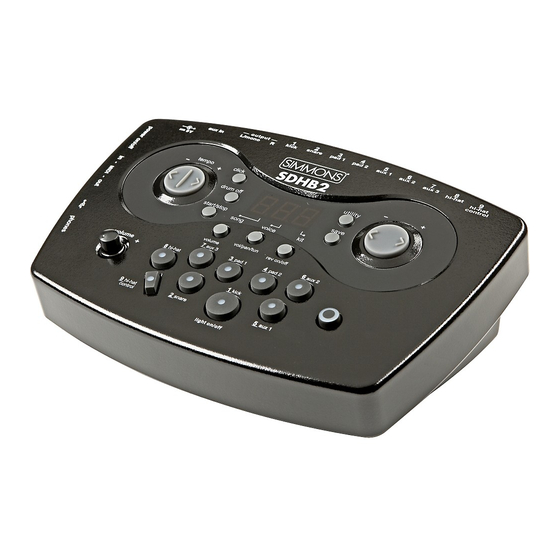
SDHB2 Panels Top Panel 9 10 Master volume knob [SONG] button Controls the volume of phone and line outputs. Enters or switches Song menu pages. Pad select buttons and indicators 3-digit LED In Kit mode, the buttons play the pad voices. This LED is the main display device of the SDHB2, In Voice Mode, they select the pad to be edited which will show the parameters of the current menu. -
Page 8: Rear Panel
9V power adapter side panel Power switch Switch that turns power on and off. MIDI IN and OUT These ports allow communication with other products equipped with a MIDI interface. Please see the MIDI section of this manual for details. USB port A port used to connect to a com- puter. (MIDI In/Out via USB) Phone jack A stereo jack used to connect headphones. SDHB2 User’s Manual... -
Page 9: Connections
SDHB2 connections Triggers and Pads CAUTION! To avoid damage, turn OFF the SDHB2’s power switch and all related devices prior to connecting or disconnecting cables. Using the provided cables, connect each pad and trigger to its corresponding trigger input jack, following the marking on the cables. www.simmonsdrums.net... -
Page 10: Audio Equipment
Connect the power adapter to the DC IN jack on the rear panel. Note: Make sure the power is switched OFF when connecting the drum module with external devices. Power Switch After confirming that all connections have been completed, rotate the volume knob to the left (its minimum volume level) before switching the power on. Set the power switch to the ON position. The kit indicator will light up and the display will show kit number 001. SDHB2 User’s Manual... -
Page 11: Using The Sdhb2 Triggers And Pads
SDHB2 using the SDHB2 Triggers and pads Playing the Triggers and pads • A ll the drum triggers and pads use a single trigger sensor for the whole drum or pad. • A ll the triggers and pads are velocity sensitive. Some voices can change sounds depending on the velocity level (striking force). metronome The SDHB2 includes a Metronome feature with two types of sounds: Click (Bell sound on the first beat, and Click sound on the other beats) or Vocal Counting (“one, two, three, four”). Press the [CLICK] button to start the metronome with the Click sound. Press the [CLICK] button a second time to change the metronome to Vocal Counting. Press the [CLICK] button again to stop the metronome. While the metronome is playing, the Beat indicator flashes at the current tempo. While the metronome is playing, the LED shows the current time signature. The time signature of the metronome can be changed using the [+] and [-] buttons. -
Page 12: Kit Mode
You can also turn on or off the Reverb effect. Selecting a drum kit In the Kit Number page, the 3-digit LED shows the current kit number. Use the [+] and [-] buttons to select any kit (1 ~ 50, looped) as the current kit. The SDHB2 includes 20 factory preset kits (1 ~ 20) and 30 User kits (21 ~ 50). (See Kit List on page 21.) Note: In KIT mode, you can use the Pad Select buttons to play the voices associated with the pads of the currently selected kit. Global reverb When the SDHB2 is in the Kit Number page, press the [KIT] button again to access the Global Reverb page. In the Global Reverb page, the LED shows the current Reverb status (“roN” for Reverb On or “roF” for Reverb Off). Global Reverb can be turned On or Off using the [+] or [-] buttons. Press the [KIT] button again to return to the Kit Number page. SDHB2 User’s Manual... -
Page 13: Voice Mode
SDHB2 voice mode If the SDHB2 is not yet in Voice Mode, press the [VOICE] button to enter the Voice Menu. The Voice indicator will light up. Now the [VOICE] button will page through the Voice Menu. In the Voice Mode, you can select the voice for each trigger / pad and adjust the level, pan, and tuning. The current trigger or pad to be edited can be selected either by pressing its Pad Select button, or by striking the pad itself. The Pad Select indicator lights up to show which pad is currently selected. Note: While editing Voice Volume, level, pan, and tuning, you can also preview the result of the current settings by pressing the Pad Select button to play the edited voice. -
Page 14: Adjusting Level
Use the [+] and [-] buttons to adjust the tuning of the current pad. saving user kits Make sure you save your customized kit; otherwise, your changes will be lost when you select another kit or turn off the SDHB2. Kits 001 ~ 020 are factory presets. Customized kits can be saved in User kits 021 ~ 050. User kits store all the Voice settings (Voice Number, level, pan and tuning) for all the pads. To save your customized kit to one of the User kits: 1. Press the [SAVE] button. The kit number flashes on the LED. 2. U se the [+] or [-] buttons to set the User kit number (021 ~ 050). The kit number will still be flashing. 3. Press the [SAVE] button again. The kit number stops flashing and the SDHB2 returns to Kit Mode. Note: To cancel the save operation while the LED is flashing, press the [KIT] or [VOICE] button. SDHB2 User’s Manual... -
Page 15: Utility Menu
SDHB2 Utility menu Press the [UTILITY] button to enter the Utility Mode. Now the [UTILITY] button will page through the Utility menu. In Utility Mode, you can adjust the trigger parameters (gain, crosstalk, curve) for each pad and trigger. Those parameters are common to all kits. The current trigger / pad to be adjusted can be selected either by pressing its Select button, or by striking the trigger / pad itself. The Pad Select indicator lights up to show which trigger / pad is currently selected. Pad and trigger sensitivity (gain) In the Trigger Gain page, the first digit of LED will display the letter ‘E’, followed by the gain value (1~16, not looped). Greater gain will allow you to trigger a signal, even if you strike the pad lightly. crosstalk In the Trigger Crosstalk page, the last 2 digits will show the crosstalk value (1~16) of the current pad with a letter ‘o’ displayed on the first digit of the LED. Hitting one pad may... -
Page 16: Curve
While in the Utility mode, press the [SAVE] button to store all trigger settings. Note: 1. I f you turn off the power without saving, you will lose the trigger setting changes you have just made. 2. These parameters affect all kits. restoring the factory preset To restore the factory preset hold down both TEMPO+ and TEMPO- when the SDHB2 is powered up. This function will replace the current settings of the following parameters by their default preset values: • All user kits (including Volume, Voice, Pan, Reverb, and Tuning setting) • Utility parameters (including gain, crosstalk, curve and splash sensitivity) SDHB2 User’s Manual... -
Page 17: Song Mode
SDHB2 Song mode If the SDHB2 is not yet in Song Mode, press the [SONG] button to enter the Song Menu. Now the [SONG] button will page through the Song Menu. The Song indicator will light up. In the Song Mode, you can select the song number while adjusting the volume of the song’s accompaniment and drum part. In addition, you can select whether to use the internal songs or control an external sequencer. -
Page 18: Accompaniment Volume
Use [TEMPO+] and [TEMPO-] buttons to adjust the tempo. Press both [TEMPO+] and [TEMPO-] buttons at the same time to reset the current tempo to its default value. (This function is not available when external song is selected.) If there’s no operation, SDHB2 will return to the previous menu page automatically after 2 seconds. SDHB2 User’s Manual... -
Page 19: Midi And Usb
SDHB2 MIDI and USB MIDI stands for Musical Instrument Digital Interface. This is a world-wide standard communication interface that enables electronic musical instruments and computers of all brands to communicate with each other so that instructions and other data can pass between them. This exchange of information makes it possible to create a system of MIDI instruments and devices that offer far greater versatility and control than what is available with isolated instruments. Whether you interface with computers, sequencers, expanders or other controllers, you’re sure to enhance your musical horizons. MIDI connection MIDI IN: This terminal receives MIDI data from an external MIDI device. MIDI OUT: This terminal transmits data from this instrument to other MIDI devices. usb connection The USB connector allows you to connect the SDHB2 directly to your computer. It can be connected without driver installation under the Windows XP & MAC OSX environment. The SDHB2 will be recognized as “USB Audio device” to receive and transmit MIDI messages through a single USB cable. USB is used only for MIDI messages (MIDI via USB). NOTE: When the USB is connected to a computer, all MIDI messages will be received and transmitted via USB. local mode From the MIDI’s point of view, the SDHB2 is composed of two devices:... -
Page 20: Midi Channels
Hybrid electronic add-on pack Using the SDHB2 as a general MIDI sound module Connecting an external keyboard or sequencer to the MIDI Input allows you to use the SDHB2 as a multi-timbral sound module to play various instrument parts in addition to your drums (for instance, Piano on Channel 1, Bass on Channel 2, Strings on Channel 3, etc.). The voices on each MIDI channel are selected using MIDI Program Change messages. (See the General MIDI Voice list on page 22.) NOTE: For more information on received MIDI messages, see the MIDI implementation chart. Using the SDHB2 to control a sequencer In Song mode, the song source can be set to external, allowing the SDHB2 to control the playback of an external sequencer. -
Page 21: Voice List
119 Power Tom 3 Bass Drum Roll Effect Snare 2 Cartoon Punch 120 Power Tom 4 Hip Hop Snare Simmons Snare 1 121 Funk Tom 1 Electronic Bass Drum ‘60s Snare Edge Simmons Snare 2 122 Funk Tom 2 House Kick 1 ‘60s Snare 100 Simmons Snare 3 123 Funk Tom 3 House Kick 2 506 Snare 101 Simmons Snare 4 124 Fusion Tom 1... - Page 22 293 Triangle Muted 187 Simmons V3 Tom 1 235 Laser Ray 294 Triangle Open 188 Simmons V3 Tom 2 236 Drive By 295 Sleigh Bells 189 Simmons V3 Tom 3 296 Wind Chimes 190 Simmons V4 Tom 1 297 Castanets 191 Simmons V4 Tom 2 298 Surdo Muted 192 Simmons V4 Tom 3 299 Surdo Open 193 Simmons Bend Tom 300 Lotus Drum SDHB2 User’s Manual...
-
Page 23: Drum Kit List
SDHB2 Drum Kit list Preset Kit Preset Kit Preset Kit Preset Kit Factory Preset Kits User Programmable Kits Factory Preset Kits User Programmable Kits 1 Rock 21 User 1 - ‘70s 11 ‘60s 31 (User 11 - Rock) 22 User 2 - Latin Percussion Standard 1 32 (User 12 - Standard 1) Simmons 1... -
Page 24: General Midi Voice List
Telephone Ring 038 Slap Bass 2 078 Shakuhachi Helicopter 039 Synth Bass 1 079 Whistle 127 Applause 040 Synth Bass 2 080 Ocarina 128 Gunshot SYNTH LEAD 081 Lead 1 (square) 082 Lead 2 (sawtooth) 083 Lead 3 (caliope lead) 084 Lead 4 (chiff lead) 085 Lead 5 (charang) 086 Lead 6 (voice) 087 Lead 7 (fifths) 088 Lead 8 (bass + lead) SDHB2 User’s Manual... -
Page 25: Percussion Set List
SDHB2 Percussion Set list Standard Room Rock Electronic Ch 10 PC Ch 9,16 PC 17,18 High Q Slap Scratch Push Scratch Pull Sticks Square Click Metronome Click Metronome Bell Acoustic Bass Drum Bass Drum 2 Acoustic Bass Drum 2 Acoustic Bass Drum... - Page 26 Car Break Car Pass By Gun Shot Crickets Train Noise 808 Maracas Helicopter Industrial Noise Gun Shot Machine Gun Laser Gun 808 Claves Explosion Dog Bark Horse Gallop Birds Chirping Rain Thunder Wind Sea Shore Stream Bubbles Bird SDHB2 User’s Manual...
-
Page 27: Midi Implementation Chart
SDHB2 midi implementation chart Function Transmitted Recognized Remarks Basic Default 10 ch 1–16 Channel Changed Default Mode Messages Altered ************** ************** Note 0–127 0–127 Number: True voice ************** 0–127 Velocity Note on 0 (99H, V=1–127) 0 (9nH,V=1-127) Note off 0 (99H,V=0) 0 (8nH or 9nH,V=0) After Key’s Touch Channel’s Pitch Bend Control... - Page 28 Simmons products. This guarantee gives you specific legal rights: you may have other legal rights which vary from state ™...
Need help?
Do you have a question about the SDHB2 and is the answer not in the manual?
Questions and answers