
Related Manuals for Draytek VigorSwitch G2240


Summary of Contents for Draytek VigorSwitch G2240
- Page 1 VigorSwitch G2240 User’s Guide Version: 1.0 Date: 2011/11/04 Copyright 2011 All rights reserved.
-
Page 2: Copyright Information
Web registration is preferred. You can register your Vigor device via Owner http://www.draytek.com. Firmware & Tools Due to the continuous evolution of DrayTek technology, all devices will be regularly Updates upgraded. Please consult the DrayTek web site for more information on newest firmware, tools and documents. -
Page 3: Regulatory Information
This device complies with Part 15 of the FCC Rules. Operation is subject to the following two conditions: (1) This device may not cause harmful interference, and (2) This device may accept any interference received, including interference that may cause undesired operation. VigorSwitch G2240 User’s Guide... -
Page 4: Table Of Contents
2.3.5 Port Isolation........................50 2.3.6 Management VLAN ......................51 2.4 MAC ............................51 2.4.1 MAC Address Table Configuration ................. 51 2.4.2 Static Filter........................53 2.4.3 Static Forward......................... 54 2.4.4 MAC Alias ........................55 2.4.5 MAC Table........................56 VigorSwitch G2240 User’s Guide... - Page 5 2.15.3 Snooping........................127 2.15.4 IGMP Group Membership................... 128 2.15.5 MVR ..........................129 2.15.6 MVID ........................... 130 2.15.7 Group Allow ........................ 132 2.15.8 MVR Group Membership .................... 133 2.16 Alarm Configuration......................134 2.16.1 Events Configuration ....................134 VigorSwitch G2240 User’s Guide...
- Page 6 2.20.1 Diagnostics ......................... 144 2.20.2 Ping..........................145 2.21 Maintenance........................146 2.21.1 Warm Restart......................146 2.21.2 Firmware Upgrade ...................... 147 2.22 Logout ..........................148 Trouble Shooting ...................149 3.1 Resolving No Link Condition....................149 3.2 Q & A ........................... 149 VigorSwitch G2240 User’s Guide...
-
Page 7: Preface
Division Multiplexing (WDM) technology that transports bi-directional full duplex signal over a single fiber simultaneously. For upgrading firmware, please refer to the Section 2.21.2 for more details. The switch will not stop operating while upgrading firmware and after that, the configuration keeps unchanged. VigorSwitch G2240 User’s Guide... - Page 8 IGMP messages. However, when acting as the proxy, the system performs the host portion of the IGMP task on the upstream interface as follows: When queried, sends group membership reports to the group. VigorSwitch G2240 User’s Guide...
-
Page 9: Features
When the last of its hosts in a particular multicast group leaves the group, sends an unsolicited leave group membership report to the all-routers group (244.0.0.2). The VigorSwitch G2240, a standalone off-the-shelf switch, provides the comprehensive features listed below for users to perform system network administration and efficiently and securely serve your network. -
Page 10: Packing List
1000Mbps LC, MM, SFP Fiber transceiver 1000Mbps LC, SM 10km, SFP Fiber transceiver 1000Mbps LC, SM 30km, SFP Fiber transceiver 1000Mbps LC, SM 50km, SFP Fiber transceiver 1000Mbps BiDi LC, type 1, SM 20km, SFP Fiber WDM transceiver VigorSwitch G2240 User’s Guide... -
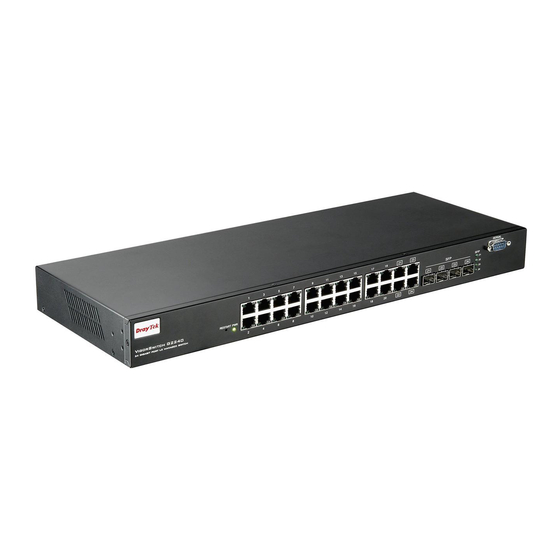
Page 11: Led Indicators And Connectors
Blinks when any traffic is present Off when module connection is not good Interface Description RESTART Used to restart the management system. LAN P1 – P24 Fast Ethernet Port SFP (21 – 24) SFP Fiber Port RS-232 DB-9 connector VigorSwitch G2240 User’s Guide... -
Page 12: Hardware Installation
After the power is on, all LED indicators will light up immediately and then all off except the power LED still keeps on. This represents a reset of the system. VigorSwitch G2240 User’s Guide... -
Page 13: Installing Optional Sfp Fiber Transceivers To The Switch
Cables with worse specification will render the LAN to work poorly. For Fast Ethernet TP network connection The grade of the cable must be Cat. 5 or Cat. 5e with a maximum length of 100 meters. VigorSwitch G2240 User’s Guide... - Page 14 The fiber, TP cables and devices’ bit-time delay (round trip) are as follows: 1000Base-X TP, Fiber 100Base-TX TP/100Base-FX Fiber Round trip Delay: 4096 Round trip Delay: 512 Cat. 5 TP Wire: 11.12/m Cat. 5 TP Wire: 1.12/m Fiber Cable: 1.0/m VigorSwitch G2240 User’s Guide...
- Page 15 Here VLAN area is defined by what VLAN you are using. The switch supports both port-based VLAN and tag-based VLAN. They are different in practical deployment, especially in physical location. The following diagram shows how it works and what the difference they are. VigorSwitch G2240 User’s Guide...
- Page 16 VLAN2 members could not access VLAN1 and VLAN3 members, but they could access VLAN4 members. VLAN3 members could not access VLAN1, VLAN2 and VLAN4. VLAN4 members could not access VLAN1 and VLAN3 members, but they could access VLAN2 members. VigorSwitch G2240 User’s Guide...
- Page 17 Case 4: The same VLAN members can be at different switches with the same VID VigorSwitch G2240 User’s Guide...
-
Page 18: Configuring The Management Agent Of Switch
Configuring the Management Agent of VigorSwitch G2240 through the Serial RS-232 Port Configuring the Management Agent of VigorSwitch G2240 through the Ethernet Port Note: Please first modify the IP address, Subnet mask, Default gateway and DNS through RS-232 console, and then do the next. - Page 19 After completing these settings in the switch, it will reboot to have the configuration taken effect. After this step, you can operate the management through the network, no matter it is from a web browser or Network Management System (NMS). VigorSwitch G2240 User’s Guide...
- Page 20 Configuring the Management Agent of VigorSwitch G2240 through the Ethernet Port There are three ways to configure and monitor the switch through the switch’s Ethernet port. They are CLI, Web browser and SNMP manager. The user interface for the last one is NMS dependent and does not cover here.
- Page 21 Note: If PC directly connects to the switch, you have to setup the same subnet mask between them. But, subnet mask may be different for the PC in the remote site. 2. Run CLI or web browser and follow the menu. Please refer to Chapter 2 VigorSwitch G2240 User’s Guide...
-
Page 22: Ip Address Assignment
IP address range between 192.0.0.0 and 223.255.255.255. Each class C network has a 24-bit network prefix followed 8-bit host address. There are 2,097,152 (2^21)/24 networks able to be defined with a maximum of 254 (2^8 –2) hosts per network. VigorSwitch G2240 User’s Guide... - Page 23 They are the addresses with all zero’s and all one’s host number. For example, an IP address 128.1.2.128, what IP address reserved will be looked like? All 0s mean the network itself, and all 1s mean IP broadcast. VigorSwitch G2240 User’s Guide...
- Page 24 For assigning an IP address to the switch, you just have to check what the IP address of the network will be connected with the switch. Use the same network address and append your host address to it. VigorSwitch G2240 User’s Guide...
- Page 25 To connect to a server, the client needs to know the IP of the server. However, user generally uses the name to connect to the server. Thus, the switch DNS client program (such as a browser) will ask the DNS to resolve the IP address of the named server. VigorSwitch G2240 User’s Guide...
-
Page 26: Typical Applications
The switch is suitable for the following applications. Central Site/Remote site application is used in carrier or ISP It is a system wide basic reference connection diagram. This diagram demonstrates how the switch connects with other network devices and hosts. VigorSwitch G2240 User’s Guide... - Page 27 Peer-to-peer application is used in two remote offices Office Network Connection VigorSwitch G2240 User’s Guide...
- Page 28 VigorSwitch G2240 User’s Guide...
-
Page 29: Operation Of Web-Based Management
To optimize the display effect, we recommend you use Microsoft IE 6.0 above, Netscape V7.1 above or FireFox V1.00 above and have the resolution 1024x768. The switch supported neutral web browser interface. VigorSwitch G2240 User’s Guide... -
Page 30: Web Management Home Overview
MAC address, serial number, how many ports good and so on. This is helpful while malfunctioning. In the following figure, left section is the whole function tree with web user interface and we will travel it through this chapter. VigorSwitch G2240 User’s Guide... -
Page 31: The Information Of
Open the function folder, a sub-menu will be shown. The functions of each folder are described in its corresponded section respectively. When clicking it, the function is performed. The following list is the full function tree for web user interface. VigorSwitch G2240 User’s Guide... -
Page 32: System Information
Function name: System Information Function description: Show the basic system information. VigorSwitch G2240 User’s Guide... - Page 33 Device Port: Show all types and numbers of the port in the switch. RAM size: The size of the DRAM in this switch. Flash size: The size of the flash memory in this switch. VigorSwitch G2240 User’s Guide...
-
Page 34: Account Configuration
3 protocol. The switch provides four built-in NTP server IP addresses resided in the Internet and a user-defined NTP server IP address. The time zone is Greenwich-centered which uses the expression form of GMT+/- xx hours. Function name: Time Function description: VigorSwitch G2240 User’s Guide... - Page 35 –12 to +13 step 1 hour. Default Time zone: +8 Hrs. Daylight Saving: Daylight saving is adopted in some countries. If set, it will adjust the time lag or in advance in unit of hours, according VigorSwitch G2240 User’s Guide...
-
Page 36: Ip Configuration
When IP address is changed, you must reboot the switch to have the setting taken effect and use the new IP to browse for web management and CLI management. Function name: IP Configuration Function description: Set IP address, subnet mask, default gateway and DNS for the switch. VigorSwitch G2240 User’s Guide... - Page 37 Subnet mask uses some bits from host address and makes an IP address looked Network address, Subnet mask number and host address. It VigorSwitch G2240 User’s Guide...
-
Page 38: Loop Detection
“Resume” to turn on the locked ports. Function name: Loop Detection Function description: Display whether switch opens Loop detection. VigorSwitch G2240 User’s Guide... -
Page 39: Management Policy
When only “accept lists” exist, then it will deny all connections, excluding the connection inside of the accepting range. Rule 3): When only “deny lists” exist, then it will accept all connections, excluding the connection inside of the denying range. VigorSwitch G2240 User’s Guide... - Page 40 <Add> button. Of course, the existed entry also can be modified by pressing this button. Delete: Remove the existed entry of Management Policy List from the management security table. Click Add to get the following page: VigorSwitch G2240 User’s Guide...
- Page 41 “Deny”. When you choose “Deny” action, you will be restricted and refused to manage the switch due to the “Access Type” you choose. However, while you select “Accept” action, you will have the authority to manage the switch. VigorSwitch G2240 User’s Guide...
-
Page 42: System Log
Master machine. Instead of SNMP or Telnet UI, VSM is only available in Web UI. While one switch becomes the Master, two rows of buttons for group device will VigorSwitch G2240 User’s Guide... - Page 43 Two types of roles, including master and slave are offered for option. Default is Master. Group ID: It is the group identifier (GID) which signs for VSM. Valid letters are A-Z, a-z, 0-9, “ “ and “_” characters. The maximal length is 15 characters VigorSwitch G2240 User’s Guide...
-
Page 44: Port Configuration
1Gbps fiber, it is always 1000Mbps and the duplex is full only. If the media is TP, the Speed/Duplex is comprised of the combination of speed mode, 10/100/1000Mbps, and duplex mode, full duplex and half duplex. The following table summarized the function the media supports. VigorSwitch G2240 User’s Guide... -
Page 45: Port Status
Auto-Negotiation status, speed/duplex, Rx Pause and Tx Pause. An extra media type information for the module ports 21 and 24 is also offered. Function name: Port Status VigorSwitch G2240 User’s Guide... - Page 46 Pause flow control (IEEE802.3x) for full-duplex operation. The switch supports both of them. Default: None, depends on the result of the negotiation. Port Description: Network managers provide a description of device ports. Parameter description of Port 21 ~ Port 24: VigorSwitch G2240 User’s Guide...
- Page 47 Show the date this SFP module was made. Temperature: Show the current temperature of SFP module. Vcc: Show the working DC voltage of SFP module. Mon1(Bias) mA: Show the Bias current of SFP module. Mon2(TX PWR): Show the transmit power of SFP module. VigorSwitch G2240 User’s Guide...
-
Page 48: Simple Counter
Refresh: The simple counts will be refreshed manually when user use mouse to click on “Refresh” button. Clear: The simple counts will be reset to zero when user use mouse to click on “Clear” button. VigorSwitch G2240 User’s Guide... -
Page 49: Detail Counter
Number of 65 ~ 127-byte frames in good and bad packets received. RX 128-255 Bytes: Number of 128 ~ 255-byte frames in good and bad packets received. RX 256-511 Bytes: Number of 256 ~ 511-byte frames in good and bad packets received. VigorSwitch G2240 User’s Guide... - Page 50 Number of 1527-byte frames in good and bad packets transmitted. Tx Drops: Number of frames dropped due to excessive collision, late collision, or frame aging. Tx lat/Exc.Coll. Number of Frames late collision or excessive collision Error, which switch transmitted VigorSwitch G2240 User’s Guide...
-
Page 51: Vlan
VLAN. If there are any more rules in ingress filtering list or egress filtering list, the packet will be screened with more filtering criteria to determine if it can be forwarded. The switch supports supplement of 802.1q. VigorSwitch G2240 User’s Guide... -
Page 52: Tag-Based Group
IGMP proxy router port configuration, which connects to a router closer to the root of the tree. This interface is the upstream interface. The router on the upstream interface should be running IGMP. VigorSwitch G2240 User’s Guide... - Page 53 1. Create a VLAN as primary VLAN and the VLAN ID is 2 and evoke the Private VLAN to enable Private VLAN service. 2. Assign port member to the VLAN2. 3. You need to assign these ports for member of port isolation. 4. Press the “Save” to complete the PVLAN configuration process. VigorSwitch G2240 User’s Guide...
-
Page 54: Port-Based Group
Add new VLAN Create a new Port-based VLAN. Input the VLAN name and choose the member by ticking the check box beside the port No., then, press the <Apply> button to have the setting taken effect. VigorSwitch G2240 User’s Guide... -
Page 55: Ports
VID y. Role: This is an egress rule of the port. Here you can choose Access, Trunk or Hybrid. Trunk means the outgoing packets must carry VLAN tag header. Access means the outgoing VigorSwitch G2240 User’s Guide... -
Page 56: Port Isolation
2 switch as a protected port or a non-protected port. A destination address on an data packet is matched with a physical address on said layer 2 switch and a forwarding map is generated for the data packet based upon the destination address on the data packet. VigorSwitch G2240 User’s Guide... -
Page 57: Management Vlan
Table. The range of Age-out Time is 10-1000000 seconds, and the setup of this time will have no effect on static MAC addresses. In addition, the learning limit of MAC maintenance is able to limit the amount of MAC that each port can learn. VigorSwitch G2240 User’s Guide... - Page 58 Disable this port MAC address dynamic learning mechanism, only support static MAC address setting. Secure: Disable this port MAC address dynamic learning mechanism and copy the dynamic learning packets to CPU Save: Save MAC Address Table configuration Reset: Reset MAC Address Table configuration VigorSwitch G2240 User’s Guide...
-
Page 59: Static Filter
00 – 40 - C7 - D6 – 00 - 02 VID: VLAN identifier. This will be filled only when tagged VLAN is applied. Valid range is 1 ~ 4094. Alias: MAC alias name you assign. VigorSwitch G2240 User’s Guide... -
Page 60: Static Forward
Port No: Port number of the switch. It is 1 ~24. VID: VLAN identifier. This will be filled only when tagged VLAN is applied. Valid range is 1 ~ 4094. Alias: MAC alias name you assign. VigorSwitch G2240 User’s Guide... -
Page 61: Mac Alias
00 – 40 - C7 - D6 – 00 - 01 Alias: MAC alias name you assign. Note: If there are too many MAC addresses learned in the table, we recommend you inputting the MAC address and alias name directly. VigorSwitch G2240 User’s Guide... -
Page 62: Mac Table
VLANs associated with currently active members, and through which ports these members can be reached. In GVRP Configuration function folder, there are three functions supported, including GVRP Config, GVRP Counter and GVRP Group explained below. VigorSwitch G2240 User’s Guide... -
Page 63: Gvrp Config
Normal - It is Normal Participant. In this mode, the switch participates normally in GARP protocol exchanges. The default setting is Normal. Non-Participant - It is Non-Participant. In this mode, the VigorSwitch G2240 User’s Guide... - Page 64 Enabled - In this mode, the switch does not create dynamic VLAN when this port received GVRP PDU. Except received dynamic VLAN message of the GVRP PDU is an existed static VLAN in the switch, this port will be added into the static VLAN members dynamically. VigorSwitch G2240 User’s Guide...
-
Page 65: Counter
Leave Empty message is received by the GARP application. Empty Message Packets:Number of GARP BPDU with Empty message is received by the GARP application. Transmitted: Total GVRP Packets:Total GARP BPDU is transmitted by the GVRP application. VigorSwitch G2240 User’s Guide... -
Page 66: Group
Those are the members belonging to the same dynamic VLAN group. Edit Administrative Control: When you create GVRP group, you can use Administrative Control function to change Applicant Mode and Registrar Mode of GVRP group member. VigorSwitch G2240 User’s Guide... -
Page 67: Qos (Quality Of Service) Configuration
QoS classification, based on IEEE 802.1p, Ethertype, VID, IPv4/IPv6 DSCP and UDP/TCP ports and ranges. Parameter description: Number of Classes: 1 / 2 / 4 Port: User can choose the port (1~24) respectively with Priority Class on Per Port Priority function. VigorSwitch G2240 User’s Guide... -
Page 68: Qos Control List
The switch supports four QoS queues per port with strict or weighted fair queuing scheduling. There are 24 QoS Control Lists (QCL) for advance programmable QoS classification, based on IEEE 802.1p, Ether Type, VID, IPv4/IPv6 DSCP and UDP/TCP ports and ranges. VigorSwitch G2240 User’s Guide... - Page 69 IBM SNA Services over Ethernet AARP, AppleTalk Address Resolution 0x 80F3 Protocol. IEEE Std 802.1Q - Customer VLAN Tag 0x8100 Type. 0x8137 IPX, Internet Packet Exchange. SNMP, Simple Network Management 0x 814C Protocol. 0x86DD IPv6, Internet Protocol version 6. VigorSwitch G2240 User’s Guide...
- Page 70 The first matching QCE determines the QoS classification of the frame. The QCE ordering is therefore important for the resulting QoS classification algorithm. If no matching QCE is found, the default QoS class is used in the port QoS configuration. VigorSwitch G2240 User’s Guide...
- Page 71 VigorSwitch G2240 User’s Guide...
-
Page 72: Rate Limiters
Rate Limit Configuration. Parameter description: Port #: Port number. Ingress Enabled: Ingress enabled to limit ingress bandwidth by ingress rate. Ingress Rate: The configurable ingress rate range: 500 Kbps ~ 1000000 Kbps |1 Mbps ~ 1000 Mbps VigorSwitch G2240 User’s Guide... -
Page 73: Storm Control
1 / 2 / 4 / 8 / 16 / 32 / 64 / 128 / 256 / 512 / 1K / 2K / 4K / 8K / 16K / 32K / 64K / 128K / 256K / 512K / 1024K VigorSwitch G2240 User’s Guide... -
Page 74: Wizard
Set up Port Policies Set up Typical Network Application Rules Set up TOS Precedence Mapping Set up VLAN Tag Priority Mapping Next: Go to next step. Cancel: Abort current configuration back to previous step. Back: Back to previous screen. VigorSwitch G2240 User’s Guide... - Page 75 Back to previous screen. Wizard Again: Click on the <Wizard Again>, back to QCL Configuration Wizard. Finish: When you click on <Finish>, the parameters will be set according to the wizard configuration and shown on the VigorSwitch G2240 User’s Guide...
- Page 76 <Apply> for changed parameters confirmation. VigorSwitch G2240 User’s Guide...
- Page 77 UDP/TCP Port Range: Port Range: 0~65535 UDP/TCP Port No.: Port Range: 0~65535 DSCP Value: DSCP Value Range: 0~63 Next: Go to next step. Cancel: Abort current configuration back to previous step. Back: Back to previous screen. VigorSwitch G2240 User’s Guide...
- Page 78 Click on the <Wizard Again>, back to QCL Configuration Wizard. Finish: When you click on <Finish>, the parameters will be set according to the wizard configuration and shown on the screen, then ask you to click on <Apply> for changed parameters confirmation. VigorSwitch G2240 User’s Guide...
- Page 79 QCL ID: QoS Control List (QCL): 1~24 TOS Precedence 0~7 Class: Low / Normal / Medium / High Next: Go to next step. Cancel: Abort current configuration back to previous step. Back: Back to previous screen. VigorSwitch G2240 User’s Guide...
- Page 80 Click on the <Wizard Again>, back to QCL Configuration Wizard. Finish: When you click on <Finish>, the parameters will be set according to the wizard configuration and shown on the screen, then ask you to click on <Apply> for changed parameters confirmation. VigorSwitch G2240 User’s Guide...
- Page 81 Back to previous screen. Wizard Again: Click on the <Wizard Again>, back to QCL Configuration Wizard. Finish: When you click on <Finish>, the parameters will be set according to the wizard configuration and shown on the VigorSwitch G2240 User’s Guide...
-
Page 82: Snmp Configuration
SNMP. A SNMP manager must pass the authentication by identifying both community names, then it can access the MIB information of the target device. So, both parties must have the same community name. Once completing the setting, click <Apply> button, the setting takes effect. VigorSwitch G2240 User’s Guide... - Page 83 Default community name for Trap: public Default Set function: Enable Default trap host IP address: 0.0.0.0 Default port number:162 Trap: In the switch, there are 6 trap hosts supported. Each of them has its own community name and IP address; is VigorSwitch G2240 User’s Guide...
-
Page 84: Acl
IPv4, EtherType, ARP Protocol, MAC Parameters and VLAN parameters: Packet Deny or Permit Rate Limiter (Unit: pps) Port Copy (1 – 24) VigorSwitch G2240 User’s Guide... - Page 85 Port number: 1~24. Copy the met ACL packets to the selected port Counter: The counter will increase from initial value 0, when this port received one of the met ACL packet the counter value will increase +1 VigorSwitch G2240 User’s Guide...
-
Page 86: Rate Limiters
1 / 2 / 4 / 8 / 16 / 32 / 64 / 128 / 256 / 512 / 1K / 2K / 4K / 8K / 16K / 32K / 64K / 128K / 256K / 512K / 1024K VigorSwitch G2240 User’s Guide... -
Page 87: Access Control List
Port 1-24: Apply this ACE rule for specific port ingress classification Frame Type: Range: Any / Ethernet Type / ARP / IPv4 Any: It is including all frame type Ethernet Type: It is including all Ethernet frame type VigorSwitch G2240 User’s Guide... - Page 88 Frame Type: Different frame type will bring different web pages. Any: It is including all frame type Ethernet Type: It is including all Ethernet frame type. When you choose this one, the following selection will appear. VigorSwitch G2240 User’s Guide...
- Page 89 BC: It is including all Broadcast MAC address UC: It is including all Unicast MAC address (When Frame Type = IPv4) DMAC Filter: Range: Any / MC / BC / UC Any: It is including all destination MAC address VigorSwitch G2240 User’s Guide...
- Page 90 DMAC address under MAC parameter setting 1: The ingress RARP frames where the Destination MAC address is equal DMAC address under MAC parameter setting IP/Ethernet Length: Range: Any / 0 / 1 Any: Both 0 and 1 VigorSwitch G2240 User’s Guide...
- Page 91 Range: Any / Host / Network Any: Including all source IP address Host: Only one specific source host IP address Network: A specific IP subnet segment under the source IP mask SIP Address: Default: 192.168.1.1 SIP Mask: Default: 255.255.255.0 VigorSwitch G2240 User’s Guide...
- Page 92 TCP Parameters will appear and contain the following options: Source Port Filter: Range: Any / Specific / Range Any: Including all TCP source ports Specific: According to following Source Port No. setting for ingress classification Range: According to following Source Port Range setting VigorSwitch G2240 User’s Guide...
- Page 93 Any: Including all TCP URG case 0: The TCP control bit URG is 0 1: The TCP control bit URG is 1 When Frame Type = IPv4 and IP Protocol Filter = Other, The IP Parameters will be as follows: VigorSwitch G2240 User’s Guide...
- Page 94 Tag Priority: Range: Any / 0-7 Any: Including all Tag Priority values 0-7: The Tag Priority Value is one of number (0-7) Action Parameters: When the ingress frame meets above ACL ingress classification rule you can do the following actions: VigorSwitch G2240 User’s Guide...
-
Page 95: Wizard
Parameter description: Please select an Action: Set up Policy Rules / Set up Port Policies / Set up Typical Network Application Rules. Next: Click on <Next> to confirm current setting and go to next step automatically. VigorSwitch G2240 User’s Guide... - Page 96 Finish: Click in <Finish> to finish the ACL Wizard setting, it will according the selection items to change the related parameters, then you have to click on <Apply> to confirm the all changed parameters setting. VigorSwitch G2240 User’s Guide...
- Page 97 Set up Port Policies Cancel: Cancel current setting back to top layer in the ACL wizard function. Back: Click on <Back> to back to previous step. Next: Click on <Next> to go to the next step. VigorSwitch G2240 User’s Guide...
- Page 98 Finish: Click in <Finish> to finish the ACL Wizard setting, it will according the selection items to change the related parameters, then you have to click on <Apply> to confirm the all changed parameters setting. VigorSwitch G2240 User’s Guide...
- Page 99 Request / Ping Reply / SNMP / SNMP Traps Cancel: Cancel current setting back to top layer in the ACL wizard function. Back: Click on <Back> to back to previous step. Next: Click on <Next> to go to the next step. VigorSwitch G2240 User’s Guide...
- Page 100 Wizard Again: Click on <Wizard Again> the UI will back to top layer in the wizard function. Finish: Click in <Finish> to finish the ACL Wizard setting, it will change the related parameters according the selection items, VigorSwitch G2240 User’s Guide...
- Page 101 <Apply> to confirm the changed parameters setting. VigorSwitch G2240 User’s Guide...
-
Page 102: Ip Mac Binding
The available ports are from 0 to 24. MAC: Six-byte MAC Address: xx-xx-xx-xx-xx-xx For example: 00-40-c7-00-00-01 Four-byte IP Address: xxx.xxx.xxx.xxx For example: 192.168.1.100 Port No: Port no.: 1-24 VID: VLAN ID: 1-4094 VigorSwitch G2240 User’s Guide... -
Page 103: Ip Mac Binding Dynamic Entry
Input MAC, IP, Port and VID, then click on <Add> to create a new entry into the IP MAC Binding table Delete: Select one of entry from the table, then click on <Delete> to delete this entry. VigorSwitch G2240 User’s Guide... -
Page 104: Configuration
MAC bridge, at any time. Authentication server: A device provides authentication service, through EAP, to an authenticator by using authentication credentials supplied by the supplicant to determine if the supplicant is authorized to access the network resource. VigorSwitch G2240 User’s Guide... - Page 105 A, then, is allowed to access B and C via the switch. If there are two switches directly connected together instead of single one, for the link connecting two switches, it may have to act two port roles at the end of the link: authenticator and supplicant, because the traffic is bi-directional. VigorSwitch G2240 User’s Guide...
- Page 106 Radius-Access-Accept to the authenticator. If not correct, the authentication server will send a Radius-Access-Reject. 9. When the authenticator PAE receives a Radius-Access-Accept, it will send an EAP-Success to the supplicant. At this time, the supplicant is authorized and the port VigorSwitch G2240 User’s Guide...
- Page 107 Port Mode Port Control Authentication Port Status Disable Don’t Care Don’t Care Port Uncontrolled Multihost Auto Successful Port Authorized Multihost Auto Failure Port Unauthorized Multihost ForceUnauthorized Don’t Care Port Unauthorized Multihost ForceAuthorized Don’t Care Port Authorized VigorSwitch G2240 User’s Guide...
-
Page 108: Server
1 – 31 characters. The character string may contain upper case, lower case and 0-9. It is character sense. It is not allowed for putting a blank between any two characters. Default: Radius Function name: 802.1X Port Configuration Function description: VigorSwitch G2240 User’s Guide... - Page 109 Auto - The controlled port is set to be in authorized state or unauthorized state depends on the result of the authentication exchange between the authentication server and the supplicant. Default: Auto VigorSwitch G2240 User’s Guide...
-
Page 110: Status
A timeout condition in the exchange between the authenticator and the authentication server. The valid range: 1 –65535. Default: 30 seconds Function name: 802.1X Status Function description: Show the each port IEEE 802.1X authentication current operating mode and status. VigorSwitch G2240 User’s Guide... -
Page 111: Statistics
Refresh the authenticator counters in the web UI automatically Refresh: Click on the <Refresh> to update the authenticator counters in the web UI Clear: Click on the <Clear> to clear all authenticator counters in the web UI VigorSwitch G2240 User’s Guide... -
Page 112: Trunking Configuration
Group ID will turn to 0. This means the port won’t aggregate with other ports. 14 ports all use LACP Trunk Group ID 1 at most 12 ports can aggregate together and transit into the ready state. VigorSwitch G2240 User’s Guide... -
Page 113: Port
This field is only referenced when a port’s trunking method is LACP. Active - An Active LACP port begins to send LACPDU to its link partner right after LACP protocol entity started to take control of this port. VigorSwitch G2240 User’s Guide... -
Page 114: Aggregator View
ID is the same as its own Port No. Method: Show the method a port uses to aggregate with other ports. Member Ports: Show all member ports of an aggregator (port). Ready Ports: Show only the ready member ports within an aggregator (port). VigorSwitch G2240 User’s Guide... - Page 115 Show the key value of the aggregator. The key value is determined by the LACP protocol entity and can’t be set through management. Trunk Status: Show the trunk status of a single member port. “---” means “not ready” VigorSwitch G2240 User’s Guide...
-
Page 116: Aggregation Hash Mode
Check this box to evoke to enable destination MAC address for Aggregate Mode. IP Address: Check this box to evoke to enable IP address for Aggregate Mode. TCP/UDP Port Number: Check this box to evoke to enable TCP/UDP Port Number for Aggregate Mode. VigorSwitch G2240 User’s Guide... -
Page 117: Lacp System Priority
STP on all switches to ensure a single active path on the network. Function name: STP Status Function description: In the Spanning Tree Status, user can read 12 parameters to know STP current status. The 12 parameters’ description is listed in the following table. VigorSwitch G2240 User’s Guide... - Page 118 Forward Delay time is set by root. The Forward Delay time is defined as the time spent from Listening state moved to Learning state or from Learning state moved to Forwarding state of a port in bridge. VigorSwitch G2240 User’s Guide...
-
Page 119: Stp Configuration
User can set the following Spanning Tree parameters to control STP function enable/disable, select mode RSTP/STP and affect STP state machine behavior to send BPDU in this switch. The default setting of Spanning Tree Protocol is “Disable”. VigorSwitch G2240 User’s Guide... - Page 120 Two options are offered for the user’s choosing STP algorithm. One is RSTP and the other is STP. If STP is chosen, RSTP will run as a legacy STP. The switch supports RSTP (802.1w) which is backward compatible with STP (802.1d). VigorSwitch G2240 User’s Guide...
-
Page 121: Port
Root Bridge. STP algorithm determines a best path to Root Bridge by calculating the sum of path cost contributed by all ports on this path. A port with a smaller path cost value would become the Root Port more possibly. VigorSwitch G2240 User’s Guide... - Page 122 BPDU instead of a legacy STP BPDU at the next transmission. The only benefit of this operation is to make the port quickly get back to act as an RSTP port. Click <M Check> button to send a RSTP BPDU from the port you specified. VigorSwitch G2240 User’s Guide...
-
Page 123: Mstp
Function description: Enable or disable MSTP. And to select a version of Spanning Tree protocol which MSTP should operate on. Parameter description: Multiple Spanning Tree Protocol: Disabled / Enabled Force Version: STP / RSTP / MSTP VigorSwitch G2240 User’s Guide... -
Page 124: Region Config
MST region must have the same Region Name and Revision Level. Parameter description: Region Name: 0-32 characters (A variable length text string encoded within a fixed field of 32 octets, conforming to RFC 2271’s definition of SnmpAdminString.) Revision Level: 0-65535 VigorSwitch G2240 User’s Guide... -
Page 125: Instance View
Provision spanning tree performance parameters per instance per port. Instance Status: Show the status report of a particular spanning tree instance. Port Status: Show the status report of all ports regarding a specific spanning tree instance. VigorSwitch G2240 User’s Guide... - Page 126 2.5-7.100-200.301.303.1000-1500 (Valid VID Range:1-4094) Instance Config Priority: The priority parameter used in the CIST (Common and Internal Spanning Tree) connection. 0 / 4096 / 8192 / 12288 / 16384 / 20480 / 24576 / 28672 / VigorSwitch G2240 User’s Guide...
- Page 127 1 / 2 In contrast with RSTP, Hello Time in MSTP is a per port setting for the CIST. Admin Edge: Yes / No The same definition as in the RSTP specification for the CIST ports. VigorSwitch G2240 User’s Guide...
- Page 128 CIST ports. Instance Status MSTP State: MSTP protocol is Enable or Disable. Force Version: It shows the current spanning tree protocol version configured. Bridge Max Age: It shows the Max Age setting of the bridge itself. VigorSwitch G2240 User’s Guide...
- Page 129 Spanning Tree Topology Change to the end of the STP convergence. Once there is no topology change occurring and no more topology change notification received, the Topology Change count will be reset to 0. VigorSwitch G2240 User’s Guide...
-
Page 130: Mirroring
Range: 1-24, select the monitored ports. Source Enable: The source enable means the monitored port ingress traffic will be copied to monitoring port. Destination Enable: The destination enable means the monitored port egress traffic will be copied to monitoring port VigorSwitch G2240 User’s Guide... -
Page 131: Multicast
This interface is the upstream interface. The router on the upstream interface should be running IGMP. Parameter description: IGMP Mode: Scroll the IGMP mode with “Disable”, “Proxy” or “Snooping”. VigorSwitch G2240 User’s Guide... -
Page 132: Proxy
Last Member Query Max Response Time: Set the max response code value in the specific query packet (Available: 1~25 secs) Update Interval of Router Port: Set the period time for the interface ever received IGMP query packet. (Available: 1~3600 secs) VigorSwitch G2240 User’s Guide... -
Page 133: Snooping
1 to 65535. The default is 125 seconds. Fast Leave: Set which port wants to enable the Fast leave mode with IGMP snooping mode. Router Ports: Set which port wants to be a Router Port with IGMP snooping mode. VigorSwitch G2240 User’s Guide... -
Page 134: Igmp Group Membership
Display current built-up multicast Group Address. VLAN ID: Display current built-up multicast VLAN ID. Port Members: Display current built-up multicast port members Previous Page: Display previous page context. Next Page: Display next page context. Refresh: Update multicast group membership. VigorSwitch G2240 User’s Guide... -
Page 135: Mvr
Switch timeout period. The unit is second and time range is from 1 to 65535. The default is 125 seconds. Fast Leave: Set which port want to enable the Fast leave mode with IGMP snooping mode. VigorSwitch G2240 User’s Guide... -
Page 136: Mvid
Display which port will join the MVR Group member Add new MVID: Create a new MVID entry. Delete: Delete the existed MVID entry. To add a new MVID, click Add new MVID. The following screen will appear. VigorSwitch G2240 User’s Guide... - Page 137 Parameter description: MVID: Input MVR group ID for MVID. Member Port: Evoke which port will join the MVR Group member. Router Port: Evoke which port will become the MVR Group router port. VigorSwitch G2240 User’s Guide...
-
Page 138: Group Allow
The switch supports managed valid IP range. You can assign effective IP range. The valid start Address is 224.0.0.0~239.255.255.254. End Address: The switch supports managed valid IP range. You can assign effective IP range. The valid End Address is 224.0.0.1~239.255.255.255. VigorSwitch G2240 User’s Guide... -
Page 139: Mvr Group Membership
Display the MVR Group Address which you set on the Switch. MVID: Display the MVR Group ID which you set on the Switch. Previous Page: Display previous page context. Next Page: Display next page context. Refresh: Update multicast group membership. VigorSwitch G2240 User’s Guide... -
Page 140: Alarm Configuration
LACP Disabled, LACP Enabled, LACP Member Added, LACP Port Failure GVRP: GVRP Disabled, GVRP Enabled VLAN: VLAN Disabled, Port-based VLAN Enabled, Tag-based VLAN, Enabled, Metro-mode Vlan Enabled, Double-tag Vlan Enabled Module Swap: Module Inserted, Module Removed, Dual Media Swapped VigorSwitch G2240 User’s Guide... -
Page 141: Email
The IP address of the server transferring your email. Username: Your username on the mail server. Password: Your password on the mail server. Email Address 1 – 6: Email address that would like to receive the alarm message. VigorSwitch G2240 User’s Guide... -
Page 142: Dhcp Snooping
DHCP server. This information can be useful in tracking an IP address back to a physical port. DHCP Snooping: Set to disable or enable the DHCP snooping function on the switch, the default is Disabled. VigorSwitch G2240 User’s Guide... -
Page 143: Dhcp Snooping Entry
Available action: keep/ drop / replace. Delete: To delete a DHCP snooping entry which you set on the Switch. Add: To create a DHCP snooping entry on the Switch Apply: To save the configuration to Switch RAM. VigorSwitch G2240 User’s Guide... - Page 144 If a DHCP packet from a client passes the filtering criteria above, it will only be forwarded to trusted ports in the same VLAN. If a DHCP packet is from server is received on a trusted port, it will be forwarded to both trusted and un-trusted ports in the same VLAN. VigorSwitch G2240 User’s Guide...
-
Page 145: Dhcp Snooping Client
Display the DHCP snooping client’s port. Display the DHCP snooping client’s IP address. Lease: Display the DHCP snooping client’s lease. Delete: Delete a DHCP snooping Client’s entry which you set on the Switch. When you choice an entry want to delete. VigorSwitch G2240 User’s Guide... -
Page 146: Save/Restore
Function name: Restore Default Configuration (includes default IP address) Function description: Restore Default Configuration function can retrieve ex-factory setting to replace the start configuration. And the IP address of the switch will also be restored to 192.168.1.1. VigorSwitch G2240 User’s Guide... -
Page 147: Save Start
Save As Start Configuration Function description: Save the current configuration as a start configuration file in flash memory. Function name: Save As User Configuration Function description: Save the current configuration as a user configuration file in flash memory. VigorSwitch G2240 User’s Guide... -
Page 148: Restore User
Restore User Configuration function can retrieve the previous confirmed working configuration stored in the flash memory to update start configuration. When completing to restore the configuration, the system’s start configuration is updated and will be changed its system settings after rebooting the system. VigorSwitch G2240 User’s Guide... -
Page 149: Export/Import
User – Export the configuration what user just configure on switch without save to Flash. Import Start Configuration: Import “Save As Start’s configuration” file stored in the flash. Import User Configuration: Import “Save As User’s configuration” file stored in the flash. VigorSwitch G2240 User’s Guide... -
Page 150: Diagnostics
Diagnostics function provides a set of basic system diagnosis. It let users know that whether the system is health or needs to be fixed. The basic system check includes UART test, DRAM test and Flash test. VigorSwitch G2240 User’s Guide... -
Page 151: Ping
Ping Result. Parameter description: IP Address: An IP address with the version of v4, e.g. 192.168.1.1. Ping size: Identify what ping packet size and unit is bytes. VigorSwitch G2240 User’s Guide... -
Page 152: Maintenance
IP configuration or changing VLAN mode configuration, then you must reboot to have the new configuration taken effect. Here we are discussing is software reset for the “Warm Restart” in the main menu. VigorSwitch G2240 User’s Guide... -
Page 153: Firmware Upgrade
Web management PC, then click on <Upload> to confirm the upgrade firmware action. The new firmware will be uploaded into the switch and write into flash memory. You have to reboot the switch for new firmware take effect after the firmware upgrade successfully. VigorSwitch G2240 User’s Guide... -
Page 154: Logout
If you do not logout and exit the browser, the switch will automatically have you logout in five minutes. Besides, you can manually logout. Parameter description: Logout: Click on Logout to leave the web UI management function. VigorSwitch G2240 User’s Guide... -
Page 155: Trouble Shooting
The COM port default parameters are [Baud Rate: 115200, Data Bits: 8, Parity Bits: None, Stop Bit: A, Flow Control: None]. Please check the COM port property in the terminal program. And if the parameters are changed, please set the COM configuration to the new setting. VigorSwitch G2240 User’s Guide... - Page 156 Linux/Unix to configure the Managed Switch. Please refer to the user guide of that terminal program. But the COM port parameters (baud rate/ data bits/ parity bits/ flow control) must be the same as the setting of the console port of the Managed Switch. VigorSwitch G2240 User’s Guide...
Need help?
Do you have a question about the VigorSwitch G2240 and is the answer not in the manual?
Questions and answers