
Related Manuals for Russell Hobbs 13943


Summary of Contents for Russell Hobbs 13943
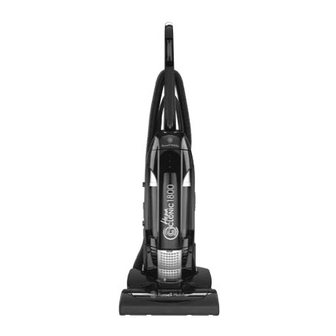
- Page 1 instructions, troubleshooting guide, and guarantee Problems? Don’t take it back to the shop, they won’t be able to fix it. Ring the helpline 0845 658 9700 it’s a local rate number...
-
Page 2: Important Safeguards
Read the instructions before using your vacuum cleaner, and keep them safe. If you pass the cleaner on, pass on the instructions too. important safeguards Follow basic safety precautions, including the ones below. It’s quite a list, but most of them are simple common sense. -
Page 3: Fit The Handle
16 Don’t leave the cleaner in direct sunlight. 17 Don’t use the cleaner if it’s damaged or malfunctions. If the cable or plug is damaged, the cleaner must be returned in order to avoid hazard (see “service” on the back page). household use only before using for the first time Remove the packaging, but keep it till you’re sure the cleaner is working properly. - Page 4 fit the tube and small brush 8 Turn to the rear of the cleaner. 9 Push the small brush into the clip on the left of the cleaner. 10 Slide the crevice tool inside the extension tube for ease of storage. 11 Put the end of the extension tube over the mount on the bottom right of the cleaner, then push the top of the extension tube into the clip on the right...
- Page 5 upright cleaning push the hose end over the main tube – this connects the main brush, on the bottom of the cleaner, to use the cleaner upright crevice tool push the hose end over the crevice tool – as its name implies, use this tool to reach down the sides of upholstery, and into awkward spaces, nooks, and crannies nothing else can reach crevice tool and...
-
Page 6: Switch Off
set the floor type 26 Slide the brush height control to the bare floor or accessories setting for bare floors, or to long, medium, or short pile, for carpet. Tilt the handle back, to raise the cleaner slightly from the floor, to make moving the brush height control easier. -
Page 7: Using The Accessories
using the accessories 37 Press and release the switch, to switch the motor off. 38 Push the handle forward till it’s fully upright, and the pedal clicks into position to hold it there. 39 Move the brush height control fully over to the long pile 3 setting, to prevent the brush hitting the surface it’s sitting on. - Page 8 check the HEPA filter 54 Hold the bin handle with one hand, hold the lid with the other. 55 Turn the lid about 15mm anti-clockwise, to align the arrow above the handle with the left of the two grooves on the side of the lid. 56 Lift the lid out –...
-
Page 9: General Cleaning
discolouration 66 The HEPA filter will discolour with use. This is normal, and won’t affect it’s performance. check the pre-motor filter 67 While the bin is out, pick the pre-motor filter out of its housing with a fingernail, and check it. 68 If it’s dirty, it can be washed in warm, soapy water. -
Page 10: External Surfaces
external surfaces Wipe external surfaces with a damp cloth. A dab of washing-up liquid should remove stubborn stains, but clean it off afterwards, or it may itself cause staining. accessories Wipe with a damp cloth, or hand wash in warm soapy water. Rinse to remove the soap, and air dry before replacing them. -
Page 11: Changing The Belt
10 If the blockage isn’t clear by now, try again, as there’s nowhere left to check. 11 Still not clear? – Ring the help line (back page). no brush action (upright) 12 If the brush isn’t turning, the belt may have broken. 13 A broken belt may be due to wear and tear, but it may also be caused by a sudden blockage, due to something like a bit of gravel jamming the brush roller. - Page 12 here’s how: 29 Put the belt between the guides. 30 Slip the end of the belt over the brush roller. 31 Hold the left side of the brush roller in your right hand. 32 Put two fingers of your left hand on the long side of the left end piece, and your thumb on the corner of the casing.
- Page 13 replace the base 38 This can be done “as is”, or, if you find it awkward, try putting the cleaner back into upright mode. 39 Put the front of the base on first, then the rear. 40 Press the rear to engage the clips at the sides. 41 Replace the screws.
- Page 14 connection The product doesn’t need an earth. It has a 13A BS1362 fuse in a 13A BS1363 plug. To replace the plug, fit the blue wire to N, and the brown wire to L. Fit the cord grip. If in doubt, call an electrician. Don’t use a non-rewireable/moulded plug unless the fuse cover is in place.
-
Page 16: Spare Parts
– 0845 658 9700 If you need help, note the Model No (13943) and ring the helpline 0845 658 9700 (it’s a local rate number). spare parts Note the Model No (13843) and the part(s) you need, then ring the helpline – 0845 658 9700, or email service@saltoneurope.com for price(s).
Need help?
Do you have a question about the 13943 and is the answer not in the manual?
Questions and answers