Table of Contents
Advertisement
Quick Links
Advertisement
Table of Contents

Subscribe to Our Youtube Channel
Related Manuals for Hawking HGMS224


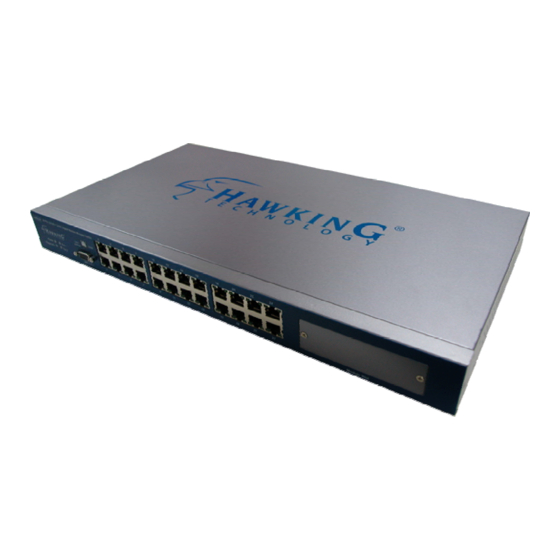
Summary of Contents for Hawking HGMS224
-
Page 2: Fcc Warning
Hawking Customer Service in order to obtain a Return Authorization number. The warranty is for repair or replacement only. Hawking Technology does not issue any refunds. BE SURE TO HAVE YOUR PROOF OF PURCHASE. - Page 3 no warranty or representation, expressed, implied or statutory, with respect to its products or the contents or use of this documentation and all accompanying software, and specifically disclaims its quality, performance, merchantability, or fitness for any particular purpose. Hawking Technology reserves the right to revise or update its products, software, or documentation without obligation notify individual...
-
Page 4: Table Of Contents
5. Web Management 5.1 Web Management Home Page Overview 5.2 Port Status 5.3 Port Statistics 5.4 Administrator 5.4.1 IP Address/Subnet Mask/Gateway 5.4.2 Switch Settings 5.4.2.1 Basic 5.4.2.2 Module Info 5.4.2.3 Advanced 5.4.3 Console Port Information 5.4.4 Port Controls 5.4.5 Trunking 5.4.5.1 Aggregator Setting... - Page 5 5.6.2 TFTP Backup Configuration 5.7 Reset System 5.8 Reboot 6. Console – Firmware Update 7. Out-of-band Management 7.1 Main Menu 7.2 Switch Static Configuration 7.2.1 Port Configuration 7.2.2 Trunk Configuration 7.2.3 VLAN Configuration 7.2.3.1 Create a VLAN Group 7.2.3.2 Edit/Delete a VLAN Group 7.2.3.3 Group Sorted Mode...
- Page 6 7.4.3 System Information 7.5 Reboot Switch 7.5.1 Default 7.5.2 Restart 7.6 TFTP Firmware Update 7.6.1 TFTP Firmware Update 7.6.2 Restore Configure File 7.6.3 Backup Configure File 8. Application Examples 8.1 VLAN Application Used with Switch 8.2 Trunking Application Used with Switch...
- Page 7 In addition, an RS-232 serial port provides an easy medium for installation and initial set-up. All ports are capable of non-blocking and maximum wire speed performance. The HGMS224 supports auto-negotiation and auto-MDIX technology on all 24 switched RJ-45 ports and both gigabit copper ports in both half and full duplex modes.
- Page 8 The complete HGMS224 package consists of: One HGMS224 24-Port 10/100 Layer 2 Managed Switch (Intelligent) + 2-Port Gigabit Module Slot Rack mount kit: 2 mounting brackets and screws Four rubber feet with adhesive backing One AC power cord One RS-232 cable One user’s manual...
-
Page 9: Rack Installation
Desktop or Shelf Installation: When installing the switch on a desktop or shelf, it is recommended that you secure to the unit the four rubber feet that are included with the package. Attach these cushioning feet to each of the four corners at the bottom of the device. - Page 10 If the fans are working properly, the “Fan” LEDs will remain unlit. If either or both of the fans stop or fail, the corresponding “Fan” LED(s) will be lit red. LED Indicators Color Power Green The device is powered on Diagnostic Green Self diagnostic successful...
-
Page 11: Out-Of-Band Terminal Mode Configuration
“Enter” to get to the login screen. In the User name field, type in “admin” and hit Enter. In the Password field, type in “123” and hit Enter. You are now logged in to the switch’s configuration program. - Page 12 Web browser configuration is easier than terminal mode configuration because the user can simply connect the network-ready PC to the switch, open the web browser, go to the switch’s configuration page (by typing the switch’s IP address), and configure the switch by clicking on the subject on the menu.
- Page 13 Press and hold the Ctrl key and then hit “A” to go to the “Action Menu”. Use the Tab key to select “Save” and hit Enter. The screen will prompt you to “Restart the system…” Turn off the switch, wait for 10 seconds, and then turn the switch’s power back on.
-
Page 14: Telnet Management
Again, after changing the settings, save them and connect your Ethernet cable from your PC to any port on the switch. Then, to access the switch, simply follow the prompts in the command lines: Telnet: IP Address for the Switch The following dialogue below appears. -
Page 16: Web Management Home
Connection Icon From this page, you can view the link status of every port on the switch. If a given port is linked, it will be represented by a connection icon (see figure above) within the switch diagram/diagnostic at the top of the page. In the column on the left side of the page, you can click on the function names to monitor and manage the switch. -
Page 17: Port Status
5.2 Port Status This page provides a display of the current status of every port on the switch. The status depends on the user settings and the negotiation results. State: Displays port status: either disabled or enabled. “Unlink” will be treated as “off ”. - Page 18 Rate Control (100K): Displays the rate control setting. “Ingr”: Displays the port’s effective ingress rate. “Egr”: Display the port’s effective egress rate. Port Security: Display the port security is enabled or disabled. Config (located beneath the “Flow Control” category) : Displays the state of the user settings.
-
Page 19: Port Statistics
5.3 Port Statistics This page provides a display of the current status of the entire unit. Press the Reset button to clear all counters on this page. -
Page 20: Administrator
You can modify the IP settings by filling in a new value, and then clicking Apply to confirm (save) the new settings. You must reboot the switch in order for the new IP settings to be activated. (Please note that if any of the value are changed in this field, you must reboot the... - Page 21 Description: Displays what type of device you are using. MAC Address: The unique hardware address assigned by the manufacturer (default). Firmware Version: Displays the firmware version of the switch. Hardware Version: Displays the hardware version of the switch. Default Configuration Value Version: Displays the default EEPROM (Electrically Erasable...
-
Page 22: Module Info
Max bridge transit delay bound control: You can limit the queuing time of the packets in the switch. If enabled, and the packets queued exceed the time value that has been set, they will be dropped. The valid values are 1sec, 2 sec, 4 sec and “Off”. The default value is 1 second. - Page 23 WRR: (Weighted Round Robin). Select the preference given to packets in the switch's high- priority queue. These options represent the number of high-priority packets sent before one low-priority packet is sent. For example, 5 High/2 Low means that the switch sends 5 high priority packets before sending 2 low-priority packets.
- Page 24 Enable Delay Bound: Limit the queuing time of low priority packets in the switch. The default “Max Delay Time” is 255ms. If the low priority packet stays in the switch longer than the “Max Delay Time”, it will be sent. The valid range is 1-255ms.
-
Page 25: Console Port Information
5.4.3 Console Port Information The Console has a standard UART interface to communicate with the serial port. You can use the Windows HyperTerminal program to establish a link to the switch. Connect To -> Configure: Bits per seconds: 9600 Data bits: 8... -
Page 26: Port Controls
5.4.4 Port Controls User may modify or change mode operation in this page. 1. State: You can enable or disable the port control for each port. 2. Auto Negotiation: You can set the auto negotiation mode to Auto, N-way (specify the speed/duplex on a specific port and enable auto-negotiation), or Force for each port. - Page 27 Rate Control: Ports 1-24 support ingress and egress rate control for each port. For example, assume that Port 1 is set at 10Mbps. You can set its effective egress rate at 1Mbps and ingress rate at 500Kbps. The device will perform flow control or backpressure to confine the ingress rate to the specified rate.
-
Page 28: Trunking
Please refer to the IEEE 802.3ad specifications for more details. 5.4.5.1 Aggregator Setting 1. System Priority: A value used to identify the active LACP. The switch with the lowest value has the highest priority and is selected as the active LACP. -
Page 29: Aggregator Information
2. Group ID: You can configure up to seven trunk groups. Choose the "Group ID" and click "Get". 3. LACP: If enabled, the group is an LACP static trunking group. If disabled, the group is a local static trunking group. All ports support LACP dynamic trunking groups. If connecting to a device that also supports LACP, the LACP dynamic trunking group will be created automatically. - Page 30 The page shown below displays the static trunking groups. 3. The page shown below displays “Actor” and “Partner” trunking.
-
Page 31: State Activity
5.4.5.3 State Activity Active (select): The port automatically sends LACP protocol packets. N/A (not selected): The port does not automatically sends LACP protocol packets, and responds only if it receives LACP protocol packets from the opposite device. 1. A link that either has two active LACP ports, or one active port can perform dynamic LACP trunking. -
Page 32: Filter Database
5.4.6 Filter Database 5.4.6.1 IGMP Snooping The switch supports IP multicasting. You can enable the IGMP protocol in the “IGMP Snooping” section. IGMP snooping information is displayed on this page. You can view different multicast groups, VIDs and member ports in this section. IP multicast addresses range... - Page 33 Protocol (IP) suite. The IP suite manages multicast traffic by using switches, routers, and hosts that support IGMP. Enabling IGMP allows the ports to detect IGMP queries and report packets, and manage IP multicast traffic through the switch. IGMP has three fundamental types of messages, shown below:...
-
Page 34: Static Mac Address
5.4.6.2 Static MAC Address When you add a static MAC address, it remains in the switch's address table, regardless of whether or not the device is physically connected to the switch. This saves the switch from having to re-learn a device's MAC address when the disconnected or powered-off device is active on the network again. -
Page 35: Mac Filtering
1. In the MAC Address box, enter the MAC address that you want to filter. 2. If a tag-based (802.1Q) VLAN is set up on the switch, type the VID in the VLAN ID box to associate with the MAC address. -
Page 36: Vlan Configuration
VLAN receive traffic from the same VLAN members. Basically, creating a VLAN from a switch is logically equivalent to reconnecting a group of network devices to another Layer 2 switch. However, all the network devices are still physically plugged into the same switch. -
Page 37: Port-Based Vlan
Port-based VLAN Packets can only be broadcast among members of the same VLAN group. Note that all unselected ports are treated as belonging to another single VLAN. If the port-based VLAN is enabled, the VLAN-tagging is ignored. -
Page 38: Q Vlan
Tag-based VLAN is an IEEE 802.1Q specification standard. Therefore, it is possible to create a VLAN across devices from different switch vendors. IEEE 802.1Q VLAN uses a technique to insert a “tag” into the Ethernet frames. Tags contain a VLAN Identifier (VID) that indicates the VLAN numbers. - Page 39 5.4.7.1 Port-Based VLAN 1. Click Add to create a new VLAN group. 2. Enter the VLAN name and group ID, and select the members for the new VLAN. 3. Click Apply. 4. If there are more groups than the viewable box can display, you can click Next Page to view other VLAN groups.
- Page 40 GVRP allows automatic VLAN configuration between the switch and corresponding nodes. If the switch is connected to a device with GVRP enabled, you can send a GVRP request using the VID of a VLAN defined on the switch. The switch will automatically...
- Page 41 Basic Create a VLAN and add tagged member ports to it. 1. Click on the “Basic” tab, and then click Add to reach the page shown below. 2. Type a name for the new VLAN. 3. Type a VID (between 2-4094). The default is 1. 4.
- Page 42 6. Click Next. Then you can view the page as follows: 7. Use this page to set the outgoing frames as VLAN-tagged frames, if necessary. Then click Apply. Tag: outgoing frames that are VLAN-tagged. Untag: outgoing frames that are not VLAN-tagged.
- Page 43 Port VID Configure Port VID Settings From the main tag-based (IEEE 802.1Q) VLAN page, click the “Port VID” tab. Port VID (PVID) Set the port VLAN ID that will be assigned to untagged traffic on a given port. This feature is useful for accommodating devices that you want to participate in the VLAN but that don’t support tagging.
-
Page 44: Ingress Filtering
Ingress filtering allows frames that belong to a specific VLAN to be forwarded if the port belongs to that VLAN. The switch has two ingress filtering rules. They are as follows: Ingress Filtering Rule 1: Only forward packets with VIDs matching this port’s configured VID. - Page 45 2. You can also view the spanning tree status of the switch. A sample is shown below.
-
Page 46: Forward Delay Time
3. You can change the settings for the STP parameters. Then click Apply. Parameter Description You can change the priority value, which is a value used to identify the Priority root bridge. The bridge with the lowest value has the highest priority and is selected as the root. -
Page 47: Port Sniffer
0-255, and the default setting is 128. The lowest number has the highest priority. This parameter specifies the path costs of the ports that the switch uses to Path Cost determine which ports are the forwarding ports. The ports with the lowest numbers are the forwarding ports. - Page 48 3. Monitored Port: The ports you want to monitor. All monitor port traffic will be copied to sniffer port. You can select max 25 monitor ports in the switch. User can choose which port that they want to monitor in only one sniffer mode.
-
Page 49: Snmp/Trap Manager
SNMP is a protocol that governs the transfer of information between management station and agent. System Options: You can define a name, location, and contact person for the switch. Fill in the system options data, and then click Apply to update the changes on this page. -
Page 50: Security Manager
Trap Managers: A trap manager is a management station that receives traps, which are the system alerts generated by the switch. If no trap manager is defined, no traps are issued. Create a trap manager by entering the IP address of the station and a community string. -
Page 51: Configuration
To enable 802.1x, go to Administrator > Switch Settings > Advanced. You can enable 802.1x at the bottom of the page. After enabling 802.1x, proceed to the “802.1x Configuration” section to fill in the authentication server information. - Page 52 Per Port Configuration In this page, you can select a specific port and configure the authorization state. You can select from a list of four authorization states for each port: Fu: Forces a specific port to be unauthorized. Fa: Forces a specific port to be authorized. Au: The state of a specific port is determined by the outcome of the authentication.
-
Page 53: Misc Configuration
Misc Configuration In this page, you can change the default configuration for the 802.1x standard: Quiet Period: Used to define periods of time during which it will not attempt to acquire a supplicant (default time is 60 seconds). Tx Period: Used to determine when an EAPOL PDU is to be transmitted (default value is 30 seconds). -
Page 54: Web Cluster
Ethernet switch without remembering the IP of the host. Moreover, the switch has no exclusiveness, meaning that the MIS can group switches of any brand and the web cluster switch will not reject any other switch from any other brand. - Page 55 Cluster Status” section, indicating the current group setting. Hosts in blue font are Web Cluster- supported. dd: Enter the IP and name of the switch to be added. If the switch is Web Cluster-supported, lick the checkbox “Web Cluster Support”. The default setting is “Off”. After clicking Add, the put host will be added to the “Web Cluster Status”...
-
Page 56: Tftp Firmware Update
Copy updated firmware image. bin Using the web management tool, select “TFTP Update Firmw Download the image.bin After the upda te is completed, click Reboot to restart the switch. into the TFTP server’s directory. are”. file by clicking Apply. 56 56... -
Page 57: Configuration Backup
Use this page to set the FTP server address. You can restore the EEPROM value from here, but you u m st put the image back in the FTP server; the switch will download back the flash .6.2 TFTP Backup Configuration se this page to set the TFTP server IP address. -
Page 58: Reset System
5.7 Reset System In this page, you can reset the switch to its default configuration. The default value is shown elow. .8 Reboot this page, you can reboot the switch in software reset. -
Page 59: Console - Firmware Update
Console - 1K Xmodem Firmware Update We provide a 1k Xmodem to update the firmware via the console. The X modem only works in 57600bp s mode. So you must change the baud rate to 57600bps to download the firmware. here are two situations in which to use the 1K X modem to update the firmware: You can enter "1K X modem receiver mode"... - Page 60 2. Press the “Connect” button and you will see “CCCC…”displayed on the console. Then go to Transfer > Send File. 3. Select 1K Xmodem under the Protocol item, and list the directory for the image file folder. Then click Send.
- Page 61 4. Start downloading the image file. 5. Finish downloading the file and the switch system will update the firmware automatically. If the message “Update firmware…ok…” appears, the switch will reboot. Please change the baud rate to 9600bps.
-
Page 62: Out-Of-Band Terminal Mode Management
Out-of-band Terminal Mode Management The switch also provides a serial interface to manage and monitor the switch. You can follow the steps outlined in the “Console Port Info” section of the web interface for using the Windows HyperTerminal program to link the switch. -
Page 63: Main Menu
Protocol Related Configuration: Allows you to configure the protocol function. Status and Counters: Displays the status of the switch. Reboot Switch: Allows you to restart the system or reset switch to its default configuration. TFTP Update Firmware: Uses TFTP to download the updated firmware. -
Page 64: Switch Static Configuration
7.2 Switch Static Configuration ou can press the Tab or Backspace keys to choose an item, and then press Enter to select the item. The action menu, shown below, applies for configuration in t his section. <Quit>: Allows you to exit the current page and return to previous menu. -
Page 65: Port Configuration
7.2.1 Port Configuration From this page, you can manipulate the status of every port. ress Spacebar to toggle between items. InRate (100K/unit): You can adjust the input rate (100K per unit). The valid range is 0-1000. 0: disables rate control. 1-1000: valid range of rate values. - Page 66 Enabled: You can enable or disable the ports. “Yes” indicates that the port is enables. “No” indicates that the port is disabled. Auto: You can set the auto-negotiation mode to either “Auto”, “N-way Force” or “Force” for each port. Spd/Dpx: You can set the speed of ports 1-24 to either 100Mbps or 10Mbps.
-
Page 67: Trunk Configuration
7.2.2 Trunk Configuration s page will allow you to create a maximu up t o four ports from ports 1-26 to build a tru 1. Select <Edit> on the “actions” menu 2. Press the spacebar to configure the member ports of a trunk group. You will also have to set the corresponding trunk groups between TRK1 and TRK7 to “Static”... - Page 68 6. All ports in the same static trunk group will be treated as a single port. So when you set the VLAN members and port configuration, they will be toggled on or off simultaneously. NOTE: VLAN groups exist, all of the members of a static trunk group must be in the same VLAN roup.
-
Page 69: Vlan Configuration
7.2.3 VLAN Configuration The page below allows you to set the VLAN mode to port-based VLAN, 802.1Q VLAN, or “Disable”. - Page 70 NOTE: Whenever you change the VLAN settings, you will need to restart the switch. the VLAN mode is set to 802.1Q VLAN, you can set PVIDs, as well as ingress filtering 1 and gress filtering 2 in this section. PVID (Port VID: 1-255): Type in the PVID.
-
Page 71: Create A Vlan Group
7.2.3.1 Create a VLAN Group Create a Port-Based VLAN Create a port-based VLAN and add member/nonmember ports to it. Select <Edit>. VLAN Name: Type in a name for the new VLAN. Grp ID: Type in the VLAN group ID. The group ID range is 1-4094. Member: Press Spacebar to choose the VLAN members. - Page 72 Create an 802.1Q VLAN Create an 802.1Q VLAN and add tagged /untagged member ports to it. Select <Edit>. VLAN Name: Type in a name for the new VLAN. VLAN ID: Type in a VID between 1-4094. The default is 1. You can configure up to 256 VLAN groups.
- Page 73 NOTE: If the trunk groups already exist, you can view them (ex: TRK1, TRK2…) after port 26 in the menu f ports and configure them as the members of a VLAN. 7.2.3 .2 E it/Delete a VLAN Group In th is pa e, you can edit or delete a VLAN group.
-
Page 74: Group Sorted Mode
NOTE: . Pressing <Enter> once will complete deletion when in delete mode. . The VLAN Name and VLAN ID cannot be modified. . The default VLAN cannot be deleted. .2.3.3 Groups Sorted Mode this page, you can sort the VLAN groups by: Name... - Page 75 The Edit/Delete a VLAN group page will display the result. Shown below is the page if sorted by name.
-
Page 76: Miscellaneous Configuration
Shown below is the page if sorted by VID. 7.2.4 Miscellaneous Configuration... -
Page 77: Mac Age Interval
7.2.4.1 MAC Age Interval Type the number of seconds that an inactive MAC address remains in the switch’s address table. he valid range is 300-765 seconds. The default value is 300 seconds. -
Page 78: Broadcast Storm Filtering
5%, 10%, 15%, 20%, 25% and NO. The default value is 5%. 7.2.4.3 Max Bridge Transmit Delay Bound 1. Max bridge transmit delay bound: Limits the queuing time of the packets in the switch. If enabled, the queued packets that exceed the limit will be dropped. Press Spacebar to set the time. -
Page 79: Port Security
NOTE: Make sure “Max bridge transit delay bound control” is enabled before enabling “Low Queue Delay Bound” because “Low Queue Delay Bound” can only work when “Max bridge ansit delay bound control” is enabled. .2.4.4 Port Security port in security mode will be “locked” without permission of the address learning. Normally only the incoming packets with SMAC already existing in the address table can be forwarded. -
Page 80: Collisions Retry Forever
1. Select <Edit>. . Press Spacebar to choose whether to enable or disable the item. . Press Ctrl + A to go back to the action menu. . Select <Save> to save all configured values. 5. You can press <Next Page> to configure the remaining ports; you can press <Previous Page>... -
Page 82: Administration Configuration
7.2.5 Administration Configuration... -
Page 83: Change Username
7.2.5.1 Change Username From this page, you can change the web management username. Type in the new username, and en press <Save>. .2.5.2 Change Password se this page; user can change web management login password. -
Page 84: Device Information
7.2.5.3 Device Information From this page, you can configure the device information. .2.5.4 IP Configuration From this page, you can configure the IP settings... -
Page 85: Port Mirroring Configuration
Monitored Ports: The ports you want to monitor. All monitored port traffic will be copied to the sniffer port. You can select up to 25 ports to monitor on the switch. You can choose which port to monitor in only one sniffer mode. Press Spacebar to choose a member port, “V”... -
Page 86: Priority Configuration
7.2.7 Priority Configuration 7.2.7 .1 Port Static Priority he static priority is based on the port: if you set the port priority to high, incoming frames from is port will always be high priority frames. -
Page 87: Priority Configuration
7.2.7.2 802.1p Priority Configuration ueues are assigned high/low priority levels from 0-7. . Select <Edit>. 2. Press Spacebar to select the priority level mapping to high or low queue. 3. High/Low Queue Service Ratio H/L: You can select the ratio of high priority packets and low priority packets. -
Page 88: Mac Address Configuration
MAC address, it remains in the switch's address table, regardless of hether the device is physically connected to the switch. This saves the switch from having to re- arn a device's MAC address when the disconnected or powered-off device is active on the network again. - Page 89 3. Port num: Press Spacebar to select the port number. 4. VLAN ID: If tag-based (802.1Q) VLANs are set up on the switch, static addresses are associated with individual VLANs. Type the VID to associate with the MAC address.
- Page 90 Edit Static MAC Addresses 1. Press the <Edit> key. 2. Choose the MAC address that you want to modify and then press enter. Press the <Edit> key to modify all the items. Press Ctrl + A to go back to the action menu, and then select <Save> to save all configured values.
- Page 91 Delete Static MAC Address 1. Press <Delete> key to d elete a filter MAC address. 2. Choose the MAC address that you want to delete and then press enter. 3. When pressing <Enter> once will complete deletion on delete mode.
-
Page 92: Filtering Mac Address
1. Press <Add>, <Edit> to add a filter MAC address. 2. MAC Address: Type the MAC address to filter. 3. VLAN ID: If tag-based (802.1Q) VLANs are set up on the switch, type the VID to associate with the MAC address. - Page 93 Edit filter MAC address Press the <Edit> key. Choose the MAC address that you want to modify and then press enter.
- Page 94 Press <Edit> to modify all the items. Press Ctrl + A to go back to the action menu, and then select <Save> to save all configured values. Delete filter MAC address Press <Delete> to delete a filter MAC address. Choose the MAC address that you want to delete and then press enter. Pressing <Enter>...
-
Page 96: Protocol Related Configuration
.3 Protocol Related Configuration .3.1 Spanning-Tree Protocol The Spanning-Tree Protocol (STP) is a standardized method (IEEE 802.1D) for avoiding loops in switched networks. When STP is enabled, it ensures that only one path at a time is active between any two nodes on the network. -
Page 97: Enabling Stp
7.3.1.1 Enabling STP This page allows you to enable or disable the Spanning Tree function. Press Spacebar to select “ Enabled” or “Disabled”. -
Page 98: Stp System Configuration
7.3.1.2 STP System Configuration . You can view the spanning tree information about the Root Bridge on the left. . On the right, you can set new values for the STP parameters. OTE: For parameter descriptions, please see Section 2-4-8. -
Page 99: Per Port Configuration
2. Select <Edit>. . PathCost: Specifies the path cost of the port that the switch uses to determine which ports are the forwarding ports. 4. Priority: This specifies the priority of port; you can make it more or less likely to become the root port. -
Page 100: Snmp
Any network management running the Simple Network Management Protocol (SNMP) can be sed to manage the switch. Use this page to define management stations as trap managers and to nter SNMP community strings. You can also define a name, location, and contact person for the... -
Page 101: System Options
7.3.2.1 System Options . Press <Edit>. . System Name: Type a name to be used for the switch. 3. System Contact: Type the name of contact person or organization. 4. System Location: Type the location of the switch. 5. Press Ctrl + A to go back to the action menu. -
Page 102: Community Strings
7.3.2.2 Community Strin se this age to Add/ Edit/ Delete SNMP community strings. Community Name: The name of current strings. Write Access: Indicates if the rights are read-only or read-write. Restricted: Read-only - enables requests accompanied by this string to display MIB-object information. - Page 103 Add Community Name Press <Add> --> <Edit> key. Community Name: Type the community name. Write Access: Press Space key to select th Edit Community Name Press <Edit>, choose the item that you want to modify, and then press Enter. Community Name: Type the new name. Write Access: Press Spacebar to set the rights to “Restricted”...
- Page 104 Delete Community Name 1. Press <Delete> key. hoose the community name that you want to delete and then press enter. 3. When pressing <Enter> once will complete deletion in delete mode.
-
Page 105: Trap Managers
Trap Managers A trap manager is a management station that receives traps, the system alerts genera switch. If no trap manager is defined, no traps are issued. Create a trap manager IP address of the station and a community string. - Page 106 Edit trap managers . Press <Edit> key, and then choose the item that you want to modify. . IP: Type the new IP address . Community Name: Type the community name. . Press Ctrl +A go to actions line, press <Save> key to save all configure.
- Page 107 Delete trap manager 1. Press the <Delete> key. 2. Choose the trap manager that you want to delete and then press Enter. 3. Pressing <Enter> once will complete deletion in delete mode.
-
Page 108: Gvrp
VRP allows automatic VLAN configuration between the switch and corresponding nodes. For xample, if the switch is connected to a device with GVRP enabled, you can activate this setting to allow dynamic VLAN configuration information to be processed by the switch. If a device sends a GVRP request using the VID of a VLAN defined on the switch, the switch will automatically add that device to the existing VLAN. -
Page 109: Igmp
7.3.4 IGMP The Internet Group Management Protocol (IGMP) is an internal protocol of the Internet Protocol P) suite. This page you can enable / disable the IGMP support. . Select <Edit>. . Press Spacebar to choose enabled / disabled. . Press Ctrl + A to go back to the action menu. . -
Page 110: Lacp (Link Aggregation Control Protocol)
7.3.4.1 LACP (Link Aggregation Control Protocol) This page can configure and view the LACP status. Note: All ports support LACP dynamic trunking groups. If connecting to a device that also supports LACP, the LACP dynamic trunking group will be created automatically. 7.3.4.2 Working Port Setting This page can set the actual work ports within the trunk group. -
Page 111: State Activity
1. Select <Edit>. 2. Group: Displays the trunk group ID. 3. LACP: Displays the trunk group’s LACP status. . LACP Work Port Num: The maximum number of ports that can be aggregated at the same time. If the group is LACP static trunking, the excess ports are standby and able to aggregate if work ports fail. -
Page 112: Lacp Status
7.3.4.4 LACP Status When you’re setting trunking group, you can see the re Static trunk group LACP trunk group lational information here. -
Page 113: Protocol
<Quit>: Exit this page and return to previous menu. < Previous Page>: Return to previous page to view. <Next page>: Go to next page to view. .3.5 802.1x Protocol rom this page, you can configure and view the 802.1x status. -
Page 114: Enable 802.1X
7.3.5.1 Enable 802.1x Select <Edit>. Press Spacebar to choose enabled/disabled. Press Ctrl + A go back to the action menu. Select <Save> to save configure value. .3.5.2 802 .1x System Configuration... - Page 115 Radius Se rver IP Address: the IP address of the authentication server. Shared Key: A key shared between this switch and the authentication server. NAS, Identifier: A string used to identify this switch. Server Port: The UDP port number used by the authentication server to authenticate.
-
Page 116: Status And Counters
3. Tx Period: Used to dete rmine when an EAPOL PDU is to be transmitted (default value is 30 onds . 4. Sup plic nt Timeout: Used to determine timeout conditions in the exchanges betwee supplicant and authentication server (default value is 30 seconds). 5. -
Page 117: Port Status
7.4.1 Port Status This page displays the status of every port. ink Status: Indicates whether the port is linked or not linked. Rate: Displays the input rate control (100K/unit) setting value. utRate: Displays the output rate control (100K/unit) setting value. nabled: Indicates whether the port is enabled or disabled. -
Page 118: Port Counters
<Quit>: Exit the “Port Status” page, and then return to the previous menu. < Previous Page>: Displays the previous page. <Next page>: Displays the next page. .4.2 Port Counters he following information provides a view of the current status of the unit. <Quit>: Exit the “Port Status”... -
Page 119: System Information
7.4.3 System Information MAC Address: The unique hardware address assigned by the manufacturer. irmware Version: Displays the switch’s firmware version. SIC Version: Displays the switch’s hardware version. PCBA version: Displa ys the board number. erial number: Displays the serial number assigned by the manufacturer. -
Page 120: Reboot Switch
7.5 Reboot Switch .5.1 Default esets the switch to its default configuration. For default settings, please see Section 2-4-14. 7.5.2 Restart Reboot the switch in software reset. -
Page 121: Tftp Firmware Update
7.6 TFTP Firmware Update his page provides you with the option to update the firmware, restore the EEPROM values, or pload current EEPROM values. -
Page 122: Tftp Firmware Update
6. Press <Save>, and the image file will begin to download. 7. When saved successfully, the image file will have finished downloading as well. 8. Restart the switch. 7.6.2 Restore Configure File From this page, you can restore the EEPROM values, save the image file from before, and form... - Page 123 . Remote File Name: Type the image file name. . Press Ctrl + A go to action line. . Press <Save>, and the image file will begin . When saved successfully, the image file will have finished d estart the switch. TFTP server. to download. ownloading as well.
-
Page 124: Backup Configure File
5. Press Ctrl + A to go back to the action menu line. 6. Press <Save>, and the image file will begin to download. 7. When saved successfully, the image file will have finished downloading as well. 8. Restart the switch. -
Page 125: Vlan Application Used With Switch
5.1 VLAN Application Used with Switch VLANs provide a simple solution for protecting your network against broadcast storming reating segments based on Layer 2 Ethernet in rocessing requirements of Layer 3 IP based routers. s a result, each group of stations connected to separate segmented ports forms a different olated broadcast domain. - Page 126 A single switch may have several independent VLANs ithin it. On the following page is an example in which an R&D, Manufacturing and dministration group can be partitioned into two different VLAN groups.
-
Page 128: Trunking Application Used With Switch
5.2 Trunking Application Used with Switch runking allows you to increase the available bandwidth between switches by grouping ports into trunk. Trunking can also be used to connect a server to switches if higher bandwidth service is quired. You can use trunking to improve the throughput between segments. Moreover, this itch provides trunking with a fail-over function.
Need help?
Do you have a question about the HGMS224 and is the answer not in the manual?
Questions and answers