Advertisement
Advertisement
Table of Contents

Related Manuals for Hawking HKS102


Summary of Contents for Hawking HKS102
- Page 2 If the product proves defective during this two-year warranty period, call Hawking Customer Service in order to obtain a Return Authorization number. Warranty is for repair or replacement only. Hawking Technology does not issue any refunds. BE SURE TO HAVE YOUR PROOF OF PURCHASE.
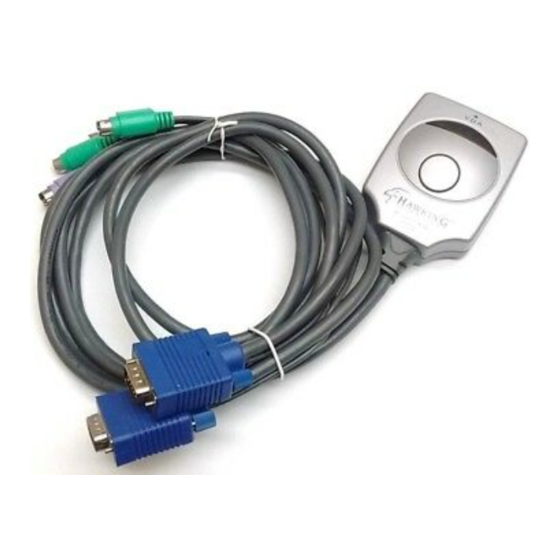
- Page 3 Introduction The HKS102 Mini 2-Port KVM Switch is a 2-port PS/2 type KVM Switch that has 1.5M built-in cables. It is a control unit that allows access to multiple computers from a single console (keyboard, monitor and mouse). With the 1.5M built-in cables, it reduces the cabling troubles and enables users to access, control, boot and reboot two computers using only one keyboard, video and mouse.
- Page 4 Pre-installation: Note: The default setting for the HKS102 Mini 2-port KVM Switch works with most systems. In fact, you do not have configure anything before installation. It is a plug and play device: Just connect the keyboard, the monitor, and the mouse to the KVM Switch.
- Page 5 To set up your HKS102, please follow the steps below: Before connecting any cable to your KVM Switch, please make sure all of your computers and their peripherals have been powered off. Otherwise, the KVM Switch might not be set up properly.
- Page 6 Easy Operation There are two methods to select a specific computer: using the push button or a hotkey sequence. Push Button The push button lets you have direct control over channel switching. Simply press the button to select the computer. See Quick Reference Sheet. Keyboard Hotkeys A keyboard hotkey sequence consists of three specific keystrokes: See Quick Reference Sheet.
- Page 7 QUICK REFERNCE SHEET for the HKS102 Mini KVM Switch Operation Commands Hotkeys/Push Button Command Hotkeys ScrLk + ScrLk + (x) (channel Select a PC no.) ScrLk + ScrLk Next lower + ↑ (arrow up) channel ScrLk + ScrLk Next higher + ↓...
Need help?
Do you have a question about the HKS102 and is the answer not in the manual?
Questions and answers