Table of Contents
Advertisement
Quick Links
Advertisement
Table of Contents

Summary of Contents for Planar PXL2240MW
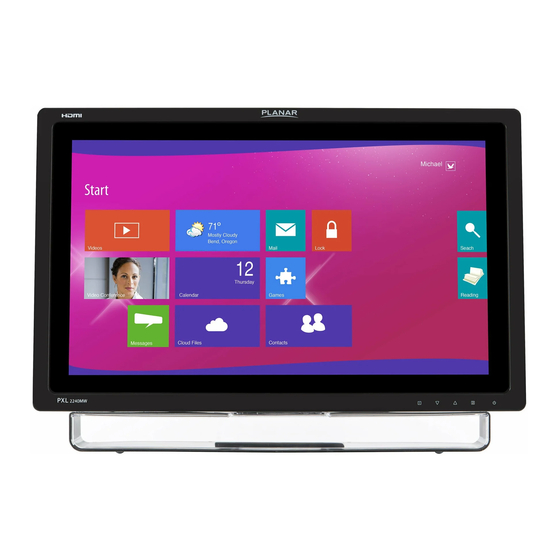
- Page 1 PXL2240MW Touch LED LCD Monitor USER'S GUIDE www.planar.com...
-
Page 2: Table Of Contents
Front View of the Product ............................4 Rear View of the Product ..............................5 Quick Installation ................................6 Basic Operation and Calibration/Reset Instructions...................7 Advanced Operation—OSD Menu..........................9 Supporting Timing Modes ............................12 Technical Information ..............................13 Wall-Mount Installation Instructions........................14 Troubleshooting................................15 Planar Support ................................16... -
Page 3: Operation Instructions
According to WEEE regulation, this Touch LED LCD Monitor can't be handled as normal trash in Europe when it is out of usage. Please refer to the recycle information on Planar’s website to handle it. For more information on how to recycle your product, please visit http://www.planar.com/about/green/... -
Page 4: Unpacking Instructions
Unpacking Instructions Move the Touch LED LCD Monitor out of the package and take off the plastic bag and Polystyrene Foam. Pull the base from Parallel versus Panel to Vertical. Adjust the Panel between 4° leaning forward and 40° leaning backward. Safety Precautions Follow all warnings, precautions and maintenance as recommended in this user’s manual to maximize the life of your unit. -
Page 5: Package Overview
Package Overview Touchscreen LED Monitor Power Cord VGA Signal Cable Audio-in Cable USB Cable (A to B) HDMI Cable User’s Guide... -
Page 6: Front View Of The Product
Front View of the Product ① ② ③ ④⑤⑥ ① OSD Turn On/ Off ② Volume Adjust/ Scroll Down/ Adjust Decrease ③ Preset Mode/ Scroll UP/ Adjust Increase ④ Input select/ Confirm Selection ⑤ LED Indicator ⑥ Power On/ Off * Hot keys Instructions please see “Using the OSD Menu”... -
Page 7: Rear View Of The Product
Rear View of the Product ① ② ③ ④ ⑤ ⑥ ⑦ ① Power Input ② USB - Type A to B ③ Headphone Jack ④ Audio Input ⑤ HDMI input (HDMI 19 pin) ⑥ DVI Input (DVI 24 pin) ⑦... -
Page 8: Quick Installation
Quick Installation Connect either VGA, DVI or HDMI Video Source from the monitor to the computer. Make sure both monitor and computer are powered OFF. Connect the audio cable from audio output of computer to the audio input of the monitor. Connect the USB cable from the computer to the monitor. -
Page 9: Basic Operation And Calibration/Reset Instructions
Basic Operation and Calibration/Reset Instructions Before using the Touch LED LCD Monitor: Connect external equipment properly. Insert the power plug, and the power LED indicator will light orange. Power On/Off To turn the Touch LED LCD Monitor on/off: Press POWER button on the front. The power LED indicator light will be blue when the Touchscreen LED Monitor is on. - Page 10 Repeat this step to unlock. PXL2240MW Calibration/Reset Instructions: The PXL2240MW is available with USB connection. It is Microsoft® Windows® 7, 8 HID (Human Interface Device) compatible if you use the USB touch screen interface. No additional software driver is required. Calibration is a simple process and can be invoked by running Tablet PC Settings from Control Panel and clicking the Calibrate button.
-
Page 11: Advanced Operation-Osd Menu
Advanced Operation—OSD Menu You can use the OSD menu to adjust various settings for your Touchscreen LED Monitor. Press the 1 button to display the OSD Menu, and use ▲▼ to select the desired OSD menu. Short Cuts Function from the button(s) Auto Image Adjust: To auto adjust Horizontal Position, Vertical Position, Phase (Fine Tune) and Clock (H. - Page 12 Input Select: When Input Select is pressed, change Input signal to VGA, DVI, HDMI or Auto. Audio Adjust: To adjust the audio functions. Volume: To adjust the volume of speaker output. Mute: To turn the Mute ON/OFF. Audio Input: When in HDMI input, select where the audio source comes from Line-In or HDMI.
- Page 13 To adjust the clarity of a non-Full HD Resolution (1920x1080) signal with ▼ Sharpness: or ▲ button. Video Mode Adjust: To select the video mode from Full Screen or Aspect Ratio. Full Screen: To select full-screen size image. Aspect Ratio: To select input timing image size. Setup Menu: To set up Language Select, OSD Position, OSD Time Out, OSD Background and Power Indicator.
-
Page 14: Supporting Timing Modes
Supporting Timing Modes STANDARD RESOLUTION 720 x 400 @ 70Hz 640 x 480 @ 60Hz 640 x 480 @ 67Hz VESA 640 x 480 @ 72Hz VESA 640 x 480 @ 75Hz VESA 800 x 600 @ 56Hz VESA 800 x 600 @ 60Hz VESA 800 x 600 @ 72Hz VESA... -
Page 15: Technical Information
Technical Information Panel 21.5” TFT (with LED backlight) Power Management On: 24 Watts (typical), 35 Watts (maximum) Standby Mode: < 0.5 Watt Off: < 0.5 Watt Displayable Resolution Full HD 1920 x 1080 max. Vertical Frequency 60Hz max. Pixel Dimension 0.24825 x 0.24825 mm Display Color 16.7M... -
Page 16: Wall-Mount Installation Instructions
Wall-Mount Installation Instructions Wall Mount Arm not included Turn the power OFF then disconnect the cables from the TFT Touchscreen LCD Monitor before performing the procedure below. 1. Lay the TFT Touchscreen LCD Monitor face down on a soft surface. 2. -
Page 17: Troubleshooting
Troubleshooting No power Make sure A/C power cord is securely connected to the power adapter and the power supply is firmly connected to the Touchscreen LED Monitor . Plug another electrical device into the power outlet to verify that the outlet is supplying proper voltage. -
Page 18: Planar Support
Planar Support Cables and Accessories To find cables and accessories for your Planar monitor, touch screen or other Planar products visit our online store at www.PlanarOnline.com. Technical Support Visit Planar at http://www.planar.com/support for operations manuals, touchscreen drivers, warranty information and access to Planar's Technical Library for online trouble shooting. - Page 19 2013 2001132404T 020-1221-00A...


Need help?
Do you have a question about the PXL2240MW and is the answer not in the manual?
Questions and answers