Table of Contents
Advertisement
Advertisement
Table of Contents

Related Manuals for Carrier G Series Heating


Summary of Contents for Carrier G Series Heating
-
Page 1: Owner S Manual
OWNER S MANUAL SPLIT SYSTEM AIR CONDITIONER G Series Heating... - Page 2 OWNER S MANUAL...
-
Page 3: Table Of Contents
Thank you for selecting Carrier ! You can be justifiably proud of your purchase because the same pride in craftsmanship and engineering know-how that goes into Carrier equipment for cooling the Astrodome sports complex in Texas, the United States Capitol s Halls of Congress and countless other installations worldwide have been built into your unit. -
Page 4: Precautions
OWNER S MANUAL - 2 PRECAUTIONS Installing and servicing air conditioning equipment can be hazardous due to system pressure and electrical components. Only trained and qualified service personnel should install or service this equipment. Untrained personnel can perform basic maintenance functions such as cleaning the coil and filters, and replacing filters. - Page 5 OWNER S MANUAL - 3 PRECAUTIONS WARNING Do not use flammable sprays near the unit. The unit can be damaged by gasoline, benzene, thinners, insecticides and other chemical agents. WARNING When unplugging the power plug, do not pull by the power cord.
- Page 6 OWNER S MANUAL - 4 PRECAUTIONS WARNING Be careful to keep the room temperature a comfortable level. Avoid continuous direct air flow to the occupant, especially in case of sleeping persons or hospital patients. WARNING Do not obstruct the front of the discharge grille of both units. This will block air flow, reduce the cooling effect and may result in unit malfunction.
- Page 7 OWNER S MANUAL - 5 PRECAUTIONS WARNING To circulate the room air only, operate at the FAN mode. WARNING In summer, if possible, prevent direct sunlight from yy y y yy yy yy y y yy yy entering the room; draw curtains or blinds. yy yy yy yy WARNING...
-
Page 8: Before Operation
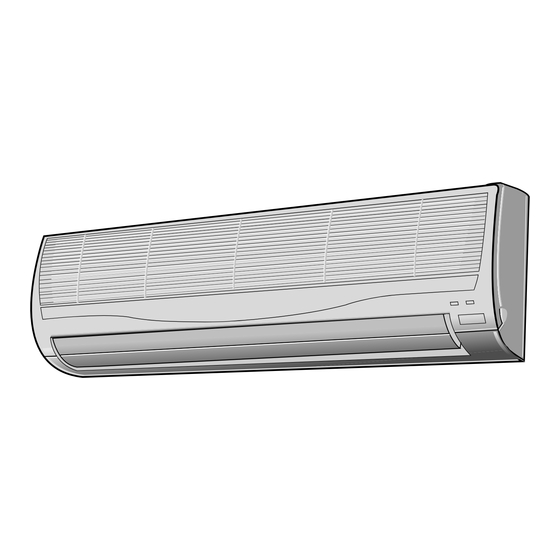
OWNER S MANUAL - 6 BEFORE OPERATION UNIT DESCRIPTION Indoor Unit ROOM AIR INLET AIR FILTER ACTIVE CARBON FILTER & OPTION 1 : ELECTROSTATIC FILTER OPTION 2 : PHOTO-CATALYST FILTER REMOTE CONTROL SIGNAL RECEIVER AIR SWING FLAP VERTICAL LOUVER ROOM AIR OUTLET POWER PLUG LCD REMOTE CONTROL OUTDOOR AIR OUTLET... -
Page 9: Indoor Unit Display
OWNER S MANUAL - 7 BEFORE OPERATION Indoor Unit Display • UNIT ON(Green): When the unit is switched on by the remote control, a green light will be displayed. • TIMER(Orange) : When the unit is in reservation mode, an orange light will be displayed. Switch Panel EMERGENCY TEST... -
Page 10: Remote Control Description
OWNER S MANUAL - 8 BEFORE OPERATION REMOTE CONTROL DESCRIPTION Names and Functions of the Buttons ON/OFF BUTTON If you press this button, the unit will begin operation. Press the button again, and operation stops. ( You can hear a receiving beep. -
Page 11: Reset Button
OWNER S MANUAL - 9 BEFORE OPERATION FLAP CONTROL BUTTON Controls the discharge air flow direction up and down. ( Refer to p.20 ) On start up, the flaps open automatically according to the operating mode. If you press this button, the flap will move stepwise and the position will be displayed. - Page 12 OWNER S MANUAL - 10 BEFORE OPERATION Remote Control Display Indicates the selected temperature. Indicates flap modes SWING Automatic position AUTO User selected position Swing up and down SWING Indicates the selected operating mode. Indicates the reserved status of SLEEP timer or EVERYDAY timer.
-
Page 13: Remote Control Preparation
OWNER S MANUAL -11 BEFORE OPERATION REMOTE CONTROL PREPARATION Replacing Batteries Remove the cover of the Remove the used batteries and Press the RST button with a sharp battery compartment at the insert new batteries. The remote object to reset the remote control back of the remote control by control uses two alkaline batteries. - Page 14 OWNER S MANUAL - 12 BEFORE OPERATION Signal Receiving The remote control will only function when operated within 5 meters of the unit. • You can hear a beeping sound from the unit in the following cases, which indicates that the signal is received. 5m maximum CAUTION •...
-
Page 15: Unit Operation
OWNER S MANUAL - 13 UNIT OPERATION AUTOMATIC OPERATION Automatic operation means that the air conditioner operates automatically by selecting the COOL or HEAT mode and automatically changes the fan speed according to the indoor condition to keep the room temperature comfortable. -
Page 16: Manual Operation
OWNER S MANUAL - 14 UNIT OPERATION MANUAL OPERATION PROCEDURE ON/OFF button Press this button and the AUTO operation is indicated. • A receiving beep is heard. • The green UNIT on lamp of the indoor unit display illuminates. MODE button Press this button to select the desired operation mode. -
Page 17: Timer Operation
OWNER S MANUAL - 15 UNIT OPERATION TIMER OPERATION ON Timer PROCEDURE ON TIMER button Press this button. On start up, time is set at 6:00 A.M.. HOUR, MINUTE buttons Press these buttons to set the start-up time desired while the ON Timer symbol is flashing. RESERV. -
Page 18: Off Timer
OWNER S MANUAL - 16 UNIT OPERATION OFF Timer PROCEDURE OFF TIMER button Press this button. In the beginning, the time is set at 2:00 A.M. . HOUR, MINUTE buttons Press these buttons to set the stop time desired while the OFF Timer symbol is flashing. - Page 19 OWNER S MANUAL - 17 UNIT OPERATION Combination of ON, OFF and EVERYDAY Timer PROCEDURE For example when you want the operation to start at 5:30 P.M. and stop at 10:30 P.M.. Reserve the ON Timer at 5:30 P.M.. Reserve the OFF Timer at 10:30 P.M.. Set the operation mode as desired.
- Page 20 OWNER S MANUAL - 18 UNIT OPERATION Cancellation of ON, OFF and EVERYDAY Timer PROCEDURE Press the ON TIMER button to cancel the ON Timer or press OFF TIMER button to cancel the OFF Timer. To cancel the EVERYDAY Timer reservation, press the EVERYDAY, ON TIMER or OFF TIMER button.
-
Page 21: Sleep Timer
OWNER S MANUAL - 19 UNIT OPERATION Sleep Timer This function enables the user to automatically switch off the unit. PROCEDURE If you want to stop the operation after 3 hours from now. Press the SLEEP button 3 times • 3:hr will be displayed and the signal will be SLEEP flashing. -
Page 22: Discharge Air Louver Control
OWNER S MANUAL - 20 UNIT OPERATION DISCHARGE AIR LOUVER CONTROL Up and Down Control The air discharge direction can be controlled to swing up and down and can be fixed at a preferred position or at automatic position by the remote control. AUTO SWING CLOSE... -
Page 23: Emergency And Test Operation
OWNER S MANUAL - 21 UNIT OPERATION EMERGENCY AND TEST OPERATION EMERGENCY TEST Emergency Operation When the remote control is lost, damaged or the battery is discharged, the EMERGENCY button can be used to run the unit. • Press the EMERGENCY button at the off mode condition. - The unit operates automatically according to the room temperature by selecting either the cooling or the heating operation. -
Page 24: Air Cleaning Operation
OWNER S MANUAL - 22 UNIT OPERATION AIR CLEANING OPERATION Information for filters • Filters Air filters Option 1 : Active carbon filter/Photo-catalyst filter Option 2 : Active carbon filter/Electrostatic filter • Air filters eliminate dust and lint • Optional Active carbon filter/Photo-catalyst filter effectively eliminates odor and cigarette smoke in the room air. •... -
Page 25: Care And Maintenance
OWNER S MANUAL - 23 CARE AND MAINTENANCE POINTS TO NOTE Operating Condition • Temperature ranges suitable for unit operation are as follows. MODE INDOOR OUTDOOR COOL 21 ~ 32 c 21 ~ 43 c HEAT Below 27 c Below 21 c 17 ~ 32 c 12 ~ 43 c •... -
Page 26: Normal Operation
OWNER S MANUAL - 24 CARE AND MAINTENANCE Frost Prevention of Indoor Unit When the unit operates (on cooling) at a low ambient temperature, frost may appear on the indoor coil. When the indoor coil temperature is below 0 c, the microcomputer makes the compressor stop to protect the unit from frost. Normal Operation Any of the following can occur during normal operation: •... -
Page 27: Cleaning The Filters And Front Panel
OWNER S MANUAL - 25 CARE AND MAINTENANCE CLEANING THE FILTERS AND FRONT PANEL Cleaning the Air Filter NOTE • Turn off the unit and pull out the power plug. • Clean the air filters once a month. Lift the front panel and pull the Clean the filters with a vacuum Rinse the filters under running air filters downward. -
Page 28: Cleaning The Main Unit
OWNER S MANUAL - 26 CARE AND MAINTENANCE CLEANING THE MAIN UNIT • Use only a damp soapy towel. • Do not pour water onto the unit, and do not use petrol, solvents or abrasive powder which may result in damage of the unit. NOTE •... -
Page 29: Troubleshooting
OWNER S MANUAL - 27 TROUBLESHOOTING Trouble Check Points Action Check that the power cord is plugged Insert the power cord into the wall outlet. into the wall outlet. Has the circuit breaker tripped or has the Reset the circuit breaker or replace the fuse blown? fuse with the specified replacement fuse. - Page 30 Carrier Corporation P/N:42QG8C5404A...
Need help?
Do you have a question about the G Series Heating and is the answer not in the manual?
Questions and answers