Accu-Chek Compact Plus Owner's Booklet
Blood glucose meter
Hide thumbs
Also See for Accu-Chek Compact Plus:
- User manual (440 pages) ,
- Owner's booklet (244 pages) ,
- Reference manual (212 pages)
Table of Contents
Advertisement
Advertisement
Table of Contents
Troubleshooting

Related Manuals for Accu-Chek Accu-Chek Compact Plus


Summary of Contents for Accu-Chek Accu-Chek Compact Plus
- Page 1 CCU- ® Compact Plus BLOOD GLUCOSE METER Owner’s Booklet...
- Page 3 Thank you for choosing the ACCU-CHEK Compact Plus system! Congratulations on your decision to take control of your diabetes. We’ve designed your new ACCU-CHEK Compact Plus system with comfort, convenience, and control in mind – to help make living with diabetes a little easier.
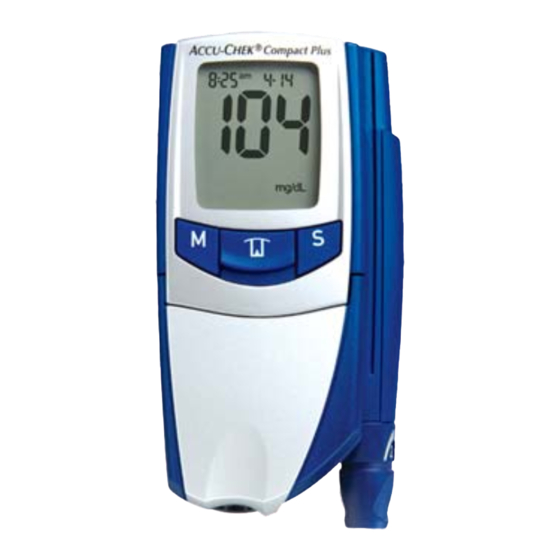
- Page 4 The ACCU-CHEK Compact Plus System Your new ACCU-CHEK Compact Plus meter and accessories work together to measure the amount of sugar (glucose) in your blood to help you and your doctor control your diabetes. The system includes: • ACCU-CHEK Compact Plus Meter with Attached •...
- Page 5 Please complete your warranty card and mail it, so you receive the best customer service possible and product update news. Important Information About Your New System • Your new blood glucose system is designed and approved for testing fresh capillary whole blood samples (for example, blood from your fingertip or palm).
-
Page 6: Table Of Contents
Contents Chapter 1: Understanding Your New System ....................6 The ACCU-CHEK Compact Plus System ...........................6 Meter Setup ..................................8 Setting the Beeper ................................9 Setting the Year, Time, and Date............................11 Setting the Test Reminders ............................13 Setting the Hypoglycemic (Hypo) Indicator ........................16 Installing the Test Drum ..............................19 Changing the Batteries..............................22... - Page 7 Symptoms of High or Low Blood Sugar .........................55 Unusual Test Results ..............................56 Comparing Your Meter Result to a Lab Result........................57 Chapter 4: Meter Memory and Downloading ....................58 Storing Test Results ..............................58 Viewing Test Results ..............................59 Viewing Your Average, Lowest, and Highest Blood Sugar Test Results ................60 Downloading Your Results .............................62 Transferring Data ................................62 Chapter 5: Maintenance and Troubleshooting...
-
Page 8: Chapter 1: Understanding Your New System
Chapter 1: Understanding Your New System The ACCU-CHEK Compact Plus System Test/On/Off Button – Release Button – Display – Slide and release this Slide to release the Shows blood button to turn on the attached lancet device. sugar results, meter and advance a... - Page 9 Infrared (IR) Window – Used to transfer data from the meter to a computer. Blue Cap – Clear Cap – Use this cap for Use this cap for Lancet Test Drum – fingertip testing only. non-fingertip testing only. The bar codes Protective on the label are automatically...
-
Page 10: Meter Setup
Meter Setup Using the Set Mode By using the set mode, you can personalize your meter to suit your lifestyle. Here are the functions you can customize: Beeper—Select on or off. Time and Date—Set the time and date. Test Reminders—Select 1-3 times a day for a reminder to test. Hypoglycemic (Hypo) Indicator—Select on or off. -
Page 11: Setting The Beeper
You are here BEEPER TIME / DATE TEST REMINDERS HYPO Setting the Beeper Your new meter has the beeper preset to “On 1.” This means the beeper is on. You can set the beeper to “OFF,” if you prefer – this will not affect your test results. - Page 12 You are here BEEPER TIME / DATE TEST REMINDERS HYPO 2. “On 1” and the beeper symbol flash. This means 1. With the meter off, press to enter the set mode. The meter turns on and briefly shows all the beeper is on. Press to change the beeper of the display symbols.
-
Page 13: Setting The Year, Time, And Date
You are here BEEPER TIME / DATE TEST REMINDERS HYPO Setting the Year, Time, and Date Your new meter comes with the batteries already installed and a preset time and date. You may need to change the time to your time zone. Setting the time and date is important if you use the meter’s memory or download your stored results to a computer. - Page 14 You are here BEEPER TIME / DATE TEST REMINDERS HYPO 3. The 12h (12-hour) or 24h 5. Repeat step 4 until the 4. The hour flashes. Press (24-hour) time format appears. minutes, month, and day are change the hour. If you select The meter can display the time set.
-
Page 15: Setting The Test Reminders
You are here BEEPER TIME / DATE TEST REMINDERS HYPO Setting the Test Reminders Test reminders are a handy way to remind you to test. You can set 1 to 3 reminders per day. The meter beeps at the time you set, unless you press any button. You must have the beeper set to “On 1” for this option. Your meter is preset with the test reminders set to “OFF.”... - Page 16 You are here BEEPER TIME / DATE TEST REMINDERS HYPO 1. With the meter off, press 2. Press and release 3. Press to change the test to enter the set mode. The repeatedly until you reach the reminder to “On.” meter turns on and briefly display with “OFF”...
- Page 17 You are here BEEPER TIME / DATE TEST REMINDERS HYPO 4. If you select “OFF,” press 5. The hour and test reminder 6. The minutes flash. Press to set your selection and symbol flash with a “1” on to change the minutes. Press move to the next function (see the display.
-
Page 18: Setting The Hypoglycemic (Hypo) Indicator
You are here BEEPER TIME / DATE TEST REMINDERS HYPO Setting the Hypoglycemic (Hypo) Indicator You can set the meter to let you know when your test result indicates a possible low blood sugar (hypoglycemia). You can also select what blood sugar level you want this indicator to have (60, 70, or 80 mg/dL). - Page 19 You are here BEEPER TIME / DATE TEST REMINDERS HYPO 1. With the meter off, press 2. Press and release 3. Press to turn on the hypo to enter the set mode. The repeatedly until you reach the indicator and the display meter turns on and briefly display with “OFF”...
- Page 20 You are here BEEPER TIME / DATE TEST REMINDERS HYPO Setting the Hypoglycemic (Hypo) Indicator (continued) 4. Slide and release to set your selection and turn off the meter. Chapter 1: Understanding Your New System ACCU-CHEK Customer Care Service Center 1-800-858-8072...
-
Page 21: Installing The Test Drum
Installing the Test Drum 1. With the meter off, open the drum door by lifting 2. Press the red release button. You MUST press the up the drum door tab located to the right of red release button if there IS or IS NOT a test the test strip slot. - Page 22 Installing the Test Drum (continued) 3. If there is a test drum in the 4. Insert a new test drum. Your 5. Close the drum door until it meter, tilt the meter forward test drum MUST have two bar snaps. The meter turns on, until the test drum comes codes on it (see the test drum automatically codes itself, and...
- Page 23 Notes: • Any time you open and close the drum door, the test drum will rotate until the meter finds the next available test strip. • Only open the drum door when the meter is off. Opening the drum door when the meter is turned on may damage the meter.
-
Page 24: Changing The Batteries
Changing the Batteries 1. Push the battery cover in the 2. Remove the old batteries. 3. Place the battery cover over direction of the arrow shown. Insert the new batteries with the batteries. The battery Lift up on the battery cover to the + and –... - Page 25 Notes: • The meter uses two AAA batteries. Use long-lasting alkaline (not rechargeable) batteries and keep an extra pair on hand. • Always replace both batteries at the same time and with the same brand. • When changing the batteries, try to insert the new batteries within two minutes. If it takes longer than two minutes, you may need to reset the time and date.
-
Page 26: Chapter 2: Control Testing
Chapter 2: Control Testing Why Run Control Tests? Running a control test lets you know that your meter and test strips are working properly to give reliable results. You should run a control test when: • You open a new box of test drums. •... -
Page 27: Running A Control Test
Running a Control Test You need your meter (with a test drum inserted) and control solution. Note: • Your meter automatically recognizes the difference between ACCU-CHEK Compact Blue control solution and blood. • It DOES NOT automatically recognize the difference between ACCU-CHEK Compact control solution and blood. - Page 28 Running a Control Test (continued) 4. The time and date appear on the display with a test strip to the control solution. Do not put flashing test strip and drop symbol. control solution on top of the test strip. When you see displayed, you have enough control 5.
- Page 29 Example 9. If you used ACCU-CHEK Compact control 8. The on the display gradually disappears and the test result appears. The meter automatically solution, the bottle symbol is not displayed. detects that you applied ACCU-CHEK Compact Press two times and the bottle symbol Blue control solution.
- Page 30 Running a Control Test (continued) Running a Control Test (continued) ACCU-CHEK Compact control solution (clear) ranges ACCU-CHEK Compact Blue control solution ranges This is an example. Refer to the acceptable ranges on your test drum container. 10. Check that the result is within the acceptable range on the test drum container or the container label.
- Page 31 11. Hold the meter so the test strip points 12. Throw the used test strip away. downward. This helps the test strip release from the meter. Slide and release to turn off the meter and release the test strip. Chapter 2: Control Testing ACCU-CHEK Customer Care Service Center 1-800-858-8072...
- Page 32 • Use either ACCU-CHEK Compact Blue control solution or ACCU-CHEK Compact control solution with your ACCU-CHEK Compact Plus system or your control test results may be inaccurate. • Keep the test drum container until you are finished with the test drum. You will need to refer to the acceptable ranges on the label when you run a control test.
-
Page 33: Understanding Control Test Results
Understanding Control Test Results ACCU-CHEK Compact control solution (clear) ranges ACCU-CHEK Compact Blue control solution ranges This is an example. Refer to the acceptable ranges on your test drum container. The label on your test drum container shows the acceptable ranges for Low and High control solutions. Your control test results should be within the listed ranges. -
Page 34: Troubleshooting Checks
Understanding Control Test Results (continued) If a control test result is not within the acceptable range on your test drum container, here are some things you can do to solve the problem: Troubleshooting Checks Action Replace control solution or test drums that have expired, or Check the Use By dates on the test drum container control solution you opened more than three months ago. -
Page 35: Chapter 3: Testing Your Blood Sugar
Chapter 3: Testing Your Blood Sugar Preparing the ACCU-CHEK Softclix Plus Lancet Device for Fingertip Testing ▲ Use a new lancet for each fingertip test to avoid infection and get a virtually pain-free test. Remember to use the blue cap to do a fingertip test. Remember, you can use your lancet device attached to the meter or unattached. - Page 36 Preparing the Lancet Device for Fingertip Testing (continued) Recessed Area 1. Remove the blue cap by using 2. Insert a lancet until it clicks. 3. Twist off the lancet’s your thumb and finger to pull protective cover. on the recessed area. Note: You can refer to the First Time Guide or the Quick Reference Guide for a simple testing summary.
- Page 37 Notches 4. Snap on the blue cap after lining up the notches. 5. Twist the cap to set the lancet depth. Start at 2 or The cap snaps easily into place. try a higher setting if needed. This is a suggested setting, yours may differ.
- Page 38 Notes: • The best depth setting is the lowest number that lets you get enough blood for a test. Try different settings to find the one that is right for you. • For virtually pain-free testing, always use a new lancet for every test. •...
-
Page 39: Running A Blood Sugar Test With Blood From Your Fingertip
Running a Blood Sugar Test with Blood from Your Fingertip Before running your first test, make sure you set up your meter properly and run a control test. See Chapters 1 and 2 for details. 1. Wash and dry your hands. 3. - Page 40 Running a Blood Sugar Test with Blood from Your Fingertip (continued) 5. The time and date appear on 6. Press the plunger on the lancet 7. Hold the lancet device against the display with a flashing test device (like a pen) ALL the way the side of your fingertip, then strip and blood drop symbol.
- Page 41 8. Gently squeeze your fingertip 9. Hold the meter so the test 10. Touch and hold the blood to get a drop of blood. strip points downward. Do drop to the black notch on not bend the test strip. the end of the test strip. When you have enough blood in the test strip, is displayed.
- Page 42 Running a Blood Sugar Test with Blood from Your Fingertip (continued) You may pull your finger away after is displayed. Example 12. Hold the meter so the test strip points 11. The on the display gradually disappears downward. This helps the test strip release and the test result is displayed in five seconds.
- Page 43 13. To remove the lancet, take off the blue cap by 14. Hold the meter so the lancet points downward. using your thumb and finger to pull on the Press the plunger to release the lancet into recessed area. a puncture-proof container. Snap on the blue cap after lining up the notches.
-
Page 44: Important Information About Running A Blood Sugar Test With Blood From Your Palm, Forearm, Upper Arm, Thigh, Or Calf (Non-Fingertip Testing)
Important Information About Running a Blood Sugar Test with Blood from Your Palm, Forearm, Upper Arm, Thigh, or Calf (non-fingertip testing) You have the option of testing other places on your body besides the fingertip. You can test the palm, forearm, upper arm, thigh, or calf. - Page 45 ▲ Do not change your treatment because of just one result. NEVER ignore symptoms of high or low blood sugar. If your blood sugar does not match how you feel, do a fingertip test to confirm your result. If the fingertip result still does not match how you feel, call your doctor. Non-fingertip testing may be done: •...
-
Page 46: Preparing The Accu-Chek Softclix Plus Lancet Device For Non-Fingertip Testing
Preparing the ACCU-CHEK Softclix Plus Lancet Device for Non-Fingertip Testing ▲ Use a new lancet for each non-fingertip test to avoid infection and get a virtually pain-free test. Remember to use the clear cap to do a non-fingertip test. Remember, you can use your lancet device attached to the meter or unattached. Release Button 1. - Page 47 Recessed Area 1. Remove the blue cap by 2. Insert a lancet until it clicks. 3. Twist off the lancet’s using your thumb and finger protective cover. to pull on the recessed area. Chapter 3: Testing Your Blood Sugar ACCU-CHEK Customer Care Service Center 1-800-858-8072...
- Page 48 Preparing the Lancet Device for Non-Fingertip Testing (continued) 4. Snap on the clear cap after lining up the notches. 5. Twist the cap to set the lancet depth. Dial the The cap snaps easily into place. depth setting to 3 for palm testing. Dial the depth setting to 5 for forearm, upper arm, thigh, or calf testing.
-
Page 49: Running A Blood Sugar Test With Blood From A Non-Fingertip Site
Running a Blood Sugar Test with Blood from a Non-Fingertip Site You will need your meter with a test drum loaded, the ACCU-CHEK Softclix Plus lancet device, a lancet, and the clear cap from your kit. 2. The meter turns on and briefly shows all of the 1. - Page 50 Running a Blood Sugar Test with Blood from a Non-Fingertip Site (continued) 3. A test strip automatically 4. The time and date appear on 5. Press the plunger on the lancet advances. the display with a flashing test device (like a pen) ALL the way strip and blood drop symbol.
- Page 51 Do not be afraid to apply pressure to the site with the lancet device to get a good blood drop. 6. Press the opening of the clear cap firmly against 7. Keep steady pressure on the area, then press and a fleshy area on the non-fingertip site.
- Page 52 Running a Blood Sugar Test with Blood from a Non-Fingertip Site (continued) 8. Hold the meter so the test strip points downward. 9. Touch and hold the blood drop to the black notch Do not bend the test strip. on the end of the test strip. When you have enough blood in the test strip, is displayed.
- Page 53 You may pull the meter away from the site when is displayed. Example 11. Hold the meter so the test strip points 10. The on the display gradually disappears downward. This helps the test strip release and the test result is displayed in five seconds. from the meter.
- Page 54 Running a Blood Sugar Test with Blood from a Non-Fingertip Site (continued) 12. To remove the lancet, take off the clear cap. 13. Hold the meter so the lancet points downward. Press the plunger to release the lancet into a puncture-proof container.
- Page 55 Notes: • Hold the meter so the test strip points downward. Do not bend the test strip. • Do not apply blood to the top of the test strip. • Do not flood the test strip with blood. Only a small drop of blood is required. •...
-
Page 56: Recording Your Results
Recording Your Results Your meter automatically records your blood sugar result in the meter’s memory. Flagging Test Results You might want to flag an event such as exercise, a non-fingertip test result, or a test result after a meal. If you wish, you can flag your test result with the asterisk ( ). -
Page 57: Understanding Your Test Results
Understanding Your Test Results The normal fasting blood glucose range for an adult without diabetes is 74 - 106 mg/dL. Two hours after meals, the blood glucose range for an adult without diabetes is less than 140 mg/dL. For people with diabetes: please consult your doctor for the blood glucose range appropriate for you. -
Page 58: Unusual Test Results
Unusual Test Results If your blood sugar result does not match the way you feel, follow these steps: Troubleshooting Checks Action Make sure the display on your meter is working properly. Read Chapter 5, Maintenance and Testing . If it is past the Use By date, use a new test drum. Check the Use By date on the test drum container or test drum. -
Page 59: Comparing Your Meter Result To A Lab Result
Comparing Your Meter Result to a Lab Result A common question is how the blood sugar results on your meter compare to the lab results. Your blood sugar can change quickly, especially after eating, taking medication, or exercising. If you test yourself in the morning, then go to the doctor’s office for a blood sugar test, your results will probably not match, even if you are fasting. -
Page 60: Chapter 4: Meter Memory And Downloading
Chapter 4: Meter Memory and Downloading Storing Test Results Your meter automatically stores up to 300 test results which you can view at any time. Once 300 results are in memory, adding a new test result causes the oldest one to be deleted. If you have set the time and date on the meter (see Chapter 1, Setting the Beeper, Year, Time, and Date ), this information is stored and displayed with your test results. -
Page 61: Viewing Test Results
Viewing Test Results 1. With the meter off, press . The most recent test result and “mem” appear. 2. Press to view your results from newest to oldest, one at a time. 3. Press to view your results from oldest to newest, one at a time. You can hold down the to scroll thru your results more quickly. -
Page 62: Viewing Your Average, Lowest, And Highest Blood Sugar Test Results
Viewing Your Average, Lowest, and Highest Blood Sugar Test Results With the ACCU-CHEK Compact Plus meter, you can see your 7, 14, and 30 day blood sugar test result averages, in that order. You can also see the lowest and highest blood sugar test results for each of those periods. - Page 63 Notes: • Do not change your therapy based on an individual test result recorded in memory. • Results stored in memory will not be lost when you replace the batteries. • When 300 results are in the memory, adding a new test result causes the oldest one to be deleted. Chapter 4: Meter Memory and Downloading ACCU-CHEK Customer Care Service Center 1-800-858-8072...
-
Page 64: Downloading Your Results
Downloading Your Results We offer a variety of ways to help you download your test results. You can transfer your stored test results to track, identify patterns, and print. Transferring Data Follow the instructions to prepare for your method of downloading. Make sure your program is ready to accept data from the meter. - Page 65 Notes: • If the data did not transfer successfully, call the ACCU-CHEK Customer Care Service Center. • To make the most of the download feature, you must set the year, date, and time on your meter. Chapter 4: Meter Memory and Downloading ACCU-CHEK Customer Care Service Center 1-800-858-8072...
-
Page 66: Chapter 5: Maintenance And Troubleshooting
Cleaning Your Meter Caring for your ACCU-CHEK Compact Plus meter is easy. If the display or the outside of the meter is dirty, wipe it off with a slightly damp cloth or cotton swab. You may use water, 10% bleach solution*, 70% alcohol (ethyl alcohol) or 70% rubbing alcohol (isopropyl alcohol). - Page 67 Notes: Some cleaning methods can damage your meter. To protect it, DO NOT: • Use vinegar or scouring agents to clean the meter because they can harm the display and measurement window. • Spray any cleaning solution directly onto the meter. •...
-
Page 68: Cleaning Your Lancet Device
Cleaning Your Lancet Device To clean the ACCU-CHEK Softclix Plus lancet device, use a mild dishwashing liquid and a soft cloth. DO NOT place the entire device under water. At least once a week, disinfect the cap after cleaning by placing it in 10% bleach solution*, 70% alcohol (ethyl alcohol) or 70% rubbing alcohol (isopropyl alcohol) for 10 minutes. -
Page 69: Display Messages And Troubleshooting
Display Messages and Troubleshooting ▲ Never make treatment decisions based on an error message. If you have any concerns, please call the ACCU-CHEK Customer Care Service Center at 1-800-858-8072, 24 hours a day, 365 days a year. The meter will not turn on or the display is blank. Possible Cause Solution Batteries are dead... - Page 70 Display Messages and Troubleshooting (continued) The beeper is turned on. See The time and date have not been Chapter 1, Setting the Beeper. set, therefore the meter cannot calculate the average for the last 7, 14, or 30 days. The average blood sugar result for The meter is ready for a drop of the last 7, 14, or 30 days is blood to be applied.
- Page 71 The batteries are running low. If Blood sugar is higher than the possible, continue testing until all measuring range of the system the test strips in the test drum (600 mg/dL). See Chapter 3, have been used. Then replace Symptoms of High or Low Blood the batteries and the test drum.
- Page 72 Display Messages and Troubleshooting (continued) To make sure the display is working The temperature is below or above the proper range for the meter, below properly, turn off the meter, then 41 or above 113ºF. Move to an area press and hold down to see the between 50 and 104ºF, wait complete display.
- Page 73 The meter is ready to download The test drum in the meter is results to a computer. empty. Insert a new test drum. If the message is still displayed, call the ACCU-CHEK Customer Care Service Center at 1-800-858-8072. A dot also appears in the strip count window on the back of the meter.
- Page 74 Display Messages and Troubleshooting (continued) The test drum 90-day use-by If there was a partly used test period has expired. If the correct drum in the meter and it took time and date were set on the longer than two minutes to meter and the drum door has not replace the batteries, the year, been opened since the...
- Page 75 The bar code information The test reminder is turned on. The test reminder symbol flashes stored in the meter is lost. Slide on the display and the meter and release to turn off the beeps, if the beeper is turned on. meter.
- Page 76 Display Messages and Troubleshooting (continued) • Blood was applied to the test strip too soon. Slide and release to turn off the meter and release the test strip, then turn on the meter again. Repeat the test, waiting for the flashing test strip and blood drop symbol before touching blood or control solution to the end of the test strip.
- Page 77 The test strip drum does not A meter error has occurred. Slide rotate. Slide and release and release to turn off the turn off the meter. Open the drum meter. Then, slide and release door and press the red drum to turn on the meter again.
- Page 78 Display Messages and Troubleshooting (continued) The test strip was bent or •The test strip is stuck in the test removed during testing. strip slot or the test drum does Remember to slide and release not rotate. Pull the test strip out , at the end of the test, to of the meter and discard it.
-
Page 79: Chapter 6: Technical Information
Chapter 6: Technical Information Product Limitations Please read the literature packaged with your test drum to find the latest information on product specifications and limitations. Specifications Display Digital LCD with symbols Automatic power-off After 60 seconds / 5 minutes (depending on testing status) Power supply AAA alkaline batteries (do not use rechargeable) Battery life... -
Page 80: Product Safety Information
Directive 2002/96/EC (Directive on waste electrical and electronic equipment (WEEE)). 29 CFR 1910.1030 – Bloodborne pathogens. Product Safety Information Explanation of Symbols CAUTION AAA batteries The ACCU-CHEK Compact Plus Meter: Lancet Device: Please refer to safety-related meter has been listed by This product fulfills the... -
Page 81: Warranty
Roche Diagnostics will replace it with a new ACCU-CHEK Compact Plus meter or equivalent product free of charge. The warranty of the replacement meter will expire on the date of the original warranty expiration or ninety (90) days after the shipment of a replacement system, whichever period is longer. -
Page 82: Money-Back Guarantee
Warranty and Service Instructions All requests for return of ACCU-CHEK Compact Plus meters under the above warranty or service policy must be made to the ACCU-CHEK Customer Care Service Center by calling 1-800-858-8072. You will be mailed a return authorization label, which must be affixed to your carton for shipping the system to Roche Diagnostics. -
Page 83: Limited License
Customers experiencing difficulties should review Maintenance and Troubleshooting in this booklet. Further inquiries should be directed to the ACCU-CHEK Customer Care Service Center at 1-800-858-8072. Be sure to fill out and mail the warranty card that comes with the ACCU-CHEK Compact Plus system. Limited License ▲... - Page 84 Customer Care Service Center at 1-800-858-8072. Except where prohibited by statute, all warranties covering the ACCU-CHEK Compact Plus system are voided by use of the ACCU-CHEK Compact Plus system with any test drums or test strips other than ACCU-CHEK Compact test drums or test strips.
-
Page 85: Patent Information
Using the ACCU-CHEK Softclix Plus lancet device indicates your acceptance of the restricted license to use the ACCU-CHEK Softclix Plus lancet device only with ACCU-CHEK Softclix lancets. Further, if you have purchased an ACCU-CHEK Softclix Plus lancet device that includes this restricted license, then this restricted license applies regardless of any additional offers found in ACCU-CHEK Softclix Plus lancet device packages. -
Page 86: Additional Supplies
Additional Supplies The following supplies and accessories are available from authorized diabetes healthcare centers, pharmacies, or medical/surgical supply dealers: Test Drums ACCU-CHEK Compact Test Drums (51 count) Cat. No.: 3038106 ACCU-CHEK Compact Test Drums (102 count) Cat. No.: 3159884 Control Solutions ACCU-CHEK Compact Blue Control Solution Cat. -
Page 87: Information For Professional Caregivers
Information for Professional Caregivers ▲ Healthcare Professionals: Follow the infection control procedures appropriate for your facility. Decisions about whether to recommend alternative site testing (AST) should take into account the motivation and knowledge level of the patient and his or her ability to understand the considerations relative to diabetes and AST. -
Page 88: References
References 1. Stedman, Thomas Lathrop. Stedman’s Medical Dictionary, 27th Edition, 1999, pg. 2082. 2. American Diabetes Association, “Clinical Practice Recommendations 2003.” Diabetes Care, Vol. 26, Supplement 1, pg. S22. Index ACCU-CHEK Softclix Plus lancet blood drop, 39, 50 control test, device, 33, 44 acceptable range, 31 blood sugar, high, 55... - Page 89 drop, blood, 39, 50 limitations, product, 77 rapid heartbeat, 55 error messages, 67 low blood sugar, 55 results, control test, understanding, 31 expiration date, 32 maintenance, meter, 66 results, logging, 54, 58 fatigue, 55 memory, meter, 58 results, test, frequent urination, 55 messages, error, 67 understanding, 55 heartbeat, rapid, 55...
- Page 90 technical information, 77 vision, blurred, 55 test results, understanding, 55 warranty, 79 test results, unusual, 56 test drum, ACCU-CHEK Compact, 7 test, blood sugar, 37, 47 thirst, increased, 55 time and date, setting, 11 tingling, 55 trembling, 55 troubleshooting, 67 unusual test results, 56 urination, frequent, 55 Chapter 6: Technical Information...
- Page 92 ACCU-CHEK ® Compact Plus www.accu-chek.com Assembled for and distributed in the U.S.A. by Roche Diagnostics, Indianapolis, IN Made in Ireland Roche Diagnostics 9115 Hague Road Indianapolis, IN 46256 trademarks of Roche. ACCU-CHEK, ACCU-CHEK COMPACT, and SOFTCLIX are 04679865003-0506 ©2006 Roche Diagnostics. All rights reserved.
Need help?
Do you have a question about the Accu-Chek Compact Plus and is the answer not in the manual?
Questions and answers