Table of Contents
Advertisement
Advertisement
Table of Contents

Subscribe to Our Youtube Channel
Related Manuals for Zanussi ZI 3102 RV

Summary of Contents for Zanussi ZI 3102 RV
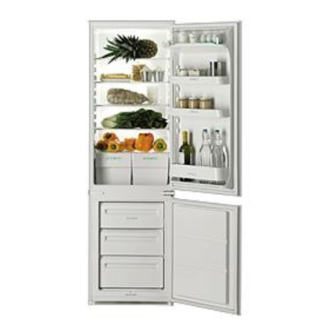
- Page 1 FRIDGE-FREEZER ZI 3102 RV INSTRUCTION BOOKLET 2222 322-41...
-
Page 2: General Safety
WARNINGS It is most important that this instruction book should be retained with the appliance for future reference. Should the appliance be sold or transferred to another owner, or should you move house and leave the appliance, always ensure that the book is supplied with the appliance in order that the new owner can be acquainted with the functioning of the appliance and the relevant warnings. -
Page 3: Environment Protection
speed up the thawing process other than those Environment Protection recommended by the manufacturer. Never use metal objects for cleaning your appliance as it may get damaged. This appliance does not contain gasses which could damage the ozone layer, in either its Installation refrigerant circuit or insulation materials. -
Page 4: Operation
Cleaning the interior Fresh food refrigeration Before using the appliance for the first time, wash To obtain the best performance: the interior and all internal accessories with luke- • do not store warm food or evaporating liquids in warm water and some neutral soap so as to remove the refrigerator;... -
Page 5: Freezing Fresh Food
Freezing fresh food Thawing The 4-star compartment is suitable for Deep-frozen or frozen food, prior to being used, can long term storage of commercially frozen food, and be thawed in the refrigerator compartment or at for freezing fresh food. room temperature, depending on the time available for this operation. -
Page 6: Movable Shelves
Movable shelves The walls of the refrigerator are equipped with a series of runners so that the shelves can be positioned as desired. Positioning the door shelves To permit storage of food packages of various sizes, the door shelves can be placed at different heights. To make these adjustments proceed as follows: Gradually pull the shelf in the direction of the arrows until it comes free, then reposition as required. -
Page 7: Hints For Refrigeration
HINTS Hints for refrigeration • The symbols on the drawers show different types of frozen goods. Useful hints: The numbers indicate storage times in months for Meat (all types): wrap in polythene bags and place the appropriate types of frozen goods. Whether on the glass shelf above the vegetable drawer. -
Page 8: Maintenance
MAINTENANCE Unplug the appliance before carrying out Periods of non-operation any maintenance operation. When the appliance is not in use for long periods, Warning take the following precautions: This appliance contains hydrocarbons in its cooling remove the plug from the wall socket; unit;... -
Page 9: Customer Service And Spare Parts
Never use sharp metal tools to scrape off frost from the evaporator as you could damage it. However, when the ice becomes very thick on the inner liner, complete defrosting should be carried out as follows: 1. pull out the plug from the wall socket or turn the thermostat knob to the «O»... -
Page 10: Installation
INSTALLATION Location Attention The appliance should be installed well away from sources of heat such as radiators, boilers, direct It must be possible to disconnect the appliance from sunlight etc. the mains power supply; the plug must therefore be easily accessible after installation. For building into kitchen units follow the special “... -
Page 11: Door Reversibility
Instructions for totally built-in appliances Door reversibility The appliance is supplied with the right or left door opening. To change the opening direction of the doors proceed as in the following instructions before installing it. 1. Unscrew the upper pin and remove the spacer 2. - Page 12 Push appliance into the housing until stop strip (A) touches the kitchen unit. Open the door and push the appliance against the side of the kitchen unit opposite to that of appliance hinges. Fasten the appliance with 4 screws provided in the kit included with the appliance.
- Page 13 Separate parts A, B, C, D as shown in the figure Place guide (A) on the inside part of the furniture door, up and down as shown in the figure and mark the position of external holes. After having drilled holes, fix the guide with the screws supplied.
- Page 14 Should the lining up of the furniture door be necessary, use the clearance of slots. At the end of operations, it is necessary to check if the door of the furniture closes properly. Fix cover (D) on guide (B) until it clips into place. If the appliance is to be fitted laterally to the kitchen unit, it will be sufficient to loosen the screws of the little plates (D), move them as shown in Fig.
Need help?
Do you have a question about the ZI 3102 RV and is the answer not in the manual?
Questions and answers