Table of Contents
Advertisement
Quick Links
Introduction
Thank you for purchasing this SHARP mobile handset.
Before and while using the handset, please read this
manual throughly and retain it for future reference. This
handset is your partner. Handle it carefully at all times to
ensure its long-term performance.
About this Operation Manual
Instruction scheme
Instructions in this manual are carefully designed to help
you operate the handset smoothly and easily. At the
beginning of each section, the steps that have to be
followed to reach the function you wish to utilise are
shown (Example 1). The steps for all subsequent
subsections are simplified (Example 2). Make sure to
B
press
to enter your selection.
Example 1:
(Excerpt from "Using the Camera")
1
Press B.
The main menu appears.
2
Press a, b, c, or d to highlight "Camera"
press B.
3
Press a or b to highlight "Create picture" and
press B.
The each step to reach camera mode is shown.
Example 2:
(Excerpt from "Capturing Still Images")
1
At the main menu, select in the following order:
"Camera" → "Create picture."
2
Press C [
].
The "Options" menu appears.
The steps to reach camera mode are simplified as shown
above (step 1).
B
,
a
,
b
,
c
,
d
, and
operation keys in this manual. For information on
the keys and handset operations, refer to "Parts
and Controls" on page 4-18.
Symbols
This indicates useful extra information for
operating the handset.
This indicates important background information
or items that need to be recognised when
operating the handset.
This indicates operations that require extreme
caution before performing on the handset.
C
[Options] indicate the
1-1
Advertisement
Table of Contents

Related Manuals for Sharp TM100


Summary of Contents for Sharp TM100
- Page 1 Introduction Thank you for purchasing this SHARP mobile handset. Example 2: Before and while using the handset, please read this (Excerpt from “Capturing Still Images”) manual throughly and retain it for future reference. This At the main menu, select in the following order: handset is your partner.
-
Page 2: Notice
NOTICE The CGS-LCD is a world advanced technology product, giving you fine picture quality. Occasionally, a few black or bright pixels may appear on the screen. We strongly recommend that you keep separate Please note that this will not have any impact on any permanent written records of all important data. - Page 3 ™ T9 Text Input is licensed under one or more of the following: Powered by JBlend , Copyright1997-2004 Aplix U.S. Pat. Nos. 5,818,437, 5,953,541, 5,187,480, 5,945,928, Corporation. All rights reserved. and 6,011,554; Australian Pat. No. 727539; Canadian Pat. Java and all Java-based trademarks and logos are No.
-
Page 4: Declaration Of Conformity
The handset should be kept Hereby, Sharp Telecommunications of Europe Ltd, declares at least 15.24 cm (6 inches) from a pacemaker at that this TM100 is in compliance with the essential ANYTIME the handset is switched on. requirements and other relevant provisions of Directive Do not switch on your handset near gas or flammable 1995/5/EC. -
Page 5: Battery Disposal
Battery may not work temporarily regardless of the amount of remaining battery power. Use your handset only with batteries, chargers and Exposing the handset to extreme temperatures will accessories recommended by the manufacturer. The shorten battery life. manufacturer disclaims any liability for damage The battery can be charged and discharged hundreds caused by the use of other chargers, batteries or of times but it will eventually wear out. -
Page 6: Camera Operation
RF Connector Before connecting the handset to a PC or a peripheral unit, read the operation manual for the other unit This RF connector is for connecting Sharp-approved carefully. antennas to the handset. Do not connect unapproved If the handset’s battery has been removed for some or modified equipment as this may damage the time, or the handset has been reset, the unit’s clock... -
Page 7: Precautions Concerning Vehicle Use
FCC Declaration of conformity install the vehicle accessories. The manufacturer disclaims any liability for damage which may result as Triple-band phone: TM100 with USB cable(CE-UC30) a consequence of improper use or use contrary to the and AC charger(CE-EA32) instructions contained herein. -
Page 8: Fcc Notice
FCC Notice Connect the equipment into an outlet on a circuit different from that to which the receiver is The phone may cause TV or radio interference if used in connected. close proximity to receiving equipment. The FCC can require you to stop using the phone if such interference Consult the dealer or an experienced radio/TV cannot be eliminated. - Page 9 wireless mobile phones employs a unit of measurement components in its assembly. The use of accessories that known as the Specific Absorption Rate, SAR. The SAR do not satisfy these requirements may not comply with limit set by the FCC is 1.6W/kg, * Tests for SAR are FCC RF exposure requirements, and should be avoided.
-
Page 10: Table Of Contents
Table of Contents Introduction ..........1-1 Shooting Video Images ........7-38 Common Functions & Information .....7-41 About this Operation Manual ....... 1-1 NOTICE..............1-2 Entering Text ..........8-45 Copyright .............. 1-2 Text Table for Multi-tap Input ......8-45 Declaration of Conformity........1-4 Selecting the Input Language ......8-46 Safety Precautions and Conditions of Use.... - Page 11 Settings for the Messages Checking the Amount of Data (for SMS and MMS Messaging Only)....11-76 Communication ..........14-121 Making Text Templates ........11-78 Setting the Handset ........ 15-122 Using Voice Mail..........11-79 Setting the Display Language ......15-122 Setting Cell Broadcasts........11-80 Setting the Display ..........15-122 Setting Cell Info..........
-
Page 12: Quick Setup
Quick Setup Quick Setup gives you the basic information you need to received SMS messages, etc. Only use a 3V SIM card start using your handset by simply following the steps. with your handset. Press ( ) and slide the cover in the direction Step 1: of the arrow ( ). - Page 13 Slide the SIM card into the SIM holder as Position the battery with the printed side up. Insert its top end as illustrated into slot illustrated. insert the other end into position Do not touch the metal part of the SIM terminal. Align the battery cover with the battery compartment as illustrated and slide it in the direction of the arrow until it clicks.
-
Page 14: Charging The Battery
When charging is complete, the Indicator Step 3: LED turns off. Charging the Battery In standby mode, the Indicator LED blinks. The battery is not fully charged when you purchase the The standard charging time is approximately 2 handset. Charge the battery for at least 2 hours before hours. -
Page 15: Turning Your Handset On
Battery Status Step 4: Check the battery indicator displayed in the upper left of Turning Your Handset On the display to estimate remaining battery power. When the battery is empty, “ ” appears on the display and Press and hold for approximately 2 seconds. an alarm sounds. -
Page 16: If You Upgrade Your Handset
If You Upgrade Your Handset Press to highlight “Settings” and press If you have a mobile phone before purchasing this Press to highlight “Date & Time” and handset, you may use your previous SIM card with the press new handset. In this case, you should keep in mind two things for the setup. -
Page 17: Sim Card
Copying the Contacts List from the SIM card The first time you insert a SIM card you have used for your previous mobile phone, you are asked whether you wish to copy the information such as the “Contacts list” entries. Follow the on-screen instructions, or you can do it later using the “Contacts list”... -
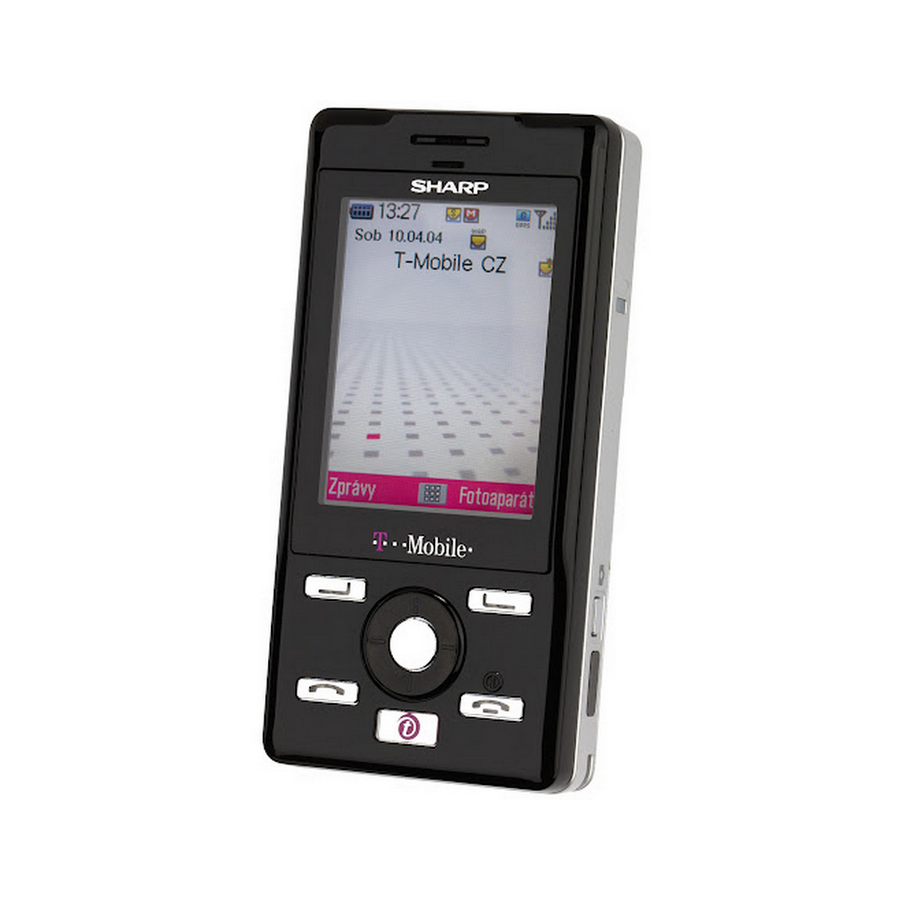
Page 18: Parts And Controls
Parts and Controls Main Handset Unit Earpiece Before reading this operation manual, becoming familiar with the names and locations of parts and controls is recommended. Navigation Keys Also, in this section are icons and indications that change Display abcd in the display. Centre Key Left Soft Key Right Soft Key... - Page 19 Connector Camera Lens Self-portrait Mirror Indicator LED Side-up/ Side-down Macro Dial (Close-up) Strap Slot Shutter Release Button Battery Cover Infrared Port 4-19...
- Page 20 Slide Functions Hands free EARphone & MIC Connection Put the pad over the earphone. You can use the hands free EARphone & MIC without the pads. Open the external connector cap and insert the hands free EARphone & MIC adapter into the earphone connector as illustrated ( Insert the plug of the hands free EARphone &...
-
Page 21: Display Indicators
Display Indicators This section describes the status indicators displayed on top of the screen. Status Indicators Indicates the strength of the received signal or that the service is out of range. Indicates the battery level. Status Appears when in call. indicators Appears when a new SMS/MMS message has arrived. - Page 22 Appears when the T9 text input Appears when the USB cable method is activated. (CE-UC30) is connected to your handset. Indicates the text input method Appears when “Infrared” is on or (First letter upper case mode/ during connection. Upper case mode/Lower case *WAP (Wireless Application Protocol) mode/Numeric mode).
-
Page 23: Guide To The Main Menu
Guide to the Main Menu Using the Main Menu After turning your handset on, the standby screen appears. If you wish to use any functions other than the basic call operation, press once to get the main menu. This has 9 gates for functions, operations, and settings. When you reach the main menu, use (navigation keys) to navigate the cursor and press select the function you wish to enjoy. - Page 24 Basic Key Operations To return to the previous menu, you can also press except when returning to the standby To use soft keys and the centre key screen. To select an item in the menu, [Select] can Your handset uses soft keys ( ) to help be used instead of .
-
Page 25: List Of Menu Function Items
List of Menu Function Items This table shows you the items in the function level (1st level), their respective menus (2nd level) and their page number. Main Menu Sub Menu Main Menu Sub Menu (1st level) (2nd level) & Page No. (1st level) (2nd level) &... - Page 26 Main Menu Sub Menu (1st level) (2nd level) & Page No. Calendar (page 13-107) Alarm (page 13-109) Organiser Calculator (page 13-112) Memo recording (page 13-113) Phone help (page 13-114) Create picture (page 7-33) Camera Create video (page 7-38) Phone settings (page 15-122) Profiles (page 15-128) Connectivity (page 15-140) Java™...
-
Page 27: Basic Handset Operations
Basic Handset Operations Answering a Call This section describes basic phone call functions. Confirm that the handset is on. The handset rings and the Indicator LED flashes Making a Call for an incoming call. Press D, B or C [Answer]. Slide open the handset and enter a phone The call is connected and “... -
Page 28: Redialling
Redialling When the Hands free EARphone & MIC is connected to the handset and the “Any Key Answer” function is set to “On” you can, answer The handset keeps a record of the phone numbers of the calls by pressing the key. -
Page 29: Useful Functions
Useful Functions Press a or b to highlight “Hold & Answer” and press B. The second party is put on hold and you can talk to Speed Dialling the third party. Up to 9 phone numbers from the “Contacts list” memory Press C [Options]. -
Page 30: Conference Call
Accessing the SMS Menu During a Press a or b to highlight “Conference all” and press B to initiate the conference call. Call You can talk with all the people on the line. During a call, press C [Options]. Press F to end the conference call. The “Options”... - Page 31 To reject adding more participants To end the call with all participants During the call, press C [Options] and select in During the call, press C [Options] and select in the following order : “Multiparty” → “Conference the following order : “Multiparty” → “Conference all.”...
- Page 32 Press C [Options]. The “Options” menu appears. Press a or b to highlight “Multiparty” and press Press a or b to highlight “Private” and press When you have finished the private conversation, continue from step 1 of “Conference Call (page 6-30).” The conference call service may not be available on all networks.
-
Page 33: Using The Camera
Using the Camera This handset features a built-in camera and video. The Hold the camera horizontally as illustrated. functions now let you take pictures or video clips, as well as having a digital zoom. Once you’ve taken your picture or video, you can save it, then send it to others via MMS. For information on how to send pictures and video clips, refer to “Sending Pictures/Video Clips”... - Page 34 Press the shutter release button (X) to save a This handset uses a CCD sensor. Although this taken picture. handset has been manufactured carefully, some pictures may still appear too bright or too dark. The picture is saved to “My pictures.” If the handset has been left in a warm place for If you press , the picture is saved to “My pictures”...
- Page 35 At the main menu, select in the following order: Press a (brighter) or b (darker) to adjust the “Camera” → “Create picture.” brightness (exposure level) of the picture. Press C [ Returning to the standby mode once, resets the The “Options” menu appears. brightness setting to default.
- Page 36 Viewing the Saved Pictures Selecting the Frame You can review the pictures saved in “My pictures.” You can select and set the frame from preset patterns or saved pictures. At the main menu, select in the following order: At the main menu, select in the following order: “Camera”...
- Page 37 Using Continuous Shooting If you set the picture size to “Large”, you cannot use the continuous shooting function. Four pictures are taken in succession. Auto shooting and If you select a frame for taking pictures, you manual shooting are available. cannot use the continuous shooting function.
-
Page 38: Shooting Video Images
Shooting Video Images Hold the camera horizontally as illustrated. You can record video clips with sound. Press B. The main menu appears. Press a, b, c, or d to highlight “Camera” and press B. Press a or b to highlight “Create video” and press B. -
Page 39: Selecting Video Quality
Adjusting the Brightness of Video “Send via MMS,” or “Send to Media Album” and press B. Clips For information on “Send via MMS” and “Send to In “Create video” mode, press (brighter) or (darker) Media Album,” refer to “Sending Pictures/Video to adjust the brightness (exposure level) of video clips. - Page 40 Recording Video Clips without Sound After you have checked the video clip, press A [Back]. You can select to record video clips with or without sound. The display returns to the thumbnail index. In the default setting, the video clip is recorded with sound.
-
Page 41: Common Functions & Information
Common Functions & At the main menu, select in the following order: “Camera” → “Create picture” or “Create video.” Information Set the macro dial to the macro position (S.) Hold the ridges to set the macro dial. This section describes useful common functions you can use for both camera and video. - Page 42 Using the Night Mode Press the shutter release button (X) or B to start the delay timer. This option allows you to take a picture of the best quality 10 seconds after the timer sounds, the shutter when it is dark. sounds, and the camera takes a picture or starts At the main menu, select in the following order: recording video.
-
Page 43: Sending Pictures/Video Clips
Sending Pictures/Video Clips left of the screen turns red. If the memory space becomes zero, and when you try to take a picture again, “Memory You can send your saved pictures/video clips to other full. You cannot take a picture!” (“Memory full. You cannot handsets via MMS. - Page 44 Picture quality indicators (for “Create picture” mode Zooming ratio indicators (page 7-41) only)(page 7-35) Indicates the magnification (×1, ×2, ×4). Indicates the quality (normal or fine) of the picture to Original size be taken. Double size Fine Quadruple size Normal Voice recording indicator (for “Create Video”...
-
Page 45: Entering Text
Entering Text This section provides information on how to enter text Upper Case Lower Case Numeric using the handset keypad for contacts list entries and text Characters Characters messages, etc. Before you try to enter text, you should JKL5 jkl5 familiarise yourself with the text input methods. -
Page 46: Selecting The Input Language
Selecting the Input Language Selecting the Input Method You can select the input language on the text entry T9 Text Input screen. T9 text input method is a shortcut to enter text easily and On the text entry screen, press C [Options]. quickly. -
Page 47: Using Text Templates
Using Text Templates If the correct word is not shown in step 5, enter the correct word again after switching to the multi-tap input method. You can use the sentences registered in “Text templates” when entering text. For information on how to create the If you press instead of step 6, a space is text templates, refer to “Registering Phrases to the Text... -
Page 48: Using The Contacts List
Using the Contacts List In the “Contacts list,” you can store the phone numbers Items stored in the SIM memory and E-mail addresses of your friends, family and Name: The number of characters that can colleagues, etc. Using “Contacts list,” you can dial or send be stored differs depending on the messages easily without entering a phone number or an SIM card you use. -
Page 49: Selecting The Memory
Selecting the Memory Selecting the Memory for viewing At the main menu, select in the following order: You can store new entries in the “Contacts list.” Before “Contacts” → “Contacts list.” saving new entries or viewing stored entries in the “Contacts list,”... -
Page 50: Saving Information To The Contacts List
Saving Information to the When you finish entering the information, press B and A [Save]. Contacts List For information on items, the number of the characters you can enter, and digits of each item At the main menu, select in the following order: you can enter in the handset or SIM card memory, “Contacts”... -
Page 51: Dialling From The Contacts List
Dialling from the Contacts List Saving an Input Phone Number to the Contacts List When dialling from the “Contacts list,” display the index After you enter the phone number in standby view of the “Contacts list” first. mode, press C [Save]. Dialling from the Contacts List Follow the steps from step 3 of “Saving Screen... -
Page 52: Contacts List
Dialling from the Details Screen Press a or b to highlight “Send message” and press B. At the main menu, select in the following order: Press a or b to highlight “via SMS,” “via MMS,” “Contacts” → “Contacts list.” or “via E-mail” and press B. Press a or b to highlight the name which Searching a Name and Number in the contains the phone number you wish to dial and... -
Page 53: Editing The Contacts List
Editing the Contacts List Press a or b to scroll through the list for selecting the name you wish to call and press B. The detail screen of the “Contacts list” appears. If you cannot find the name you wish to edit, follow the steps in “Searching a Name and Number in the You can also dial by pressing D when the name Contacts List (page 9-52).”... - Page 54 Press A [Save]. Press a or b to highlight a thumbnail image you wish to add and press B. The changes are saved. If you do not wish to save the changes, press C If the picture size exceeds 240 [W] × 320 [H] dots, [Options] before step 7 and press a or b to press a, b, c, or d to specify the area you wish highlight “Cancel”, then press B.
- Page 55 Setting the Ringtone for a Contacts Press a or b to highlight the ringtone you wish to set and press C [OK]. List Entry (for the handset entry For more information on how to select a ringtone, only) refer to “Setting a Melody as the Ringtone” on page 15-129.
- Page 56 Press B to display the detail screen and press At the main menu, select in the following order: “Contacts” → “Contacts list.” a or b to highlight the phone number you wish to copy. Press C [Options]. The “Options” menu appears. Press C [Options].
-
Page 57: Deleting All Contacts List Entries
Deleting All Contacts List Entries Press a or b to highlight “Swap” and press B. Enter the location number you wish to swap and By the following steps you can delete all entries in the press B. “Contacts list.” Before deleting all “Contacts list” entries, ensure that you are accessing the memory you wish to Deleting a Contacts List Entry delete. -
Page 58: Setting The Groups
Setting the Groups Group Call You can set different ringtones for each group. When you You can set group icons when saving the “Contacts list” purchase this handset, groups are set to off. If you do not entries so that you can easily find and edit them. set a group ringtone, the ringtone assigned in the “Profiles”... -
Page 59: Checking The Memory Status
Checking the Memory Status Press a or b to highlight “More sounds,” “My sounds,” or “T-Mobile” and press B. The files in “T-Mobile” are preset data. You can check the number of entries registered in the “Contacts list.” Press a or b to highlight the ringtone you wish to set. -
Page 60: Setting The Speed Dial List
Setting the Speed Dial List The nine digit keys correspond to list numbers. You can set a maximum of 9 phone numbers in the Viewing the Speed Dial List “Speed dial list”. At the main menu, select “Contacts.” For information on making a call by Speed dialling, refer to “Speed Dialling”... -
Page 61: Checking Own Numbers
Checking Own Numbers To re-assign another phone number to a “Speed Dial” You can check your own voice, data and fax phone Select “Re-assign” in step 4 of “Deleting the Speed Dial numbers. List.” To clear all the “Speed dial list” items At the main menu, select “Contacts.”... -
Page 62: Accessing The "T-Zones
Accessing the “t-zones”! Viewing the WAP Browser The handset is already designed to access the “t-zones” multimedia services from T-Mobile and receive information from the service. Press while the handset is in standby mode. “t-zones” is your gateway to entertainment, information The handset starts to access the t-zones site. -
Page 63: Browser Menu
Browser Menu Alert inbox: Shows your list of WAP push messages. You can receive push While browsing, you can reach browsing options by messages via WAP services. pressing [Options]. Settings: Includes “Downloads,” etc. Browser menu Security: Sets the security. Home: Goes to the “t-zones”... -
Page 64: Deleting A Bookmark
Accessing the Bookmarked Pages Deleting a Bookmark Press C [Options] while browsing. Press C [Options] while browsing. The “Options” menu appears. The “Options” menu appears. Press a or b to highlight “View Bookmarks” Press a or b to highlight “View Bookmarks” and press B. -
Page 65: Using The Message Service
Using the Message Service Making Messages When sending SMS, messages exceeding 160 characters are divided during the sending process. If the recipient uses a compatible This section explains various messaging functions that handset, divided messages are recombined enable you to send video clips, pictures, and sounds as and delivered as one message. - Page 66 Press a or b to highlight “Create message” When sending an SMS message of more than 160 and press B. characters, a confirmation message appears. Press [Yes] to send or [No] to cancel. Enter the phone number or E-mail address of the person you wish to send the message to and Using the Text Templates press B.
-
Page 67: Sending The Message
Adding the Subject of the Message To add recipients (for MMS and E-mail messaging After entering a message, press B. only) Press a or b to highlight “Add contact” and press B. After entering a message, press B. Press a or b to highlight “To,” “Cc,” or “Bcc” Press a or b to highlight “Subject”... - Page 68 Setting the Slide Show On and Off To send a message using the message template (for MMS messaging only) (for MMS messaging only) You can send message templates with an image and This function enables you to create messages that have voice attachment.
- Page 69 Attaching Data (for MMS messaging To remove attached data only) In step 4 of “Attaching Data (for MMS messaging only),” press a or b to highlight the file name You can send pictures, sounds, and video clips saved in you wish to remove and press C [Options]. “Attach pictures,”...
-
Page 70: Receiving E-Mail Messages
Receiving E-mail Messages Press a or b to highlight “Edit message” and press B. When sending “SMS,” select “Edit.” When the handset is within the service area, SMS and If necessary, modify the phone number or E-mail MMS messages are received automatically. However, address of the recipient and press B. -
Page 71: Reading Messages
Reading Messages To check sender/receiver information (for the MMS and E-mail messaging only) Depending on the type of the received message, the At the main menu, select in the following order: following indicator appears at the top of the standby “Messages”... -
Page 72: Replying To A Message
Replying to a Message Enter the phone number or E-mail address of the recipient and press B. At the main menu, select in the following order: If you wish to select the phone number (for SMS and “Messages” → select “SMS,” “MMS,” or “E-mail” MMS) or E-mail address (for MMS and E-mail) in the →... - Page 73 Retrieving a Message (for MMS Press a or b to highlight the message you wish to modify and press B. messaging only) Press C [Options]. When “ ” or “ ” is in the “Inbox,” the following can be The “Options” menu appears. done.
-
Page 74: Deleting Messages
Resending a Message in the Outbox Press a or b to highlight “Delivery report” and press B. (for MMS and E-mail messaging This menu is available only for sent messages that only) have the “Delivery report” set “On.” For information on the “Delivery Report,”... - Page 75 Calling the Sender (for SMS and Once you have deleted a message, they cannot be restored. MMS messaging only) You can call the sender of a message in the “Inbox” You cannot delete locked messages. whose address (From) is the phone number. At the main menu, select in the following order: To lock messages (for MMS and E-mail “Messages”...
-
Page 76: Settings For The Messages (For Sms And Mms Messaging Only)
Settings for the Messages (for Press C [Options]. The “Options” menu appears. SMS and MMS Messaging Press a or b to highlight “Extract numbers” Only) and press B. Phone numbers embedded in the message appear. Press B. Press C [Options]. The main menu appears. - Page 77 Message lifetime: Delivery rep. allow: Set the time span that the message service centre Enables “Delivery report” when receiving a message that continually tries to send the message to the recipient you applies to the “Delivery report” function. specified. Anonymous reject: Message format: Rejects messages from an unknown or empty address Select a message format from the 7 choices.
-
Page 78: Making Text Templates
Making Text Templates Editing Text Templates At the main menu, select in the following order: You can register up to 20 text templates for frequently “Messages” → “Text templates.” used text on the handset. The list of the text templates appears. Press B. -
Page 79: Using Voice Mail
Using Voice Mail Deleting Text Templates At the main menu, select in the following order: You can use the voice mail service according to the “Messages” → “Text templates.” service provider you use. For information on the voice mail service, contact your service provider. Press a or b to highlight the item you wish to delete and press C [Options]. -
Page 80: Setting Cell Broadcasts
Setting Cell Broadcasts Reading Cell Broadcast Messages When you receive a cell broadcast message, This setting enables you to receive the cell broadcast press B. messages such as weather forecasts, and traffic reports, A popup is displayed over the standby screen. etc. -
Page 81: Setting Cell Info
Setting Cell Info You can set a maximum of four subjects for subscription in step 5. When you cannot find the page you wish to Cell info is the message information that operators send view in the list that appears in step 5, select to subscribers in certain areas. - Page 82 Browsing the WAP Alerts The WAP Alerts are the WAP based messages sent from a service provider to the subscribers. You can view the messages in the “WAP Alerts” menu. At the main menu, select in the following order: “Messages” → “WAP Alerts.” The WAP Alerts list appears.
-
Page 83: Downloading And Other Features
Downloading and Other Features Downloading Pictures The “Downloads” menu enables you to store pictures, sounds, and video clips you created using the handset or Press B. downloaded through the “t-zones” web site. Moreover, you can store games and applications downloaded to The main menu appears. -
Page 84: Viewing Pictures
Viewing Pictures Setting the stored image as wallpaper At the main menu, select in the following order: At the main menu, select in the following order: “Downloads” → “Pictures” → “My pictures.” “Downloads” → “Pictures” → “My pictures.” The thumbnail index of “My pictures” appears. The thumbnail index of “My pictures”... -
Page 85: Editing Pictures
Editing Pictures The selected option is confirmed on the display. Press B to apply. You can edit pictures by retouching, adding frames or If you wish to cancel, press [Cancel]. stamps, or rotating. Also, you can adjust the size of the picture or rename the picture file. - Page 86 Press a, b, c or d to select a frame and Press a or b to highlight “Add stamps” and press B. press B. The selected option is confirmed on the display. Press a or b to select a stamp and press B. Press B to apply.
- Page 87 Press C [Options]. Press a or b to highlight “Rename” and press The “Options” menu appears. The text entry screen appears. For more information Press a or b to highlight “Edit picture” and on how to enter text, refer to “Entering Text” on press B.
- Page 88 Saving Pictures to the Contacts List Sending Pictures as Attachments You can add pictures to the “Contacts list.” At the main menu, select in the following order: “Downloads” → “Pictures” → “My pictures.” At the main menu, select in the following order: The thumbnail index of “My pictures”...
- Page 89 Sending Pictures to the Media Album Checking the Picture Information At the main menu, select in the following order: At the main menu, select in the following order: “Downloads” → “Pictures” → “My pictures.” “Downloads” → “Pictures” → “My pictures.” The thumbnail index of “My pictures”...
-
Page 90: Using Sounds
Using Sounds Deleting Pictures At the main menu, select in the following order: In the “Sounds” function mode, you can download “Downloads” → “Pictures” → “My pictures.” “Sounds,” “Ringtones,” and “Melodies.” You can also The thumbnail index of “My pictures” appears. create original ringtones and edit them. - Page 91 Downloading Sound At the main menu, select in the following order: “Downloads” → “Sounds” → “My sounds.” Press B. The list of “My sounds” appears. The main menu appears. Press a or b to highlight an item you wish to Press a, b, c, or d to highlight “Downloads”...
-
Page 92: Changing The Name Of Sound Files
Changing the Name of Sound Files Press a or b to highlight “Send via MMS” and press B. At the main menu, select in the following order: For information on how to make messages, refer to “Downloads” → “Sounds” → “My sounds.” “Using the Message Service”... - Page 93 Deleting Sounds Using Melody Editor You can create original ringtones by using “Melody At the main menu, select in the following order: editor”. You can also send melodies by attaching them to “Downloads” → “Sounds” → “My sounds.” MMS. The list of “My sounds” appears. Your original ringtone is registered in “My sounds.”...
- Page 94 Setting tempo and the type of chords Repeat steps 6 to 8 to complete the melody. When you press during input, the melody that Press a or b to highlight one of the tempos you have entered is played back. below and press B.
- Page 95 To input a melody Specifying the length of notes and rests You can specify the length of each musical note and rest Specifying the pitch of the musical note by pressing repeatedly. Pressing , changes You can specify the pitch of a musical note and rest by the length of notes and rests in reverse to pressing pressing the keys shown below.
- Page 96 Enter the title of your original ringtones and You cannot make a dotted semi quaver (dotted press B. semi quaver rest) or a dotted semi breve (dotted semi breve rest). Select the tempo and the type of chords. Three continuous notes are required for a The “Score Input”...
- Page 97 Press d to move the cursor. Press a or b to highlight the item you wish to edit and press C [Options]. Press I to input an “E” note and press b to The “Options” menu appears. move the note one semitone lower. Press a or b to highlight “Edit data”...
- Page 98 Press [Options] in this step and select “Confirm Category Tone Category Tone Tones” to play back the syllable names (1 octave Piano Celesta from C) in the selected tone. Bright Piano Glockenspiel Press B to set the tone and go back to the E.
- Page 99 Category Tone Category Tone Category Tone Category Tone String Ensemble 1 Trumpet Rain Sitar String Ensemble 2 Trombone Soundtrack Banjo Synth Strings 1 Tuba Crystal Shamisen Synth Strings 2 Muted Trumpet Synth Atmosphere Koto Strings 2 Brasses Ethnics Choir Aahs French Horn Effects Brightness...
-
Page 100: Using Games Or Applications
To set the strength of each chord Only a user created melody can be selected in this step. In the “Score Input” screen, press C [Options] Press a or b to highlight “Set strength” and (refer to “To create an original ringtone” on press B. - Page 101 Downloading Games or Applications Starting a Game or an Application Before downloading the game or application, you are At the main menu, select in the following order: asked to confirm what you are about to receive. After “Downloads” → “Games & more” → “My games checking the information on the confirmation screen, the &...
-
Page 102: Deleting The Game Or Application
Viewing the Game or Application Deleting the Game or Application information At the main menu, select in the following order: “Downloads” → “Games & more” → “My games At the main menu, select in the following order: & more.” “Downloads” → “Games & more” → “My games games &... -
Page 103: Using Videos
Using Videos To download videos from Media Album Press to highlight “Media Album” instead of “More videos” in step. The “Videos” function enables you to play back the video clips created using the built-in digital camera. Also, more Playing Back Videos video clips for the handset are available via the mobile Internet service and such services as “t-movies”... -
Page 104: Changing The Name Of The Video
Changing the name of the video Sending Videos as Attachments At the main menu, select in the following order: At the main menu, select in the following order: “Downloads” → “Videos” → “My videos.” “Downloads” → “Videos” → “My videos.” The thumbnail index of “My videos”... -
Page 105: Deleting Videos
Deleting Videos Press a, b, c, or d to select an image of the video clip in the thumbnail index you wish to At the main menu, select in the following order: send to Media Album and press C [Options]. “Downloads”... -
Page 106: Memory Status
Memory Status This function helps you to check the memory status of “Downloads”. Press The main menu appears. Press a, b, c, or d to highlight “Downloads” and press B. Press a or b to highlight “Memory status” and press B. The memory status is indicated by using the bar chart. -
Page 107: Using The Personal Organiser
Using the Personal Organiser Entering Schedules This section provides the information on the organiser that helps you organise and manage your busy schedule You can navigate the calendar by using the navigation and raise your productivity. It contains such functions as key and you can enter up to 3 schedules each day. -
Page 108: Finding A Particular Date
Finding a Particular Date Press a or b to highlight “Monday-Sunday” or “Sunday-Saturday” and press B. To enter or check schedules on a particular day, jump to Monday-Sunday: Weekly format from Monday. that day by entering the date on the calendar. Sunday-Saturday: Weekly format from Sunday. -
Page 109: Using The Alarm
Using the Alarm If you wish to delete all the schedules in a day, select “1 Day” in step 5 above. The result is the same as the next option, “To delete all schedules This function alerts you at a specified time such as for an in a day.”... - Page 110 Enter the alarm time using the digit keys and You can set the vibration with the alarm tone. press B. Press to highlight “Vibration” in step 4, and select between “Enable,” “Disable,” and When you enter the alarm time in the 12-hour clock “Link to sound.”...
- Page 111 Setting the Snooze Press a or b to highlight “On” or “Off” and press B. At the main menu, select in the following order: If you select “Off,” the alarm does not work. “Organiser” → “Alarm” → “List alarms.” Resetting an Alarm Setting Press a or b to highlight the desired alarm At the main menu, select in the following order: number and press B.
-
Page 112: Using The Calculator
Using the Calculator Converting Currency You can also use the calculator for the currency You can use the calculator function of the handset for conversion. You can convert to or from the home currency basic arithmetic calculations and rate conversions using by entering the exchange rate. -
Page 113: Using Memo Recording
Using Memo Recording To convert a value At the main menu, select in the following order: The “Memo recording” function enables you to record a “Organiser” → “Calculator.” voice message of up to 60 seconds, which can be used to Enter the value to be converted and press C remind you of schedule entries. -
Page 114: Using The Phone Help
Using the Phone Help Press while the main menu appears, instead of steps 2 to 3 to enter the “Memo recording” function. You can view the help list and use it to guide you in the phone’s functions. If you wish to record the memo recording again, Press B. -
Page 115: Using The Call History
Using the Call History Calling from the Call Log If you do not answer an incoming call, the handset records that a call was missed. “Missed calls” and the number of missed calls appears on the standby screen. Press B. The handset records the last 10 missed calls, received calls, and dialled numbers (Number of dialled numbers The main menu appears. -
Page 116: Saving A Call Log To The Contacts List
Saving a Call Log to the Sending Messages from the Call Log Contacts List At the main menu, select “Call Register.” Press a or b to highlight “Missed calls,” At the main menu, select “Call Register.” “Received calls,” or “Dialled numbers,” and press B. -
Page 117: Deleting A Call Log
Deleting a Call Log Clearing Call Logs At the main menu, select “Call Register.” At the main menu, select “Call Register.” Press a or b to highlight “Missed calls,” Press a or b to highlight “Missed calls,” “Received calls,” or “Dialled numbers,” and “Received calls,”... -
Page 118: Checking The Duration Of Calls
Checking the Duration of Calls Clearing All Call Time Logs At the main menu, select “Call Register.” You can check the duration of your calls. Press a or b to highlight “Call timers” and Checking the Duration of the Last press B. -
Page 119: Checking The Cost Of Calls
Checking the Cost of Calls Enter a cost per unit and press B. To enter a decimal point, press You can check the phone charge for your calls. Enter a currency unit (up to 3 characters), and press B. Checking and Setting the Charge Rate Some networks do not support Charging Advice. - Page 120 Clearing All Call Costs Enter a cost per unit and press B. To enter a decimal point, press At the main menu, select in the following order: If you wish to check the current charge limit, select “Call Register” → “Call costs.” “Read limit”...
-
Page 121: Checking The Amount Of Data Communication
Checking the Amount of Data Clearing Data Counter Communication At the main menu, select in the following order: “Call Register” → “Data counter.” You can confirm the number of bytes which you used in Press a or b to highlight “Clear counter” and GPRS transmission by using the “Data counter”... -
Page 122: Setting The Handset
Setting the Handset Setting the Display Language Setting the Display You can change the Language (11 languages and You can change the settings of the Display such as “Automatic”) of menus and messages. “Wallpaper,” “Backlight,” “Wallpaper calendar,” “Brightness,” “Power saving,” “Greeting message,” and Press B. -
Page 123: Setting The Wallpaper
Setting the Wallpaper To set the picture you registered as wallpaper At the main menu, select in the following order: To set the built-in wallpaper “Settings” → “Phone settings” → ”Display.” At the main menu, select in the following order: Press a or b to highlight “Wallpaper”... - Page 124 Turning On/Off the Backlight To display Wallpaper Calendar At the main menu, select in the following order: The illumination time for the display and keypad backlight “Settings” → “Phone settings” → ”Display.” can be set. At the main menu, select in the following order: Press a or b to highlight “Wallpaper calendar”...
- Page 125 Setting Display Power Saving Setting the Greeting Message You can set the display to turn off, after a given time or at You can set a message to appear when the handset is a start/end time. turned on. At the main menu, select in the following order: At the main menu, select in the following order: “Settings”...
-
Page 126: Assigning Pictures
Assigning Pictures To set preloaded animations A selected picture appears when turning the power on or After step 3, press a or b to highlight off, receiving an incoming call, or operating the alarms. “T-Mobile.” Pictures taken with the built-in digital camera or images To set the picture on “My pictures”... -
Page 127: Setting The Auto Keypad Lock
Setting The Auto Keypad Lock If you press any key when the handset is closed, you will see the message “Keypad Locked” on the main menu. After about 1 To avoid keys being pressed accidentally when carrying second, “Press and hold the Centre key to the handset, you can set the auto keypad lock function to unlock the keypad”... -
Page 128: Resetting The Phone Setting
Resetting the Phone Setting Setting the Profiles You can reset all the phone settings to the default This section describes the settings for sound such as settings. ringtone, keypad tones, etc. These are 6 profiles that each sound can be set to suit every occasion. When a To cancel the settings, you need to have set the handset profile is set, the icon corresponding to the profile name code beforehand or refer to page 15-148 for details. -
Page 129: Setting The Ringer Volume
Setting a Melody as the Ringtone Press a or b to highlight the profile you wish to set, press C [Options]. You can select preset data in “T-Mobile” and “My sounds” for use as ringtones, sound effects, melodies, etc. You Press a or b to highlight “Personalise”... -
Page 130: Setting The Keypad Tones
Setting the Vibration Setting the Keypad Tones You can set the vibration for incoming calls regardless of You can set and change the tone of the keypad sound that the ringer volume and tone settings. you hear each time you press a key. In the following settings you can select the volume level, the melody to be At the main menu, select in the following order: used, and the duration. - Page 131 Select the keypad tones and press B. Press a or b to highlight “High,” “Middle,” or “Low” and press B. For information on how to select tones, refer to “Setting a Melody as the Ringtone” on page 15-129. Press a or b to highlight “Tone” and press B. Press a or b to highlight “Duration”...
- Page 132 Setting the Message Alert Press a or b to highlight “Power on sound” or “Power off sound” and press B. You can set and change the message alert sound that you hear when receiving messages. In the following Press a or b to highlight “On” or ”Off” and settings you can select the volume level, the melody to be press B.
-
Page 133: Setting Any Key Answer
Press a or b to highlight “More sounds,” “My Press a or b to highlight “Low battery alert” sounds,” or “T-Mobile” and press B. and press B. The files in “T-Mobile” are preset data. Press to highlight “High,” “Low,” or “Silent” to adjust the volume and press Select the message alert sound and press B. - Page 134 Setting the Automatic Answer Resetting the Profiles Setting The automatic answer function allows you to answer calls You can reset all the profiles settings that you have set to automatically when the handset is connected to Hands the default settings. free car kit.
-
Page 135: Call Settings
Call Settings The call waiting service may not be available on all service provider. Contact your service provider for more information. This section describes the settings for call functions such as call waiting, adjusting earpiece volume, etc. that are To check the call waiting service status related directly to calling or receiving operations. -
Page 136: Displaying Your Own Number
Displaying Your Own Number Press a or b to select the volume level from one of 5 levels and press B. Activating this function lets you control whether or not to show your phone number to the party you are calling. You can also adjust the Hands free EARphone &... - Page 137 Activating Auto Redial Settings for Sliding the Handset Closed This function makes the redial automatically when the first redial attempt is unsuccessful. If you wish to stop You can reject an incoming call, send a busy tone, or redialling, press [End].
-
Page 138: Call Diverts
Call Diverts Resetting the Call Settings You can reset all “Call settings” you have set to the default This service is used to divert incoming calls to your voice settings. mail system or to another number depending on certain To cancel the settings, you need to have set the handset conditions in which you cannot answer a call. - Page 139 Cancelling Divert Settings “Not reachable”: Diverts incoming calls when your handset is out of network Individually service or switched off. At the main menu, select in the following order: Press a or b to highlight “On” and press B. “Settings” → “Connectivity” → “Call diverts.” Enter the phone number you wish to divert.
-
Page 140: Setting Networks
Setting Networks Selecting a Network Manually If you wish to connect to networks other than the preferred This setting enables you to connect the preferred network network, perform the following steps. each time the power is turned on. At the main menu, select in the following order: Connecting To a Network “Settings”... - Page 141 Press a or b to highlight “Set preferred” and Enter the network name and press B. press B. When there are a few networks If you already have set a few networks in the list, press Press a or b to highlight the name of the [Options] and press to highlight “Add”...
- Page 142 Selecting an Applicable Zone Press a or b to highlight “On” and press B. will appear on the screen. Your handset tries to select an applicable zone The infrared setting will return to off when no data is automatically on startup. You can also select it according transmitted/received via the infrared connection.
-
Page 143: Setting Java™ Applications
Setting Java™ Applications Setting the Resume Time This setting defines the time period for the screensaver to This section describes the settings for Java™ activate. applications such as screensavers, the operation priority At the main menu, select in the following order: between calls (or alarms) and an active Java™... -
Page 144: Setting The Backlight
Press a or b to highlight the option you wish to Press a or b to highlight “Backlight” and press set and press B. The options available are: Press a or b to highlight “On/Off” and press B. “Call priority” or “Alarm priority”: The application is suspended automatically, and Press a or b to highlight “On,”... - Page 145 To reset all items in the “Settings” menu To clear all applications These steps enable you to delete all applications installed At the main menu, select in the following order: in “Applications.” However, preinstalled applications “Settings” → “Java™” → “Settings.” cannot be deleted.
-
Page 146: Setting The Date And Time
Setting the Date and Time Press a or b to highlight “Clock settings” and press B. You need to set the correct date and time in order for your Press a or b to highlight “Date format” and handset’s various time-based functions to work correctly. press B. -
Page 147: Setting Security
Press a or b to highlight “Daylight saving” and Enter time-zone differences using the digit keys press B. and press B. Press P to switch between – and Press a or b to highlight “On” and press B. Setting Security Setting the Time Zone At the main menu, select in the following order: These settings enable the security function to prevent... - Page 148 Enabling the Handset Lock Press a or b to highlight “On” and press B. Enter your PIN code and press B. The “Handset lock” is an additional security feature that prevents unauthorised use of the handset. The default Press B. handset code is “0000.”...
-
Page 149: Barring Calls
To change the handset code Enter the new PIN2 code again and press B. If you enter a code different from the code which you In step 3 of “Enabling the Handset Lock” above, entered in this step, the screen returns to step 4. press a or b to highlight “Change code”... - Page 150 To disable barring calls options individually “Bar inc if abroad”: Restricts all incoming calls when you are In step 5 of “Barring Calls (page 15-149),” press outside of the coverage area of your to highlight “Off” and press registered service provider. The selected call barring option is cancelled.
- Page 151 Setting Fixed Dialling No. Press C [Options]. The “Options” menu appears. This setting enables the “Fixed Dialling No.” function. If Press a or b to highlight “Add new contact” you turn the security function on, you can only call predefined numbers. In this step you are asked to enter and press B.
- Page 152 To edit a registered entry Press C [Yes]. The selected entry is deleted. After step 3 of “Setting Fixed Dialling No. To cancel, press [No] in this step. (page 15-151),” press a or b to highlight “Edit dial list” and press B. Press a or b to highlight the entry you wish to edit.
-
Page 153: Setting An Account
Setting an Account Item Description Operation The followings is information on how to setup WAP, MMS Press to highlight and E-mail settings. “Circuit prompt” and press Circuit to select. WAP Settings Circuit prompt Prompt Press to highlight “Enable” or “Disable” and Item Description Operation... - Page 154 Item Description Operation Item Description Operation GPRS settings (If “GPRS then CSD” or “GPRS” is selected Press to highlight as connection type, they should be set) “Line type” and press ISDN or Line type Press to highlight Press to highlight Analogue “ISDN”...
- Page 155 MMS Settings Item Description Operation GPRS Settings (If “GPRS then CSD” or “GPRS” is selected Item Description Operation as connection type, they should be set) MMS Profile Press to highlight Press to highlight Name “Profile name” and press Profile name* Access Point “APN”...
- Page 156 Item Description Operation CSD Settings (If “GPRS then CSD” or “CSD” is selected as connection type, they should be set) Press to highlight Access Point “Phone No.” and press Phone No.* Number Enter Access Point Number and press Press to highlight “Line type”...
-
Page 157: E-Mail Settings
E-mail Settings Item Description Operation Press to highlight Item Description Operation “POP before SMTP,” Settings for Press to highlight Send settings “SMTP-AUTH On,” or E-mail Profile sending mail “Profile name” and press “SMTP-AUTH Off” and Name Profile name* press (Unique Enter the desired strings and Name) Press... - Page 158 Item Description Operation Item Description Operation GPRS Settings (If “GPRS then CSD” or “GPRS” is selected CSD Settings (If “GPRS then CSD” or “CSD” is selected as as connection type, they should be set) connection type, they should be set) Press to highlight Press...
-
Page 159: Automatic Setting
To setup your account information To select the network connection profile Your Service Provider supplies you with account After step 4 of “To set up your account information. Please contact your service provider for information”, press a or b to highlight the details. -
Page 160: Customising Keys
Customising Keys Create picture Create video Memo recording While the handset is in standby mode, four Navigation keys ( , and ) and side-up/down keys ( My pictures (default setting) ) are available for assigning shortcuts for directly My videos (default setting) accessing the screens shown below, and you can also My sounds... -
Page 161: Master Reset
Master Reset Changing the Shortcuts Press B. These steps enable you to cancel all the settings to The main menu appears. default. Special caution needs to be paid before you do the master reset. If you wish to retain settings for some Press a, b, c or d to highlight “Settings”... -
Page 162: Connecting To A Pc
Connect the handset to the USB cable by GSM/GPRS Modem following the on-screen instructions. The GSM/GPRS modem in your handset enables digital equipment to access the Internet. For more information on software support, refer to the following site: http://www.sharp-mobile.com/tm/ 16-162... -
Page 163: Connecting The Handset
It is not recommended that you make or answer calls when using the handset as a GSM/GPRS modem, as the operation may be interrupted. Connecting the Handset You can connect your handset to digital equipment that use an infrared or USB port. When connecting your handset to a PC, you need to select the connection method for PC link. -
Page 164: Troubleshooting
Troubleshooting Symptom Check Points Symptom Check Points Is the battery properly inserted? Even when (page 3-12) charged, the Is the SIM card inserted correctly? Is the battery empty? If the alert phone functions (page 3-14) sounds and you are unable to turn on stop working. - Page 165 Symptom Check Points Symptom Check Points Are you in a location where the signal Did you enter the correct code (4 to 8 is poor? (Check the indicator and digits)? (page 3-16) see if the service is out of range. Have you made 3 unsuccessful Move to a location where the radio The PIN code or...
- Page 166 Symptom Check Points Does your service provider support the MMS service? Contact your service The MMS service provider to confirm whether they support cannot be the service and that the correct settings accessed. for the MMS service have been performed on your handset. Have you made the necessary settings The E-mail for the E-mail service? (page 15-157) If...
-
Page 167: Index
Index Symbols Assigning pictures ...........15-126 Attaching data ...........11-69 #/Silence profile Key .......... 4-18 Auto keypad lock ..........15-127 */Shift Key............4-18 Auto redial............15-137 Numerics Auto shooting ............7-37 12 hour ............15-146 Automatic answer..........15-134 24 hour ............15-146 Automatic redialling..........6-28 AC charger............3-12 Backlight ..........15-124, 15-144 Activity ............ - Page 168 Checking the amount of data communication ..........14-121 Calculator............13-112 Checking video information ......12-105 Calendar ............13-107 Chords ...............12-94 Call diverts ............15-138 Cigarette lighter charger ........3-14 Call history............14-115 Clearing call logs..........14-117 Call log............14-116 Close-up picture s ..........7-41 Call notice ............15-144 Conference............15-128 Call priority.............
- Page 169 Deleting a contacts list entry....... 9-57 Deleting messages ..........11-74 Earphone Connector ..........4-18 Deleting pictures ..........12-90 Earpiece ...............4-18 Deleting pictures/video clips ......7-43 Earpiece volume ..........15-136 Deleting schedules .......... 13-108 Editing pictures ..........12-85 Deleting sounds ..........12-93 Electromagnetic waves..........1-4 Deleting the game or application ....
- Page 170 Introduction ............1-1 Game or application information ....12-102 Games ............. 12-100 Java™ applications..........15-143 Greeting message ..........15-125 Java™ information ..........15-145 Group call ............9-58 Groups..............9-58 GSM/GPRS modem........16-162 Key pad..............4-18 Keypad tones ...........15-130 Hands free EARphone & MIC......3-12 Hands free EARphone &...
- Page 171 Memory............... 9-49 Memory space............. 7-43 Online confirmation ........15-144 Memory status ........9-59, 12-106 Only local & home ..........15-149 Menu ..............5-25 Operating system..........16-162 Message alert ..........15-132 Organiser ..........5-26, 13-107 Message service ..........11-65 Original ringtones..........12-91 Message template..........11-68 Own numbers ............9-61 Messages..........
- Page 172 Profiles ............15-128 Ringtones............12-91 PUK code ............3-16 Rotating pictures..........12-86 Punctuation ............8-47 Safety precautions ..........1-4 Quick setup ............3-12 SAR ...............1-7 Saved pictures............7-36 Saved video clips..........7-39 Reading messages ..........11-71 Saving information ..........9-50 Received calls ..........14-115 Saving pictures ..........12-88 Rechargeable Li-ion battery........
- Page 173 Settings ............... 5-26 Sunday-Saturday ..........13-108 Settings for the messages........11-76 Suspending the game or application....12-101 Shortcuts ............15-161 Symbols..............1-1 Shutter release button .......4-19, 7-33, 7-38 Shutter sound ............7-35 T9 text input ............8-46 Side-up/ Side-down Key........4-19 Tempo..............12-94 Silent ............... 15-128 Text..............8-45 SIM application ..........
- Page 174 Video images ............7-38 Video quality............7-39 Viewing groups........... 9-58 Viewing pictures ..........12-84 Viewing the contacts list........9-48 Voice calls............15-150 Voice mail............11-79 Voice mail key ............ 4-18 Voice memo ............ 13-113 Wallpaper............15-123 Wallpaper calendar ......... 15-124 Wallpapers ............
Need help?
Do you have a question about the TM100 and is the answer not in the manual?
Questions and answers