Table of Contents
Advertisement
Quick Links
Declaration of Conformity
Hereby, Sharp Telecommunications of Europe Limited, declares
that this SH9010C is in compliance with the essential requirements
and other relevant provisions of Directive 1999/5/EC.
A copy of the original declaration of conformity can be found at the
following Internet address:
http://www.sharp-mobile.com
Sharp Telecommunications of Europe Ltd.
Azure House, Bagshot Road, Bracknell, Berkshire RG12 7QY UK
Advertisement
Table of Contents

Related Manuals for Sharp SH9010C


Summary of Contents for Sharp SH9010C
- Page 1 Declaration of Conformity Hereby, Sharp Telecommunications of Europe Limited, declares that this SH9010C is in compliance with the essential requirements and other relevant provisions of Directive 1999/5/EC. A copy of the original declaration of conformity can be found at the following Internet address: http://www.sharp-mobile.com...
-
Page 2: Introduction
Introduction • Screen layout may differ from that illustrated in this user guide. The information described in this user guide is subject to change Congratulations on your new Sharp SH9010C phone. without notice. About This User Guide • All the functions described in this user guide may not be This user guide is carefully designed to help you learn about your supported by all networks. - Page 3 ©2002-2008 HI Corporation. All Rights Reserved. Bluetooth SIG, Inc. and any use of such marks by Sharp is under license. T9 Text Input is licensed under one or more of the following: U.S. Pat. Nos.
- Page 4 CYCLOID is a registration-pending trademark of SHARP Corporation in People’s Republic of China. IrSimple™, IrSS™ and IrSimpleShot™ are trademarks of the Infrared Data This product contains NF Browser and NF Messaging Client of ACCESS CO., ® Association LTD. © 2008 ACCESS CO., LTD. All rights reserved.
- Page 5 ® Bluetooth Useful Functions and Services • A wireless technology interface for establishing Your phone offers you the following features: contact and transmitting data with certain devices. You can transmit pictures, sounds, and video clips to OBEX-enabled • Cycloid position. You can rotate the display 90° clockwise for phones.
-
Page 6: Table Of Contents
Contents Introduction ..............1 Copying, Cutting and Pasting Text ......34 List of Menu Functions ..........7 Insert Phonebook Entries ........34 Your Phone ..............9 Using the Menu ............35 Optional Accessories ..........9 Main Menu ............35 Getting Started ............10 Shortcut Keys ............ - Page 7 Connectivity ............106 Bluetooth ............106 Infrared .............108 Mass Storage ............108 USB Charge ............108 Card Settings .............109 Connecting SH9010C to Your PC ......110 System Requirements ........110 GSM/GPRS Modem ..........110 Handset Manager ..........111 Music Manager ..........112 Sync Manager ...........114 Safety Precautions and Conditions of Use ....115 Conditions of Use ..........115...
-
Page 8: List Of Menu Functions
List of Menu Functions SH9010C functions are listed below. See relevant page for details of each function. The menu’s corresponding number is used for shortcuts. For details, see page 35. 1 Java™ 3 Organiser 4 Messages 6 Gallery p. 68... - Page 9 (Tab 3: Network Settings) 8 Call Manager 9 Settings 12 Connectivity 1 Network Settings p. 100 1 Phonebook p. 37 (Tab 1: Phone Settings) 1 Bluetooth p. 106 2 Off Line Mode p. 101 2 Add New p. 37 1 Profiles p.
-
Page 10: Your Phone
• USB Data Cable • Quick Start Guide • CD-ROM • Warranty Optional Accessories • Li-ion Spare Battery • USB Data Cable • AC Charger • Stereo Handsfree Note • Use only the accessories supplied or accessories approved by Sharp. Your Phone... -
Page 11: Getting Started
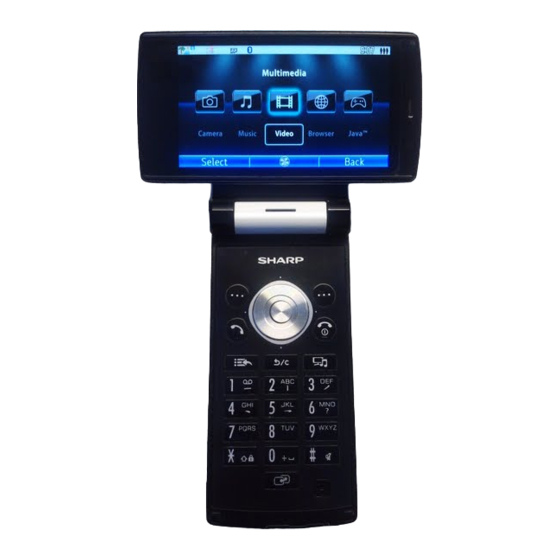
Getting Started Getting Started... - Page 12 1. Earpiece 11. * /Shift Key: P 2. Light Sensor Switches character input method as follows on the text entry 3. Main Display screen. 4. Speaker Abc, ABC, abc, 123, T9 PinYin, and T9 Stroke 5. Navigation Keys (Arrow Keys): abcd Press to enter P, ? or * in standby.
- Page 13 19. Microphone 30. Handsfree Kit/Microphone Connector 20. External Connector: 31. Infrared Port: Used to connect either the charger or a USB data cable. Sends and receives data via infrared. 21. Sub Display 22. Small Light: Flashes when an incoming call or a new message is received or missed, if Event Light (p.
-
Page 14: Battery
2. Slide the SIM card into the SIM holder Note • Make sure that only 3V SIM cards are used. • Make sure that the standard Sharp accessory battery is used. Battery Disposal The device is battery-powered. In order to protect the environment,... -
Page 15: Charging The Battery
Charging the Battery To Disconnect the Charger When charging is completed, the battery indicator icon displays You must charge the battery for at least 150 minutes before the full charge status. The Small Light also turns off when using your phone for the first time. completed. -
Page 16: Inserting/Removing The Memory Card
Inserting/Removing the Memory Card Battery Level Indicator The current battery level is displayed in the upper right of the main Note and external displays. • Make sure that the phone is turned off before inserting/removing Low Battery during Use the memory card. When the battery is running low, an alarm will sound and “... -
Page 17: Connecting The Handsfree Kit
Connecting the Handsfree Kit 3. Insert the memory card until it clicks. (To remove the memory card, push the memory card until it clicks.) 1. Open the connector cover. 2. Connect the handsfree kit. 4. Close the cover. • You see the following indicators when the memory card is in use: : Appears when the card is inserted. -
Page 18: Turning Your Phone On And Off
Turning Your Phone On and Off Cycloid Position To turn the power on or off, long press F for approximately 2 Rotating the Display seconds. 1. Open the phone into portrait position as illustrated. To Enter the PIN Code If the PIN (Personal Identification Number) code is enabled you are asked to enter the PIN code each time the phone is switched on. - Page 19 Note • Do not turn the display anticlockwise as this may damage the phone. • Do not carry the phone in the cycloid position as this may damage the display. Assigning a Function You can assign a function to activate automatically when the display is rotated to the cycloid position in standby.
-
Page 20: Display Indicators (Main Display)
Display Indicators (Main Display) : Strength of received signal/Service out of range : EDGE Indicator area : GPRS enabled : Roaming outside network Connection to the server [established/ communicating] Voice call [incoming/in progress] Alerts [text message and multimedia message/ Email] / / /#: Mailbox full [SIM/USIM card only/handset only/both SIM/USIM card and handset/Email only]... - Page 21 Secure WAP/Web page displayed Keypad Lock enabled / / : Silent/vibration setting [silent/vibration enabled/ 22. (No display)/ / / : silent and vibration enabled] Current profile [Normal/Car/Silent/Original] / / : Speaker mode [speaker phone/speaker activated/ Hour minder enabled microphone muted] 24.
-
Page 22: Display Indicators (External Display)
Display Indicators (External Display) Status Indicators Battery level [sufficiently charged/charging recommended/charging required/empty] : Clock : Strength of received signal/Service out of range : Missed events Voice call incoming Call in progress Alerts [messages/Delivery Report] Alarm enabled [Daily alarm/Schedule alarm/Task alarm] Sound file being played Streaming Stopwatch/countdown timer... -
Page 23: Navigating Functions
Navigating Functions The following menus have tabs - Organiser and Settings. You can select the desired tab with the c/d key, and after that All applications are accessed from the Main menu. To open the you can select the item you wish to set in the selected tab with the Main menu, press the centre key B in standby. -
Page 24: Voice Call Functions
Voice Call Functions International Calls 1. Long press Q until a + (international dialling prefix) sign is displayed. Making a Voice Call 2. Enter the country code, followed by the area code (without 1. Enter the area code and the phone number you wish to dial, the leading zero) and the phone number, and press D to and then press D to dial. - Page 25 Speed Dialling Answering a Voice Call Up to 8 phone numbers from the Phonebook memory (Handset and When an incoming call is detected, the phone rings. SIM/USIM) can be assigned to speed dials. You can call the 1. Press D or B to answer the call. numbers using the digit keys (G to O).
- Page 26 Turning the Speaker On and Off Call Waiting You can talk via the loudspeaker on the phone when it is on. 1. During a call, press [Options] and select “Hold & Answer” to answer the second call. 1. During a call, press B. The first call is put on hold and you can now talk to the second Putting a Call on Hold caller.
- Page 27 Note To Have a Private Conversation with One of the Participants • The conference call service may not be available on all networks. 1. During a conference call, select the person that you wish to Contact your service provider for more information. talk to.
-
Page 28: Entering Characters
Entering Characters Changing the Input Language 1. On the text entry screen, press [Options] and select “Input In multi-tap input method, press each key until the desired Language”. character is displayed. For example, press H once for the letter 2. Select the desired language. A or twice for the letter B. - Page 29 English/T9 mode T9 English Mode Using T9 English Mode 1. On the text entry screen, press [Options]. 2. Select “Input Method”. 3. Select the T9 mode (T9 Abc, T9 ABC, T9 abc) you wish to English/Multi-tap mode change. “ ” is displayed on the main display. 4.
- Page 30 To Edit a Word in the List Stroke PinYin 1. On the text entry screen in T9 mode, press [Options] and Space select “User Dictionary”. 2. Highlight the desired word. Go to the FullWidth Symbols screen. 3. Press [Options] and select “Edit”. G - O : Long press to input corresponding Chinese 4.
- Page 31 Using Stroke Mode (Traditional) Using PinYin Mode The following is an example of entering “ ”. Input field 1. Change the input mode to T9 Stroke Long press the corresponding mode. numeric key to select the desired character directly from the Candidate field.
-
Page 32: Chinese User Dictionary
3. Select the desired character. Editing a Word in the List 4. Long press corresponding numeric key to enter the desired 1. On the text entry screen, press [Options] and select character (in this case, H). “Chinese User Dictionary”. 2. Highlight the desired word. 3. - Page 33 To Call the Entry Note Examples of entry words and acronyms: • Acronyms are available for T9 PinYin mode only. • You can also enjoy word completion or predictive input of the words stored in the Chinese User Dictionary. When the first three characters of a word are entered, the whole word appears at once.
- Page 34 3. Long press N to enter “ ”. Symbols and Punctuations 1. On the text entry screen, press [Options]. 2. Select “Add Symbol”. The first symbol page is displayed. In Chinese input mode, the FullWidth Symbols screen is 4. Long press O to enter “ ”. displayed.
-
Page 35: Using Templates
Using Templates Insert Phonebook Entries For details on creating the text template, see “Adding Phrases to For details on creating the Phonebook entries, see “Call Manager” Text Templates” on page 83. on page 37. 1. On the text entry screen, move the cursor to the point you 1. -
Page 36: Using The Menu
Using the Menu Shortcut Keys You can access menus by pressing B and digit keys for the Main Menu corresponding number on the Main menu. For numbers 10 to 12, press B and P (10), Q (11) or R (12). For menus with tabs, press d (or c when necessary) to select the desired tab before pressing the digit keys. -
Page 37: Shortcuts
Shortcuts To Use the Shortcut Key 1. Press E in standby. Your phone has a shortcut function (press E in standby) which 2. Select the desired item or number. enables you to access the desired menu quickly. The default shortcuts are as follows (shortcuts assigned to G-O can be To Customise the Assigned Shortcuts customised): 1. -
Page 38: Call Manager
Call Manager (M 8) Searching for an Entry Changing the List Displayed (M 8-8-2) Your phone can store up to 750 entries. For each entry, you can → → “Call Manager” “Phonebook Settings” “Source” enter information including up to 5 phone numbers and 5 Email 1. -
Page 39: Sending A Message From The Phonebook
Dialling from the Phonebook Using Mailing Lists (M 8-7) Up to 20 groups can be registered. → “Call Manager” “Phonebook” To Create a New Mailing List 1. Highlight the desired entry and press D to make a voice → → “Call Manager”... - Page 40 Editing Phonebook Entries Assigning a Ringtone or a Ring Video Clip to Each Entry → “Call Manager” “Phonebook” → “Call Manager” “Phonebook” 1. Highlight the desired entry. 1. Highlight the entry you wish to edit. 2. Press [Options] and select “Edit”. 2.
- Page 41 Deleting a Phonebook Entry For “As Message” → For details, see “MMS” on page 51. “Call Manager” “Phonebook” 1. Highlight the desired entry. For “Via Bluetooth” 2. Press [Options] and select “Delete”. For details, see “Bluetooth” on page 106. For “Via Infrared” Managing the Phonebook For details, see “Infrared”...
- Page 42 Editing the Category Name → “Call Manager” “Manage Groups” 1. Highlight the desired category name. 2. Press [Edit] and select “Edit Name”. 3. Modify the name. Speed Dial List (M 8-6) Setting Phonebook Entries in the Speed Dial List → “Call Manager”...
-
Page 43: Multimedia
Multimedia (M 7) Playing Back Video Clip Files (M 7-3-2) → → “Multimedia” “Video Player” “My Videos” 1. Select “All Videos” or the desired playlist. Streaming Player (M 7-1) 2. Select the desired file. You can play back video clip files while downloading them from the To pause playback, press B. - Page 44 4. Select the desired playlist. • “Sound Effects” (“Normal”, “Bass”, “Surround”, “Surround The file highlighted in step 2 is saved. Bass”, “Loud-Wide”, “Karaoke”, “Rock”, “Hall”, “Hiphop”) To delete files from the playlist, highlight the file in the playlist Downloading Video Clip Files (M 7-3-4) and press [Options].
- Page 45 Playing Back Sound Files Sorting Files → → → → → “Multimedia” “Music Player” “My Music” “Multimedia” “Music Player” “My Music” “All Music” 1. Select the item you wish to play back. 1. Press [Options] and select “Sort”. • “All Music”: All sound files are displayed. •...
-
Page 46: Camera
Camera (M 5) 3. Select “Save”. The video clip is saved in Gallery. To view the preview before saving, select “Preview”. Taking Pictures To send the video clip, select “Send”. “Camera” For further procedures, see “Creating a New Message” on 1. - Page 47 Adjusting the Exposure Note → → → • The better quality you select, the larger the file size becomes. “Camera” [Options] “Shooting Settings” “Exposure” Using the Self-Timer → → → “Camera” [Options] “Record Settings” “Exposure” → → “Camera” [Options] “Self-timer” 1.
- Page 48 Mobile Light Common Shortcut Keys → → “Camera” [Options] “Mobile Light” Photo Camera Video Camera 1. Select the desired mode. Focus Lock “On” ( ): The light is always on. Focus “Auto” ( ): The light turns on if the phone detects that the conditions are dark.
-
Page 49: Functions In Photo Camera Mode
Functions in Photo Camera Mode Note • When you select “Manual” to take continuous pictures, press B Selecting the Picture Size manually at the desired speed. You can select the size of pictures. All taken pictures are saved in • You cannot use the Continuous Shoot function for picture sizes the JPEG format. - Page 50 To Set the AE-Lock Note When this setting is enabled, the exposure setting is fixed for the • You cannot use the Camera Effects function for picture sizes same brightness level. × larger than 240 320 dots. → → → “Camera”...
-
Page 51: Functions In Video Camera Mode
Selecting the Shutter Sound If “SD VIDEO” is selected, select “VGA(640×480)” or → → → “QVGA(320×240)”. “Camera” [Options] “Settings” “Shutter Sound” 1. Select the desired shutter sound from 3 preset patterns. Note To play back the shutter sound, press [Play] in step 1. •... -
Page 52: Messages
Messages (M 4) Creating a New Message (M 4-1) (SMS/MMS) Your phone allows you to send and receive text, multimedia and → → “Messages” “Create Message” “Message” Email. It is compatible with most POP3 Email providers. (Email) → → “Messages” “Create Message”... - Page 53 6. Press [Options] and select “Send”. To Attach Data “Send” is not available when no recipients are set. 1. In step 6 in “Creating a New Message” on page 51, press After the message is sent, the message is moved to the Sent [Options] and select “Insert Item”.
- Page 54 To Remove Attachments Sending a Message in the Drafts Box 1. In step 6 in “Creating a New Message” on page 51, highlight (SMS/MMS) the desired item, press [Options] and then select “Remove → → “Messages” “Message” “Drafts” Item”. (Email) →...
- Page 55 Storing the Phone Number of a Sender in the Phonebook Downloading a Single MMS → → (SMS/MMS) “Messages” “Message” “Inbox” → → 1. Highlight the message alert ( “Messages” “Message” “Inbox” ) you wish to download. 2. Press [Options] and select “Download”. (Email) →...
- Page 56 Cell Broadcasts (M 4-6) Forwarding a Message (SMS/MMS) This function may not be available on all mobile phone networks. → → “Messages” “Message” “Inbox” Contact your service provider for more information. (Email) Enabling/Disabling Cell Broadcasts → → “Messages” “Email” “Inbox” →...
-
Page 57: Area Info
Messaging Settings (M 4-8) Subscribing to Cell Broadcasts Select the page of the cell broadcast message that you want. General Settings → → → “Messages” “Cell Broadcasts” “Settings” “Set → → “Messages” “Messaging Settings” Info Subjects” “General Settings” 1. Press B. 1. - Page 58 SMS Settings MMS Settings → → → → “Messages” “Messaging Settings” “SMS Settings” “Messages” “Messaging Settings” “MMS Settings” 1. Select the item you wish to set up. 1. Select the item you wish to set up. • “Delivery Report”: • “MMS Accounts”: Enables or disables Delivery Report request.
- Page 59 • “Automatic Resend”: • “Max Message Size”: Tries to resend the failed SMS message up to two times Sets the maximum message size for sending and disables (“On” or “Off” selection). sending MMS messages exceeding that size. • “Delivery Report Allow”: •...
- Page 60 Email Settings → → “Messages” “Messaging Settings” “Email Settings” To Set an Email Account 1. Select “Email Accounts” and highlight the preset Email account. You can also create a new account. 2. Press [Options] and select “Edit”. 3. Select the item you wish to set up. “Account Name”: Email account name (unique name) “Incoming Server”:...
-
Page 61: Browser
Browser → (M 2) “Browser” “Access History” The history of pages you have recently browsed is displayed. Your phone is already configured to access the mobile Internet. → “Browser” “Browser Settings” Your phone uses GPRS, it has a system that is faster than previous See page 61. - Page 62 Editing Bookmarks (M 2-3) (When there are no bookmarks) → “Add New Bookmark”: Creates new bookmarks. “Browser” “Bookmarks” “Create New Folder”: Creates new folders. 1. Select the desired URL, and press [Options]. You can edit the list of Bookmarks by the following options: Browser Settings (M 2-7) (When a bookmark is highlighted)
- Page 63 Browser Options when Online “Convenient Functions”: Displays functions for page → operation. [Options] “Access History”: Shows the history where you have “Home”: Goes to the homepage. browsed. “Alert Inbox”: Displays WAP push alert. ® ® “Flash Menu”: Displays Flash menu. (This option “Forward”: Goes to the next page.
-
Page 64: Gallery
Gallery (M 6) Note • “Picture Editor” may not be available depending on the original Gallery contains all your pictures, music and videos. You can also picture and copyright issued. Bluetooth transmit pictures, sounds and video clips via infrared or Saving an Image to Phonebook Entries wireless technology to other OBEX-enabled devices. - Page 65 Note Note • To switch between viewing handset or memory card content, • In order to manage video clips with SD VIDEO, perform recording select the first item in the options menu. as follows: → → → [Options] “Record Time” “Extended Video”...
- Page 66 Other Documents (M 6-8) Downloading Sound Files → → “Gallery” “Sound Gallery” “Download Sounds” Opening a Document File The sound file download site is displayed. → “Gallery” “Other Documents” 1. Select the desired file. Themes (M 6-6) Note You can easily customise the display by using the theme files. •...
- Page 67 Common Option Menus Sending Gallery Data 1. Select the appropriate folder for the desired file type. Gallery contains the following folders. 2. Highlight the desired file. → “Gallery” “Picture Gallery” 3. Press [Options] and select “Send”. → “Gallery” “Video Gallery” 4.
- Page 68 Using Gallery Data Selecting Multiple Files 1. Select the appropriate folder for the desired file type (p. 66). Note 2. Highlight the desired file. • The following procedure applies except when the “Download 3. Press [Options] and select “Manage Items”. More”...
-
Page 69: Java
Java™ (M 1) Setting as a Screensaver for the Display → “Java™” “Java™ Gallery” 1. Highlight the file you wish to use as a screensaver. Java™ Gallery (M 1-1) 2. Press [Options] and select “Set as Screensaver”. Downloading Applications Setting Permission →... - Page 70 “Use Multimedia”: Sets permission to use the multimedia Deleting an Application recording. You can delete an application in the folder. “Location Access”: Sets permission to send location → “Java™” “Java™ Gallery” information. 1. Highlight the desired Java™ application. 4. Select one of the following options: 2.
- Page 71 To Set the Blinking Operation • “Call Notice”, “Message Notice”, “Alarm Notice” or “Notice If set to “Off”, the backlight cannot be turned on from the of Incoming msg”: application. The marquee (character scrolls) is displayed on the first line of the screen while the application continues.
- Page 72 Java™ Information (M 1-3) To Set the Suspend Time → → “Java™” “Java™ Settings” “Set Java™ Wallpaper” → “Java™” “Java™ Information” → “Suspend Time” The information about the licences belonging to Java™ is 1. Set the desired time period from “after 15 min.” to “after displayed.
-
Page 73: Organiser
Organiser (M 3) To Change the Settings 1. Select the item you wish to change in the New Entry screen. • “Alarm”: Sets options including “Alarm Time”, Calendar (M 3-1) “Assign Tone/Video” and “Duration” for Creating a New Entry the reminder. →... - Page 74 To Search by Date Weekly view Displays the previous week. 1. In any view, press [Options] and select “Go to”. Displays the next week. 2. Select “Today” to display today or “Enter Date” to enter the Displays the Help screen. desired date.
- Page 75 For Days of the Week Colour Finding a Schedule Entry 1. Press [Options] and select “Calendar Settings”. To Search by a Subject 2. Select “Set Colour”. → → “Organiser” “Tools 1” tab “Calendar” 3. Select “By Week” and then select days of the week you wish 1.
- Page 76 Deleting Schedule Entries Sending a Schedule Entry → → 1. In any view, press [Options] and select “Delete”. “Organiser” “Tools 1” tab “Calendar” 2. Select the desired option. 1. Select the day including schedule entries you wish to send. “This Appointment” (daily view): 2.
- Page 77 Alarms (M 3-2) • “Duration”: Sets the duration of the alarm. Setting the Alarms Resetting an Alarm → → “Organiser” “Tools 1” tab “Alarms” → → “Organiser” “Tools 1” tab “Alarms” 1. Select the blank line (--:--) you wish to set an alarm to. 1.
- Page 78 Tasks (M 3-3) 4. Select the desired tone or video clip file. For details on selecting a tone, see “Assigning a Ringtone for Creating a New Entry an Incoming Call” on page 91. → → “Organiser” “Tools 1” tab “Tasks” To Change the Duration of Alarm Tone or Video 1.
- Page 79 To Set the Priority Finding a Task Entry 1. On the New Entry screen, select “Priority”. To Search by a Subject 2. Select “Normal”, “High” or “Low”. → → “Organiser” “Tools 1” tab “Tasks” 1. Press [Options] and select “Find”. To Change the Description 1.
- Page 80 Calculator (M 3-4) Note • When pairing, you need to enter your passcode when → → “Organiser” “Tools 1” tab “Calculator” establishing contact with a Bluetooth wireless technology enabled device for the first time. Viewing the Memory Status → → “Organiser”...
- Page 81 Rate Conversion To Change Category 1. In the total view, highlight the desired item. To Set a Currency Conversion Rate 2. Press [Options] and select “Change Category”. → → → “Organiser” “Tools 1” tab “Calculator” [Options] 3. Select the desired category. →...
- Page 82 Stopwatch (M 3-d-1) World Clock (M 3-d-3) You can store 4 lap times when using the stopwatch function. Setting the Time Zone → → “Organiser” “Tools 2” tab “Stopwatch” → → “Organiser” “Tools 2” tab “World Clock” 1. Press [Start]. 1.
- Page 83 Hour Minder (M 3-d-4) Document Viewer (M 3-d-d-1) Hour Minder function informs you of the time by sounding a tone. You can view PC documents. → → → → “Organiser” “Tools 2” tab “Hour Minder” “Organiser” “Tools 3” tab “Document Viewer” 1.
- Page 84 Text Templates (M 3-d-d-2) Sending Text Templates → → “Organiser” “Tools 3” tab “Text Templates” You can register up to 50 text templates for use in text messages 1. Highlight the text template you wish to send. and multimedia messages. The maximum capacity of the text templates is 256 characters.
- Page 85 Sending Voice Clips Note → → • When scanning does not take place, it may be due to one of the “Organiser” “Tools 3” tab “Voice Recorder” following reasons: type or size of barcode, scratches, dirt, 1. Press B to start recording. damage, print quality, light reflection, etc.
- Page 86 4. Press [Options] and select the desired option. Opening a Barcode Picture → → → “Select/Edit”: The scanned result can be modified. “Organiser” “Tools 3” tab “Scanner” “Open “Change Mode”: The scanned result can be converted to a Barcode” web address, mail address, phone 1.
-
Page 87: Sim Application
SIM Application (M 10) You can refer to the information on the SIM/USIM card. Contact your service provider for further details. SIM Application... -
Page 88: Settings
Settings (M 9) 4. Select the desired option. “For Voice Call”: Flashes when an incoming voice call is received. Phone Settings “For New Message”: Flashes when a new message is Setting a Profile received. There are 4 profiles: “Normal”, “Car”, “Silent” and “Original”. Bluetooth “Java Start”: Flashes when... - Page 89 Any Key Answer Assigning Pictures (M 9-2-2) For details, see page 24. To Set Built-in Pictures → → “Settings” “Phone Settings” tab “Profiles” → → “Settings” “Phone Settings” tab “Display Settings” 1. Highlight the profile you wish to customise. → “Assign Pictures”...
- Page 90 Setting the Font (M 9-2-3) Setting the Greeting Message (M 9-2-6) You can set the message which is displayed when the phone is To Set the Font Size turned on. → → “Settings” “Phone Settings” tab “Display Settings” → → “Settings”...
- Page 91 To Set the Clock Type Setting the Display Saving (M 9-2-9) → → → → “Settings” “Phone Settings” tab “Display Settings” “Settings” “Phone Settings” tab “Display Settings” → → → “External Display” “Clock Type” “Display Saving” 1. Select the desired clock type. 1.
- Page 92 Sound Settings (M 9-4) Assigning a Ring Video Clip for an Incoming Call → → → → “Settings” “Phone Settings” tab “Sound Settings” “Settings” “Phone Settings” tab “Sound Settings” 1. Select “Ringtone/Ringvideos”. Volume 2. Select “For Voice Call”. → → “Settings”...
- Page 93 11. Select “Duration”. 1. Select “Handset Open” or “Handset Close”. 12. Enter the desired duration of message notification in 2 digits 2. Select “Sound” or “Duration”. using the digit keys. For “Sound”, select “Off”, “Preset Sounds” or “Sound Gallery”. For “Duration”, select the desired time. Keypad Tones →...
- Page 94 Date & Time (M 9-5) To Select the Time Format (M 9-5-5) → → → → → → “Settings” “Phone Settings” tab “Date & Time” “Settings” “Phone Settings” tab “Date & Time” “Set Date/Time” “Time Format” 1. Enter the day, month, year and time using the digit keys. 1.
- Page 95 Display Rotation (M 9-7) Enabling/Disabling the PIN Code → → If the PIN code is enabled, you are asked to enter the PIN code each “Settings” “Phone Settings” tab “Display Rotation” time the phone is switched on. Your PIN code is registered on the 1.
- Page 96 Handset Lock History Lock The Handset Lock prevents unauthorised use of the phone or The History Lock function prevents unauthorised access to Call Log certain features on the phone when the power is turned on. and sent/received mail records. By setting this option on, Call Log and sent/received mail records cannot be viewed until the correct Select “On”...
- Page 97 Master Reset (M 9-12) Note → → → • This service may not be available on all mobile phone networks. “Settings” “Phone Settings” tab “Master Reset” Contact your service provider for more information. “Reset Settings” 1. Enter your handset code. To Access the Voicemail Centre For details on the handset code, see “Change Handset Code”...
- Page 98 To Activate the Diverts Service To Deactivate the Diverts Service Select the appropriate option. Select the appropriate option. → → → → “Settings” “Call/Video Call” tab “Voicemail & “Settings” “Call/Video Call” tab “Voicemail & → → Diverts” “Diverts” Diverts” “Deactivate” 1.
- Page 99 3. Select one of the following options: Restrict Calls (M 9-d-4) To activate this option you will need the specified password, which “All Services”: Restricts all services. is available from your service provider. “Voice Calls”: Restricts all voice calls. “Fax”: Restricts all fax calls.
- Page 100 To Add a New Name Rejecting a Call when the Caller’s Number is Withheld → → → → → → “Settings” “Call/Video Call” tab “Restrict Calls” “Settings” “Call/Video Call” tab “Restrict Calls” “FDN” “Withheld Call” 1. Enter your PIN2 code. 1.
- Page 101 To Set the Answer Time Network Settings (M 9-d-d-1) → → “Settings” “Call/Video Call” tab “Auto Answer” To Select a Service Automatically 1. Enter your handset code. Each time the power is turned on, your phone selects a service 2. Select “Answer Time”. automatically.
- Page 102 To Add a New Network Internet Settings (M 9-d-d-3) → → “Settings” “Network Settings” tab “Network Note → → Settings” “Select Network” “Add New Network” • In normal operations, you do not need to change the settings. If there are no entries, press B and go to step 2. •...
- Page 103 Java™ Settings Proxy Settings (M 9-d-d-3-2) (M 9-d-d-3-4) → → → → “Settings” “Network Settings” tab “Internet “Settings” “Network Settings” tab “Internet → → → → Settings” “Java™ Settings” “Create New” Settings” “Proxy Settings” “Create New” “Profile Name”: Profile name for Java™ application “Proxy Name”: Proxy name (unique name) (unique name)
- Page 104 Re-provisioning Settings (M 9-d-d-3-6) → → “Settings” “Network Settings” tab “Internet → → Settings” “Re-provisioning Settings” “Execute Pending” Clearing DNS Cache (M 9-d-d-3-7) → → “Settings” “Network Settings” tab “Internet → Settings” “Clear DNS Cache” To Activate the Browser/Java™/Streaming Profile →...
-
Page 105: Call Log
Call Log (M 11) Resetting Call Timers (M 11-5-3) → → “Call Log” “Call Timers” “Clear Timers” The phone will record the last 30 missed calls, received calls and 1. Enter your handset code. dialled numbers. For details on the handset code, see “Change Handset Code” Viewing Call Log on page 95. - Page 106 Checking the Residual Credit (M 11-6-3) → → “Call Log” “Call Costs” “Residual Credit” Resetting All Call Costs (M 11-6-4) → → “Call Log” “Call Costs” “Clear Costs” 1. Enter your PIN2 code. Data Counter (M 11-7) → “Call Log” “Data Counter”...
-
Page 107: Connectivity
Connectivity (M 12) • In order to pair two devices with Bluetooth wireless technology, the users should agree on the same passcode for both devices. • The passcode is used only once, so there is no need to Bluetooth (M 12-1) remember it. - Page 108 To Rename or Delete the Paired Devices Bluetooth Wireless Settings (M 12-1-5) → → “Connectivity” “Bluetooth” “Paired Devices” To Rename Your Phone 1. Press c or d to switch between all paired devices and → → → “Connectivity” “Bluetooth” “Bluetooth Settings” handsfree devices.
-
Page 109: Infrared
To Set Java™ Application Request Turning On or Off → → → → → “Connectivity” “Bluetooth” “Bluetooth Settings” “Connectivity” “Infrared” “Switch On/Off” → “Java™ Application Request” “Switch On/Off” 1. Select “On” or “Off”. 1. Select “On” or “Off”. The infrared setting is activated, and “ ” is displayed. To View the Last Received Java™... -
Page 110: Card Settings
Card Settings (M 12-5) Restoring a Backup File → → → “Connectivity” “Card Settings” “Backup/Restore” Formatting Memory Card (M 12-5-1) “Restore” → → “Connectivity” “Card Settings” “Format Card” 1. Enter your handset code. 1. Enter your handset code. For details on the handset code, see “Change Handset Code” For details on the handset code, see “Change Handset Code”... -
Page 111: Connecting Sh9010C To Your Pc
Connecting SH9010C to Your PC GSM/GPRS Modem You can use SH9010C as a GSM/GPRS modem to access the You can use the following functions by connecting the SH9010C to Bluetooth Internet from your PC. Connect your phone to your PC via... -
Page 112: Handset Manager
• If you have not installed the USB driver, follow steps 2 and 3 • It is not recommended that you make or answer calls when you on page 110. are using SH9010C as a GSM/GPRS modem. The operation may be interrupted. Connecting SH9010C to Your PC 111... -
Page 113: Music Manager
6. Launch Handset Manager from the relevant folder. interface or USB data cable. 7. Follow the on-screen instructions of Handset Manager. • If you have already installed Sharp Handset Manager, you need to uninstall the previous one. Via Bluetooth • If you have trouble with installation, uninstall Handset Manager, 1. - Page 114 Browses all the media files sorted in Genre/ Media files in Handset can be easily explored in 2 main Artist/Album. columns. Input Window: Quickly finds the media files in Library or the playlist with keyword entry. Connecting SH9010C to Your PC 113...
-
Page 115: Sync Manager
PC (only available in MP3 format). Sync Manager You can synchronise the following data with the data of Microsoft Outlook or Outlook Express on your PC. • Phonebook entries. • Schedule entries. 114 Connecting SH9010C to Your PC... -
Page 116: Safety Precautions And Conditions Of Use
Safety Precautions and Conditions of • Observe the rules concerning the use of mobile phones at gasoline stations, chemical plants and at all sites where a risk of explosion exists. Your phone conforms to international regulations insofar as it is Caring for your phone used under normal conditions and in accordance with the following •... -
Page 117: Mobile Light Led Properties
CAUTION Battery • Use your phone only with batteries, chargers and accessories Use of controls, adjustments or performance of EN60825-1:1994 A1:2002 & A2:2001 recommended by the manufacturer. The manufacturer disclaims procedure other than those specified herein may CLASS 1 any liability for damage caused by the use of other chargers, LED Product result in hazardous radiation exposure. -
Page 118: Environment
• Use only the aerial supplied or one approved by Sharp for your • If the phone’s battery has been removed for some time, or the mobile phone. -
Page 119: Precautions Concerning Vehicle Use
(SAR). The SAR limit for the general public is currently 2 watts per use of a mobile phone in vehicles. Pay full attention to driving. kilogram averaged over 10 grams of body tissue. Your Sharp mobile Pull off to the side of the road, park the car, and switch off the phone SAR value is watts per kilogram. - Page 120 Exposure to Radio Waves Before a phone model is available for sale to the public, it must be tested and certified to the FCC that it does not exceed the limit THIS MODEL PHONE MEETS THE GOVERNMENT’S established by the government-adopted requirement for safe REQUIREMENTS FOR EXPOSURE TO RADIO WAVES.
- Page 121 Grant section of http://www.fcc.gov/oet/fccid after searching on FCC ID APYHRO000 Additional information on Specific Absorption Rates (SAR) can be found on the Cellular Telecommunications & Internet Association (CTIA) web-site at http://www.phonefacts.net. * In the United States and Canada, the SAR limit for mobile phones used by the public is 1.6 watts/kg (W/kg) averaged over one gram of tissue.
- Page 122 Safety Precautions and Conditions of Use 121...
-
Page 123: Out Of Warranty List
(iv) Defects caused by the fact that the Product was used with or connected to a product or an accessory not manufactured or supplied by Sharp or was used other than for its intended use. (v) Defects caused by a defective function of the cellular network. -
Page 124: Index
Index International Calls 23 Scanner 49 Conditions of Use 115 Make Another Call 25 Scene 49 Connectivity 106 Alarms 76 Minute Minder 99 Settings 45 Countdown Timer 81 Area Info 56 Muting the Microphone 26 Shortcut Keys 47 Cycloid Position 17 My Phone Number 97 Switching Modes 47 Battery 13, 116... - Page 125 Adding a New Playlist 43 Phonebook Lock 95 Downloading Music 44 Picture Gallery 63 Java™ 68 T9 Text Input Playing Back Music 44 PIN/PIN2 Code 94 Java™ Settings 69 Using PinYin mode 30 Sorting 44 Power On and Off 17 Using Stroke mode 30 Using T9 English Mode 28 Main Menu 35...
Need help?
Do you have a question about the SH9010C and is the answer not in the manual?
Questions and answers