
Related Manuals for Sharp Aquos LC-30HV4E


Summary of Contents for Sharp Aquos LC-30HV4E
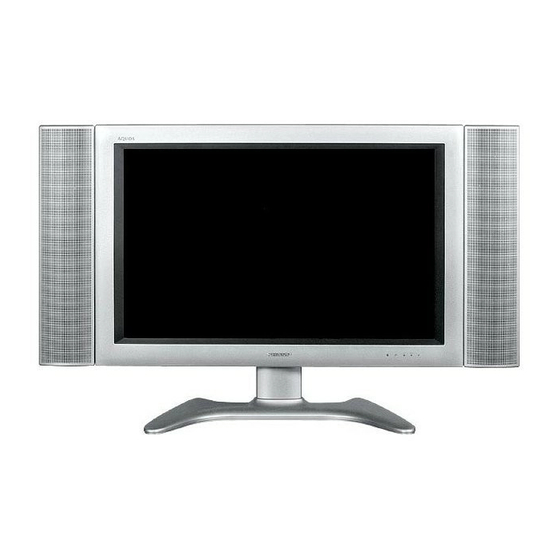
- Page 1 LC - 30HV4E LCD COLOUR TELEVISION LCD-FARBFERNSEHGERÄT TÉLÉVISION COULEUR À ÉCRAN À CRISTAUX LIQUIDES (LCD) OPERATION MANUAL BEDIENUNGSANLEITUNG MODE D’EMPLOI...
- Page 2 This equipment complies with the requirements of Directive 89/336/EEC and 73/23/EEC as amended by 93/68/ EEC. Dieses Gerät entspricht den Anforderungen der EG-Richtlinien 89/336/EWG und 73/23/EWG mit Änderung 93/ 68/EWG. Ce matériel répond aux exigences contenues dans les directives 89/336/CEE et 73/23/CEE modifiées par la directive 93/68/CEE.
-
Page 3: Table Of Contents
OPERATION MANUAL Contents Contents …………………………………………………… 1 Power control for AV source …………………… 36 Power control for PC source …………………… 38 Dear SHARP customer …………………………………… 2 Using external equipment ……………………………… 39 Important Safety Precautions ………………………… 2 Supplied accessories …………………………………… 4 Watching a decoder image ………………………… 40 Preparation …………………………………………………... -
Page 4: Dear Sharp Customer
Dear SHARP customer Thank you for your purchase of the SHARP LCD colour TV product. To ensure safety and many years of trouble- free operation of your product, please read the Important Safety Precautions carefully before using this product. Important Safety Precautions Electricity is used to perform many useful functions, but it can also cause personal injuries and property damage if improperly handled. - Page 5 Important Safety Precautions • Cleaning—Unplug the AC cord from the AC outlet before cleaning the product. Use a damp cloth to clean the product. Do not use liquid cleaners or aerosol cleaners. • Water and moisture—Do not use the product near water, such as bathtub, washbasin, kitchen sink, laundry tub, swimming pool and in a wet basement.
-
Page 6: Supplied Accessories
Page 7 Stand unit (for AVC System) (g1) System cable (g1) AC cord (g2) Product shape varies in some countries. Page 6 Page 6 Operation manual Stand (g1) LC-30HV4E Stand cushion (g4) Stand spacer (g4) Stand screw (g2) Page 8... -
Page 7: Preparation
Preparation Where to place the System “System” means the Display and AVC System. First select the location where to place the System. Selecting the location of the System • Select a place with no direct sunlight and good ventilation. • The Display and the AVC System are connected by the system cable. (See page 6 for details.) System cable AVC System... -
Page 8: Setting The System
Preparation Setting the System After putting the Display and the AVC System in place, connect the system cables and AC cords. Use the cable clamp for bundling the cables. Removing the terminal cover Display (rear view) Press down the two upper hooks to remove the cover toward you. - Page 9 Preparation Attaching the clamp to the leg of the Display Bundling the cables with the clamp Display (rear view) Closing the terminal cover Cables come out from the small opening.
-
Page 10: Setting The Display On The Wall
• Installing the LCD Colour TV requires special skill that should only be performed by qualified service personnel. Customers should not attempt to do the work themselves. SHARP bears no responsibility for improper mounting or mounting that results in accident or injury. -
Page 11: Inserting The Batteries
Preparation Inserting the batteries Before using the System for the first time, insert two LR6 (“AA” size) Alkaline batteries (supplied). When the batteries become depleted and the remote control fails to operate, replace the batteries with new LR6 (“AA” size) Alkaline batteries. Open the battery cover. -
Page 12: Controls & Indicators
Part names Display VOLUME buttons INPUT MAIN POWER ( il/k ) button button CHANNEL buttons STANDBY/ON button (CHs/r) Remote control sensor Remote control sensor indicator OPC sensor OPC indicator* STANDBY/ON indicator *OPC: Optical Picture Control (See Pages 36 and 38.) -
Page 13: Avc System
Part names AVC System Front view Headphone PC INPUT terminal (AUDIO) INPUT 4 terminal (VIDEO) (When connecting headphones, the sound from the speakers is muted.) PC INPUT terminal STANDBY/ON indicator INPUT 4 terminals (AUDIO) (ANALOG RGB) INPUT 4 terminal (S-VIDEO) POWER button CLEAR* (How to open the door) -
Page 14: Remote Control Unit
Part names B (STANDBY/ON) Remote control unit To switch the power on and off. (See page 14.) du (FREEZE/HOLD for TELETEXT) TV/External input mode: Change the still image mode. TELETEXT mode: Freeze a multi-page on screen while other pages are automatically updated. Press d again to return to the normal image. -
Page 15: Watching Tv
Watching TV Simple operations for watching a TV programme Basic connection Connecting to an antenna To enjoy a clearer picture, use an outdoor antenna. The following is a brief explanation of the types of connections that are used for coaxial cable. Standard DIN45325 plug (IEC169-2) 75-ohm coaxial cable (round cable) (commercially available) -
Page 16: Turning On The Power
Watching TV Turning on the power Display Press MAIN POWER on the Display. • The STANDBY/ON indicator on the Display flashes red. STANDBY/ON button Press POWER on the AVC System. MAIN POWER • The System turns the power on. • The STANDBY/ON indicator on the Display lights up green and the one on the AVC System lights up green. -
Page 17: Initial Auto Installation
Watching TV Initial auto installation Setting the on-screen display language When the System powers on for the first time after 1 Press a/b/c/d to select the desired purchase, the initial auto installation is invoked. You language listed on the screen. can automatically set language, country and channels 2 Press ENTER to enter the setting. - Page 18 Watching TV Automatic channel searching Automatic channel sorting Channel auto search finds all channels viewable in When channel auto labelling finishes, the System starts your area. sorting the labelled channels. TV MENU TV MENU Setup Setup Auto Installation Programme Setup “Auto” Auto Installation Programme Setup “Auto”...
-
Page 19: Simple Button Operations For Changing Channels
Watching TV Channel display Simple button operations for Channel display changes approximately after 3 changing channels seconds as shown below. You can change channels in several ways. Using CHa a a a a /b b b b b on the remote control unit SAT.1 •... -
Page 20: Simple Button Operation For Changing Volume/Sound
Watching TV Using e on the remote control unit Simple button operation for changing e mutes the current sound output. volume/sound Changing the volume You can change the volume on the Display or on the remote control unit. il/k Press e. •... - Page 21 Watching TV Using h on the remote control unit h produces SRS and FOCUS effect from the speakers. Each time you press h, the mode changes among SRS, FOCUS, FOCUSeSRS and OFF. SRS sound options • SRS (Sound Retrieval System): Creates more a natural sound retrieving the spatial information from any stereo recording and restoring the original three- dimensional sound field.
- Page 22 Watching TV Using SOUND on the remote control unit In the TV mode of IGR TV broadcasts When receiving a stereo signal Each time you press SOUND, the mode switches between STEREO and MONO. Stereo mode BBC2 STEREO In the NICAM TV broadcasts BBC2 When receiving a stereo signal Each time you press SOUND, the mode switches...
-
Page 23: Basic Adjustment Settings
Basic adjustment settings AV input mode menu items PC input mode menu items List of AV menu items to help you with List of PC menu items to help you with operations operations Picture Picture Contrast ......... Page 30 Contrast ......... Page 30 Brightness ........ -
Page 24: Auto Installation
Basic adjustment settings Auto installation Press a/b to select “Auto Installation”, and then press ENTER. You can run auto installation again, even after setting up the preset channels. TV MENU Setup Option Auto Installation Programme Setup Child Lock Position [Off] 4:3 Mode [Normal] Full Mode... -
Page 25: Programme Setup
Basic adjustment settings Programme setup Press c/d to select “Yes”, and then press ENTER. You can run the auto installation procedure again at any time, by accessing the Setup menu, then • Auto search starts with the following order. Programme Setup. Channels can be tuned 1 Programme auto search 2 Auto labelling automatically or manually. -
Page 26: Manual Setting For Each Channel
Basic adjustment settings Programme Setup “Manual” menu Manual setting for each channel TV MENU You can set some channel items manually. They are Setup Fine (TV frequency), Colour sys., Sound sys., Label Programme Setup “Manual” (Network name), Skip, Decoder and Lock (Child Lock). 01 SAT.1 02 PR07 03 KABEL... -
Page 27: Fine Tuning
Basic adjustment settings Manual setting for each channel (continued) Fine tuning Press a/b/c/d to select the channel you want to edit, and then press ENTER. • The selected channel information displays. Press a/b to select “Fine”, and then press ENTER. Press c/d to adjust the frequency, and then press ENTER. -
Page 28: Colour System
Basic adjustment settings Manual setting for each channel (continued) Press a/b to select the optimum sound Colour system system, and then press ENTER. NOTE • If you adjust this setting, please check the colour system information. (See left column.) Labelling channels When a TV channel sends its Network Name, the auto installation detects the information and assigns a name to it. -
Page 29: Skipping Channels
Basic adjustment settings Manual setting for each channel (continued) Press a/b to select “Decoder”, and then press ENTER. Skipping channels • Terminal inputs information displays. Decoder menu TV MENU Setup Programme Setup “Manual” Fine [179.25] Colour sys. [AUTO] Sound sys. [B/G] Label [SAT.1]... -
Page 30: Sort
Basic adjustment settings Sort Move it to the desired position by pressing a/b/c/d, and then press ENTER. Channel positions can be sorted freely. Repeat the steps 6 and 7 until all desired channels are sorted. Sort menus TV MENU Setup Programme Setup “Sort”... -
Page 31: Language Setting For On-Screen Display
Basic adjustment settings PC input mode Language setting for on-screen display Press MENU and the PC MENU screen You can also select a language from setup menu. displays. Select from among 12 languages: English, German, French, Italian, Spanish, Dutch, Swedish, Portuguese, Press c/d to select “Setup”. -
Page 32: Picture Adjustments
Basic adjustment settings Picture adjustments Press MENU and the TV MENU (PC MENU) screen displays. Adjust the picture to your preference with the following picture settings. Press c/d to select “Picture”. • Picture menu displays. Press a/b to select a specific adjustment item. -
Page 33: Colour Management System)
Basic adjustment settings C.M.S. (Colour Management System) Press a/b to select a specific adjustment item. Colour tone is managed using the six-colour adjustment setting. TV MENU Picture Advanced [USER] C. M. S. Changing reds [ 0] –30 closer to [ 0] –30 magenta or yellow. -
Page 34: Colour Temperature
Basic adjustment settings Colour temperature Black Adjusts the colour temperature to give the best white Allows you to select a level for automatic adjustment image. of a black areas of the image to suit viewing conditions. Press MENU and the TV MENU screen displays. -
Page 35: Monochrome
Basic adjustment settings Monochrome Film mode For viewing a video in monochrome. Automatically detects a film-based source (originally encoded at 24 frames/second), analyses it then recreates each still film frame for high-definition picture quality. Press MENU and the TV MENU screen displays. -
Page 36: I/P Setting
Basic adjustment settings I/P setting DNR (Digital Noise Reduction) Adjusting the image and input signal can give you a Produces a clearer video image. more beautiful picture. Press MENU and the TV MENU screen displays. Press c/d to select “Picture”. •... -
Page 37: Audio Adjustment
Basic adjustment settings Audio adjustment Surround You can also produce SRS and Focus effects from the Sound adjustment “Audio” setting. You can adjust the sound quality to your preference with the following settings. Press MENU and the TV MENU (PC MENU) screen displays. -
Page 38: Power Control
Basic adjustment settings Power control Selected item Description Power Control setting allows you to reduce the display The screen darkens slightly to conserve brightness to save energy. Save1 power consumption. The screen darkens more significantly to Save2 conserve power consumption. Backlight brightness adjusts according Auto to the ambient light of the room to... -
Page 39: No Signal Off
Basic adjustment settings No signal off No operation off When set to “Enable”, the power will automatically shut When set to “Enable”, the power will automatically shut down if no signal inputs for 15 minutes. down if there is no operation for 3 hours. Press MENU and the TV MENU screen Press MENU and the TV MENU screen displays. -
Page 40: Power Control For Pc Source
Basic adjustment settings Power control for PC source Power control allows you to reduce display brightness and save energy. Power save When set to “Save1”, “Save2”, or “Auto”, power consumption is reduced by decreasing backlight brightness. Press MENU and the PC MENU screen Power management displays. -
Page 41: Using External Equipment
Using external equipment You can connect many types of external equipment to your System, like a decoder, VCR, DVD player, PC, game console and camcorder. To view external source images, select the input source from b on the remote control unit or INPUT on the Display. Display DVD player (rear view) -
Page 42: Watching A Decoder Image
Using external equipment Watching a decoder image Connecting a decoder You can use the INPUT 1 terminal when connecting a decoder and other audiovisual equipment. AVC System (rear view) SCART cable (commercially available) Decoder Displaying a programme To watch a decoder image, select “INPUT1” from the “INPUT SOURCE”... -
Page 43: Watching A Vcr Image
Using external equipment Watching a VCR image Connecting a VCR You can use the INPUT 2 terminal when connecting a VCR and other audiovisual equipment. If your VCR supports TV-VCR advanced “AV Link” systems (see page 42), you can connect the VCR to the INPUT 2 terminal on the AVC System using the fully-wired SCART cable. -
Page 44: Using Av Link Function
Using external equipment Using AV Link function This System incorporates four typical AV Link functions for smooth connections between AVC System and other audiovisual equipment. NOTE • Only works when the audiovisual equipment is connected to the INPUT 2 terminal on the AVC System with AV Link via a fully wired SCART. -
Page 45: Watching A Dvd Image
Using external equipment Watching a DVD image Connecting a DVD player You can use the INPUT 3 terminal when connecting to a DVD player and other audiovisual equipment. AVC System (rear view) SCART cable (commercially available) When using component cable, select “COMPONENT”... -
Page 46: Enjoying A Game Console And Viewing Camcorder Images
Using external equipment Enjoying a game console and viewing camcorder images Connecting a game console or camcorder A game console, camcorder and some other audiovisual equipment are conveniently connected using the INPUT 4 terminals. NOTE • The S-video terminal has priority over the video terminals. AVC System (front view) Composite video cable (commercially available) -
Page 47: Viewing An Image From A Pc
Using external equipment Viewing an image from a PC Connecting a PC Use the PC terminals to connect a PC. NOTE • The PC input terminals are DDC1/2B-compatible. • Refer to page 67 for a list of PC signals compatible with the System. AVC System (front view) RGB cable (commercially available) -
Page 48: Removing The Speakers
Using external equipment Removing the speakers This unit has detachable type speakers. You can detach the system speakers when using external amplifier/speakers. Before detaching (or attaching) speakers, unplug the AC cord from the AC outlet. Before attaching/detaching speakers • Before performing work make sure to turn off the System. •... -
Page 49: Useful Adjustment Settings
Useful adjustment settings Image position (for TV/AV input mode) NOTE • For resetting all adjustment items to the factory preset For adjusting a picture’s horizontal and vertical values, press a/b to select “Reset”, and then press position. ENTER. • Adjustments are stored separately according to input source. -
Page 50: Moving The Picture On The Screen
Useful adjustment settings Moving the picture on the screen You can move the picture around on the screen. Press a/b/c/d to move an image on the screen to the desired position. Press ENTER to return to the initial image position. NOTE •... -
Page 51: Auto Sync. Adjustment (Pc Input Mode Only)
Useful adjustment settings Auto Sync. adjustment (PC input Fine Sync. adjustment (PC input mode only) mode only) For automatically adjusting the PC image. Ordinarily you can easily adjust the picture as necessary to change image position using Auto Sync. In some cases, however, manual adjustment is needed to optimise the image. -
Page 52: Input Signal Source
Useful adjustment settings Input signal source Press a/b/c/d to select a signal type you want to set, and then press ENTER. Input selection • If the selected signal type is incorrect, an image Can use for selecting the input source. does not display or no colour image displays. -
Page 53: Colour System Setting (For Tv/Av Input Mode)
Useful adjustment settings Colour system setting (for TV/AV AV mode selection input mode) AV mode gives you five viewing options to choose from to best match the system environment, which can vary u can change the colour system to one that is due to factors like room-brightness, type of programme compatible with the image on the screen. -
Page 54: Wide Mode (For Tv/Av Input Mode)
Useful adjustment settings WIDE mode (for TV/AV input mode) WIDE MODE Normal Manual Selection Full 14:9 Press f. Zoom 14:9 • The WIDE MODE menu displays. Panorama • The menu lists the wide mode options selectable for the type of video signal currently received. Full Cinema 16:9 Press f or a/b while the WIDE MODE... -
Page 55: Wide Mode (For Pc Input Mode)
Useful adjustment settings WIDE mode (for PC input mode) Input signal (640m480) You can select the screen size. WIDE MODE NOTE • Connect the PC before making adjustments. (See page Normal 45.) Full • Selectable screen size may vary with input signal type. Dot by Dot Press f. -
Page 56: Input Signal (Pc Input Mode Only)
Useful adjustment settings Input signal (PC input mode only) Press MENU and the PC MENU screen displays. • Some input signals may have to be registered manually to display properly. • The pairs of input signals (resolutions) in the list below Press c/d to select “Setup”. -
Page 57: Wide Screen Signalling (Wss) (For Tv/Av Input Mode)
Useful adjustment settings Wide screen signalling (WSS) (for Picture aspect ratio (for TV/AV input TV/AV input mode) mode) WSS allows a television to switch automatically among The WSS signal has 4:3 auto-switching that allows you the different screen formats. to select between Normal and Panorama. Press MENU and the TV MENU screen displays. -
Page 58: Selecting Full Mode Display (For Tv/Av Input Mode)
Useful adjustment settings Full Mode screen Selecting Full Mode display (for TV/ Full mode “Mode1” Full mode “Mode2” AV input mode) Select the display type in Full Mode. Selected item Description Projects 16:9 squeeze image evenly over Mode1 entire screen. Displays a 16:9 squeeze image without Mode2 distortion. -
Page 59: Rotate
Useful adjustment settings Rotate You can set the orientation of the picture. AV input mode Press MENU and the TV MENU screen displays. Press c/d to select “Setup”. • If password is already set, you are asked to enter it. Follow the same steps as explained in “Auto installation”. -
Page 60: Audio Out
Useful adjustment settings Audio out Selected item Description Allows you to select what controls the audio output. • Sound via speakers is adjusted with il/k on the remote control unit or the Display. Fixed • Sound via the AV OUTPUT terminal is not adjustable and constantly outputs. -
Page 61: Cool Climate
Useful adjustment settings Cool climate Improves LCD response when viewing fast-moving images. The effect is greater at low room temperatures (at or below 15˚C/59°F). AV input mode PC input mode Press MENU and the TV MENU screen Press MENU and the PC MENU screen displays. -
Page 62: Password Setting For Child Lock (For Tv/Av Input Mode)
Useful adjustment settings Password setting for child lock (for Enter the same 4-digit number as in step 5 TV/AV input mode) to confirm. • “The new password is registered.” displays. Allows you to use a password to protect certain settings from being accidentally changed. -
Page 63: Useful Features
Useful features Dual screen functions Press b to select another input source on the active screen. Allows you to display two pictures on the screen at • A selected image displays. one time. Dual screen Press c to exit dual screen. You can display two same-sized pictures except when inputting from a PC INPUT terminal. - Page 64 Useful features Picture and still image You can display two same-sized pictures – one moving and one still – when inputting from an AV source. Press d. • A moving image displays on the left screen and a still image displays on the right screen. The still image is one frame captured from a moving image at the moment you press d.
-
Page 65: Teletext Function
Useful features Teletext function What is Teletext? Teletext broadcasts pages of information and entertainment to specially equipped television sets. Your System receives Teletext signals broadcast by a TV network, and decodes them into graphical format for viewing. News, weather and sports information, TELETEXT stock exchange prices and programme previews are among the many services available. - Page 66 Useful features Displaying Subpages Displaying TOP Overview You can display several subpages as they are When receiving TOP Teletext, you can read a TOP text transmitted. overview. Press m to display Teletext. Press l to display the TOP Overview as shown below.
- Page 67 Useful features Time display You can display the time information included in the Teletext. Follow the steps below to display the time. Select a TV channel providing Teletext information. (The time information is automatically captured.) NOTE • The time is not captured when a selected channel has no Teletext information.
-
Page 68: Appendix
Appendix Troubleshooting Problem Possible Solution • No power. • Make sure the Display and the AVC System are connected correctly. (See page • Check if you pressed B on the remote control unit. (See page 14.) If the indicator on the Display lights up red, press B. •... -
Page 69: Pc Compatibility Chart
Appendix PC compatibility chart Resolution Frequency Remarks 640g400 85 Hz 720g400 70 Hz 85 Hz 640g480 60 Hz Macintosh 13 (67 Hz) 65 Hz 72 Hz 75 Hz 85 Hz 800g600 56 Hz 60 Hz 72 Hz 75 Hz 85 Hz 832g624 74.5 Hz Macintosh 16... -
Page 70: Rs-232C Port Specifications
Appendix RS-232C port specifications PC Control of the System • When a program is set, the display can be controlled from the PC using the RS-232C terminal. The input signal (PC/video) can be selected, the volume can be adjusted and various other adjustments and settings can be made, enabling automatic programmed playing. - Page 71 Appendix Response code format Normal response Return code (0DH) Problem response (communication error or incorrect command) Return code (0DH) Commands CONTROL CONTROL CONTROL ITEM COMMAND PARAMETER CONTROL ITEM COMMAND PARAMETER CONTENTS CONTENTS POWER SETTING POWER OFF (STANDBY) WIDE MODE TOGGLE INPUT SELECTION A INPUT SWITCHING (TOGGLE) NORMAL...
-
Page 72: Connecting Pin Assignments For Scart
Appendix Connecting pin assignments for SCART Various audio and video devices may be connected via the SCART terminals. 1 3 5 7 9 111315171921 2 4 6 8 101214161820 SCART (INPUT 1) 8. Audio-video control 15. Red input Audio right output (TV Monitor out) 9. -
Page 73: Specifications
(g2), LR6 (“AA” size) Alkaline battery (g2), Stand unit (g1), Cable clamp (g1) • As a part of policy of continuous improvement, SHARP reserves the right to make design and specification changes for product improvement without prior notice. The performance specification figures indicated are nominal values of production units. -
Page 74: Dimensional Drawings
Dimensional drawings Display Unit: mm 84.5 117.5 117.5 1002... - Page 75 Dimensional drawings AVC System Unit: mm...
-
Page 76: How To Set The Factory Presets
HOW TO SET THE FACTORY PRESETS Press and hold down CLEAR on the AVC System while it is in standby mode. Then press STANDBY/ON button on the Display or B on the remote control unit to turn the System on. All setting items (except TV channel) return to the factory presetting. -
Page 77: Sharp Corporation
SHARP CORPORATION Printed in Japan Gedruckt in Japan Printed on post-consumer recycled paper. Imprimé au Japon Gedruckt auf Nachverbraucher-Recyclingpapier. TINS-A482WJZZ Imprimé sur du papier recyclé. 03P01-JKG...
Need help?
Do you have a question about the Aquos LC-30HV4E and is the answer not in the manual?
Questions and answers