Table of Contents
Advertisement
Quick Links
Operating Instructions
GB
English,1
SH09PGWAX
Contents
Installation, 2-7
Start-up and use, 9-10
Troubleshooting, 13
HOB
GB
Advertisement
Table of Contents

Subscribe to Our Youtube Channel
Related Manuals for SCHOLTES SH09PGWAX


Summary of Contents for SCHOLTES SH09PGWAX
-
Page 1: Table Of Contents
Description of the appliance, 8 Overall view Start-up and use, 9-10 Practical advice on using the burners Precautions and tips, 11 General safety SH09PGWAX Disposal Maintenance and care, 12 Switching the appliance off Cleaning the appliance Gas tap maintenance Troubleshooting, 13... -
Page 2: Installation
Installation ! Before operating your new appliance please read this The system can also provide the Adjacent Room to be instruction booklet carefully. It contains important Room Vented air needed for combustion information for safe use, installation and care of the indirectly, i.e. - Page 3 FOR MOD: FOR MOD: FOR MOD: FOR MOD: FOR MOD: SH09PGWAX Fig.2 1- Built-in hobs to be slotted in (Class 3 - see figure 2, detail H1). In this case it is necessary to make a hole in the worktop whose measurements match those of the hob.
- Page 4 3- Sit-on hobs (Class 1) with edges higher than 58 mm (see figure 2, detail H3). In this case, the lower X mm casing of the hob does not protrude further than the edge of the appliance. Even when the hob is resting on the worktop, it will suffice to leave space for the gas supply tube and electricity supply cable.
-
Page 5: Electrical Connection
Gas connection Electrical connection This appliance is designated and set to work with Hobs equipped with a three-pole power supply cable are the gas indicated on the label situated on the type designed to operate with alternating current at the voltage for which the appliance has been set, proceed with and frequency indicated on the data plate (this is located replacing the corresponding nozzles (provided),... -
Page 6: Data Plate
5. Once the adjustment has been made, replace the seals Adapting to different types of gas on the by-passes using sealing wax or a similar To adapt the hob to a different type of gas other than substance. default type (indicated on the rating plate at the base of the hob or on the packaging), the burner nozzles should ! If the appliance is connected to liquid gas, the regulation be replaced as follows:... -
Page 7: Burner And Nozzle Specifications
Burner and nozzle specifications Table 1 Liquid Gas Natural Gas Burner Diameter Thermal power By-Pass Nozzle Flow* Nozzle Flow* (mm) kW (p.c.s.*) 1/100 1/100 1/100 Nomin. Ridot. (mm) (mm) (mm) B. Semi fast 1,65 0,40 A. Auxiliary 1,00 0,40 C. Oval burner —... -
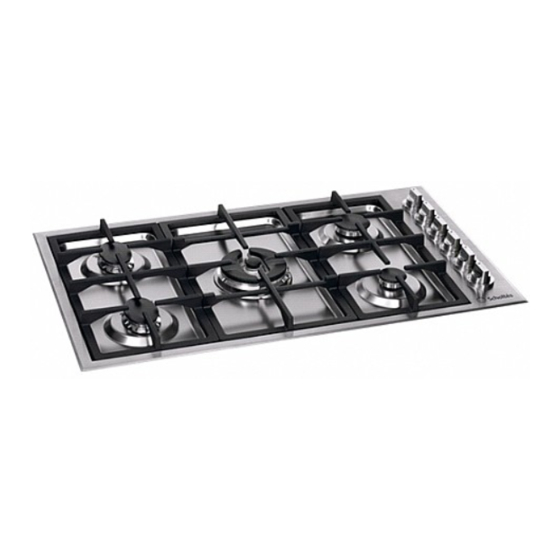
Page 8: Description Of The Appliance
Description of the appliance Overall view Gas burners Pan supports Control knobs Flame supervision Ignition device • Gas burners differ in size and power as described in the previous page. Use the diameter of the cookware to choose the most appropriate burner to cook with. -
Page 9: Start-Up And Use
Start-up and use ! The position of the corresponding gas burner is To turn on one of the burners press the relevant shown on every knob. knob all the way down and turn it anti-clockwise to the full setting. To adjust the power of the burner Gas burners and turn it off, follow the instructions previously described. - Page 10 To turn the two burners 90°, proceed as follows: Practical advice on using the Oval burners • Make sure that the burners are cool; • Lift the burner completely out of its housing; The two Oval burners have been designed to •...
-
Page 11: Precautions And Tips
Precautions and tips ! This appliance has been designed and • Do not use unstable or deformed pans. manufactured in compliance with international safety • Do not let children play with the appliance. standards. The following warnings are provided for •... -
Page 12: Maintenance And Care
Maintenance and care Switching the appliance off Disconnect your appliance from the electricity supply before carrying out any work on it. Cleaning the appliance ! Do not use abrasive or corrosive detergents such as stain removers, anti-rust products, powder detergents or sponges with abrasive surfaces: these may scratch the surface beyond repair. -
Page 13: Troubleshooting
Troubleshooting It may happen that the appliance does not function properly or at all. Before calling the service centre for assistance, check if anything can be done. First, check to see that there are no interruptions in the gas and electrical supplies, and, in particular, that the gas valves for the mains are open. -
Page 14: After Sales Support
Scholtès UK | Morley Way, Peterborough, PE2 9JB Scholtès UK Scholtès UK Scholtès UK Scholtès UK t. t. t. t. t. 0800 158 55 00 e. e. e. e. e. info@scholtes.co.uk w. w. w. scholtes.co.uk w. w. Commitment to after sales support Thank you for investing in Scholtès... - Page 16 03/2010 - 195082269.01 XEROX FABRIANO...
Need help?
Do you have a question about the SH09PGWAX and is the answer not in the manual?
Questions and answers