Table of Contents
Advertisement
Advertisement
Table of Contents

Subscribe to Our Youtube Channel
Summary of Contents for TECHNIKA PRO SH-1060
- Page 1 SH-1060 Digital Camera User Guide...
- Page 2 Now you can organise and present your photos the professional way with our photo books. You can also create your own artwork with our gallery canvases and quality frames, or just produce beautiful, personalised gifts from our wide selection of items all available from www.tesco.com/photo...
-
Page 3: Read First
Read First Warning & Cautions Before using the camera, please make sure that you read and understand all the following safety precautions. Always ensure that the camera is operated correctly. The safety precautions will instruct you in the safe and correct operation of the camera and its accessories, preventing injury or damage to yourself, other persons and equipment. - Page 4 Read First • Turn off immediately when malfunction occurs If you notice unusual smell or smoke coming from the equipment, please unplug the AC adapter and remove the battery immediately. Proceed swiftly but with caution to avoid being burnt. Take the equipment to an authorized service center for inspection.
- Page 5 CAUTIONS Observe and exercise the following cautions to avoid damage and keep your camera in an optimum working status. • Keep Dry This camera is not waterproof, and may malfunction if immersed in water, or any liquids enter the interior of the camera. •...
- Page 6 Read First • Handle the lens and all parts with care Do not touch the lens or lens barrel. Be careful in handling the memory card and battery. These parts are not designed to withstand force greater than regular use. •...
-
Page 7: Table Of Contents
Table of Contents Read First....................3 Table of Contents ................... 7 Quick Start .................... 10 Chapter 1: Getting Started ..............11 Camera Parts ..................11 Set Up ....................12 Attaching the Wrist Strap ............. 12 Charging the Battery ..............12 Inserting the Battery and the Memory Card ......... - Page 8 Contents Setting ISO .................. 30 Setting Focus ................30 Setting Anti-shake ................ 31 Setting Exposure Area ..............32 Setting Color Style ............... 33 Setting Sharpness ............... 34 Setting Contrast ................35 Setting Saturation ................ 36 Setting Drive Mode ..............37 Setting Photo Frame ..............
- Page 9 Chapter 5: Uploading, Printing & Displaying Images......57 Uploading to a computer ..............57 Printing Images ................... 58 Displaying Images on a TV ..............59 Chapter 6: Adjusting the Camera Settings ........60 Using the Setup Menu ..............60 Setting Language................. 60 Setting Date/Time ................
-
Page 10: Quick Start
Quick Start Insert a battery. See page 13. Insert a memory card. See page 13. Turn on the camera. Press the button to capture mode and frame your subjects with the LCD monitor. Slightly press the shutter release button half way down and hold it to set the focus and exposure. -
Page 11: Chapter 1: Getting Started
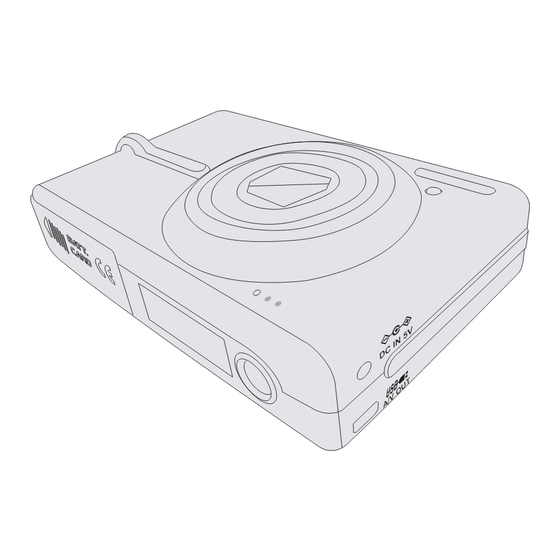
Chapter 1: Getting Started Camera Parts Strap Mount Lens Flash Microphone DC Terminal USB Connecter/ A/V Out (Audio Video Output) Terminal Tripod Mount Memory Card Slot/Battery Cover Speaker LCD Monitor Power Button Shutter Release Button Zoom Button Capture/Playback Button Menu Button Power Lamp Four-way +OK Button Macro Button... -
Page 12: Set Up
Chapter1: Getting Started Set Up Attaching the Wrist Strap Insert the small loop of the wrist strap into the strap eyelet. Insert the long loop of the wrist strap into the small loop of the strap and then tighten it. Charging the Battery The supplied rechargeable Li-ion battery pack should be charged before use. -
Page 13: Inserting The Battery And The Memory Card
Set Up Inserting the Battery and Memory Card Open the battery/memory card cover. Insert the battery. Please check whether the battery is inserted with the correct polarity (+/-). Note: Risk of explosion if battery is replaced by an incorrect type. Dispose of used batteries according to the instructions. -
Page 14: Turning On For The First Time
Chapter1: Getting Started Turning On for the First Time The language selection screen appears. Select the language you want from the list. Press button to select the language you need. Press the OK button to confi rm all settings. Note: To change the language after you have performed confi... -
Page 15: Chapter 2: Taking Images & Recording Video Clips
Chapter 2: Taking Images and Recording Video Clips Using the LCD Monitor When you turn on the camera, the LCD monitor turns on automatically. With the LCD monitor you can frame the images or Video clips you want to capture and record. The following illustration shows the LCD monitor layout and descriptions of all icons. -
Page 16: Capture Mode
Chapter2: Taking Images and Recording Video Clips Capture Mode Auto 1000 Flash mode White Balance Auto flash Auto Fill in flash Daylight Flash off Fluorescent Flash with Red-eye reduction Tungsten Slow Sync. (Only in night scene mode) Cloudy Remaining number of Pictures Quality SD Card Normal... -
Page 17: Video Mode
Using the LCD Monitor Video Mode White Balance Auto Daylight Fluorescent Tungsten Cloudy Remaining time of recording Quality SD Card Normal / Internal memory Fine Video Mode Best Battery Size Full capacity 640x480 Half capacity 320x240 Low capacity Exhausted Self-timer / DC IN 10sec. -
Page 18: Changing Mode
Chapter2: Taking Images and Recording Video Clips Changing Mode You can change the contents on the LCD monitor by pressing the button to cycle through the available options. • Capture Mode On (Default) OSD On + Histogram OSD Off * OSD stands for ‘on screen display’. * Histogram: The histogram is a graph to judge the tonal range of the image. -
Page 19: Using Zoom
Using Zoom Using Zoom This camera features 3x optical zoom and 8x digital zoom. Optical Zoom Press the W/T button to zoom in and out of an image. The zoom indicator appears on the LCD monitor. Optical Zoom Digital Zoom To use the digital zoom, you must activate it through the settings menu. -
Page 20: Taking Pictures
Chapter2: Taking Images and Recording Video Clips Taking Pictures Using Auto Focus The Auto Focus function makes taking still photos a straightforward process. By pressing the shutter release button down halfway, the camera will focus on your subject automatically and calculate all photo settings, such as exposure and saturation. -
Page 21: Using Focus Lock
Taking Pictures Using Focus Lock When taking a photo where your subject is off-center, the camera will focus on the central area, resulting in your subject being out of focus. Focus Lock allows you to focus on an off-center subject. Frame your subject in the center of the frame with the LCD monitor. -
Page 22: Macro Mode ( )
Chapter2: Taking Images and Recording Video Clips Macro Mode ( ) Press the button to select “Macro” or “Infi nity” function. To shoot a close-up image, use “Macro” function to get the detail and sharpness of the subject by fi xed focus. To shoot infi... -
Page 23: Setting Ev (Exposure Value)
Taking Pictures Setting EV (Exposure Value) In some diffi cult lighting condition, the automatic exposure may be misled into giving the wrong readings. Exposure compensation allows you to adjust the exposure value and correctly expose your images. In Capture mode, press button (EV value will be selected and light red) . -
Page 24: Mode Options
Chapter2: Taking Images and Recording Video Clips Mode Options There are six scene mode options (Auto, Video, Portrait, Landscape, Night scene and Sports modes) of this camera. In Capture live view, press the SP/ button to mode option and use button to select the mode. -
Page 25: Recording Video Clips
Recording Video Clips Recording Video Clips Press the SP/ button and select Video mode. Zoom in or out on your subjects by pressing the W/T button before you start recording. Press the shutter release button halfway down and hold it to set the focus and exposure. -
Page 26: Using The Capture/Video Menu
Chapter2: Taking Images and Recording Video Clips Using the Capture/Video Menu You can adjust image and video settings through the capture menu. Press the button to select Capture mode or press SP/ button to select Video mode. Press the button to enter the capture or video menu. -
Page 27: Setting Image Size (Resolution)
Using the Capture/Video Menu Setting Image Size (Resolution) Changing the image size affects the number of images that can be stored on your memory card. You can capture more detailed images with higher resolutions. The higher the resolution, the more memory space will be required. -
Page 28: Setting Quality
Chapter2: Taking Images and Recording Video Clips Setting Quality The camera features three quality settings. Image quality determines the compression applied to your photo or video. The higher the quality, the less the compression applied, resulting in a more detailed image. These more detailed images require more memory space. -
Page 29: Setting White Balance
Using the Capture/Video Menu Setting White Balance You can select the appropriate setting depending on the lighting condition of your surroundings. White Balance will adjust color levels that are affected by these lighting conditions. In Capture/Video menu, select WHITE BALANCE”. Select “CLOUDY”, “TUNGSTEN”, “FLUORESCENT”, “DAYLIGHT”, or “AUTO”. -
Page 30: Setting Iso
Chapter2: Taking Images and Recording Video Clips Setting ISO (Sensitivity) Adjust the ISO value depending on the lighting levels of your surroundings; use a high ISO setting in dim conditions and a lower ISO setting in brighter conditions. In Capture menu, select “ISO”. Select “1000”, “800”, “400”, “200”, “100”... -
Page 31: Setting Anti-Shake
Using the Capture/Video Menu Setting Function MULTI AF The camera will see the shooting conditions and select among the nine focus frames to focus on. CENTER AF The camera uses the center focus frame to focus on. FACE TRACKING The camera will detect and focus on faces automatically. -
Page 32: Setting Exposure Area
Chapter2: Taking Images and Recording Video Clips Setting Exposure Area The camera will measure the brightness of the selected area in order to determine the exposure level. In Capture menu, select “EXPOSURE AREA”. Select “FULL” , “CENTRAL”or “SPOT”. Press OK button to confi rm the setting. Setting Function FULL... -
Page 33: Setting Color Style
Using the Capture/Video Menu Color Style Adjust the color style to change the color of the fi nal image. In Capture/Video menu, select “COLOR STYLE”. Select “B&W”, “SEPIA” or “NORMAL”. Press OK button to confi rm the setting. Setting Function B&W Takes the photo in black and white. -
Page 34: Setting Sharpness
Chapter2: Taking Images and Recording Video Clips Setting Sharpness Adjust the sharpness settings to emphasize or soften the overall appear- ance of the image. In Capture/Video menu, select “SHARPNESS”. Select “HARD”, “NORMAL” or “SOFT”. Press OK button to confi rm the setting. Setting Function HARD... -
Page 35: Setting Contrast
Using the Capture/Video Menu Setting Contrast Adjust the Contrast setting to alter the distinction between light and dark in the image; the result is a harder or softer appearance of the fi nal image. In Capture/Video menu, select “CONTRAST”. Select “HARD”, “NORMAL” or “SOFT”. Press OK button to confi... -
Page 36: Setting Saturation
Chapter2: Taking Images and Recording Video Clips Setting Saturation Adjust the Saturation setting to alter the intensity and purity of the color. The higher the saturation setting, the more vivid the image is. In Capture/Video menu, select “SATURATION”. Select “MORE”, “NORMAL” or “LESS”. Press OK button to confi... -
Page 37: Setting Drive Mode
Using the Capture/Video Menu Setting Drive Mode When you select DRIVE MODE in the capture menu, you can choose from three shooting modes: Single, Continuous and Burst modes. In Capture menu, select “DRIVE MODE”. Select “SINGLE”, “CONTINUOUS” or “BURST”. Press OK button to confi rm the setting. Note 1: The fl... -
Page 38: Setting Photo Frame
Chapter2: Taking Images and Recording Video Clips Setting Photo Frame You can add frames to your photos by using Photo Frame. In Capture menu, select “PHOTO FRAME”. Select “OFF”, “P1”, “P2”, “P3”, “P4”, “P5”, “P6”, “P7”, “P8” or “P9”. Press OK button to confi rm the setting and take your picture with the Photo Frame. -
Page 39: Chapter 3: Reviewing Images & Video Clips
Chapter 3: Reviewing Images and Video Clips Using the LCD Monitor The following illustration outlines the layout and icons on the LCD monitor in playback mode. Playback Mode • Capture Flash mode Auto flash Quality Fill in flash Normal Flash off Fine Flash with Red-eye reduction Best... - Page 40 Chapter3: Reviewing Images and Video Clips OSD On (Default) OSD On + Histogram OSD Off • Video Playback Mode Protection status Movie clip Image size Recorded File size date/time Recording time File name Displayed image number/ Total number of images Play/pause indicator OSD On (Default) OSD On + Detaied Information...
-
Page 41: Using Playback
Using Playback Using Playback Playback mode allows you to review still images and video clips stored on your camera. Press the button to select Playback mode. The last taken image or the fi rst frame of the videos appears on the LCD monitor. Press button to the previous or next fi... -
Page 42: Using The Playback Menu
Chapter3: Reviewing Images and Video Clips Using the Playback Menu Press the button to select Playback mode. Press the button to enter the Playback menu. Scroll through the menu by pressing button and press button to highlight the option you want. Press the OK button to confi... -
Page 43: Activating Digital Enlargement
Using the Playback Menu Activating Digital Enlargement You can magnify images when reviewing images in playback mode. When reviewing the image, press T button to magnify. The icons on the LCD monitor will disappear and the approximate location of the area and magnifi... -
Page 44: Using Index Display
Chapter3: Reviewing Images and Video Clips Using Index Display Index display allows you to view up to nine images at a time. When reviewing the image, press W button to show the index . Up to nine images can be viewed at the same time. -
Page 45: Deleting Images And Video Clips
Using the Playback Menu Deleting Images and Video Clips This function allows you to delete your images and video clips. In Playback menu, select “DELETE”. Select “ALL” to delete all images and video clips or select “ONE” to delete the displayed one. Press the OK button. A confi... -
Page 46: Protecting Images & Video Clips
Chapter3: Reviewing Images and Video Clips Protecting Images and Video Clips This function prevents images and video clips from being modifi ed or deleted accidentally. In Playback menu, select “PROTECT”. Select “ONE” to protect the selected one or select “ALL” to protect all images or video clips. -
Page 47: Adding Voice Memo To A Still Image
Using the Playback Menu Adding Voice Memo to a Still Image You can add a voice memo up to around 30 seconds in length for each still image. In Playback menu, select “MEMO”. To record a voice memo, select “RECORD” and then press OK button. Press button to start recording. - Page 48 Chapter3: Reviewing Images and Video Clips To delete a voice memo, select “DELETE” and then press OK button. A confi rmation dialogue will appear. Select “OK” and press OK button to delete memo.
-
Page 49: Setting Dpof
Using the Playback Menu Setting DPOF This function helps you to print out your images at a professional print service or on a DPOF (Digital Print Order Format) compatible printer directly. In Playback menu, select “DPOF”. To decide which images are to be printed and the number of copies, select “STANDARD”... - Page 50 Chapter3: Reviewing Images and Video Clips To cancel the setting of “STANDARD”, select “REMOVE” and a confi rmation dialogue will appear. Select “OK” and then press OK button to remove print settings. To print index of images, select “INDEX” and press OK button. Use button to select “ADD”...
-
Page 51: Playing A Slide Show
Using the Playback Menu Playing a Slide Show This function allows you to automatically play back still images one by one on the LCD monitor or a TV. In Playback menu, select “SLIDE SHOW”. button to select “INTERVAL” and use button to select the interval setting (1~10sec). -
Page 52: Rotating The Still Images
Chapter3: Reviewing Images and Video Clips Rotating the Still Images This function allows you to rotate still images. In Playback menu, select “ROTATE”. Press Left or Right button to rotate 90° clockwise or counterclockwise. Press OK button and return to the previous menu. -
Page 53: Chapter 4: Installing The Software
Chapter 4: Installing the Software The software CD supplied with the camera includes the driver and the application (PhotoImpression, and VideoImpression). The application allows you to upload the images from the camera, view them, print them, and e-mail them. You must install the software before you connect the camera to computer. -
Page 54: Installing The Application
Chapter 4: Installing the Software Installing the Application After you insert the CD into the CD- ROM drive, the pop-up image will appear. If the image does not appear, click “Start” and then “Run”. Type “E:\Technika.exe”. Click “PhotoImpression”. The computer proceeds to install PhotoImpression. -
Page 55: Using The Application
Using the Application Using the Application PhotoImpression Connect the camera to the computer. See page 57. Launch PhotoImpression. To download the images from the camera, select “Removable Media” . Press “OK” and PhotoImpression will detect new photos to your computer. Press “OK”... -
Page 56: Videoimpression
Chapter 4: Installing the Software VideoImpression We recommend you to install Windows Media Player 9 or later when you play back the video clip on the computer. If you use Windows XP, you also have to upgrade to Windows XP Service Pack 2(SP2). Launch VideoImpression and then select “add”. -
Page 57: Chapter 5: Uploading, Printing & Displaying Images
Chapter 5: Uploading, Printing & Displaying Images After you take images, you can upload images to a computer from your camera, print them with a printer, and display them on a TV. Uploading to a Computer Connect the larger end of the USB cable to the USB slot on your computer. -
Page 58: Printing Images
Chapter 5: Uploading, Printing, & Displaying Images Printing Images There are three printing methods you can use to print out selected images. This camera supports direct printing, Digital Print Order Format (DPOF), and PictBridge. Direct printing allows you to print out images by connecting the camera directly to some specifi... -
Page 59: Displaying Images On A Tv
Displaying Images on a TV Displaying Images on a TV By connecting your camera to a TV, you can view images as a slide show and play video clips. Select a compatible TV system in “SETUP” menu. Connect the A/V (Audio/Video) cable to the A/V inputs of the TV, and connect the A/V cable to the A/V connector of the camera. -
Page 60: Chapter 6: Adjusting The Camera Settings
Chapter 6: Adjusting the Camera Settings Using the Setup Menu In Capture, Video or Playback menu, use button to select “Setup” and press OK button to enter the menu. Scroll through the menu by using button and use button to highlight the option you want to select. -
Page 61: Setting Digital Zoom
Using the Setup Menu Setting Digital Zoom This function allows you to activate digital zoom function. DIGITAL ZOOM In Setup menu, select “DIGITAL ZOOM”. Select “ON” or “OFF”. Press OK button to confi rm the setting. Setting AF Illuminator This function allows you to turn on or off the AF illuminator at the front of the camera. -
Page 62: Setting Instant Review
Chapter 6: Adjusting the Camera Settings Setting Instant Review This function allows you to review the image for 3 seconds after taking a image. In Setup menu, select “INSTANT REVIEW”. Select “ON” or “OFF”. Press OK button to confi rm the setting. Moving Images to Card This function allows you to move images stored on the internal memory to your memory card. -
Page 63: Resetting The File Number
Using the Setup Menu Resetting the File Number This function allows you to reset the fi le numbers assigned to each image or fi le. In Setup menu, select “FILE NO. RESET” and then press OK button. A confi rmation dialogue will appear. Select “OK”... -
Page 64: Formatting The Memory
Chapter 6: Adjusting the Camera Settings Setting Function DATE & TIME The image is printed with the date and time it was taken. DATE The image is printed with the date it was taken. The image is printed without the date or time. Formatting the Memory This function allows you to delete all of the images, data, information, and folders in your memory card or internal memory. -
Page 65: Setting Lcd Brightness
Using the Setup Menu Setting LCD Brightness This function allows you to adjust the brightness of the LCD monitor. In Setup menu, select “LCD BRIGHTNESS”. button to adjust the brightness value. Press OK button to confi rm the setting. Note: This setting is disabled when viewing images or videos through your TV. -
Page 66: Setting Camera Volume
Chapter 6: Adjusting the Camera Settings Setting Function SHUTTER ONLY All sound is off apart from a shutter sound when an image is taken. All camera sounds are turned on. All camera sounds are turned off. Setting Camera Volume This function allows you to adjust the volume. In Setup menu, select “VOLUME”. -
Page 67: Setting Auto Power Off
Using the Setup Menu Setting Auto Power Off To save battery power, you can set the camera to turn off automatically when it is not in use for a fi xed time. In Setup menu, select “AUTO POWER OFF”. Select “10 MIN”, “5 MIN”, “3 MIN”, “1 MIN”... -
Page 68: Using Pictbridge
Chapter 6: Adjusting the Camera Settings Using PictBridge You can connect the camera directly to a printer that supports PictBridge, and perform image selection and printing using the camera monitor screen and controls. PictBridge is a standard established by the Camera and Imaging Products Association (CIPA). - Page 69 Using the Setup Menu The total number of images you have selected and the number of copies that you have set appear on the screen. Press the OK button to print or the button to return to the PictBridge menu. Select “ALL”...
-
Page 70: Resetting Your Camera
Chapter 6: Adjusting the Camera Settings Resetting Your Camera This function allows you to reset all camera settings to default. In Setup menu, select “RESET” and press the OK button. A confi rmation dialogue appears. Select OK to reset your camera. Press the OK button to reset all settings. -
Page 71: Trouble Shooting
Trouble Shooting Problem Possible Cause Solution The camera does The power is off. Press the power button to not work. turn it on. The battery is inserted Reload the battery incorrectly. correctly. The battery power is Replace battery with a new low or drained. - Page 72 Trouble Shooting Problem Possible Cause Solution The images are The camera is moving Hold the camera steady or blurry. when you press the use a tripod when taking shutter release button. images. The focus brackets are Position the focus brackets not positioned on the on your subject.
-
Page 73: Warning Indicators And Messages
Warning Indicators and Messages When ... Solution Date/Time has The system detects that Reset the date/time. See been lost. Please the camera has lost page 60. reset it date/time after you turn it on. Card locked! Memory card is locked. Slide the switch on the memory card to unlock. - Page 74 Warning Indicators and Messages When ... Solution Not support! The selected image Ensure that images are cannot be displayed the proper type for your for playback due to an camera. unsupported type with this image. Image error! ERR! The selected image Use image processing cannot be displayed software to view the...
-
Page 75: Specifi Cations
Specifi cations Image Sensor • 1/1.8 inch-type CCD • 10 Mega pixels LCD Monitor • 2.5” Lens • Focal length f=7.4-22.2mm (35mm fi lm equivalent : 35 - 105mm) • Aperture range F 2.84 (Wide) - F 5.1 (Tele) Focusing •... - Page 76 Specifi cations Storage • Internal memory About 32 MB • External memory SD card(Max. card size : 2GB) • File format Still image : JPEG (DCF), Exif 2.2, DPOF 1.1, PictBridge Video clip : ASF (MPEG-4) ; Audio : WAV •...
- Page 77 Produced after 13th August 2005. Waste electrical products should not be disposed of with household waste. Please recycle where facilities exist. Check with your Local Authority or retailer for recycling advice. Warranty Your Technika appliance is covered by a warranty for 12 months from the date of purchase.
Need help?
Do you have a question about the SH-1060 and is the answer not in the manual?
Questions and answers