
Related Manuals for JVC KW-XR416


Summary of Contents for JVC KW-XR416
- Page 1 KW-XR416/KW-XR414 CD RECEIVER For canceling the display demonstration, see page 4. For installation and connections, refer to the separate manual. INSTRUCTIONS GET0656-001A [U/UH/UT/UN/UI]...
- Page 2 Thank you for purchasing a JVC product. Please read all instructions carefully before operation, to ensure your complete understanding and to obtain the best possible performance from the unit. IMPORTANT FOR LASER PRODUCTS 1. CLASS 1 LASER PRODUCT 2. CAUTION: Do not open the top cover. There are no user serviceable parts inside the unit; leave all servicing to qualified service personnel.
-
Page 3: Table Of Contents
How to read this manual CONTENTS The following icons/symbols are used to How to read this manual indicate: How to reset your unit Press and hold the button(s) How to forcibly eject a disc [Hold] until the desired operation Canceling the display begins. -
Page 4: Canceling The Display Demonstration
Canceling the display demonstration Turn on the power. Select <DEMO OFF>. [Hold] (Initial setting) Finish the procedure. Setting the clock Turn on the power. [Hold] (Initial setting) Select <CLOCK>. Select <CLOCK SET>. Adjust the hour. Adjust the minute. Finish the procedure. ENGLISH... -
Page 5: Preparing The Remote Controller
Preparing the remote controller (RM-RK50) Caution: When you use the remote controller for the first time, pull out the insulation sheet. • Danger of explosion if battery is incorrectly replaced. Replace only with the same or equivalent type. • Battery shall not be exposed to excessive heat such as sunshine, fire, or the like. -
Page 6: Basic Operations
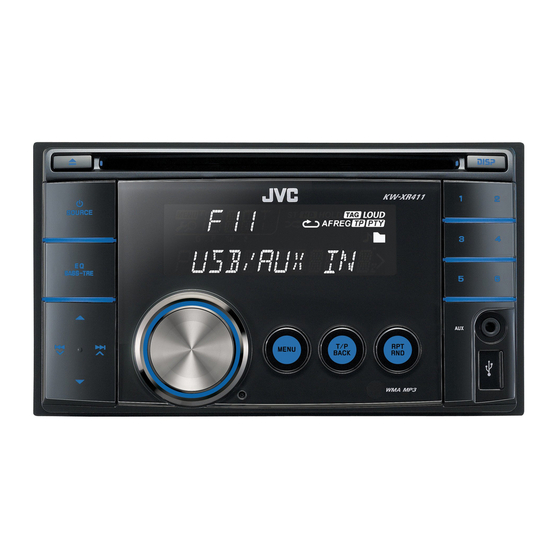
Basic operations Ejects the disc Display window Loading slot Selects preset station. Control dial USB (Universal Serial Bus) input terminal Auxiliary input jack Remote sensor • DO NOT expose to bright sunlight. When you press or hold the following button(s)... Remote Main unit General operation... -
Page 7: Listening To The Radio
Remote Main unit General operation controller Adjusts the volume level. — Selects items. • Mutes the sound while listening to a source. If the source is “CD” or “USB,” playback pauses. Press the control dial again to cancel — muting or resume playback. •... -
Page 8: Selecting A Preset Station
When an FM stereo broadcast is Manual presetting (FM/AM) hard to receive You can preset up to 18 stations for FM and 6 stations for AM. Ex.: Storing FM station of 92.50 MHz into preset [Hold] number “04.” ] “92.50MHz” ] <TUNER>... -
Page 9: Listening To A Disc
Using the remote controller 5 U / D ∞ : Changes the preset stations ] Select a character (A – Z, 0 – 9, —, /, 2 R / F 3 : Searches for stations <, >, space). Title assignment You can assign titles up to 30 station ] Move to the next (or previous) frequencies (FM and AM) using 8 characters... -
Page 10: Selecting The Playback Modes
Stopping playback and ejecting Selecting the playback modes the disc You can use only one of the following playback modes at a time. “NO DISC” appears. Press SOURCE to listen to another playback source. Prohibiting disc ejection [Hold] ] “REPEAT” j “RANDOM” To cancel the prohibition, repeat the same procedure. -
Page 11: Listening To The Usb Device
Listening to the USB device This unit can play MP3/WMA files stored in a USB device. Ÿ ] Turn on the power. USB input terminal USB memory All tracks will be played repeatedly until you change the source or detach the USB device. Caution on volume setting: Cautions: USB devices produce very little noise compared... -
Page 12: Listening To The Other External
Listening to the other external components You can connect an external component to the AUX (auxiliary) input jack on the control panel. Preparation: Make sure <AUX ON> is selected ] “AUX IN” for the <SRC SELECT> = <AUX IN> setting. Ÿ... -
Page 13: Selecting A Preset Sound Mode
Selecting a preset sound mode Storing your own sound mode You can select a preset sound mode suitable for the music genre. You can store your own adjustments in memory. FLAT = NATURAL = DYNAMIC = VOCAL [Hold] BOOST = BASS BOOST = USER = (back to the beginning) While listening, you can adjust the tone level of ] <PRO EQ>... -
Page 14: Menu Operations
Menu operations Repeat step 2 if necessary. • To return to the previous [Hold] menu, press BACK. • To exit from the menu, press DISP or MENU. Category Menu item Selectable setting, [ Initial: Underlined DEMO • DEMO ON : Display demonstration will be activated Display automatically if no operation is done for about demonstration... - Page 15 Category Menu item Selectable setting, [ Initial: Underlined SSM * • SSM 01 – 06 : For settings, Strong-station • SSM 07 – 12 Sequential • SSM 13 – 18 Memory MONO * • MONO ON : Activate monaural mode to improve FM Monaural mode reception, but stereo effect will be lost.
- Page 16 Category Menu item Selectable setting, [ Initial: Underlined L/O MODE • SUB.W : Select if the REAR LINE OUT terminals are Line output used for connecting a subwoofer (through an mode external amplifier). • REAR : Select if the REAR LINE OUT terminals are used for connecting the speakers (through an external amplifier).
-
Page 17: Maintenance
Maintenance Moisture condensation Do not use the following discs: Moisture may condense on the lens inside the Single CD (8 cm disc) Warped disc unit in the following cases: • After starting the heater in the car. • If it becomes very humid inside the car. Should this occur, the unit may malfunction. -
Page 18: More About This Unit
More about this unit Basic operations • If you change the source while listening to a disc, playback stops. Next time you select “CD” General as the playback source, playback will start • If you turn off the power while listening to from where it had been stopped previously. - Page 19 • CD-RWs may require a longer readout time • This unit can play back files recorded in VBR since the reflectance of CD-RWs is lower than (variable bit rate). that of regular CDs. Files recorded in VBR have a discrepancy •...
- Page 20 • This unit can play back MP3/WMA files JVC bears no responsibility for any loss of data meeting the conditions below: in the USB mass storage class device while – Bit rate of MP3/WMA: 32 kbps — 320 kbps using this System.
-
Page 21: Troubleshooting
( If “PROTECT” does not disappear, consult your JVC car audio dealer or a company supplying kits. The unit does not work at all. - Page 22 Symptom Remedy/Cause Disc cannot be played back. • Use a disc with MP3/WMA tracks recorded in a format compliant with ISO 9660 Level 1, Level 2, Romeo, or Joliet. • Add the extension code <.mp3> or <.wma> to the file names. Noise is generated.
- Page 23 Symptom Remedy/Cause Noise is generated. The track played back is not an MP3/WMA track. Skip to another file. (Do not add the extension code <.mp3> or <.wma> to non-MP3 or WMA tracks.) “READING” keeps flashing on • Readout time varies depending on the USB device. the display.
-
Page 24: Specifications
Specifications Maximum Power Output: Front/Rear: 50 W per channel Continuous Power Output (RMS): Front/Rear: 20 W per channel into 4 Ω, 40 Hz to 20 000 Hz at no more than 1% total harmonic distortion. Load Impedance: 4 Ω (4 Ω to 8 Ω allowance) Tone Control Range: Bass: ±12 dB (60 Hz, 80 Hz, 100 Hz, 200 Hz) - Page 25 Type: Compact disc player Signal Detection System: Non-contact optical pickup (semiconductor laser) Number of Channels: 2 channels (stereo) Frequency Response: 5 Hz to 20 000 Hz Dynamic Range: 96 dB Signal-to-Noise Ratio: 98 dB Wow and Flutter: Less than measurable limit MP3 Decoding Format: (MPEG1/2 Audio Layer 3) Max.
- Page 26 Having TROUBLE with operation? Please reset your unit Refer to page of How to reset your unit © 2010 Victor Company of Japan, Limited 0110DTSMDTJEIN...
- Page 27 Heat sink INSTALLATION / The following illustration shows a typical installation. If you have any questions or require information regarding installation kits, consult your JVC car audio dealer or a company supplying kits. Part list / In-dash mounting / A Flat countersunk screws—M5 × 8 mm / —...
-
Page 28: Electrical Connections
IMPORTANT: A custom wiring harness (separately purchased) which is suitable for your car is recommanded for connection between the unit and your car. • • Consult your JVC car audio dealer or a company supplying kits for details. PRECAUTIONS on power supply and speaker connections •... - Page 29 Ilustrasi berikut menunjukkan sebuah tipe pemasangan. Jika anda mempunyai suatu pertanyaan atau informasi yang diperlukan mengenai alat-alat pemasangan, konsultasikan pada penyalur audio mobil JVC atau sebuah regarding installation kits, consult your JVC car audio dealer or a company supplying kits. perusahaan yang mensuplai alat-alat.
-
Page 30: Electrical Connections/Sambungan-Sambungan Listrik
Anda. recommended for connection between the unit and your car. • Tanyakan kepada dealer audio mobil JVC atau perusahaan yang memasok perlengkapan untuk mengetahui • Consult your JVC car audio dealer or a company supplying kits for details. - Page 31 โปรดปรึ ก ษาตั ว แทนจำหน่ า ยเครื ่ อ งเสี ย งติ ด รถยนต์ ของท่ า นหรื อ บริ ษ ั ท ที ่ จ ั ด หาชุ ด อุ ป กรณ์ ใ ห้ regarding installation kits, consult your JVC car audio dealer or a company supplying kits. รายการอุ ป กรณ์...
- Page 32 • Consult your JVC car audio dealer or a company supplying kits for details. ของคุ ณ หรื อ บริ ษ ั ท ที ่ จ ั ด ส่ ง ชุ ด อุ ป กรณ์ เ พื ่ อ ขอรายละเอี ย ด...
- Page 33 • The heat sink becomes very hot after use. Be careful not to touch it when removing this unit. Heat sink INSTALLATION The following illustration shows a typical installation. If you have any questions or require information regarding installation kits, consult your JVC car audio dealer or a company supplying kits. Part list In-dash mounting A Flat countersunk screws—M5 ×...
- Page 34 IMPORTANT: A custom wiring harness (separately purchased) which is suitable for your car is recommended for connection between the unit and your car. • Consult your JVC car audio dealer or a company supplying kits for details. PRECAUTIONS on power supply and speaker connections •...
Need help?
Do you have a question about the KW-XR416 and is the answer not in the manual?
Questions and answers
If its display only shows protect and nothing is working due to it then what to do
I want to reset the stero
Jvekw xr 416 reset