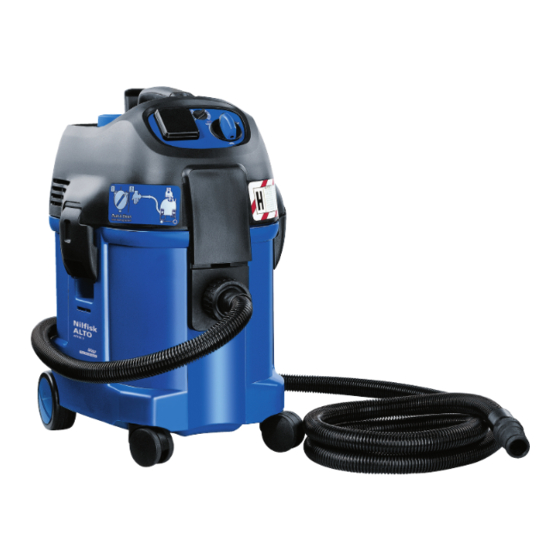
Table of Contents
Advertisement
ATTIX 350-0H
ATTIX 360-0H
ATTIX 360-2H
Operating Instructions ................................1-16
Betriebsanleitung ......................................17-32
Notice d'utilisation ....................................33-48
Gebruiksaanwijzing ..................................49-64
Istruzioni sull'uso ......................................65-80
Driftsinstruks .............................................81-96
Bruksanvisning ....................................... 97-112
Driftsvejledning ..................................... 113-128
Käyttöohje ..............................................129-144
Navodilo za uporabo ............................145-160
Uputstvo za rad .....................................161-176
Prevádzkový návod ...............................177-192
Provozní návod .....................................193-208
Instrukcja obsługi .................................209-224
Kezelési utasítás ...................................225-240
Ðóêîâîäñòâî ïî ýêñïëóàòàöèè ...............241-256
Instrucciones de manejo ......................257-272
Instruções de operação ........................273-288
Οδηγίες λειτουργίας ..............................289-304
Ýþletme kýlavuzu ..................................305-320
302001672 - 2005-02-17
ATTIX 550-0H
ATTIX 550-2H
ATTIX 560-2HXC
ATTIX 751-0H
Advertisement
Table of Contents

Summary of Contents for Nilfisk-ALTO ATTIX 350-0H
- Page 1 ATTIX 350-0H ATTIX 550-0H ATTIX 360-0H ATTIX 550-2H ATTIX 360-2H ATTIX 560-2HXC ATTIX 751-0H Operating Instructions ........1-16 Betriebsanleitung ........17-32 Notice d’utilisation ........33-48 Gebruiksaanwijzing ........49-64 Istruzioni sull’uso ........65-80 Driftsinstruks ..........81-96 Bruksanvisning ........97-112 Driftsvejledning ........113-128 Käyttöohje ..........129-144 Navodilo za uporabo ......145-160 Uputstvo za rad ........161-176...
- Page 2 ATTIX 350-0H/360-0H/360-2H ATTIX 550-0H/550-2H/560-2HXC ATTIX 751-0H ATTIX 3-H ATTIX 5-H ATTIX 7-H...
-
Page 3: Table Of Contents
7.2.1 Replacing the waste bag ............ 11 7.2.2 Replacing the filter bag............11 7.2.3 Replacing filter element „H“ (ATTIX 350-0H/360-0H/550-0H/360-2H/550-2H/751-0H) ..12 7.2.4 Replacing filter element „H“ (ATTIX 560-2HXC) ....12 7.2.5 Emptying dirt tank (ATTIX 3/5) ...........13 7.2.6 Emptying dirt tank (ATTIX 7) ..........13 8 Troubleshooting ..................14... -
Page 4: Important Safety Instructions
ATTIX 350-0H/360-0H/360-2H ATTIX 550-0H/550-2H/560-2HXC ATTIX 751-0H 1 Important safety instructions Symbols used to mark Before using the This symbol instructions vacuum cleaner, used mark always read the safety instruc- operating instruc- tions that must tions and keep be observed to... - Page 5 ATTIX 350-0H/360-0H/360-2H ATTIX 550-0H/550-2H/560-2HXC ATTIX 751-0H port must be made by a special- the rate at which air is exchanged ist and signed by him. in the room must be adequate if the exhaust air from the vacuum Permanent filters should be re-...
- Page 6 ATTIX 350-0H/360-0H/360-2H ATTIX 550-0H/550-2H/560-2HXC ATTIX 751-0H See section 5 for information on When using an extension lead, handling liquids and (hazard- check the minimum cross-sec- ous) dust. tions of the cable: Cable length Cross section <16 A <25 A Electrical components up to 20 m ø1.5mm²...
-
Page 7: Description
Nilfisk- Alto service or a trained person. Accessories and spare parts Use only the brushes supplied Use only original Nilfisk-Alto ac- with the vacuum cleaner or cessories and spare parts (see specified in the operating manu- section 9.5). -
Page 8: Before Start-Up
To pick up materials containing as- concentration values. bestos: Use only the vacuum cleaners ATTIX 350-0H, 360-0H, 550-0H and 751-0H with a suction hose with a diameter of 36 mm. 4.1.2 Electrical connection The operating voltage shown on the 1. -
Page 9: Connecting Electrical Appliances
To pick up asbestos or material containing asbestos: bag. 1. Use ATTIX 350-0H, 360-0H, 550-0H and 751-0H only. 2. Use a suction hose with a diameter of 36 mm. 3. Use switch position “I”. -
Page 10: Acoustic Warning
ATTIX 350-0H/360-0H/360-2H ATTIX 550-0H/550-2H/560-2HXC ATTIX 751-0H Acoustic warning For safety reasons, an acoustic warning sounds if the air speed in the suction hose drops to be- low 20 m/s. See section “Trou- bleshooting”. Cleaning the filter element (ATTIX auto 360-0H/360-2H only) -
Page 11: Applications And
(ATTIX 350-0H/360-0H/3 To reduce the amount of foam, 60-2H/550-0H/550-2H/751-0H) use foam killer Nilfisk-Alto Foam or the water level limit (ATTIX Stop (see section 9.5 „Accesso- 560-2HXC) works properly. (See ries“ for order number). -
Page 12: After Finishing Work
7.2.4 Replacing filter element „H“ (ATTIX 560-2HXC) 7.2.5 Emptying dirt tank (ATTIX 3/5) 7.2.6 Emptying dirt tank (ATTIX 7) Maintenance work ATTIX 350-0H / 360-0H / 7.2.1 Replacing the waste 360-2H / 550-0H / 550-2H / 560-2HXC: 1. Open the retaining clamps... -
Page 13: Replacing The Waste Bag
ATTIX 350-0H/360-0H/360-2H ATTIX 550-0H/550-2H/560-2HXC ATTIX 751-0H 4. Close the waste bag using the cable binder (3). 5. Dispose of the dirt in accord- ance with legal regulations. 6. Insert a new filter bag into the cleaned tank as described in the instructions enclosed. -
Page 14: Replacing Filter Element „H" (Attix 560-2Hxc)
8. Check the antistatic clamp (5) for damage and have it replaced by Nilfisk-Alto Service if neces- sary. 9. Fit a new filter element. 10. Check that the float (6) works properly. When the filter holder is turned, the float inside must move about easily. -
Page 15: Emptying Dirt Tank (Attix 3/5)
ATTIX 350-0H/360-0H/360-2H ATTIX 550-0H/550-2H/560-2HXC ATTIX 751-0H 8. Check that the control flap (6) for filter cleaning works properly. The control flap should move back and for- wards easily. 9. Clean the level hose (7). 10. Fit a new filter element. -
Page 16: Troubleshooting
Switch off the vacuum cleaner has tripped. and allow it to cool for approx. 5 minutes. If the cleaner can- not be started again, contact the Nilfisk-Alto service depart- ment. > Self-acting carbon brush is • Have carbon brushes changed worn. -
Page 17: Further Information
In addition, the vacuum clean- equipment works properly. ers ATTIX 350-0H, 550-0H and ATTIX 751-0H have been tested in accordance with the addi- tional requirements for asbes- tos vacuum cleaners (Edition 2.1996) and they fulfilled the... -
Page 18: Technical Data
ATTIX 350-0H/360-0H/360-2H ATTIX 550-0H/550-2H/560-2HXC ATTIX 751-0H Technical data ATTIX 350-0H 360-2H 360-2H 550-0H 550-0H 550-0H 550-2H 560-2HXC 560-2HXC 751-0H 230/240V 230/240V 110V 110V Voltage 230/240 230/240 Mains frequency 50/60 Fuse Power consumption 1000 1200 1000 1200 1000 Connected load for...


Need help?
Do you have a question about the ATTIX 350-0H and is the answer not in the manual?
Questions and answers