
Related Manuals for DigiPos Retail Active 8000


Summary of Contents for DigiPos Retail Active 8000
-
Page 1: User Guide
Retail Active 8000 Designed for Retail PoS Big impact. Small space. User Guide Release Version 1.0 August, 2008... -
Page 2: Table Of Contents
Connecting USB Devices ............7 Connecting a Magnetic Swipe Reader........... 8 Connecting Speakers .............. 8 Connecting a Microphone............9 Using the DigiPoS Retail Active 8000 ............ 10 Powering on the DigiPoS Retail Active ........10 Power LED................. 10 HDD Status LED..............10 LAN Status LED .............. -
Page 3: Preface
(including damages for loss of profits, loss of business, loss of use or data, interruption of business and the like), even if DigiPoS Systems has been advised of the possibility of such damages arising from any defect or error in this manual or product. -
Page 4: Safety Instructions
- The equipment has been exposed to moisture - The DigiPoS Retail Active 8000 is not working properly or you can not get it to work according to the User Manual - The DigiPoS Retail Active 8000 has been dropped and damaged - The DigiPoS Retail Active 8000 has obvious signs of breakage or physical damage •... -
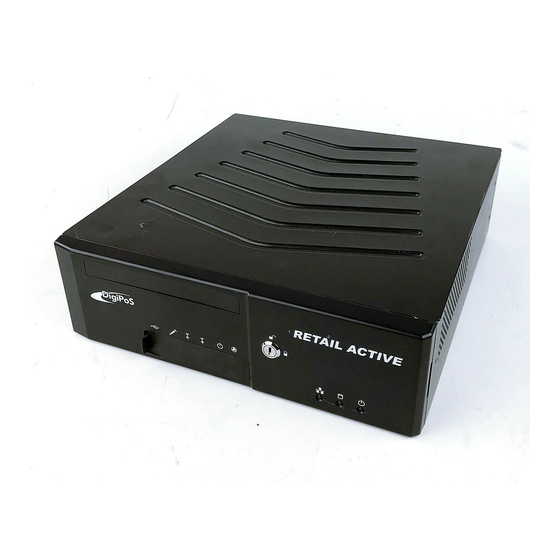
Page 5: Overview
Overview Overview Congratulations on your purchase of the DigiPoS Retail Active 8000. You are now the owner of a state-of-the-art POS system. The DigiPoS Retail Active offers unparalleled features, speed and performance combined with exceptional reliability. It is unrivalled by other conventional Intel based PCs within the EPoS industry. -
Page 6: Front Side Components
DigiPoS Retail Active 8000 Front Side Components With Cover Fitted 2 3 4 RETAIL ACTIVE 6 7 8 9 101 1 12 1314 Name Name CD-ROM drive Line-out port CD-ROM LED Microphone port CD-ROM drawer open button Power button CD-ROM drawer manual open catch... -
Page 7: Rear Side Components
Overview Rear Side Components POWERED RS232 EXTERNAL POWERED INPUT 24VDC POWERED USB OUTPUT CASH DRAWER 1 2 3 4 Name PCI-1 slot Mouse port Keyboard port VGA port DVI port RJ45 LAN port Two USB ports Two 12V Powered USB ports 24V Powered USB port Four COM ports Cash drawer port... -
Page 8: Making Connections
DigiPoS Retail Active 8000 Making Connections By using the ports on the rear side of your DigiPoS Retail Active 8000, you can connect it to various devices. Refer to the procedures described in this section to make connections to these ports. -
Page 9: Using The Vga Port
The DigiPoS Retail Active 8000 provides a wide range of output voltages from its Powered USB ports: 12V and 24V. These ports allow the connected devices to be powered directly from your DigiPoS Retail Active 8000. You can also use these ports for standard USB data transmission. -
Page 10: Using The 12V Powered Usb Port
Using the 24V Powered USB port The 24V PoweredUSB port (red connector) is located on the rear side of your DigiPoS Retail Active 8000. By using the 24V PoweredUSB port, you can connect printers powered by a 24V current. -
Page 11: Connecting Usb Devices
Making Connections Connecting USB Devices There are two USB ports on both the front and the rear side of the DigiPoS Retail Active 8000 available for USB peripheral devices. You can connect USB devices, such as a USB keyboard, a USB mouse, and data storage devices (i.e. USB flash drives). -
Page 12: Connecting A Magnetic Swipe Reader
DigiPoS Retail Active 8000 Connecting a Magnetic Swipe Reader You can connect an MSR (Magnetic Swipe Reader) using the COM port on the rear side of the DigiPoS Retail Active 8000. POWERED RS232 EXTERNAL POWERED INPUT Connect the MSR to one of the COM ports... -
Page 13: Connecting A Microphone
Making Connections Connecting a Microphone The microphone port on the front side of the DigiPoS Retail Active 8000 allows you RETAIL ACTIVE to connect an external microphone. Connect the microphone plug into the microphone port as shown. -
Page 14: Using The Digipos Retail Active 8000
The power LED indicates the power status of the your DigiPoS Retail Active. The LED lights green when your DigiPoS Retail Active is turned on. It lights orange when on standby mode. See “Front Side Components” on page 2 for the location of the power LED. -
Page 15: Serial Com Ports
The DigiPoS Retail Active provides two different voltage of PoweredUSB ports located on the rear side. With these enhanced USB ports, you can connect peripheral devices directly to the DigiPoS Retail Active via a single USB cable for both power and data connectivity. -
Page 16: Jumper Settings
DigiPoS Retail Active 8000 Jumper Settings Please refer to the illustration below for the jumper settings. -
Page 17: Removing The Front Cover
4 Grab both sides of the front panel to pull the cover as shown. Removing the Top Cover You are sometimes required to remove the top cover of your DigiPoS Retail Active to set the COM port and cash drawer port voltages. Follow the procedures below to properly remove the top cover: * Warning: Be sure to turn the power off the Retail Active before proceeding. -
Page 18: Installing The Flash Card
To remove the flash card, simply push the eject button. Removing the Hard Disc Drive The DigiPoS Retail Active comes with a removable hard disk drive tray. Follow the steps below to remove the hard disc drive: * Warning: Be sure to turn the power off the Retail Active before proceeding. - Page 19 Using the DigiPoS Retail Active 8000 3 Grip the HDD tray and pull it out as shown. 4 Remove the four screws securing the hard disc drive from the HDD tray. 5 Slide the hard disc drive out the tray.
-
Page 20: Specifications
DigiPoS Retail Active 8000 Specifications Mainboard LGA 775 Max. TDP=65W Intel® Celeron® 440 2.0 Ghz 512KB L2 TDP=35W Intel® Celeron® D processor 352 3.2Ghz 512KB L2 Intel® Core™2 Duo processor E4300, 1.8Ghz 2 MB L2 945GC System Chipset 800/533 MHz... - Page 21 Specifications 2 x 12V powered USB (Max 1.6A) Rear I/O 1 x 24V powered USB (Max 2.3A) 2 x PS/2 2 x USB 2.0 1 x LAN (Giga Lan) 1 x VGA 1 x DVI 4 x Powered COM (Pin 9 select by jumper 0V/5V/12V/24V) 1 x Cash drawer (12V/24V) 1 x DC Input (Neutrik) 1 x 24V DC Output (Hoshiden)
- Page 22 DigiPoS Retail Active 8000 Dimension (W x D x H) 293 mm x 307 mm x 90 mm (with front bezel) Noise Level TDP = 35W, CPU 90% load 24dBA Axes: 3 axes / Vertical / Transverse / Longitudinal Swept Sine, 10-57Hz 0.006in. p-p, 57-500Hz, 0.5g peak, 3...
Need help?
Do you have a question about the Retail Active 8000 and is the answer not in the manual?
Questions and answers