Table of Contents
Advertisement
Advertisement
Table of Contents

Related Manuals for Polaroid TFT-LCD TV


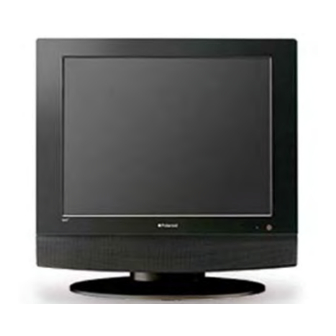
Summary of Contents for Polaroid TFT-LCD TV
-
Page 2: Table Of Contents
Table of Contents Important Safety Instructions ................2 Accessory List ......................4 View of Unit ......................5 Remote Control......................7 System Connections ....................9 Connecting External AV Signal Source..............9 Connecting External AV Signal Source (YPbPr)............10 Connecting External AV Device (AV Output) ............11 Connecting PC ...................... -
Page 3: Important Safety Instructions
Important Safety Instructions The lightning flash with arrowhead symbol, within an equilateral triangle, is intended to alert the user to the presence of uninsulated “dangerous voltage” within the product’s enclosure that may be of sufficient magnitude to constitute a risk of electrocution. - Page 4 Important Safety Instructions 1) Read and follow all directions. 2) Keep these instructions. 3) Heed all warnings. 4) Do not use near water. 5) Clean only with dry cloth. 6) Do not block any ventilation openings. Maintain well ventilated conditions around the product, Do not put product on bed, sofa or anything that blocks ventilation.
-
Page 5: Accessory List
Accessory List ITEM NAME Remote Control (with batteries) (optional) Power Supply Cord Operation Manual Note: Accessories and their numbers are subject to modification without prior notice. - 4 -... -
Page 6: View Of Unit
View of Unit Front and Right Side Panel 1. Color TFT screen 6. POWER button 2. SOURCE button Press to enter or exit standby mode. Press repeatedly to select input sources, 7. Headphone Jack choose from: VGA, Component, When connected to headphone, the internal S-VIDEO or Composite mode. - Page 7 View of Unit Rear Panel Open the back cover on the right side of the unit’s rear panel and all the jacks will appear, as shown on the figure below: external video signal input source. 1. Y/Pr(Cr)/Pb(Cb) Input Jacks The L/R audio input jacks can be used in Connect Y/Pr(Cr)/Pb(Cb) input source in both S-VIDEO and Composite modes.
-
Page 8: Remote Control
Remote Control 4. VOL +/- button Press to increase or decrease the volume. 5. ASPECT button Press to select screen aspect ratio. 6. SOURCE button Press repeatedly to select the input source, choose from: VGA, Componont, S-VIDEO or Composite. 7. Direction buttons (▲▼◄►) Used for menu selection in setup (menu) mode. -
Page 9: Using Remote Control
Remote Control Preparation Using Remote control Softly push the back cover to open the battery Point the remote control unit from no more than compartment. about 7 meters (22 feet) from the television and within about 60 degrees of the front of the unit. Insert two batteries (1.5V, size AAA), ensuring the polarity matches the marks inside the compartment. -
Page 10: System Connections
System Connections • Do not connect the power cord until all other connections have been made. • Ensure that you observe and correctly connect colored cables when connecting audio and video cables. • Before connecting, open the cover on the right side of the unit’s rear panel. Connecting External AV Signal Source Use the AV cables to connect an external AV signal source to the AV input jacks on the rear panel of the unit. -
Page 11: Connecting External Av Signal Source (Ypbpr)
System Connections Connecting External AV Signal Source Use AV cables to connect an external AV signal source to the Y/Pb (Cb) /Pr (Cr) input jacks on the rear panel of the unit. After connection, turn on the power of the unit and the external AV signal source and press the SOURCE button to select Component mode. -
Page 12: Connecting External Av Device (Av Output)
System Connections Connecting External AV Device (AV Output) Use AV cables to connect external AV device(s) to the audio and video output jacks on the rear panel of the unit. Note: This television is designed to provide composite video and audio to an external device. To avoid potential damage to an external device, ensure that the television output is correctly cabled to composite connectors only. -
Page 13: Connecting A Pc
System Connections Connecting a PC Follow the steps and figure below to connect PC to the unit. 1. Connect one end of the VGA cable to the VGA input jack on the jack panel of the unit and the other end to the PC VGA output. 2. -
Page 14: Connecting Power Supply
System Connections Connecting Power Supply Power is supplied through the provided appropriative power adapter, one end is connected to the DC 12V IN jack on the rear panel of the unit, the other end to the AC100~240V wall outlet. Connecting Earphones Connect earphones to the earphone jack on the jack panel of the unit for listening. -
Page 15: Connecting Tv Signal Source
System Connections Connecting a TV Signal Source Connect a TV signal source (antenna or analog cable) to the RF (TV) jack on the jack panel of the unit. After connecting to the antenna, turn on the unit, and go on with program searching, you can follow the below steps to select channels: When cable is connected, 1. - Page 16 System Connections 4. For 100~125channels: Press the number buttons to select channels XXX, and it will go to the selected channel immediately. When Air is connected, 1. For 0~9 channel: Press the number buttons to select the channel X, wait three seconds and it will go to the selected channel.
-
Page 17: System Setup
System Setup Preparation 1. After connection, press the POWER button to turn on the unit. 2. Press the SOURCE button to select TV mode and follow the procedures below. Image Setting Note: This item is only available when there is signal input. Press the MENU button once to enter the setup menu, as shown on the right: In the setup menu, press the ▲▼... - Page 18 System Setup Brightness Setup Press the ▲▼ button to select Brightness and press the ◄► button to adjust the value. Press MENU button return previous menu. Contrast Setup Press the ▲▼ button to select Contrast and press the ◄► button to adjust the value. Press the MENU button to return to the previous menu.
-
Page 19: Audio Setting
System Setup Audio Setting Press the MENU button once to enter the setup menu. Press the ▲▼ button to select Audio and press the ENTER button to enter the menu shown on the right. In the Audio setup menu, press the ▲▼ button to select the desired item and press the ENTER button to enter. -
Page 20: Sleep Setting
System Setup Sleep Setting Press the MENU button to enter the setup menu. Press the ▲▼ button to select Sleep and press the ENTER button to enter the menu shown on the right. In the Sleep setup menu, press the▲▼ button to select 15Min, 30Min, 45Min, 60Min, 75Min, 90Min, 105Min, 120Min or Off. - Page 21 System Setup Change PIN Press the ▲▼ button to select Change PIN and press the ENTER button to enter. Use the number buttons to enter the new pin you want and then press the ENTER button to confirm. Then use the number buttons to enter the new pin again and press the ENTER button to confirm and return to the previous menu.
- Page 22 System Setup Movie Rating Press the ▲▼ button to select Movie Rating and press the ENTER button to enter. Press the ▲▼ button to select the desired item and then press the ENTER button to confirm your selection. Press the MENU button to return to the previous menu.
-
Page 23: Setup Setting
System Setup CA Fr Rating Press the ▲▼ button to select CA Fr Rating and press the ENTER button to enter. Press the ▲▼ button to select the desired item and then press the ENTER button to confirm your selection. Press the MENU button to return to the previous menu. - Page 24 System Setup Tuner/Channel ▲▼ Press button select Tuner/Channel and press the ENTER button to enter the menu as shown on the right. Press the ▲▼ button to select the desired item and press the ENTER button to enter. Press the MENU button to return to the previous menu.
- Page 25 System Setup Prog Organizer Press the ▲▼ button to select the Prog Organizer and press the ENTER button to enter the menu as shown on the right. In the Prog Organizer setup menu, press the ▲▼ button to select the desired item.
- Page 26 System Setup Channel Name Press the ▲▼ button to select the Channel Name and press the ENTER button to enter. Then press the ▲▼button to select letters or press the number button to input numbers. Press the MENU button to return to the previous menu. Add Program Press the ▲▼...
- Page 27 System Setup CC Mode Press the ▲▼ button to select CC Mode and press the ENTER button to enter. Press the ▲▼ button to select the desired item and then press the ENTER button to confirm your selection. Press the MENU button to return to the previous menu.
-
Page 28: Use Of The Wall Mount
Use of the Wall Mount Your TV may have come equipped with a wall mount and can wall mount the TV through use the mounting screw holes on the back of the TV and optinal mount. You may uninstall the stand before walling mount the TV. -
Page 29: Troubleshooting
Many simple problems can quickly be solved using the procedures below. Please follow the procedures below prior to contacting Polaroid customer service. If you suspect something wrong with this unit, immediately turn the power off and disconnect the power connector from the unit. -
Page 30: Specifications
Specifications TFT-LCD Resolution 1440 x 900 TFT-LCD Screen Size 19 inches AC100~240V,50/60Hz Power DC 12V 5A Power Consumption < 60W 494 × 184 × 412mm(LXWXH) Dimension 19.4 x 7.2 x 16.2inch (LXWXH) About 8.26 Kgs Weight About 18 lbs. 10 to 45˚C Ambient Temperature 50 to 113˚F DESIGN AND SPECIFICATIONS ARE SUBJECT TO CHANGE WITHOUT NOTICE... -
Page 31: Warranty
PPSA, and no other express warranty or guaranty given by any person, firm or entity with respect to the product shall be binding on PHEG or Polaroid Corporation. Repair or replacement is the customer’s exclusive remedy. Neither PHEG nor Polaroid Corporation shall be liable for any incidental or consequential damages caused by the use, misuse or inability to use the product.
Need help?
Do you have a question about the TFT-LCD TV and is the answer not in the manual?
Questions and answers