
Related Manuals for Polaroid TLU-02612C


Summary of Contents for Polaroid TLU-02612C
- Page 1 26” HD Widescreen LCD TV TLU-02612C Questions? Need some help? This manual should help you understand your new product. If you have questions, call our toll-free number found on the insert with this icon: Or visit www.polaroid.com.
- Page 2 To fi nd out how to properly this product is disposed of properly. To fi nd out how to properly dispose of this product, please go to www.polaroid.com and click dispose of this product, please go to www.polaroid.com and click on “Company“...
-
Page 3: Warnings And Precautions
Warnings and Precautions Warnings and Precautions To prevent any injuries, the following safety precautions should be observed in the installation, use, servicing and maintenance of this equipment. Before operating this equipment, please read this manual completely, and keep it nearby for future reference. - Page 4 Warnings and Precautions ▪ Use and handle the power cord with care. Do not place any heavy objects on the AC power cord. ▪ Do not pull the AC power cord. Do not handle the AC power cord with a wet hand. ▪...
-
Page 5: Antenna Safety Instructions
Warnings and Precautions Outdoor Antenna Safety Instructions If an outdoor antenna is connected, follow the precautions below: ▪ An outdoor antenna should not be located in any area where it could come in contact with overhead power lines, or any other electric light or power circuits. ▪... -
Page 6: Table Of Contents
CONTENTS Warnings and Precautions Important Safety Instructions ..................3 Antenna Safety Instructions ..................5 Chapter 1 Introducing the LCD TV Key Features ....................... 7 Package Contents ....................... 8 Setting Your LCD TV ....................9 Your LCD TV .......................11 Your Remote Control ....................13 Chapter 2 Installing the LCD TV Connecting a TV Cable or an Antenna .............. -
Page 7: Chapter 1 Introducing The Lcd Tv
Chapter 1 Introducing the LCD TV Chapter 1 Introducing the LCD TV Key Features Various Audio/Video terminals for external equipment connection ▪ 2 set of composite A/V input terminals ▪ 2 SCART input terminals ▪ 1 set of component Video input terminals ▪... -
Page 8: Package Contents
Chapter 1 Introducing the LCD TV Package Contents Make sure all of the following contents are included. LCD TV Bottom Stand / Screw Driver and 6 Screws Remote Control/ VIDEO Cable Component Cable AAA Batteries x 2 POWER P.MODE SWAP S.MODE MUTE CAPTION... -
Page 9: Setting Your Lcd Tv
Setting Your LCD TV How to install the TV Stand If you prefer to mount your new Polaroid TV on a wall instead of attaching it to the stand, please reference the instructions included in the wall mounting kit(not included). - Page 10 Chapter 1 Introducing the LCD TV How to setup the TV Use a supplied antenna cable to connect the VHF/UHF signal to the LCD TV’s ANT. terminal (refer to page 17). Connect the AC power cord at the back of the TV and connect the power cord to wall outlet. Insert the 2 batteries supplied in remote control.
-
Page 11: Your Lcd Tv
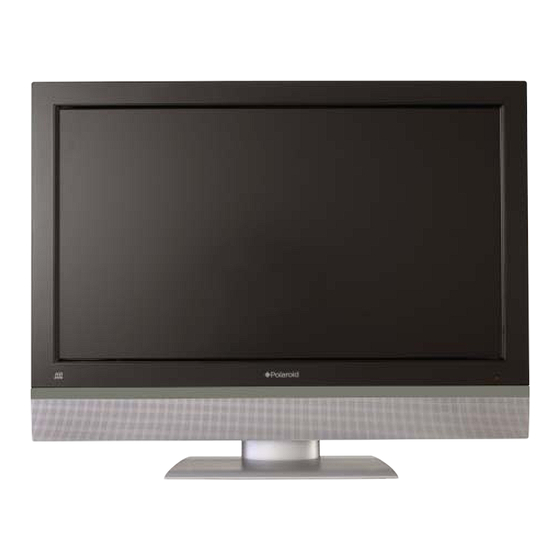
Chapter 1 Introducing the LCD TV Your LCD TV Front/Right Side View and Controls The LED light indicates when the LCD TV is activated. Infrared Receiver VOLUME ▲▼ VIDEO1 IN Adjusts the volume up and down. Connects to the composite Selects the main-menu item and change VIDEO Video and Audio output jacks... - Page 12 Chapter 1 Introducing the LCD TV Rear View and Jacks VIDEO2 IN Connects to the composite VIDEO and AUDIO(L/R) output jacks on external video equipment. HDMI 1/HDMI 2 IN Connects the all digital AV equipment with HDMI connector.HDMI supports enhanced, high-defi nition video and two-channel digital audio.
-
Page 13: Your Remote Control
Chapter 1 Introducing the LCD TV Your Remote Control POWER Turns the LCD TV on and off. SWAP Does not function. FREEZE Pressing FREEZE to freeze the current POWER picture, press again to restore the picture. FREEZE SWAP Does not function. FAV.CH I-II Cycles through the TV sound options... - Page 14 Chapter 2 Installing the LCD TV EXIT Exits the OSD menu. MENU Displays the OSD menu on the screen. ▲▼►◄ Cycles through OSD options and POWER selects individual menu items. OK confi rms option settings. FREEZE SWAP S.MODE Selects sound effect options: Surround/ FAV.CH Live/Dance/Techno/Classic/Soft/Rock/ Pop/Off.
-
Page 15: Chapter 2 Installing The Lcd Tv
Chapter 2 Installing the LCD TV Chapter 2 Installing the LCD TV Refer to the owner’s manual of any external equipment to be connected. When connecting any external equipment, do not connect any AC power cords to wall outlets until all other connections are completed. Connecting a TV Cable or an Antenna Antenna Connection The antenna requirements for good color TV reception are more important than those for a black &... - Page 16 Chapter 2 Installing the LCD TV Use one of the following two diagrams when connecting an outdoor antenna. A: Shows how to use a VHF/UHF combination outdoor antenna. B: Shows how to use a separate VHF and/or UHF outdoor antenna. A.
- Page 17 Chapter 2 Installing the LCD TV Cable TV (CATV) Connection ■ A 75-ohm coaxial cable connector is built into the set for easy hookup. When connecting the 75-ohm coaxial cable to the set, connect the 75- ohm cable into the ANT. terminal. ■...
- Page 18 Chapter 2 Installing the LCD TV Use a supplied antenna cable to connect the TV signal to the LCD TV’s TV CABLE terminal. TV CABLE Connect the AC power cord at the back of the TV and connect the power cord to wall outlet.
- Page 19 Chapter 2 Installing the LCD TV SOURCE button on the remote to display the Source List. Use the ▲▼ buttons Press the to select TV, and press the OK button. Main: TV(CABLE/AIR) VIDEO1 (SIDE) VIDEO2 (REAR) VIDEO3 (SCART1) VIDEO4 (SCART2) VIDEO5 (YPbPr) VIDEO6 (HDMI1) VIDEO7 (HDMI2)
-
Page 20: Connecting A Vcr
Chapter 2 Installing the LCD TV Connecting a VCR Rear of TV HDMI 1 IN HDMI 2 IN VGA/PC IN COMPONENT IN AUDIO AUDIO IN AUDIO IN TV CABLE AUDIO IN VIDEO VHF/UHF IN VIDEO2 IN SCART 1 SCART 2 AUDIO IN AV Cable Use a composite cable to connect the VCR’s composite video/audio jacks to the LCD TV’s... -
Page 21: Connecting A Video Camera Or Game Console
Chapter 2 Installing the LCD TV Connecting a Video Camera or Game Console Rear of TV Right Side HDMI 1 IN HDMI 2 IN VGA/PC IN COMPONENT IN AUDIO VIDEO AUDIO IN AUDIO IN TV CABLE AUDIO IN AUDIO VIDEO VIDEO1 IN VHF/UHF IN SCART 1... -
Page 22: Connecting A Dvd Player
Chapter 2 Installing the LCD TV Connecting a DVD Player Rear of TV HDMI 1 IN HDMI 2 IN VGA/PC IN COMPONENT IN AUDIO AUDIO IN AUDIO IN TV CABLE AUDIO IN VIDEO VHF/UHF IN SCART 1 VIDEO2 IN SCART 2 AUDIO IN COMPONENT/AUDIO Cable A/V Cable... - Page 23 Chapter 2 Installing the LCD TV Connect all AC power sources, before turning on the power switch of the LCD TV or other connected equipment. Press the button on the remote to turn on the LCD TV. To watch a DVD, press the SOURCE button on the remote to select VIDEO2( METHOD A), or VIDEO5 (METHOD B).
-
Page 24: Connecting A Digital Tv Cable Box Or Digital Satellite Receiver
Chapter 2 Installing the LCD TV Connecting a Digital TV Cable Box or Digital Satellite Receiver Rear of TV HDMI 1 IN HDMI 2 IN VGA/PC IN COMPONENT IN AUDIO AUDIO IN AUDIO IN TV CABLE AUDIO IN VIDEO VHF/UHF IN SCART 1 VIDEO2 IN SCART 2... -
Page 25: Connecting An Av Equipment With Hdmi Connector
Chapter 2 Installing the LCD TV Connecting AV Equipment with HDMI Connector Rear of TV HDMI 1 IN HDMI 2 IN VGA/PC IN COMPONENT IN AUDIO AUDIO IN AUDIO IN TV CABLE AUDIO IN VIDEO VHF/UHF IN SCART 1 VIDEO2 IN SCART 2 AUDIO IN HDMI Cable... -
Page 26: Connecting An Av Equipment With Dvi Connector
Chapter 2 Installing the LCD TV Connecting an AV Equipment with DVI Connector Rear of TV HDMI 1 IN HDMI 2 IN VGA/PC IN COMPONENT IN AUDIO AUDIO IN AUDIO IN TV CABLE AUDIO IN VIDEO VHF/UHF IN VIDEO2 IN SCART 1 SCART 2 AUDIO IN... -
Page 27: Connecting An Av Equipment With Scart Connector
Chapter 3 Using the LCD TV Connecting an A/V Device with SCART Connector Rear of TV HDMI 1 IN HDMI 2 IN VGA/PC IN COMPONENT IN AUDIO AUDIO IN AUDIO IN TV CABLE AUDIO IN VIDEO VHF/UHF IN VIDEO2 IN SCART 1 SCART 2 AUDIO IN... -
Page 28: Connecting A Pc
Chapter 3 Using the LCD TV Connecting a PC Rear of TV HDMI 1 IN HDMI 2 IN VGA/PC IN COMPONENT IN AUDIO DIO IN AUDIO IN TV CABLE AUDIO IN VIDEO VHF/UHF IN VIDEO2 IN SCART 1 SCART 2 AUDIO IN AUDIO Cable VGA Cable... -
Page 29: Connecting An Audio Receiver
Chapter 3 Using the LCD TV Connecting an Audio Receiver For better sound quality, you may want to play the LCD TV audio through your stereo system. HDMI 1 IN HDMI 2 IN VGA/PC IN COMPONENT IN AUDIO AUDIO IN AUDIO IN TV CABLE AUDIO IN... -
Page 30: Widescreen Viewing
Chapter 3 Using the LCD TV Widescreen Viewing Widescreen function allows viewing of 4:3/16:9 images in wide screen mode, cycling through the following wide screen settings. Press the P.SIZE button repeatedly to select the screen format you want. NORMAL Displays at 4:3 aspect ratio. FULL Stretches the image vertically and horizontally to keeps the image size... -
Page 31: Using Telextext Functions
Chapter 3 Using the LCD TV Using TELETEXT Functions The TELETEXT feature displays all sorts of information provided by the information system company on your screen, such as news, sports, travel offers, weather, fi lm & theater reviews, net issues etc. Press switch on or off teletext display. -
Page 32: Operating The Menu
Chapter 3 Using the LCD TV Operating the Menu Press the button to turn the LCD TV on. Press the MENU button on the remote control, the on-screen menu will appear on the screen. Use the ◄► buttons to select your main menu option. VIDEO MENU: Allows you to make adjustments to your picture settings. - Page 33 Chapter 3 Using the LCD TV TV MENU: Allows you to edit and label channels. Region Selection Searching Manual Scan Update Search Program Edit Favorite Select Exit SETUP MENU: Allows you to set up a variety of features: Language, factory reset, V-Chip, Parental Control, etc. Parental Language English...
-
Page 34: Customizing The Video Settings
Chapter 3 Using the LCD TV Customizing the VIDEO Settings Press the button to turn the LCD TV on. Press the MENU button on the remote control to display the Main menu, and use the ◄► buttons to select the VIDEO. Use the ▲▼... - Page 35 Chapter 3 Using the LCD TV Display adjustment Press the OK button to enter the Display adjustment setting: H Position V Position Video Select Exit ▪ H Position Adjusts the position of the picture left and right in the window. ▪...
-
Page 36: Customizing The Audio Settings
Chapter 3 Using the LCD TV Customizing the AUDIO Settings Press the button to turn the LCD TV on. Press the MENU button on the remote control to display the Main menu, and use the ◄► buttons to select the AUDIO. Use the ▲▼... -
Page 37: Customizing The Setup Settings
Chapter 3 Using the LCD TV Customizing the SETUP Settings Press the button to turn the LCD TV on. Press the MENU button on the remote control to display the Main menu, and use the ◄► buttons to select the SETUP. Use the ▲▼... -
Page 38: Using The Parental Settings
Chapter 3 Using the LCD TV Using the Parental Settings The Parental blocking can be set up on the TV to block a Channel or a Video Source. Use the ▼ button to select the Parental, and press the OK to display the Parental menu. -
Page 39: Using The Parantal Settings
Chapter 3 Using the LCD TV Customizing the TV Settings Press the button to turn the LCD TV on. Press the MENU button on the remote control to display the Main menu, and use the ◄► buttons to select the TV. Use the ▲▼... - Page 40 Chapter 3 Using the LCD TV Program Edit Allows Swap/Insertion/addition/removal of channels on the channel list. Press the OK button to display the Program Edit menu: Program Edit Freq System Name Skip 49.75 - - - - - - - - - - - - - - - - - -...
-
Page 41: Troubleshooting
VOL+ Press the button to increase the volume. Audio noise Move any infrared equipment away from the TV. “Polaroid” and “Polaroid and Pixel” are trademarks of Polaroid Corporation, Waltham, MA, USA. For service, support and warranty information, visit www.polaroid.com. -
Page 42: Display Modes
Specifications DISPLAY MODES The screen resolution has been optimized during production for the display modes listed below. If the signal from the system equals the standard signal mode, the screen adjusts automatically. If the signal from the system does not equal the standard signal mode, adjust the screen resolution by referring to your video card user guide, otherwise there may be no video. -
Page 43: Specifi Cations
Specifications SPECIFICATIONS LCD Panel Panel Size 26” TFT LCD 32” TFT LCD Brightness Contrast Ratio 800:1 1200:1 Max. Resolution 1366x768 1366x768 Input Connector VIDEO/AUDIO(L/R) SCART YPbPr/AUDIO(L/R) VGA/AUDIO(L/R) HDMI/AUDIO(L/R) AUDIO OUT(L/R) HEADPHONE Power Source AC100~240V, 50/60HZ AC100~240V, 50/60HZ Power Consumption 200 W, standby <3 W 200 W, standby <... - Page 44 20070625 20070625...
Need help?
Do you have a question about the TLU-02612C and is the answer not in the manual?
Questions and answers