Table of Contents
Advertisement
s
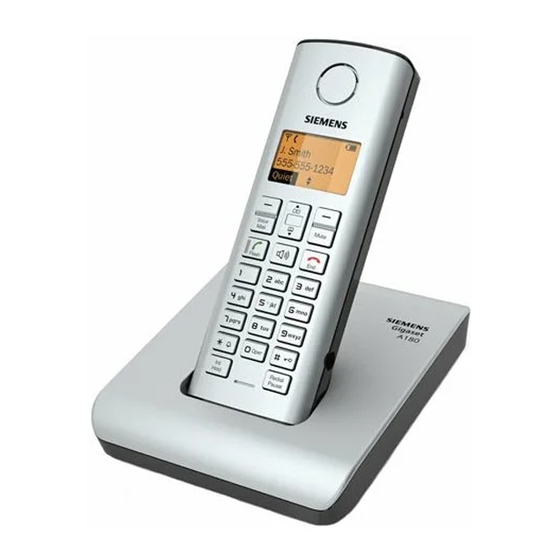
Gigaset A180 - A185
Issued by
Gigaset Communications GmbH
Schlavenhorst 66, D-46395 Bocholt
Gigaset Communications GmbH is a trademark licensee of Siemens AG
© Gigaset Communications GmbH 200
9
All rights reserved.
Subject to availability. Rights of modifications reserved.
Gigaset
www.gigaset.com
UCZZ01981AZ( )
0
Advertisement
Table of Contents

Related Manuals for Gigaset Gigaset A180


Summary of Contents for Gigaset Gigaset A180
- Page 1 Gigaset A180 - A185 Issued by Gigaset Communications GmbH Schlavenhorst 66, D-46395 Bocholt Gigaset Communications GmbH is a trademark licensee of Siemens AG © Gigaset Communications GmbH 200 All rights reserved. Subject to availability. Rights of modifications reserved. Gigaset www.gigaset.com...
-
Page 2: The Handset At A Glance
The handset at a glance The handset at a glance 1 Display in idle status 2 Charge status of the batteries (page 2) 3 Display keys (page 13) 4 Control key t Access to Calls list. s Access to directory. 5 Mute key Mute/unmute microphone. -
Page 3: Overview Of Handset's Display Icons
The base station at a glance Overview of handset’s display icons Ä Ó Reception indicator Calls list icon Handset is linked with the base station. Entries stored in the Calls list. Flashes: the handset is out of range or Flashes: New missed calls in the Calls list not registered î... - Page 4 The base station at a glance Base station without answering You can use the keys on the base station to operate the integrated answering machine and machine register the handset to the base station. 1 Page key Paging handsets (press briefly) Start the registration procedure (press and hold in idle mode).
-
Page 5: Table Of Contents
Example: menu input ....6 Linking internal callers to Gigaset A180 and Gigaset A185 an external call ....25 –... -
Page 6: Safety Precautions
Safety precautions Safety precautions Only use the power supply unit supplied as indicated on the underside of the device. Only insert approved rechargeable batteries of the same type. Never use ordinary (non-rechargeable) batteries as they may pose a health hazard or cause injury. Do not charge the handset in charging cradle or base station while the headset is connected. -
Page 7: Notes On The Operating Instructions
Notes on the operating instructions Notes on the operating Example: menu input instructions In the user guide, the steps you need to perform are shown in abbreviated form. This is illustrated below using "Changing This section explains the meaning of cer- the display language"... -
Page 8: Gigaset A180 And Gigaset A185 - More Than Just A Telephone
Gigaset A180 and Gigaset A185 – more than just a telephone Gigaset A180 and First Steps Gigaset A185 Package contents – more than just a telephone One Gigaset A180 or Gigaset A185 Your phone not only lets you store up to... -
Page 9: Setting Up The Handset For Use
First Steps Inserting the batteries Reception indicator: The display shows if the handset is linked to the base station: Caution: Ä is on: handset is linked to the base Use only rechargeable Nickel-metal hydride station. (NiMH) UL-approved AAA batteries. Never use Ä... -
Page 10: Settings Date/Time
First Steps Setting the date and time Attaching the belt clip There are notches on the sides of the You should set the date and time, for handset for attaching the belt clip, nearly example, to ensure the correct time of at the same height as the handset ear- incoming calls is recorded. -
Page 11: Area Code
First Steps Area code Display in idle status To make a call using the incoming calls list Once the phone is registered and the time (page 15), your phone's area code must set, the idle display looks as shown here Õ... -
Page 12: Making Calls
Making calls Making calls Answering a call The handset indicates an incoming call in three ways: by ringing, by a display on the Making an external call screen, and by the flashing Talk key c. You can accept the call by: External calls are calls using the outside ¤... -
Page 13: Handsfree Operation
Operating the handset Handsfree operation Control key You can activate the speakerphone at any time to provide handsfree operation dur- ing a call. Activating/deactivating handsfree Activating while dialing 1 Control key In the description below, the top or bot- Enter the number and press tom of the Control key (up, down), which the Handsfree key. -
Page 14: Display Keys
Operating the handset Display keys Menu guidance The function of the display keys changes Your phone's functions are accessed using depending on the particular operating sit- a menu that has a number of levels. uation. Example: Main menu (first menu level) ¤... -
Page 15: Using The Directory And Lists
Using the directory and lists Using the directory and lists Entering and editing names The following rules apply when creating an entry: The options are: To enter a letter press the correspond- Directory ing numeric key as often as necessary. Last Number Redial list Use ts to move the cursor to the left Calls list... -
Page 16: Last Number Redial List
Using the directory and lists Editing entries Managing entries in the Last Number ¢ Redial list Edit Entry §Menu§ Edit the name and press §OK§ Press the key. Edit the number and press §OK§ Select the entry. You can use the key to delete one §Clear§... - Page 17 Using the directory and lists Viewing an entry and changing the List entry number format New messages are at the top. A list entry ¢ q (Select entry) contains the following information: ¢ List type (in header) View §Menu§ The entry is displayed. Status of entry (new entries are marked If necessary, press the * key with a star (*) in the header)
-
Page 18: Operating The Answering
Operating the answering machine Operating the answering Operation using the handset machine If you have enabled call screening on the base station (see page 20) you can auto- matically listen through the loudspeaker You can operate the base station's answer- of the base station while a caller is record- ing machine using the handset, using the ing a message. - Page 19 Operating the answering machine ¤ Now record your announcement (must Selecting an announcement mode be at least 3 seconds long). You can choose between Answer & Rec. Note: Answer Only. ¢ ¢ When recording your announcement, speak Answer Machine Answer Mode §Menu§...
- Page 20 Operating the answering machine After a new message has been played Play in full, its status becomes "old". If the recorded message has been saved 01/02 with the date and time, you will hear the 01/31 09:45AM date and time announced before playback §§§§§Back§§§§§...
-
Page 21: Setting Up The Answering Machine
Operating the answering machine Setting up the answering On the base station in idle status: Press and õ hold the key. machine If you have no old messages, you will hear The answering machine is preconfigured an error tone and will display No Messages at the factory. -
Page 22: Operating When On The Move (Remote Operation)
Operating the answering machine When is set, the following deter- Activating Remote Access Toll Saver mines when the answering machine ¢ ¢ Answer Machine Settings §Menu§ accepts calls: ¢ Remote Access If no new messages are present, the Select and press to confirm §OK§... -
Page 23: Using The Voice Mailbox
Using the voice mailbox Using the voice mailbox Activating the answering machine Dial your own number. ¤ The voice mailbox is your telephone net- Allow the phone to ring until the ring work provider’s answering machine back tone stops and the phone answers within their telephone network. -
Page 24: Using Several Handsets
Making internal calls De-registering handsets Internal calls to other handsets registered You can de-register any registered handset with the same base station are free. from your Gigaset A180/Gigaset A185. Initiate internal call. On a handset: Select the handset you want to ¢... -
Page 25: Transferring A Call To Another Handset
Using several handsets Ending a call Ending the internal call ¤ Ask the other internal party to end the Press the End Call key. call. Transferring a call to another You are reconnected to the external caller. handset Accepting/rejecting call waiting You can transfer an external call to If you get an external call while conduct- another handset. -
Page 26: Linking Internal Callers To An External Call
Handset settings Linking internal callers to When the called handset has answered the call: an external call Press the display key to start §Conf.§ the conference. Important: The internal conference func- On both handsets, you will see Conference tion (called In) must be activated. -
Page 27: Setting The Display Contrast
Handset settings Setting the display contrast Ring tone melodies You can choose between 15 different mel- You have a choice five different contrasts. odies. ¢ ¢ ¢ ¢ ¢ Settings Handset §Menu§ Settings Audio Settings §Menu§ ¢ Display Contr. Ring Tones Select your preferred level and Select your preferred melody press... -
Page 28: Base Station Settings
Base station settings Base station settings System settings The system settings are carried out using a Changing ring tones registered Gigaset A18H handset. Protecting against unauthorized Volume access You can adjust the ring tone on the base Protect the system settings of the base sta- station before you answer a call or when tion with a PIN known only to you. -
Page 29: Restoring The Default Settings
Restoring the default settings Restoring the default Settings for connecting the base station to the PABX settings The following settings are only needed when your PABX requires them. Please You can restore the default values for refer to the user guide of your PABX. most settings. -
Page 30: Appendix
Appendix Appendix Troubleshooting The display is blank. Care 1. The handset is not switched on. ¥ Press and hold the End Call key. Wipe the base station and handset with a 2. The batteries are empty. ¥ damp cloth (do not use solvents) or an Charge or replace the batteries (page 8). -
Page 31: Specifications
Appendix Handset operating times/charging The incoming call number is not displayed times through CID. Caller ID is not enabled. ¥ Capacity 550 mAh You must ask the telephone network pro- Standby time Approx. 300 hours vider to activate Caller ID (CID). (12.5 days) You hear an error tone when keying an Talk time... -
Page 32: Industry Canada Certification
Appendix Industry Canada Certification This Class B digital apparatus complies with Canadian ICES-003. Cet appareil numérique de la classe B est con- Operation is subject to the following two condi- forme à la norme NMB-003 du Canada. tions (1) this device may not cause interfer- ence, and (2) this device must accept any inter- ference, including interference that may cause Safety precautions... - Page 33 Appendix BATTERY SAFETY PRECAUTIONS 12. Unplug the product from the wall outlet and refer servicing to qualified service personnel To reduce the risk of fire, injury or electric under the following conditions: shock, and to properly dispose of batteries, a.) When the power cord is damaged or frayed. please read and understand the following b.) If liquid has been spilled into the product.
-
Page 34: Service (Customer Care)
Appendix Service (Customer Care) Customer Care Warranty for Cordless Products To obtain Customer Care Warranty service, product operation information, or for problem resolution, call: Toll Free: 1-866-247-8758 www.gigaset.com/customercare End-user limited warranty 3. THIS LIMITED WARRANTY DOES NOT COVER AND IS VOID WITH RESPECT This product is covered by a one year limited TO THE FOLLOWING: warranty. - Page 35 Appendix 4. WARRANTY CLAIM PROCEDURE – Products which have had warranty stickers, electronic serial number and/or serial All warranty claims must be made by notifying number label removed, altered, rendered Gigaset NAM prior to the expiration of the war- illegible or fraudulently applied to other ranty period.
- Page 36 Appendix 7. DISCLAIMER OF WARRANTIES 8. EXCLUSION OF INCIDENTAL, CONSEQUENTIAL AND CERTAIN GIGASET NAM AND ITS SUPPLIERS PROVIDE THE PRODUCT AND SUPPORT SERVICES (IF ANY) AS OTHER DAMAGES IS AND WITH ALL FAULTS. THE LIMITED WAR- TO THE MAXIMUM EXTENT PERMITTED BY RANTY IS IN LIEU OF ANY OTHER EXPRESS WAR- APPLICABLE LAW, IN NO EVENT SHALL GIGASET RANTIES (IF ANY) CREATED BY ANY DOCUMEN-...
- Page 37 1-866-247-8758. Issued by Gigaset Communications GmbH Schlavenhorst 66, D-46395 Bocholt Gigaset Communications GmbH is a licensee of the Siemens trademark. © Gigaset Communications GmbH 2009 All rights reserved. Subject to availability. Rights of modifications reserved. Product attributes subject to change.
-
Page 38: Menu Of The Handset
Menu of the handset Menu of the handset £ Directory View page 14 £ New Entry page 14 £ <directory list> Edit Entry page 15 £ Delete page 15 £ Delete List page 15 £ Answer Machine Play Repeat page 19 <message Next playback>... - Page 39 Menu of the handset £ Settings Date/Time Set Date/Time page 9 Set Format £ Audio Settings HS Ring Volume page 26 HS Ring Tones Base Ring Tones £ Key Touch Tone page 26 £ Registration Register HS page 23 £ Unregister HS page 23 £...
-
Page 40: Index
Index Index Call answering ....Symbols conference call ...."External"... - Page 41 Index Date Handset calls list activating/deactivating ....... format changing name .
- Page 42 Index Keypad lock Name of a handset ........Keys Name of caller (calls list) .
- Page 43 Index Safety precautions ....Searching in the directory ..Setting date ......time .
Need help?
Do you have a question about the Gigaset A180 and is the answer not in the manual?
Questions and answers
how to swich pulse or tone?
To switch between pulse and tone dialing on the Gigaset A180:
1. On the registered Gigaset A18H handset, press §Menu§.
2. Select Settings > System > Dialing Mode.
3. Choose either "Tone" (DTMF) or "Pulse" (DP).
4. Press §OK§ to confirm the selection.
This answer is automatically generated