Table of Contents
Advertisement
Quick Links
Advertisement
Table of Contents

Related Manuals for Siemens ER59553EU


Summary of Contents for Siemens ER59553EU
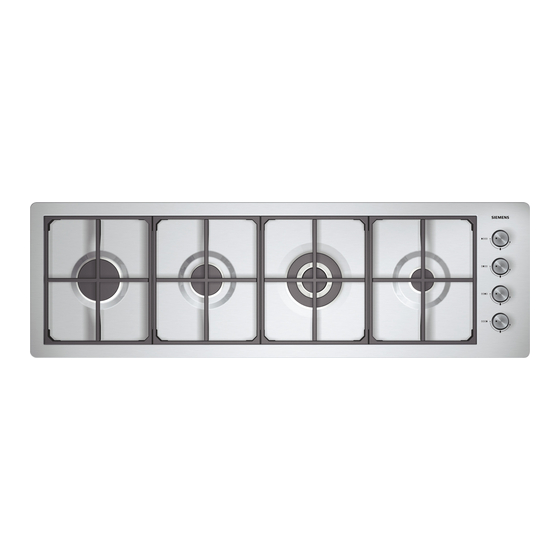
- Page 1 Operating, installation and caring instructions ER59553EU...
- Page 2 Operating, installation and caring instructions page 02 English Dear Customer, We thank you and congratulate you on your choice. This practical appliance, which is modern and functional, has been manufactured from top-quality materials which have been subjected to a strict quality control during the entire manufacturing process and have been carefully tested so that they will meet all your cooking needs.
- Page 3 This appliance shall be installed in accordance with the regulations in force and only used in a well ventilated location. Read the instructions before installing or using this appliance. Isolate the appliance from the mains during every maintenance operation. To do this, remove the plug from the mains or actuate the corresponding fuse.
- Page 4 If a gas tap gets stuck, do not force it. Call our service technician immediately. Do not clean the appliance with a steam cleaning apparatus or with water pressure – risk of short-circuiting. Whenever the appliance is fitted under a vapour extractor hood and the hob is in use, always have pots or pans over the burners in use.
-
Page 5: Table Of Contents
CONTENTS 1. INSTALLATION ....................6 Before installation ....................6 Installation (for the installer) ................... 9 Electrical connection..................... 11 Gas connection (for the fitter)................12 Caution ......................... 15 Converting the burners to another type of gas (for the fitter) ....... 16 Changing the nozzles ................... -
Page 6: Installation
1. INSTALLATION These built-in hobs are intended for insertion into a Before cut out in the worktop. installation The appliance must only be connected by an authorized gas and electrical fitter to ensure that statutory regulations connection requirements of the local electricity and gas supply company are met. - Page 8 Chimney cooker hoods are to be installed in accordance with the installation instructions of the hood. On the furniture into which the appliance is to be installed, the plastic coating and/or veneer must have been treated with a heat-resistant adhesive, otherwise it may become distorted or peel off, especially on the narrow sides.
-
Page 9: Installation (For The Installer)
Note: If you intend to have the gas hob welded into a stainless steel worktop, for safety reasons and in order to fully maintain the requirements of your Siemens warranty, we recommend that this type of installation be done solely through our designated partner: Bautek. (Address available on request). - Page 10 Picture 3...
-
Page 11: Electrical Connection
Prior to connection check the voltage and total Electrical output on the technical label affixed to the appliance. connection It is obligatory that this appliance be earthed. When connecting the appliance, ensure the earth wire is connected first and that all wires are connected to the correct terminals. -
Page 12: Gas Connection (For The Fitter)
The gas supply system must comply with the Gas connection local standards in the country in effect. (for the fitter) Attach the elbow coupling to the appliance gas supply, using the seal provided. Your hob is pre-mounted with the connection ISO 7-1. - Page 14 compliance with currently effective regulations, the hob must be connected to the gas pipe with a stop valve. This valve must be easily accessible at all times. After connecting the unit to the gas mains always check the seal of the connection using a solution of soapy water.
-
Page 15: Caution
Only switch on the circuit breaker or main switch Caution once the appliance has been installed. The appliance must be installed in the furniture in accordance with these operating, installation and maintenance instructions. It is important to note that we shall accept no liability for damage which is a direct or indirect result of improper connection or installation. -
Page 16: Converting The Burners To Another Type Of Gas (For The Fitter)
Nozzles for conversion to LPG are provided with Converting the this appliance or can be obtained from the after burners to sales service (see list included). another type of Prior to making the necessary adjustments, the gas (for the fitter) hob must be disconnected from the mains. -
Page 17: Nozzle Table
REGULATION OF MINIMUM FROM NG TO LPG Nozzle table 1. Light the burner and turn the knob to the minimum position. 2. Remove the knob from the tap 3. Introduce a small screwdriver in hole B (picture 6) and tighten the adjusting screw completely (taking care not to turn the shaft of the tap). -
Page 18: Operation
2. OPERATION Control knobs This is your new Auxiliary burner, 1.0 kW Semi - Rapid burner, 1.75 kW Rapid burner, 2,7 kW Triple Crown Wok burner, 3.5 kW This control is used to make the heat setting of the Gas tap gas burner. -
Page 19: Ignition
The knob for the relevant burner is first pushed Ignition down and turned anti-clockwise to "large flame". Press the knob down firmly and hold for approx. 3 seconds - only then will the gas be released from the burner and safely ignited by the sparks. When the burner is ignited release the knob. -
Page 20: What To Look Out For
3. WHAT TO LOOK OUT FOR Always use the correct pan for the correct burner! A few tips on pots Do not use small pots or pans on large burners. Please see the below table for the correct pot sizes. Recommended pan diameter Auxiliary burner... -
Page 21: Notes On Cooking Using The Wok Burner
The diameter of the saucepan or frying pan base Notes on cooking must be no greater than 280 mm. Using larger pans using the wok could cause the hot waste gas flowing out from underneath the pan to damage the worktop or a wall burner that is not heat-resistant. -
Page 22: Care And Cleaning
4. CARE AND CLEANING If cared for properly, your gas hob will continue to How to care for look good for a long time, and cleaning will also be your gas hob: easier. Use a sponge and soapy water (or a specialist Cleaning cleaning product) to care for stainless steel components, but always wait until the appliance has... -
Page 23: Your Burner And Burner Cap
• You should only start to clean the burner cap Your burner and once it has cooled to its normal temperature burner cap after use, i.e. when you can touch it with your bare hand. • The burner cap should be cleaned with hot water and a normal cleaning agent, using a soft sponge or cloth. -
Page 24: Pan Support
• Only clean the pan support once it has cooled to Pan support its normal temperature, i.e. when you can touch it with your bare hand. • The pan support can be removed for cleaning. • The pan support should be cleaned with hot water and a standard cleaning agent, using a soft sponge or cloth and afterwards, dried thoroughly with a towel. - Page 25 What has gone Probable cause Solution wrong? - Defective fuse. - Check the fuse in the main fuse box and change it if necessary. - The automatic fuse may have - Check the main fuse box to see fused or the trip switch has whether the automatic trip switch tripped.
-
Page 26: After-Sales Service
After-sales service Our after-sales service is there for you if your hob should need to be repaired. You will find the address and telephone number of your nearest after-sales service centre in the phone book. The after-sales service centres listed will also be happy to advice you of a service point in your local area. - Page 27 This appliance is marked according to the European directive 2002/96/EC on Waste Electrical and Electronic Equipment (WEEE).By ensuring this product is disposed of correctly, you will help prevent potential negative consequences for the environment and human health, which could otherwise caused by inappropriate waste handling of this product.
- Page 28 Service If you should contact our Customer Service, please state E- and FD-number of your gas hob. Siemens-Electrogeräte GmbH Carl-Wery-Str. 34 D-81739 München 10.2007...
Need help?
Do you have a question about the ER59553EU and is the answer not in the manual?
Questions and answers